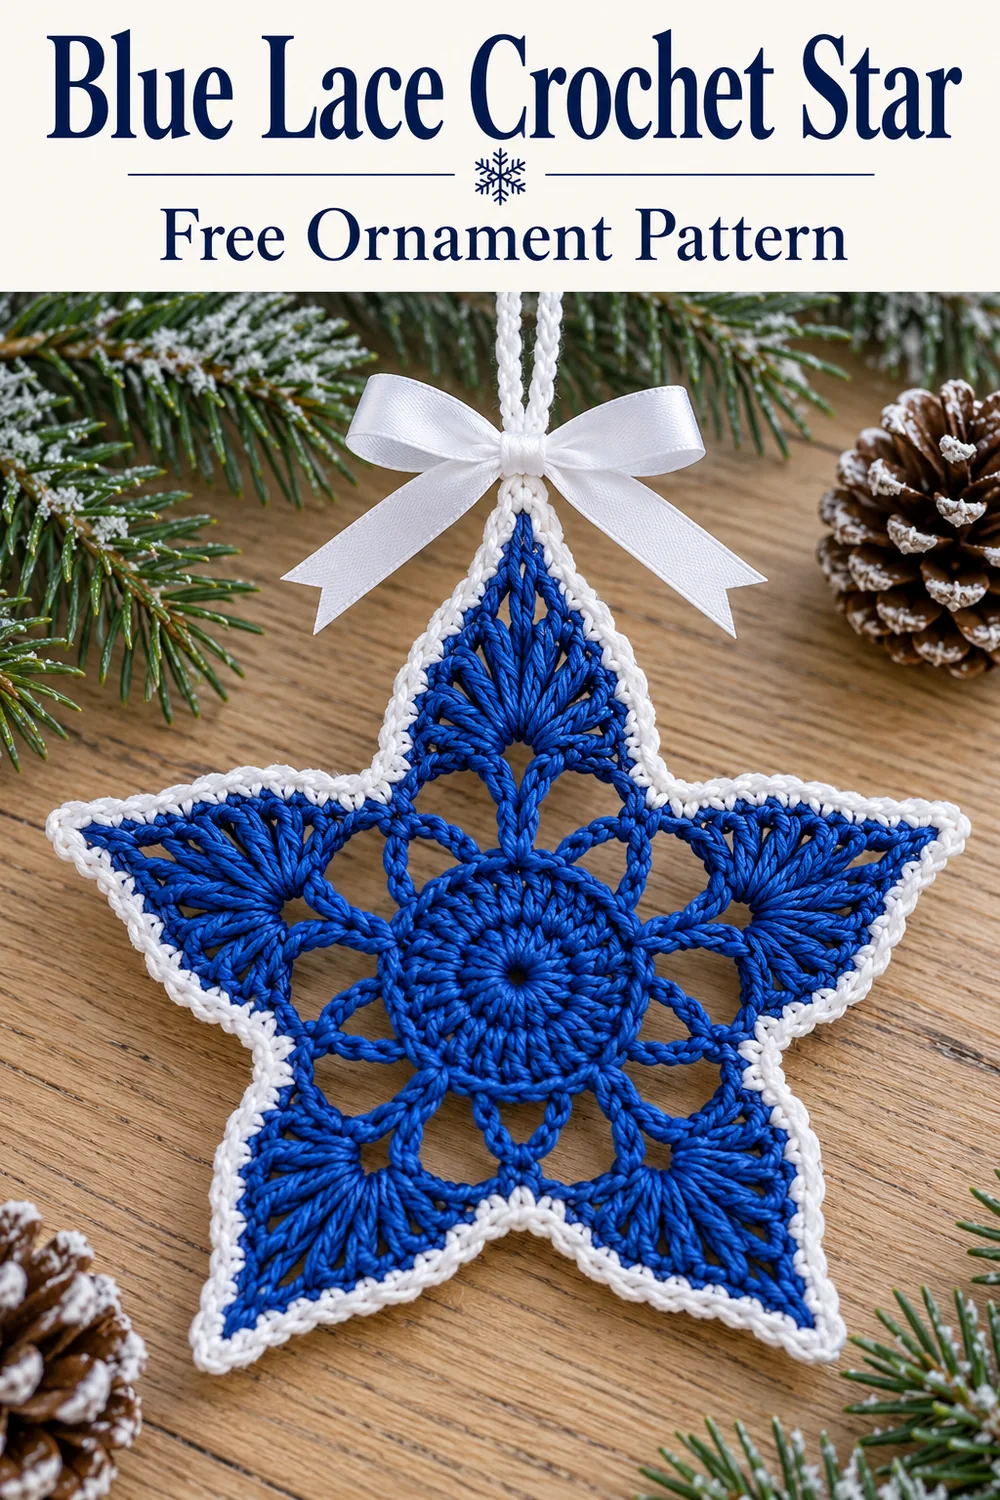
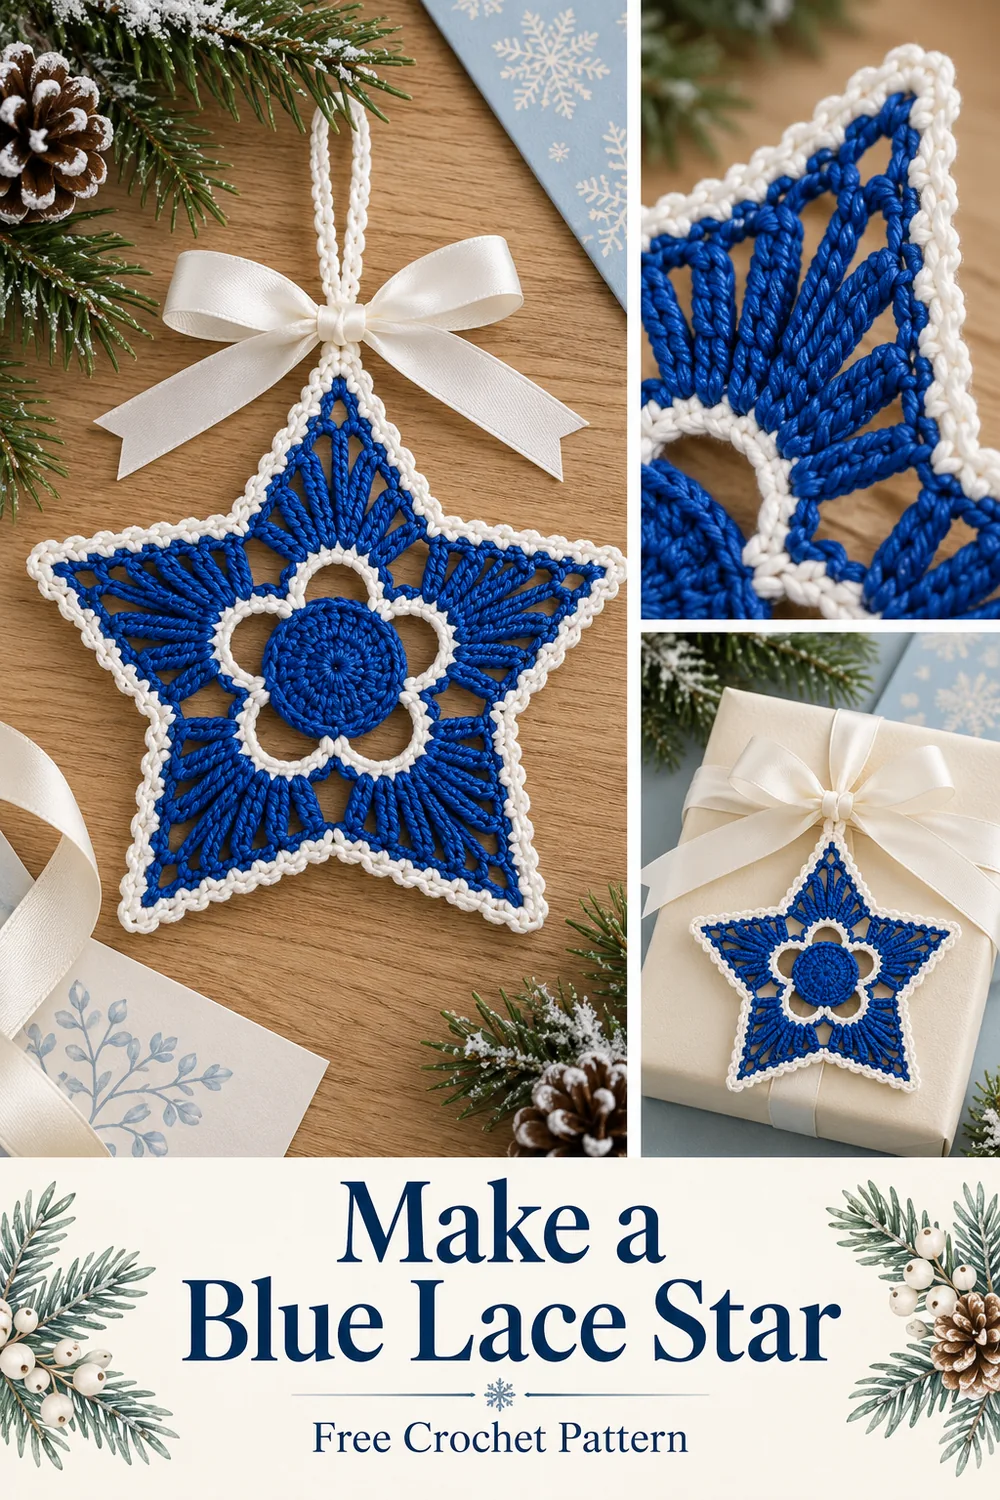
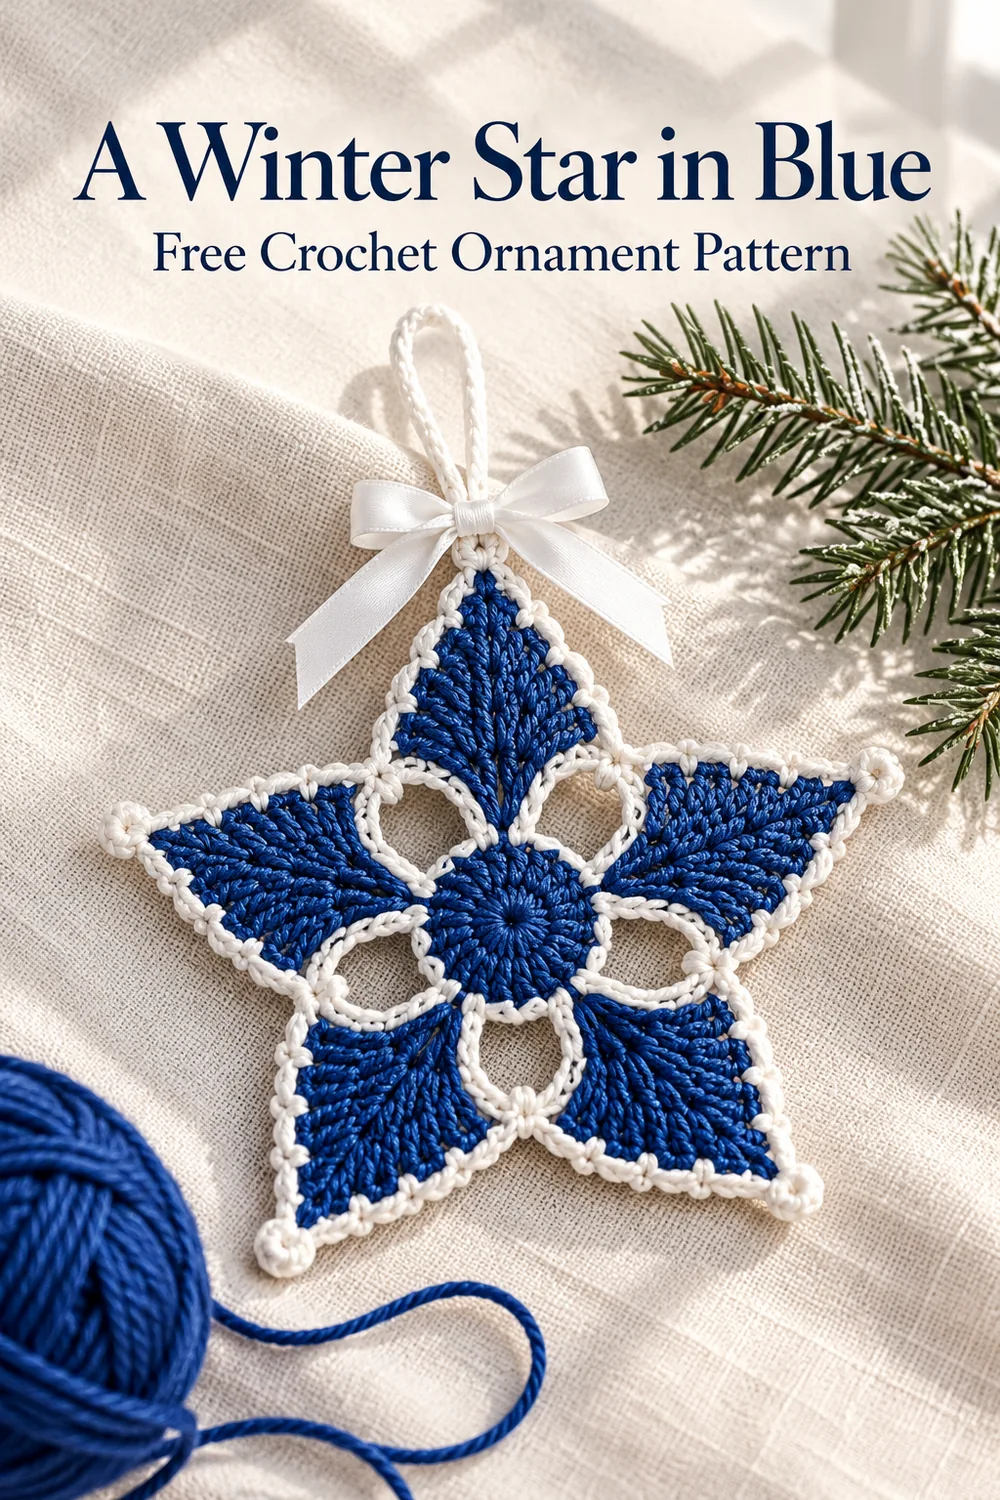
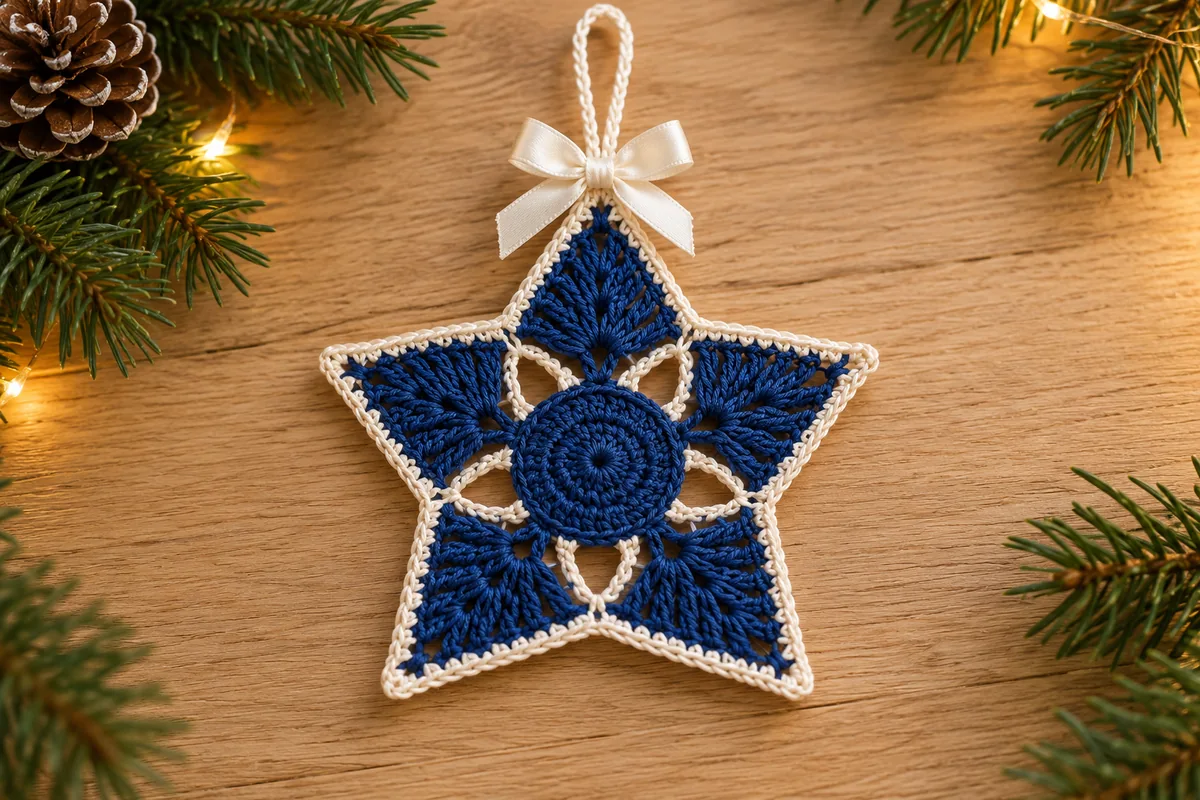
A blue lace crochet star brings a crisp winter palette to an openwork ornament. This original version pairs a compact cobalt center with five tall fan points, then frames the silhouette in white. A separate chain loop and a small ribbon bow finish the upper tip.
The structure uses a solid circle and five chain arches rather than a granny-cluster center. Each arch receives a graduated fan of single, half double, double and treble crochet stitches. The tallest stitches sit beside the tip opening; shorter stitches return the fabric to the valley.
Make one star before planning a matching set, since your yarn and chain tension determine how the points settle. If you prefer grouped granny stitches, the Christmas granny star pattern offers a different construction. This blue version has its own round sequence and stitch counts.
About this blue lace crochet star
This pattern is an original interpretation inspired by the blue-and-white reference, not the exact recipe behind its photograph. The stitch arithmetic has been checked, but the design has not been physically tested. No measured gauge, finished dimensions or yarn consumption is claimed. Use the written instructions and symbol charts for placement; the photographs illustrate the intended appearance.
The blue lace crochet star is worked flat in four joined rounds without turning. Fasten off after each round, including between the blue rounds. This adds a few ends, but it gives each round a clear starting location and avoids traveling slip stitches. Beginning chains do not count as stitches anywhere in this pattern.
Materials and yarn choices
- Smooth blue cotton yarn for the center, arches and points.
- White cotton yarn of the same weight for the edging and hanger.
- A hook suited to your yarn. For DK cotton, a 3 mm hook is a starting option, not a measured gauge recommendation.
- A blunt yarn needle, scissors and a removable marker.
- Narrow white ribbon for an optional sewn-on bow.
- A flat blocking surface and rustproof pins, if permitted by the yarn care instructions.
Use similar yarn thicknesses for blue and white. A much thinner border can pinch the points, while a heavier white yarn can overwhelm the open spaces. Avoid a highly textured yarn for the first attempt: the valley anchors are easier to identify when the stitch tops are clear.
This project suits a crocheter comfortable with joined rounds, chain spaces and treble crochet. It has no stuffing or backing layer. Treat it as a decorative ornament; keep hanging loops and ribbon away from young children.
US crochet abbreviations
- MR: magic ring.
- ch: chain.
- sl st: slip stitch.
- sc: single crochet.
- hdc: half double crochet.
- dc: double crochet.
- tr: treble crochet.
- st/sts: stitch/stitches; sp: space.
The Craft Yarn Council abbreviation guide is a useful reference for US stitch names. Here, a treble crochet begins with two yarn overs; a double crochet begins with one.
How to work a treble crochet
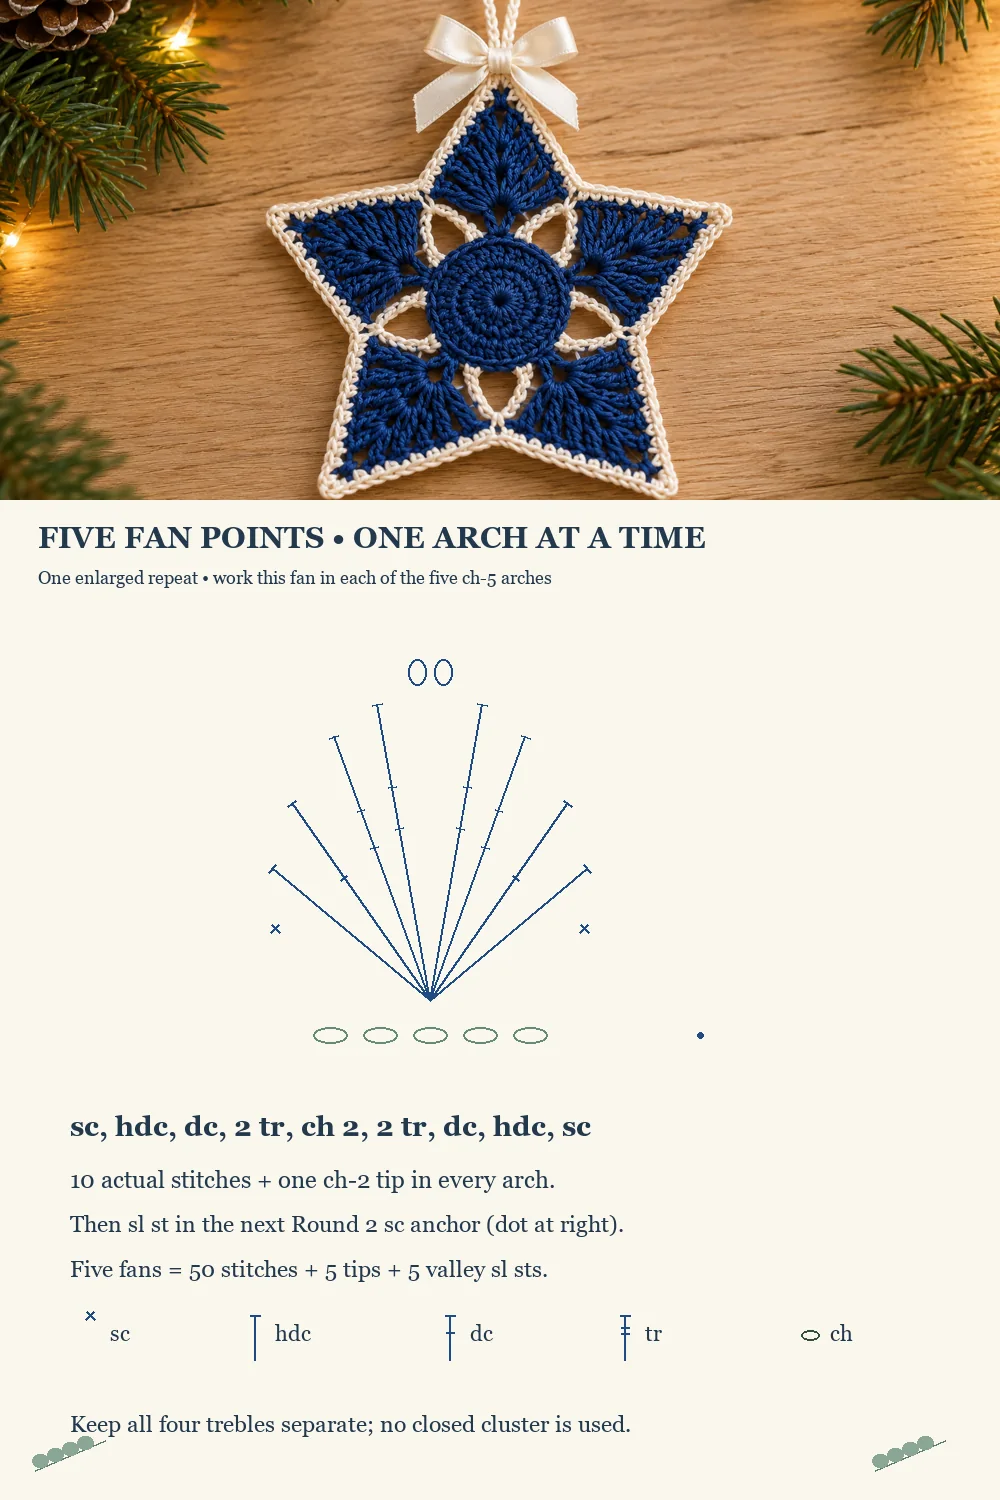
Yarn over twice, insert the hook into the indicated arch, yarn over and pull up a loop. Four loops are on the hook. Yarn over and draw through two loops three times. One loop remains. Complete each treble separately; the four trebles in a fan do not share a closed top.
The five-point fan
One fan is (sc, hdc, dc, 2 tr, ch 2, 2 tr, dc, hdc, sc), all in the same ch-5 arch. That gives ten actual stitches and one ch-2 tip space. The five stitches before the tip mirror the five after it. The slip stitch between fans belongs in the next Round 2 sc anchor, not in the chain arch.
Blue lace crochet star: four-round pattern
Work all stitches through both loops unless a chain space is specified. Use a sl st to attach a fresh yarn end, then make the stated beginning chain. Attachment slip stitches and beginning chains are separate from the round counts. At the end, join to the first actual stitch of that round.
Round 1: solid blue center
With blue, make an MR and ch 2 without counting these chains as a dc. Work 10 dc into the ring. Join with a sl st to the first dc and fasten off. Gently close the ring, leaving the dc tops accessible.
Count: 10 dc. Mark the first dc before working the next round. Do not mistake the beginning ch 2 or joining sl st for an eleventh stitch. Secure the ring tail on the back during finishing rather than relying on a tight pull alone.
Round 2: five open arches
Attach blue with a sl st in any Round 1 dc. Ch 1 without counting it. Starting in that same dc, repeat [sc in the next dc, ch 5, skip the next dc] five times. Join to the first sc and fasten off.
Count: 5 sc anchors and 5 ch-5 arches. Each repeat uses two center stitches: one receives a sc and one is skipped. Five repeats use all ten dc. The last ch-5 arch travels over the tenth dc before joining back to the first anchor.
Keep the five chains relaxed and consistent. Do not work into the skipped dc on the following round. The open arch, rather than those underlying stitch tops, supports the whole fan.
Round 3: five graduated fan points
Attach blue with a sl st in any ch-5 arch and ch 1 without counting it. In that same arch, work (sc, hdc, dc, 2 tr, ch 2, 2 tr, dc, hdc, sc). Sl st into the next Round 2 sc anchor.
Work that fan in each of the remaining four arches, making a sl st into the next Round 2 sc anchor after each fan. After the fifth anchor sl st, join with a separate sl st to the first actual sc of the first fan. Fasten off blue.
Count: 50 fan stitches — 10 sc, 10 hdc, 10 dc and 20 tr — plus 5 ch-2 tip spaces and 5 valley anchor slip stitches. The final joining sl st is additional and is not a sixth valley. Each arch carries one complete fan; never split a fan between two arches.
Round 4: white outline
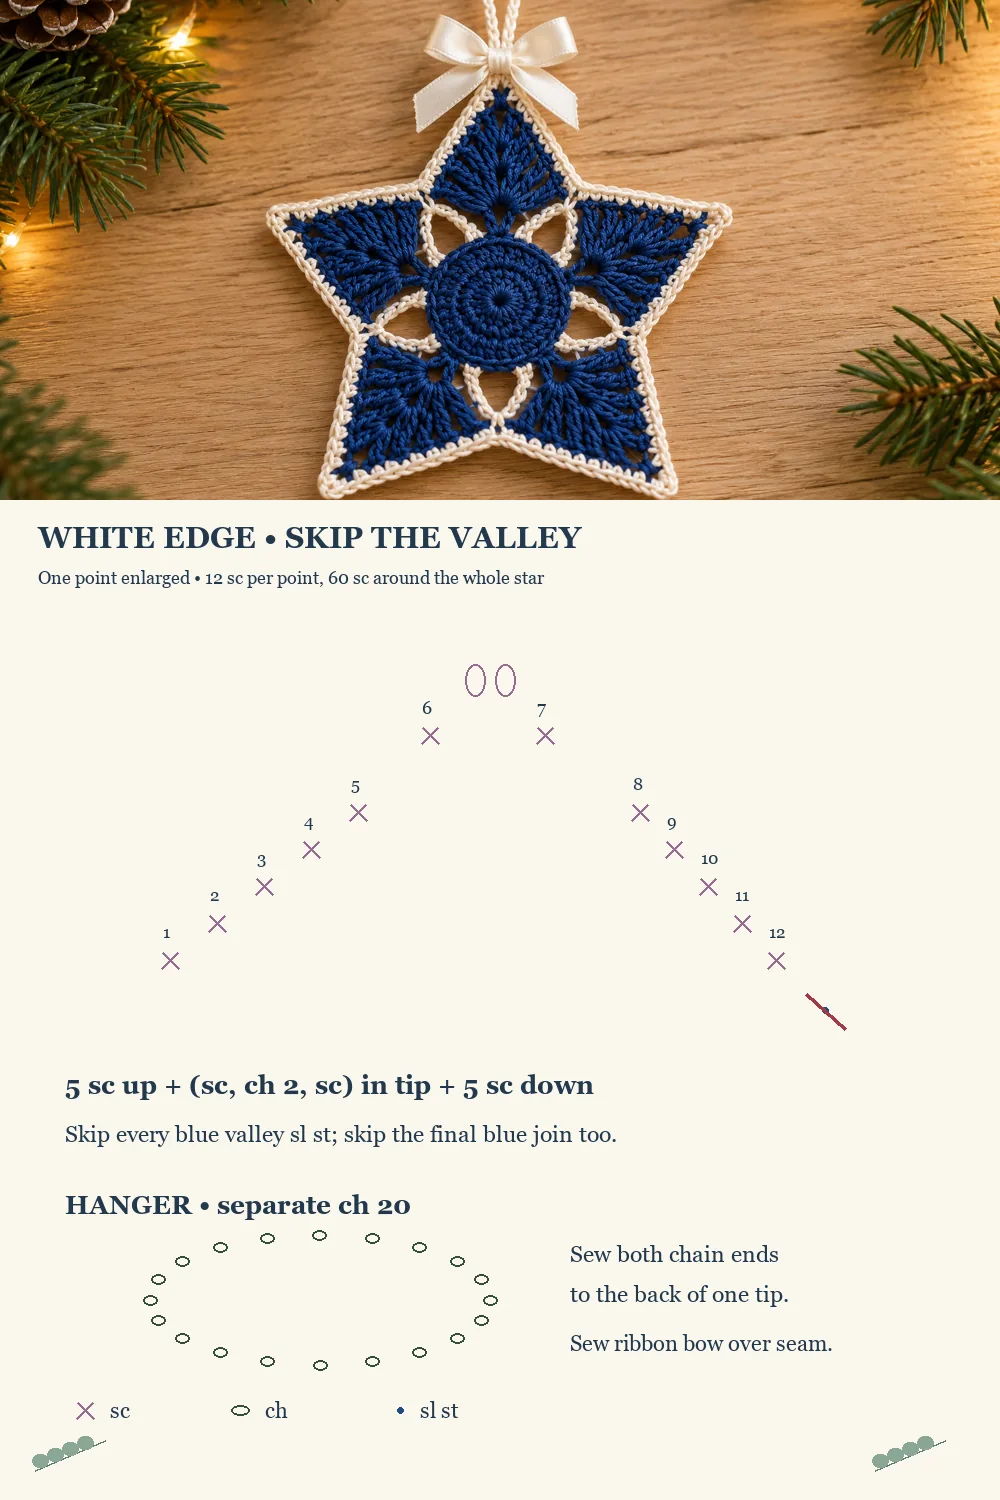
Attach white with a sl st in the first sc of any fan and ch 1 without counting it. Sc in each of the five stitches before the ch-2 tip: sc, hdc, dc, tr and tr. In the ch-2 tip space, work (sc, ch 2, sc). Sc in each of the five stitches down the other side.
Skip the blue valley anchor sl st. Repeat that sequence around the remaining four points. After the fifth point, also skip the final blue joining sl st as you return to the start. Join to the first white sc and fasten off.
Count: 60 sc and 5 ch-2 tip spaces. Each point has 5 sc up, 2 sc in the tip space and 5 sc down: twelve sc. There is no white stitch in a blue valley slip stitch or in any beginning chain.
Check the counts before finishing
| Round | Working stitches | Chain spaces |
|---|---|---|
| 1, blue | 10 dc | None |
| 2, blue | 5 sc | 5 ch-5 arches |
| 3, blue | 50 fan sts + 5 valley sl sts | 5 ch-2 tips |
| 4, white | 60 sc | 5 ch-2 tips |
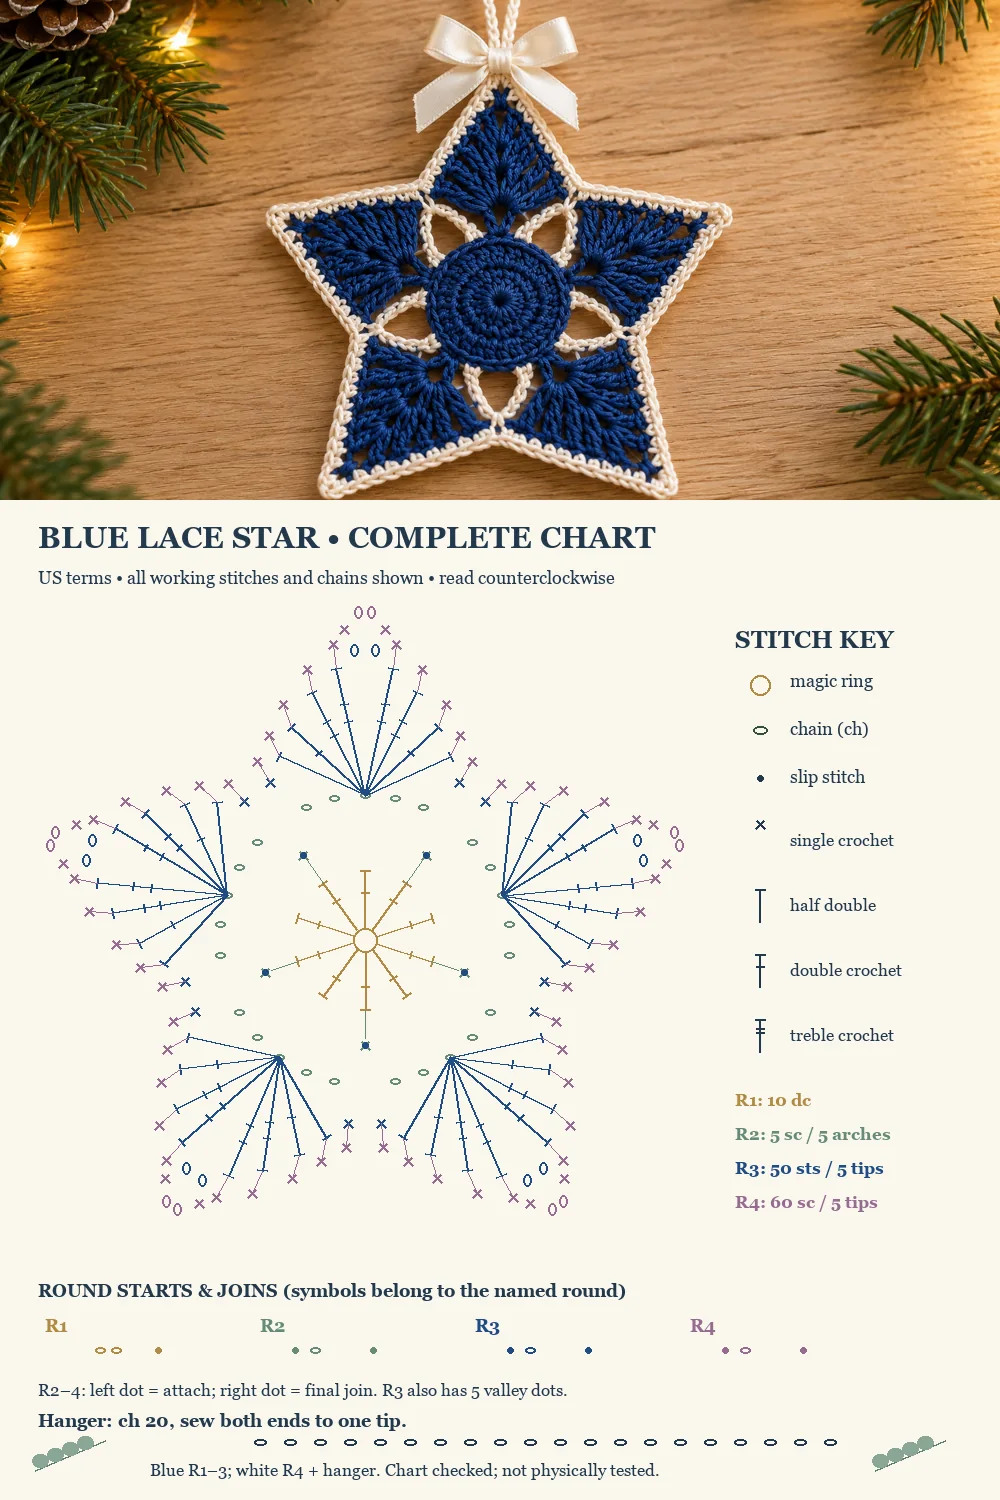
The complete chart uses different ink colors to separate the rounds; those chart colors are not extra yarn colors. Work Rounds 1–3 in blue and Round 4 in white. Every stitch and chain is shown, including the separate hanger. Sewing the bow is a finishing action rather than a crochet round.
Block the points and add the hanger
Weave the ends through the backs of matching-color stitches, changing direction before trimming. Keep the white tail inside the edging rather than carrying it across an open blue arch. Check the back for loose strands that could catch the hanging cord.
If the yarn allows damp blocking, dampen the star lightly and arrange it on a flat surface. Pin the five white tip spaces evenly around the center. Ease the valleys inward with your fingertips, keeping the center flat. Let it dry fully before removing the pins. Blocking refines an even motif; it cannot replace missing stitches.
For the hanger, make a separate white chain of 20. Fasten off with tails for sewing. Sew both ends to the back of one white tip, passing through several firm border stitches. The chain forms a loop; no joining slip stitch is needed. Test the hanging position before trimming the tails.
Tie a small white ribbon bow separately, then sew its center securely over the hanger attachment. Keep the bow small enough to leave the upper fan visible. The ribbon is optional: the chain loop alone gives the blue lace crochet star a cleaner outline.
Troubleshooting the blue lace crochet star
There are only four arches
Return to Round 2 and check ten center dc. You need five repetitions of one sc, five chains and one skipped dc. The final arch can disappear behind the joining area if it was pulled tight; trace it from the fifth sc to the first.
A point looks narrow or off-center
Count five stitches on each side of its ch-2 space. Each half must contain sc, hdc, dc and two tr in mirrored order. A missing treble shortens one shoulder. Undo that fan rather than stretching the short side during blocking.
The border ruffles at the valleys
Check that you skipped all five blue anchor slip stitches. Adding a white sc in each anchor raises the count from 60 to 65. Also avoid the blue round join at the final valley. Use a marker to distinguish the first fan sc from the nearby join.
The star cups instead of lying flat
First check the five ch-5 arches and all fifty fan stitches. If the counts match, tight arch chains or tight white edging may be pulling the fabric inward. Remake the affected round with more relaxed chain tension or a suitable hook adjustment. Do not force a strongly cupped center flat by stretching only its tips.
Use the winter palette in a small set
Keep the white outline and try navy or a softer denim blue for the main rounds. Use the same yarn family and hook for a coordinated group. Compare the first completed ornament before cutting ribbon for the others so the bow stays in proportion.
Pair this star with the lace-body polar bear ornament for a blue-and-ivory winter theme. For a different star outline with bells, see the six-point jingle bell star. Store finished motifs flat and tuck the hanger behind each piece.
Blue lace crochet star images and diagrams
The three Pin layouts are followed by a complete symbol chart, an enlarged fan guide and a border-and-hanger guide. Use the stitch key beside each chart. The full chart follows this written construction; it is not a claim that the reference photograph was made from these instructions.