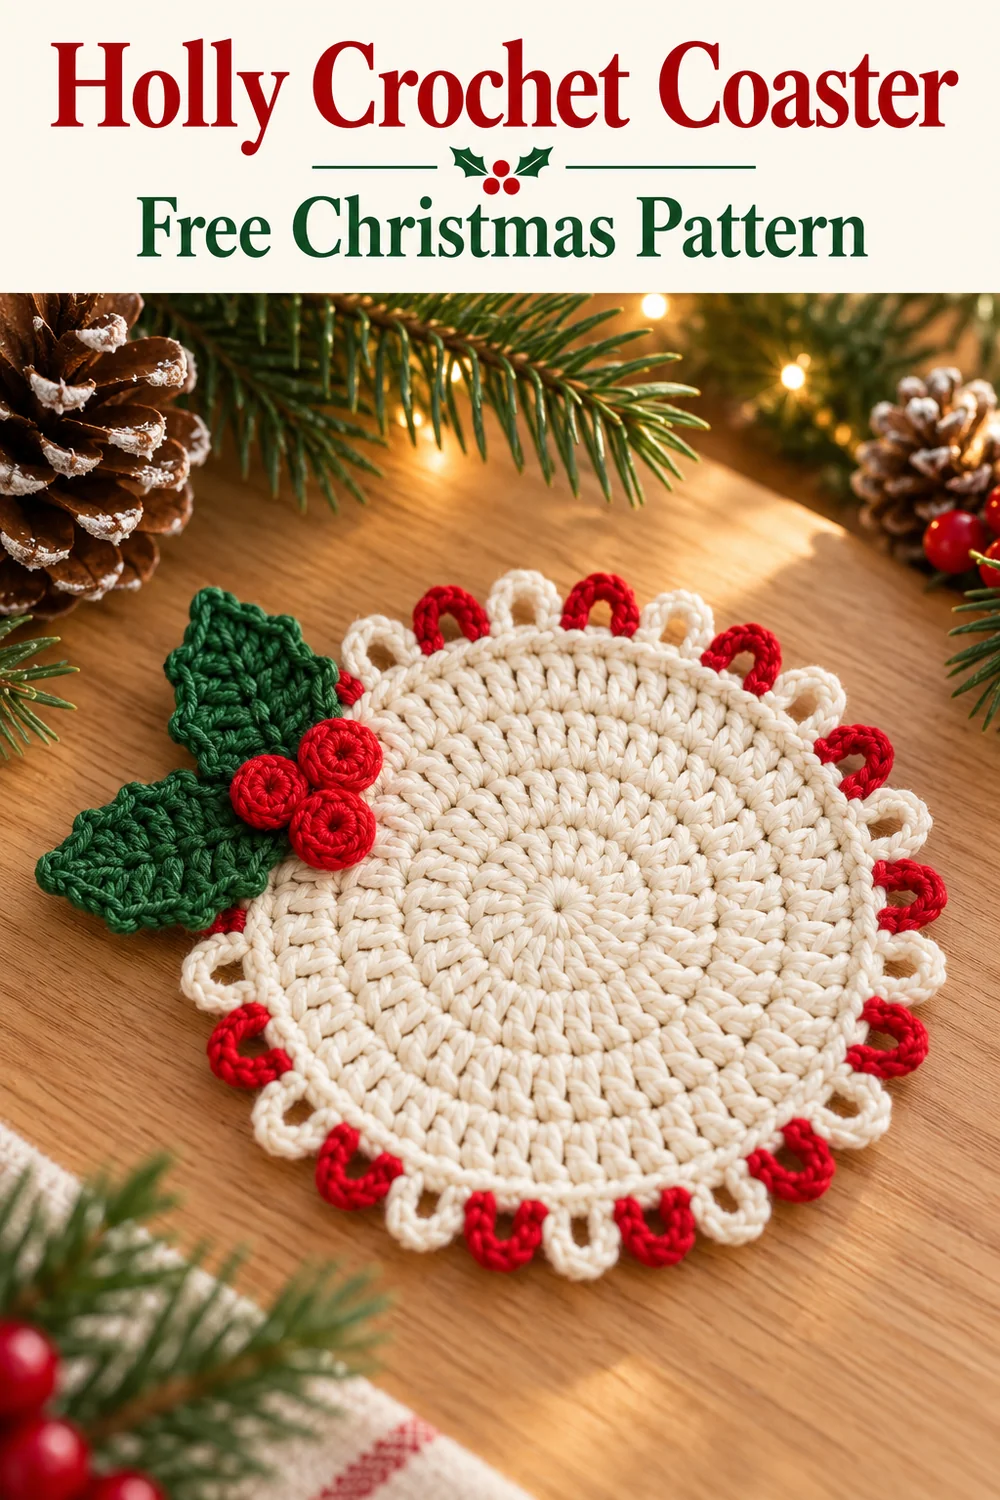
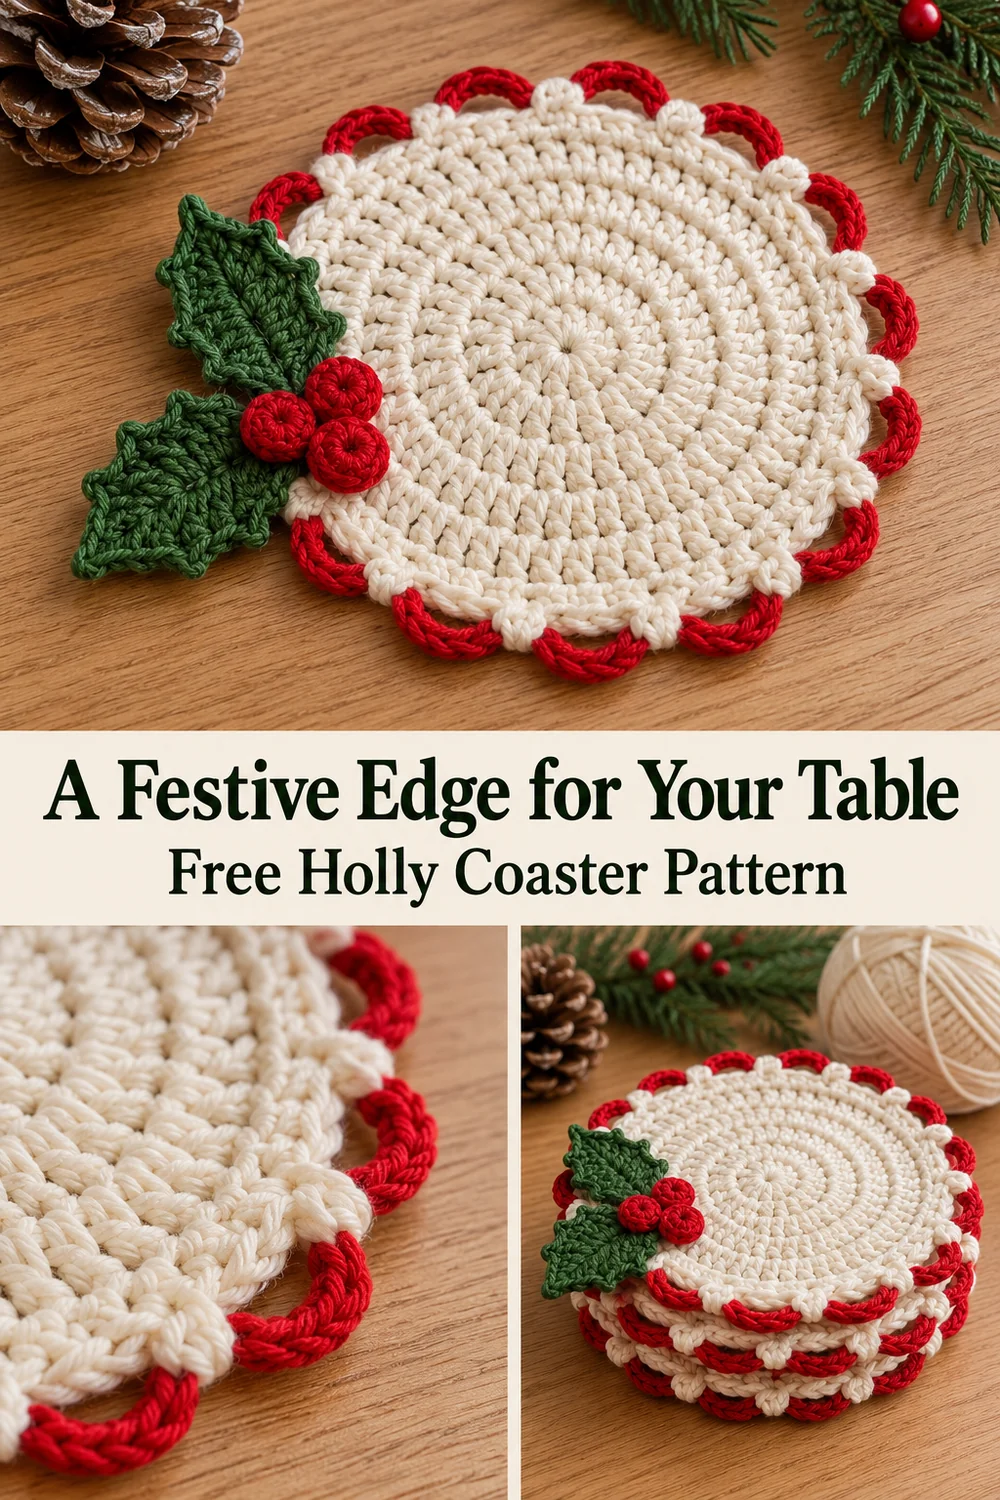
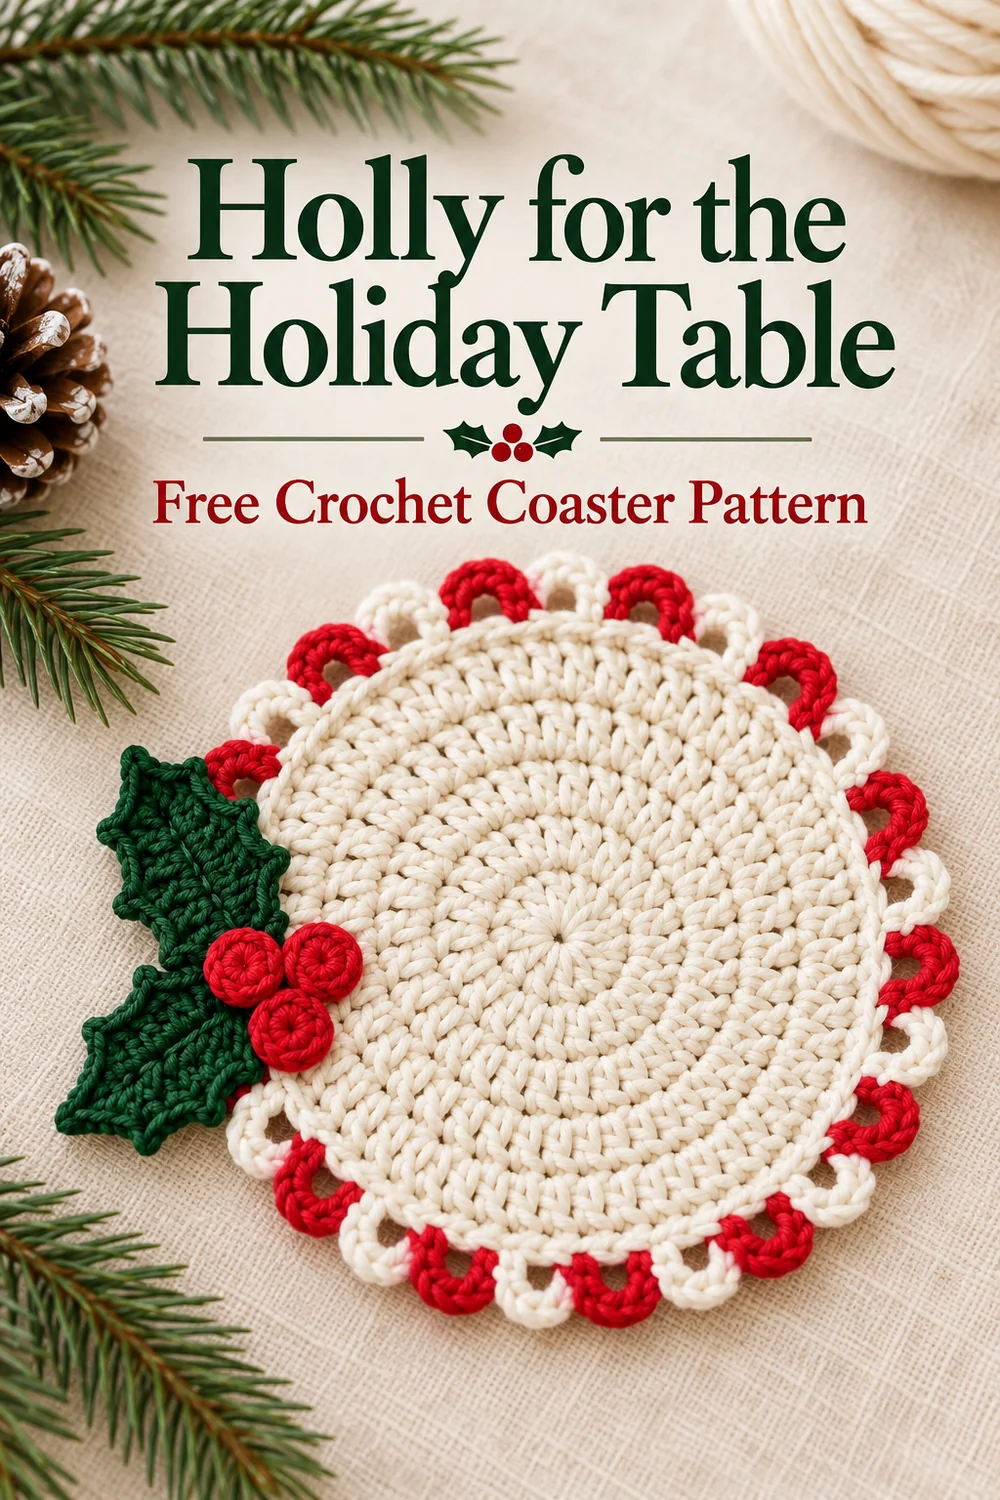
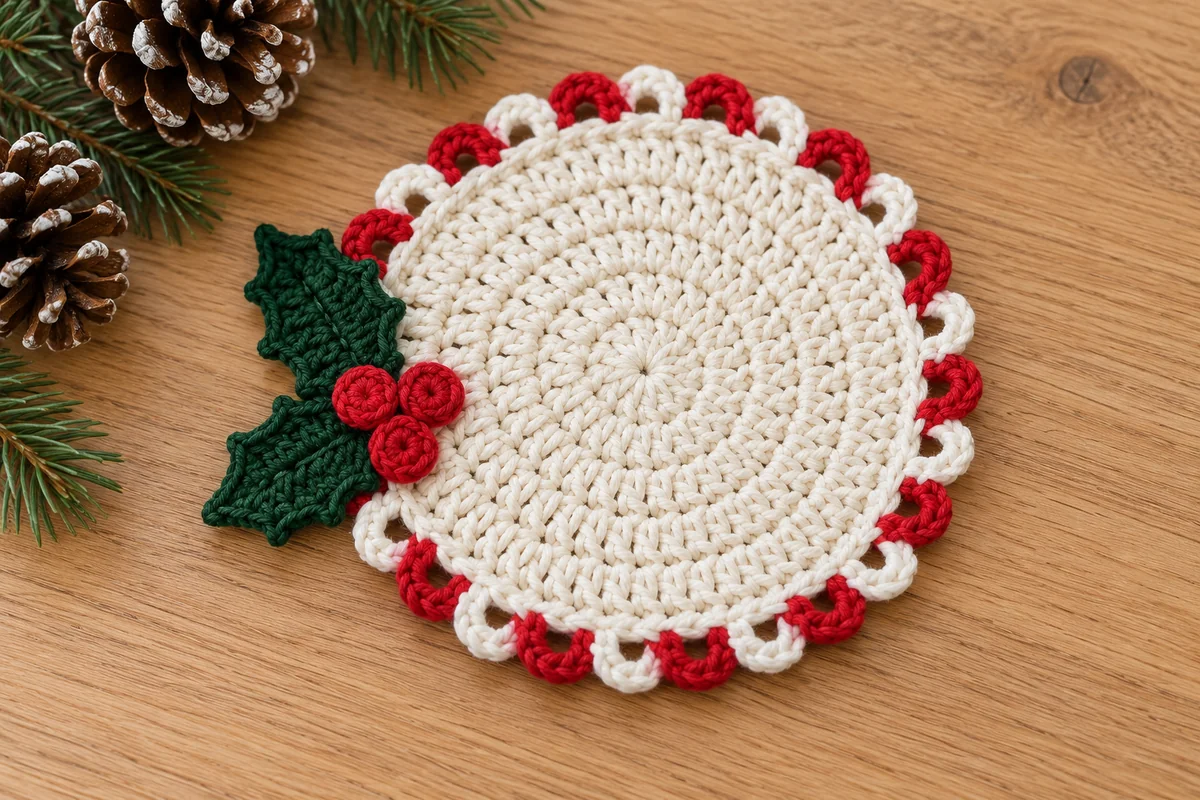
A holly crochet coaster combines a plain ivory center with a red-and-white looped edge and two little green leaves. Three flat red berries sit at the leaf bases, outside the main area where a glass would rest. The contrast comes from the border and applique rather than a textured flower in the center.
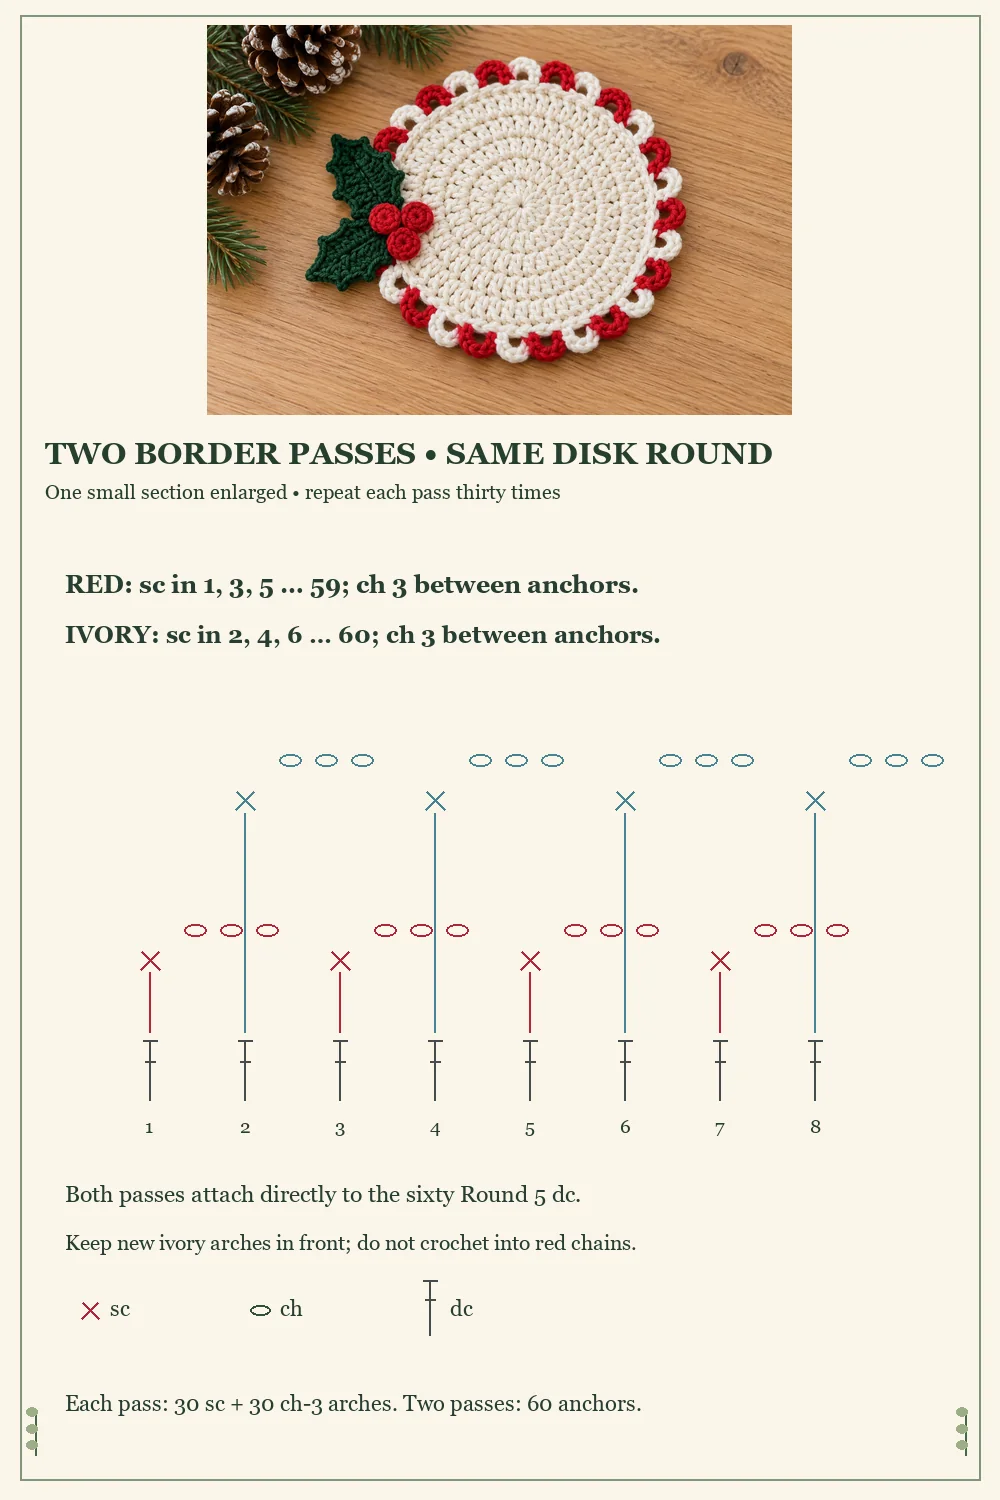
This original interpretation uses five double-crochet rounds for the disk. Red chain arches attach to alternating stitches in its last round; a second white pass attaches to the stitches left between those red anchors. The two passes create a staggered loop border without changing yarn at every repeat.
Make the disk first and check it with your intended glass before adding the holly. For another festive table accent with a floral center, see the Christmas flower coaster. This version keeps the central surface simpler and adds its leaves separately.
How this holly crochet coaster is built
The pattern is an original design inspired by the reference, not the exact recipe used for the photograph. The stitch arithmetic has been checked; the design has not been physically tested. No measured gauge, finished diameter or yarn consumption is supplied. The photos illustrate the styling, while the written instructions and charts define the stitch placement.
The coaster has a disk, two leaves and three small berry circles. Its loop border is decorative, not a raised protective rim. Sew the applications close to the outside edge so they do not create a lump beneath the glass. A dry finished motif must sit flat and support the chosen glass steadily before use.
Materials for a holly crochet coaster
- Smooth cotton yarn in ivory or white, red and green, all of similar thickness.
- A hook suitable for your yarn; a 3 mm hook is a starting option for DK cotton, not a tested gauge specification.
- A blunt yarn needle, scissors and a removable stitch marker.
- A flat blocking surface and rustproof pins if the yarn care instructions permit damp blocking.
Use absorbent yarn with clear stitch definition. A very fuzzy yarn makes it harder to find the unworked disk stitches for the white border pass. Keep the red and ivory yarn weights matched: thick red arches beside fine white arches will sit at different heights.
The holly crochet coaster suits a crocheter comfortable with joined rounds and working around both sides of a foundation chain. There is no stuffing, wire, glue or purchased berry bead. The small crocheted circles stay flat; they are sewn over the leaf bases after blocking.
US stitch terms and special details
- MR: magic ring; ch: chain.
- sl st: slip stitch; sc: single crochet.
- hdc: half double crochet; dc: double crochet.
- inc: work 2 dc into one stitch for the disk.
- st/sts: stitch/stitches; sp: space.
The Craft Yarn Council crochet abbreviation guide provides standard US terms. All starting chains in this pattern are extra height chains and do not count as working stitches.
The small leaf picot
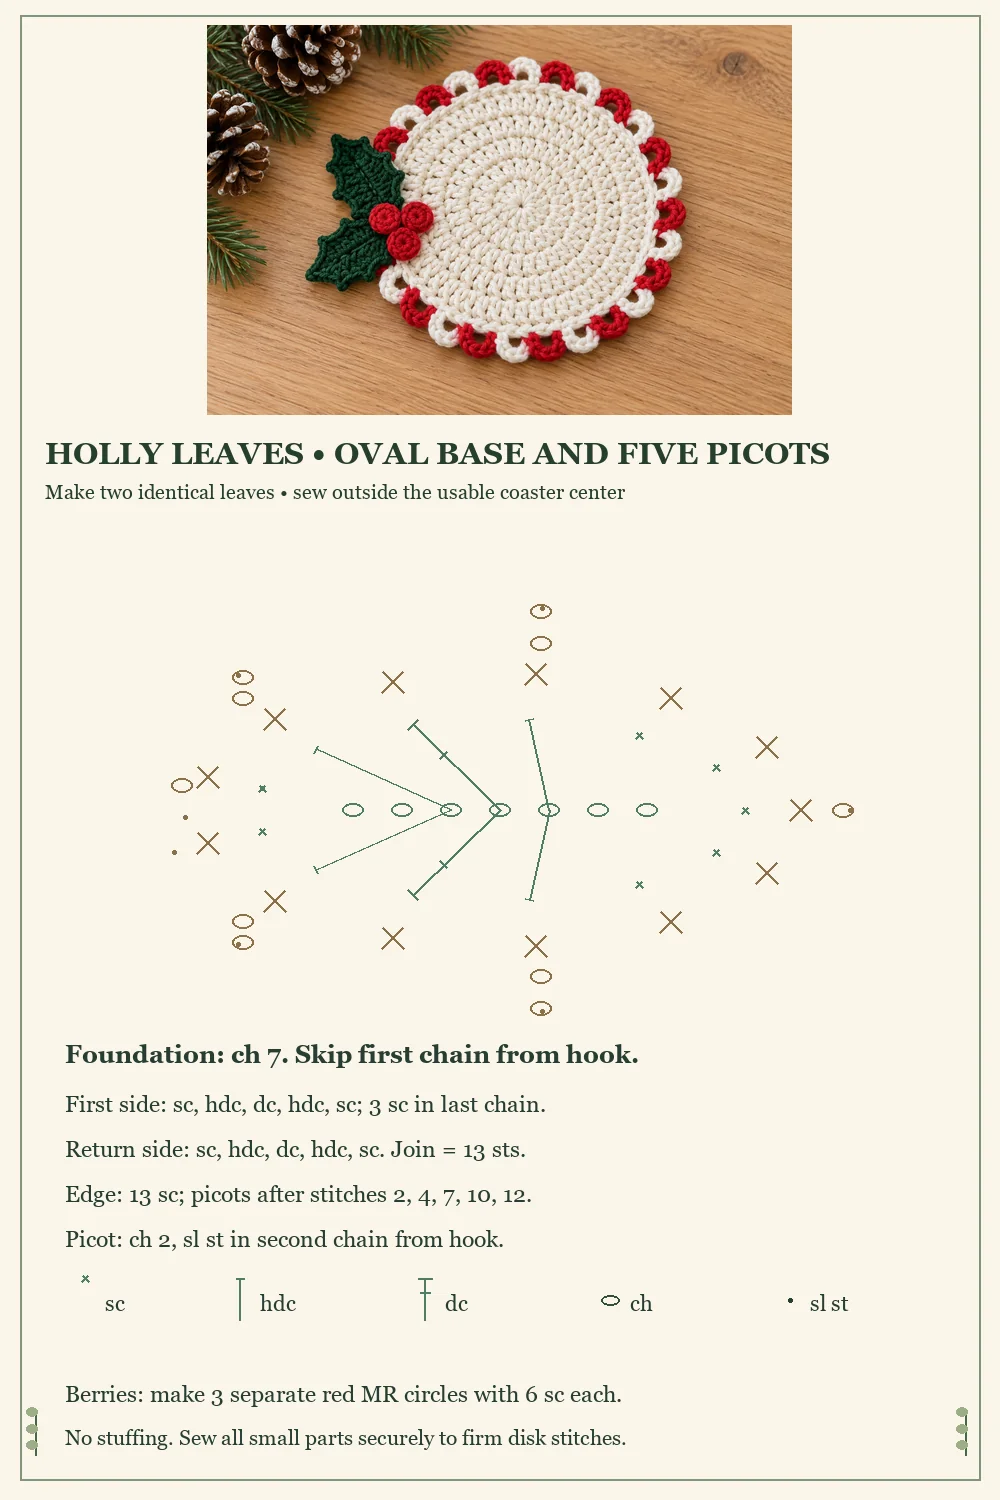
After the indicated leaf sc, ch 2 and sl st into the second chain from the hook, which is the first chain you made. Continue to the next leaf stitch. Each picot adds two chains and one small slip stitch, but it does not use another base stitch. There are five picots on each leaf.
Keep the two border passes separate
Round 6 uses every other stitch of Round 5. Round 7 returns to the same disk round and uses the thirty untouched stitches between the red anchors. It does not work into the red chain arches or the red sc tops. The white chains sit over the red pass as a separate decorative layer.
Holly crochet coaster: the ivory disk
Work joined rounds without turning. For a clear start in every round, fasten off after each disk round, then attach ivory with a sl st to the first actual dc of the previous round. Make the stated ch 2 and begin in that same dc. Attachment and joining slip stitches are not included in dc totals.
Round 1
With ivory, make an MR and ch 2. Work 12 dc into the ring, join to the first dc and fasten off. Close the ring gently. Count: 12 dc.
Round 2
Attach ivory to the first dc and ch 2. Work 2 dc in each dc around. Join to the first dc and fasten off. Count: 24 dc. There are twelve increases.
Round 3
Attach ivory to the first dc and ch 2. Repeat [dc in the next stitch, 2 dc in the next stitch] twelve times, starting in the attachment stitch. Join and fasten off. Count: 36 dc.
Round 4
Attach ivory to the first dc and ch 2. Repeat [dc in each of the next 2 stitches, 2 dc in the next stitch] twelve times. Join and fasten off. Count: 48 dc.
Round 5
Attach ivory to the first dc and ch 2. Repeat [dc in each of the next 3 stitches, 2 dc in the next stitch] twelve times. Join and fasten off. Count: 60 dc. Mark the first actual dc; this becomes stitch 1 for both border passes.
Each increase round adds twelve dc. The disk totals are 12, 24, 36, 48 and 60. Do not work into a starting chain or join when counting the sixty outer stitches.
Two-pass red and white loop border
Round 6: red arches
Attach red with a sl st to marked Round 5 stitch 1. Ch 1. Starting in that same stitch, repeat [sc in the next Round 5 dc, ch 3, skip the next Round 5 dc] thirty times. Join to the first red sc and fasten off.
Count: 30 red sc and 30 ch-3 arches. The sc anchors occupy odd-numbered disk stitches 1, 3, 5 through 59. Even-numbered stitches 2, 4, 6 through 60 remain unworked. Leave them accessible beneath the arches.
Round 7: white arches
Keep the front of the coaster facing you. Attach ivory with a sl st directly into Round 5 stitch 2, beneath the first red arch. Ch 1. Starting in that same stitch, repeat [sc in the next unworked Round 5 dc, ch 3, pass over the next disk dc already holding a red sc] thirty times. Keep the new white chain arches on the front of the red layer as you work.
Each new sc goes into the next even-numbered disk stitch. After the white sc in stitch 60, make the final ch 3 over stitch 1 and join to the first white sc in stitch 2. Fasten off.
Count: 30 white sc and 30 ch-3 arches. Together, the two passes have sixty sc anchors and sixty chain arches, with one anchor in every Round 5 dc. Keep the arches relaxed; no stitch is worked into the other color’s chains. The effect is staggered loops rather than a twisted cord.
Two green holly leaves
Leaf Round 1: the oval
With green, ch 7. Starting in the second chain from the hook, work sc, hdc, dc, hdc and sc across the next five chains. Work 3 sc in the last chain. Turn around the end of the chain to work along its unused underside loops, without turning the fabric over.
Along the underside of the next five chains, work sc, hdc, dc, hdc and sc. Join to the first sc and fasten off. Count: 13 stitches — 7 sc, 4 hdc and 2 dc. The three sc at the narrow tip are stitches 6, 7 and 8; the central one is stitch 7.
Leaf Round 2: the pointed edge
Attach green with a sl st to leaf stitch 1 and ch 1. Sc in each of the thirteen stitches around, making a small ch-2 picot after sc number 2, 4, 7, 10 and 12. Join to the first sc and fasten off with a sewing tail.
Count: 13 sc and 5 picots. Each picot contains two chains and one sl st. The tip picot follows stitch 7. Make the second leaf exactly the same way, then arrange the pair at different angles when sewing.
Three flat red berries
For each berry, make a red MR, ch 1 and work 6 sc into the ring. Join to the first sc and fasten off with a sewing tail. Close the center and secure the ring tail on the back. Make three circles, each with six sc. Do not stuff them or draw the outer edge into a ball.
Finish the holly crochet coaster
Weave in the disk and border ends through matching-color stitches, changing direction before trimming. If permitted by the yarn label, damp-block the disk flat and arrange the arches evenly. Dry completely before attaching the applications.
Position the leaves with their bases meeting near the outer edge, pointing away from the central disk. Sew through firm disk stitches rather than only through a chain loop. Tack the leaf tips as needed to keep them from curling underneath. Sew each berry circle around its edge over the meeting point of the leaf bases, securing every small piece.
Place the intended glass on the dry center and check stability. If it rocks, catches the applique or extends onto the loop border, use the motif as a decorative mat or choose a larger suitable coaster. This design has not been tested as a heat-resistant trivet; follow the yarn’s care instructions for cleaning.
Checks and common difficulties
| Part | Count to check |
|---|---|
| Disk Rounds 1–5 | 12, 24, 36, 48, 60 dc |
| Red border | 30 sc + 30 ch-3 arches in odd disk stitches |
| White border | 30 sc + 30 ch-3 arches in even disk stitches |
| Each leaf | 13 oval stitches; then 13 sc + 5 picots |
| Each berry | 6 sc |
The disk cups or ripples
Check twelve increases in every round after Round 1. A missed increase pulls the next round inward; an extra increase adds unwanted fabric. If the counts are correct, review tension and yarn suitability before stretching the disk. Strong cupping is not something to fix by pulling on the decorative border.
The white anchors are hard to find
Lift a red arch gently and locate the untouched Round 5 dc beneath it. Its two top loops are between two stitches already holding red sc. Insert into those disk loops, not the red arch. Mark a few even-numbered disk stitches before beginning if needed.
A leaf has too many base stitches
The starting ch 7 provides six working chains. Five get one stitch on the first side; the last gets three sc. Only five chains remain for the return side. Do not add another group of three at the base. Count thirteen stitches before adding the picot edge.
Coordinate a Christmas table set
For matching pieces, use the same yarn family, hook and chain tension. Finish one holly crochet coaster before making the remaining disks so you can check your preferred glass and leaf placement. Keep applications outside that usable center on every piece.
The crochet wreath coaster gives another option for a festive table, while the blue lace star ornament brings a cooler palette to the tree. Red, ivory and green also work with darker burgundy and forest-green variations.
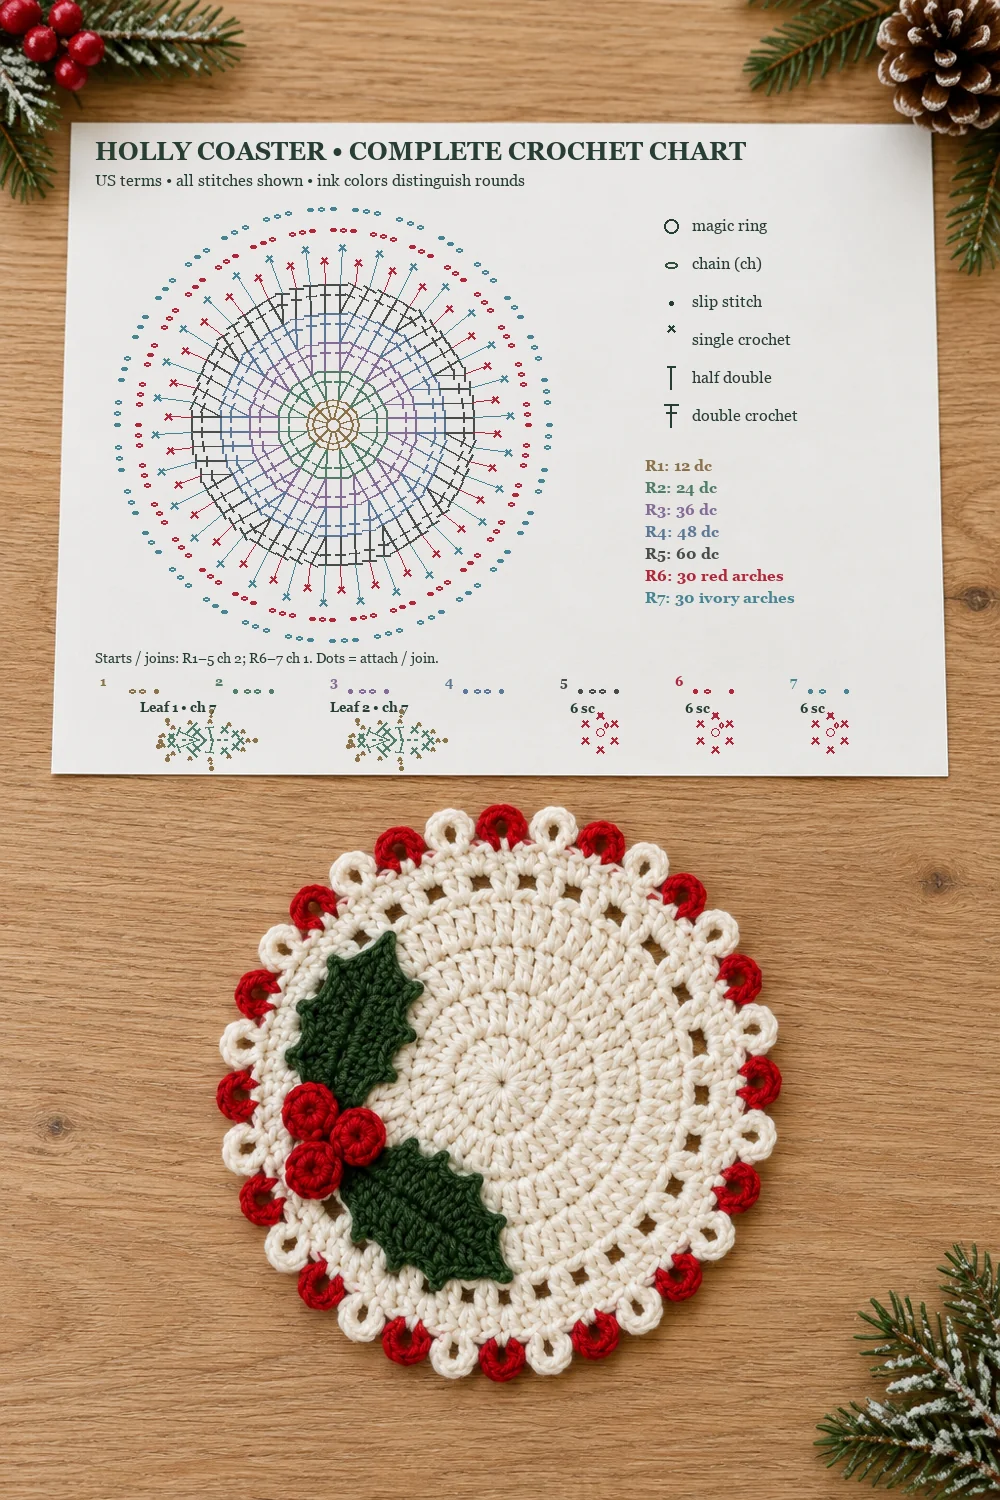
Holly crochet coaster photos and stitch guides
The three Pin designs are followed by three diagram images. The complete chart appears on a paper sheet on the same table as the finished piece. The other guides enlarge the two border passes and the leaf construction. Chart ink separates the rounds; the written yarn colors remain ivory, red and green. The symbols follow this interpretation without claiming a physically tested sample.