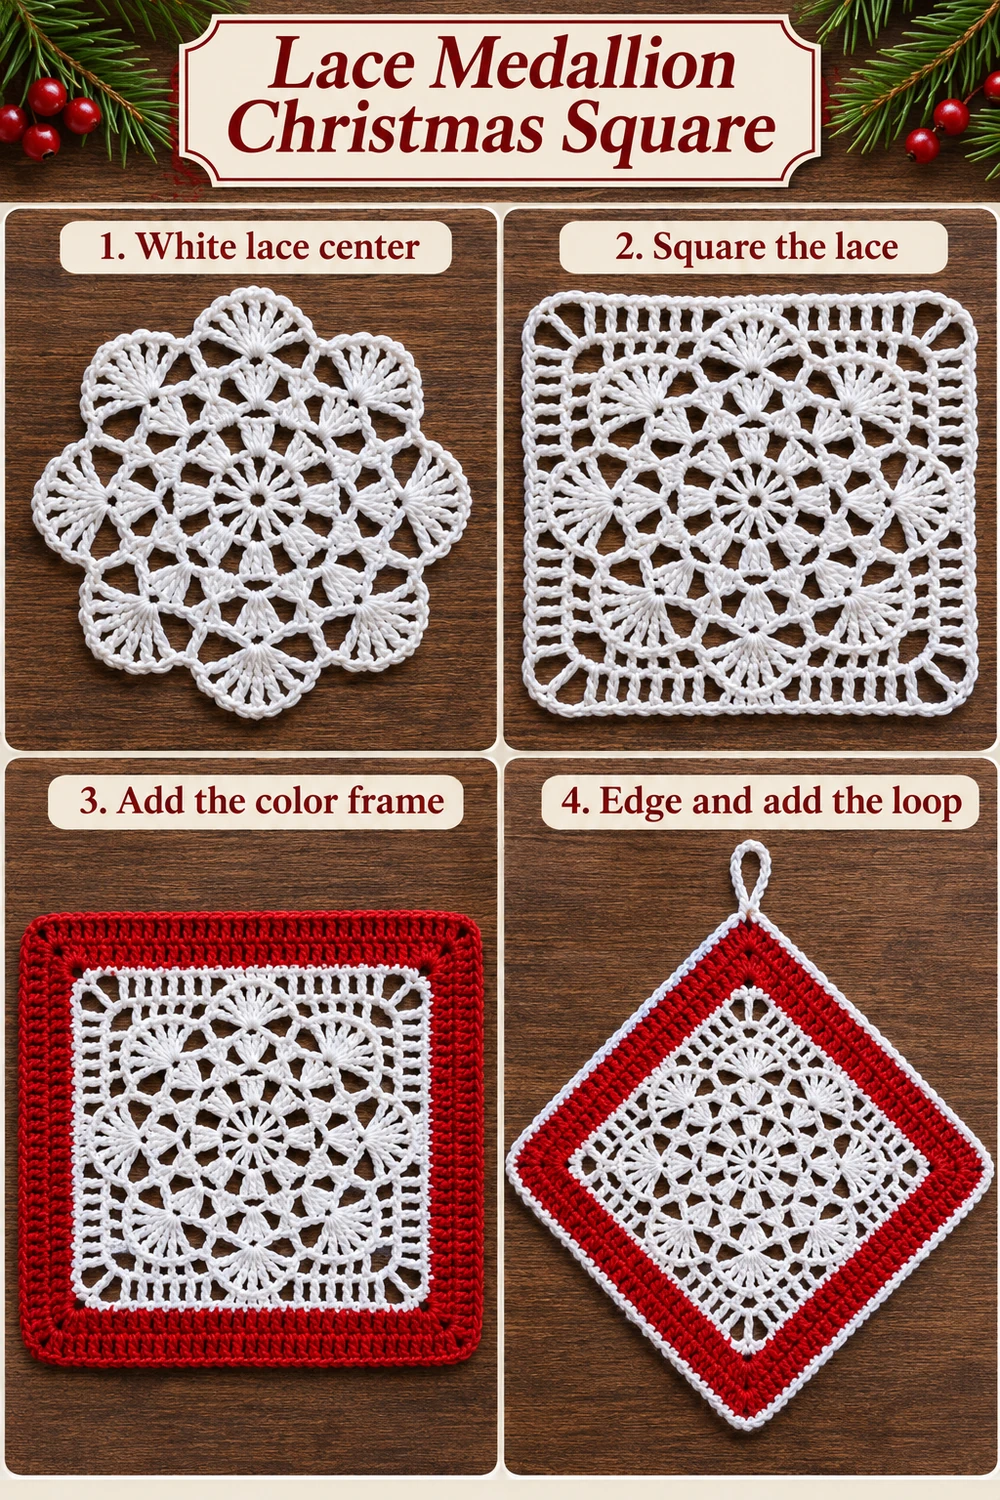
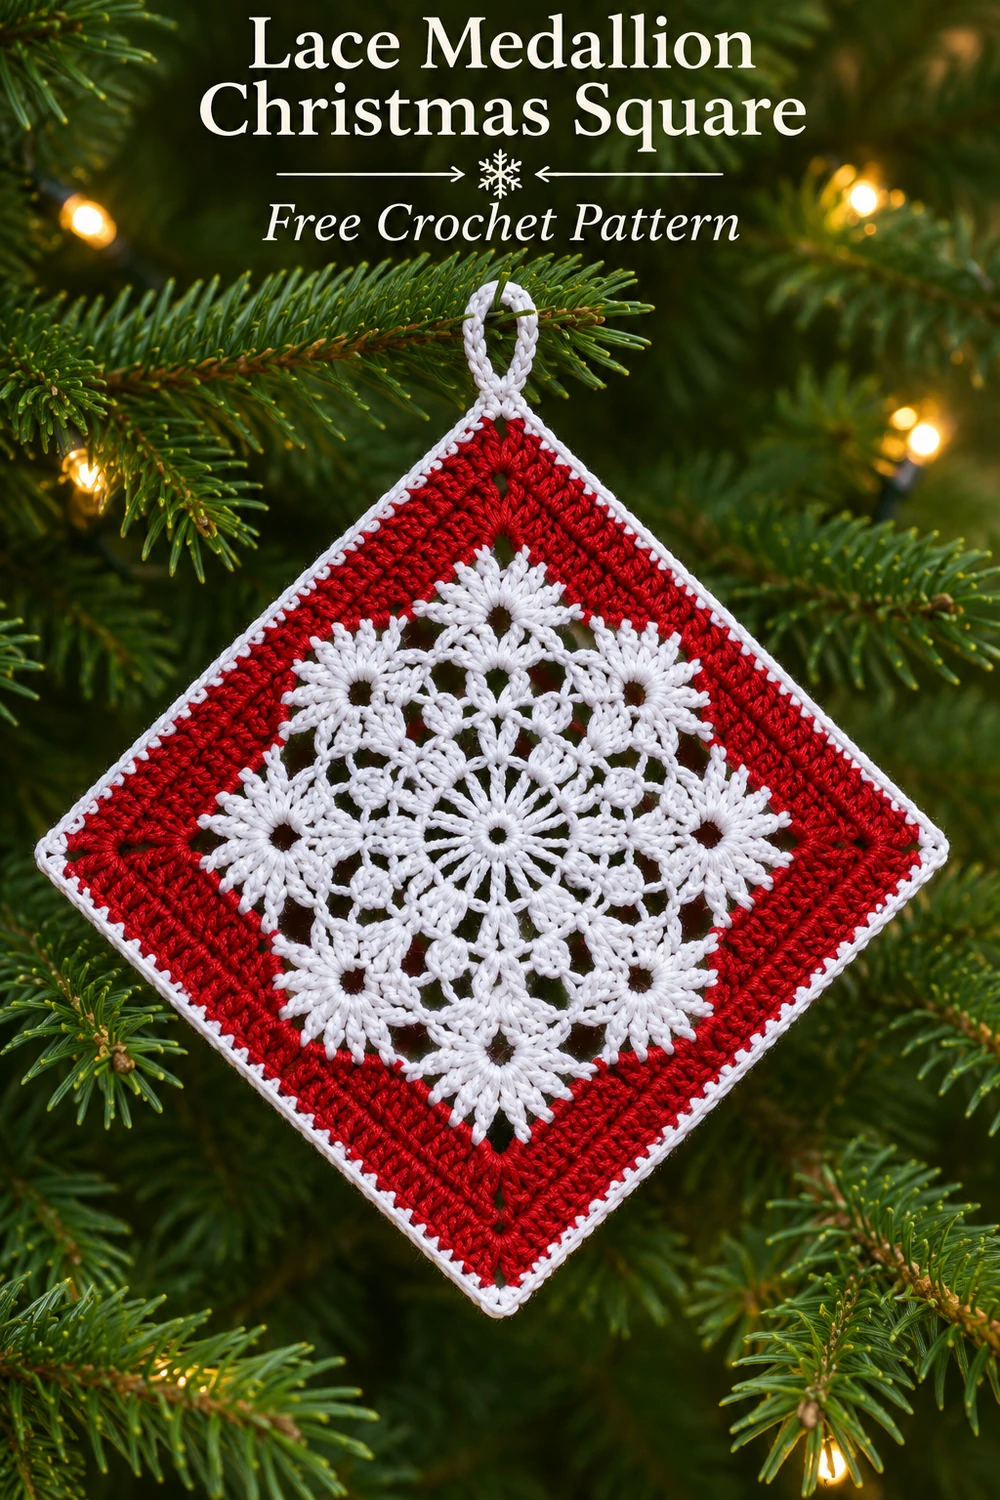
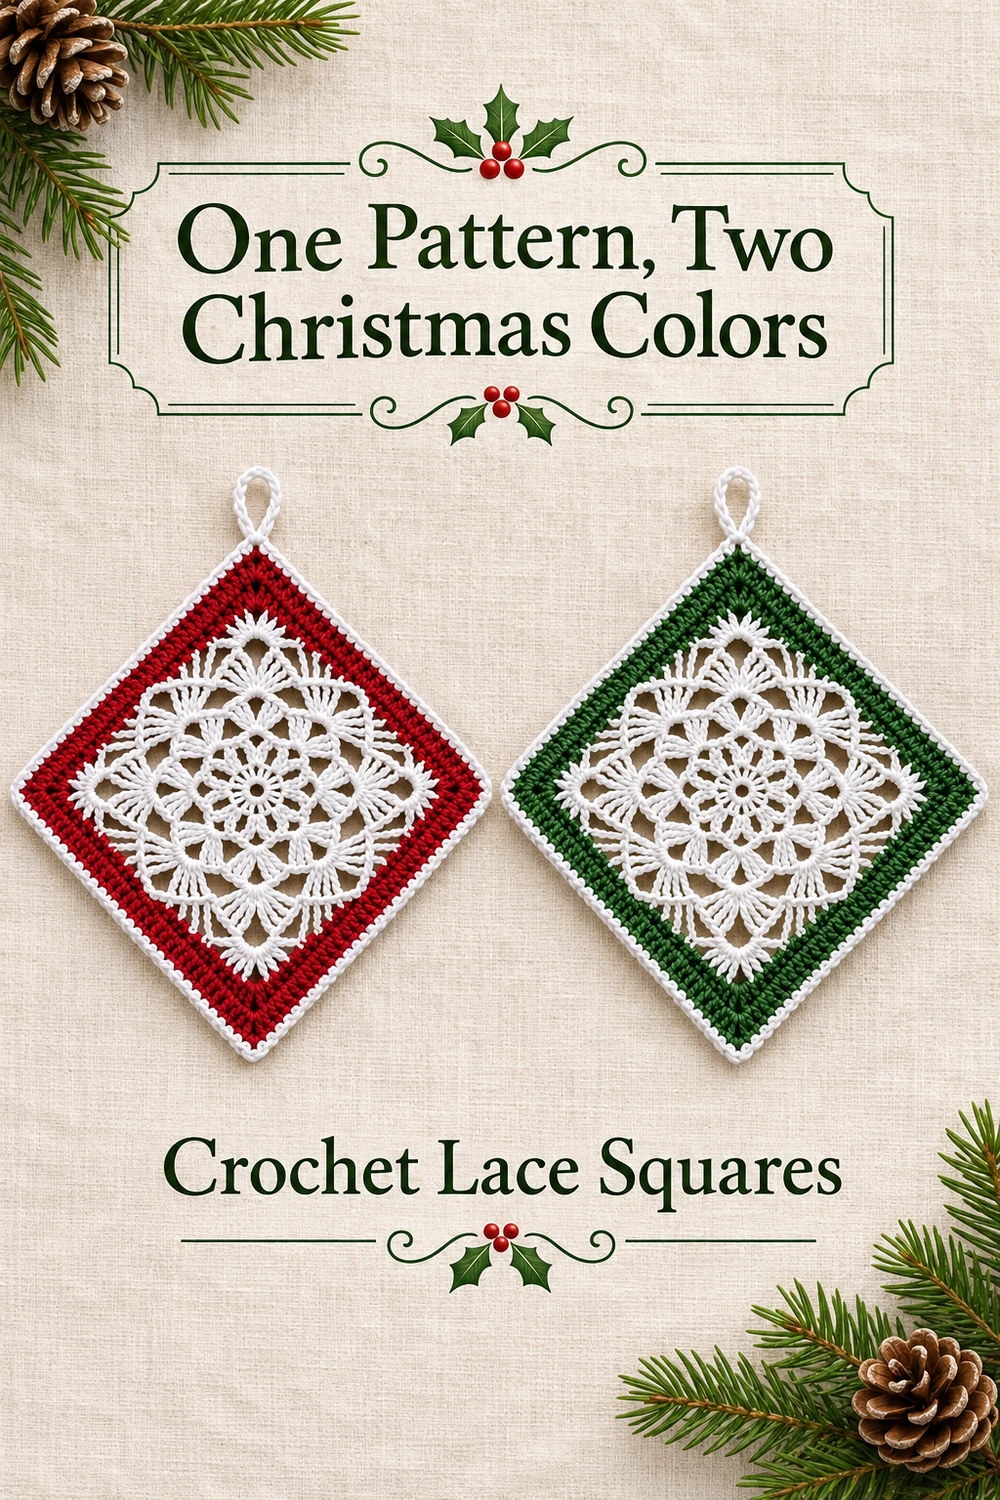
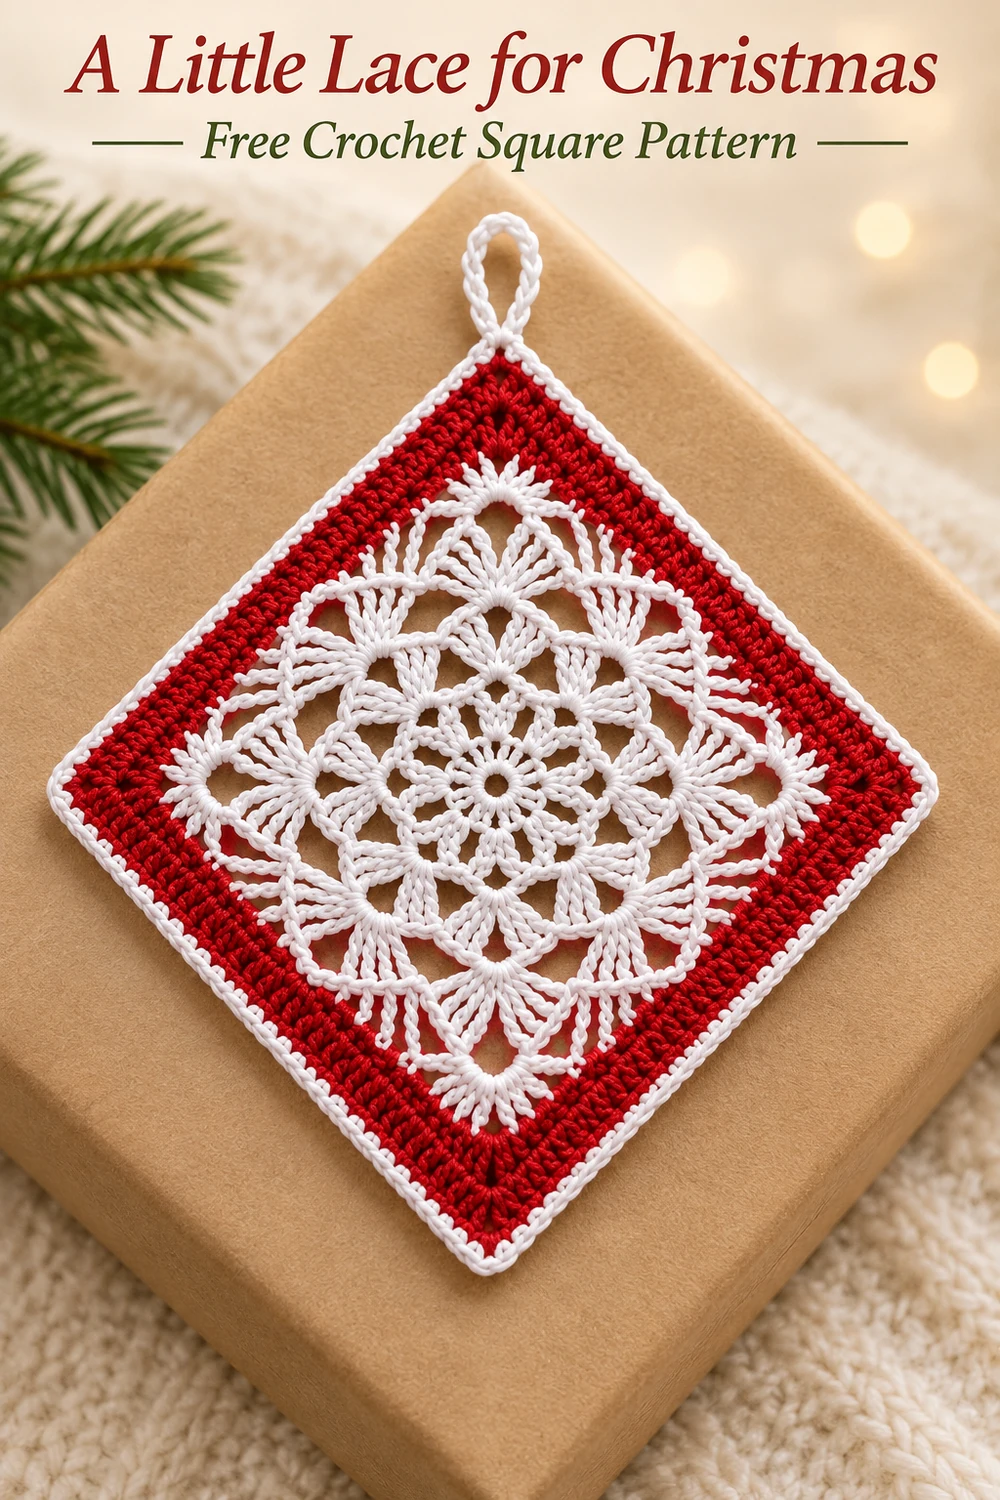
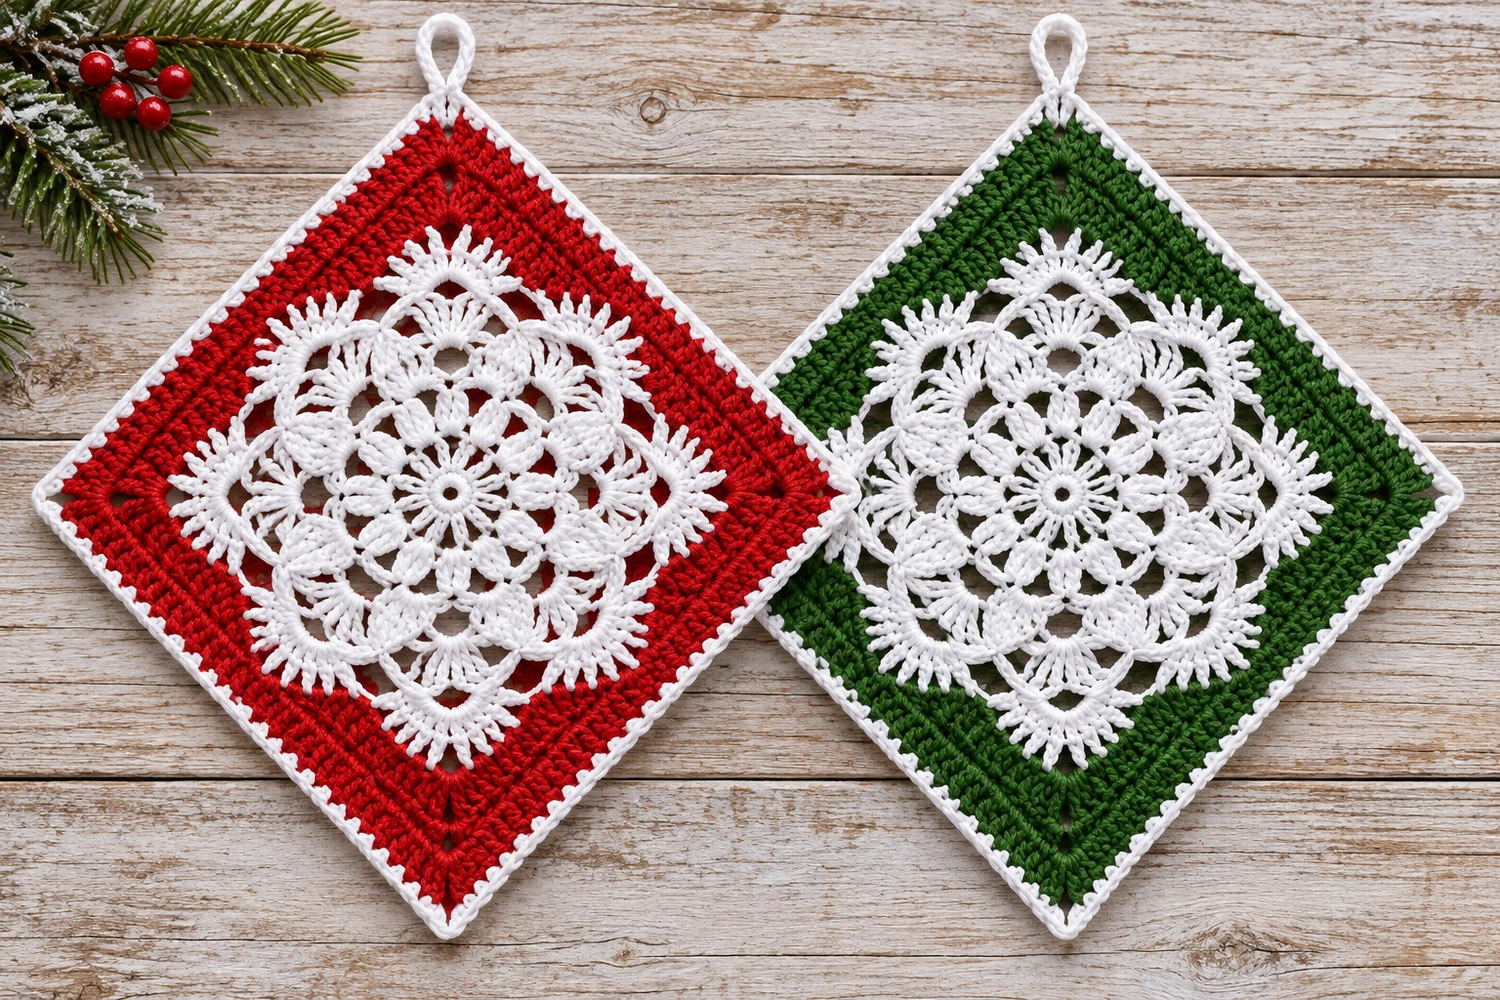
This lace medallion Christmas square combines a white flower-like lace center with a broad red frame and a fine white edge. Hang the square from one corner and its simple outline becomes a diamond, with the open stitches showing against the branches of a Christmas tree.
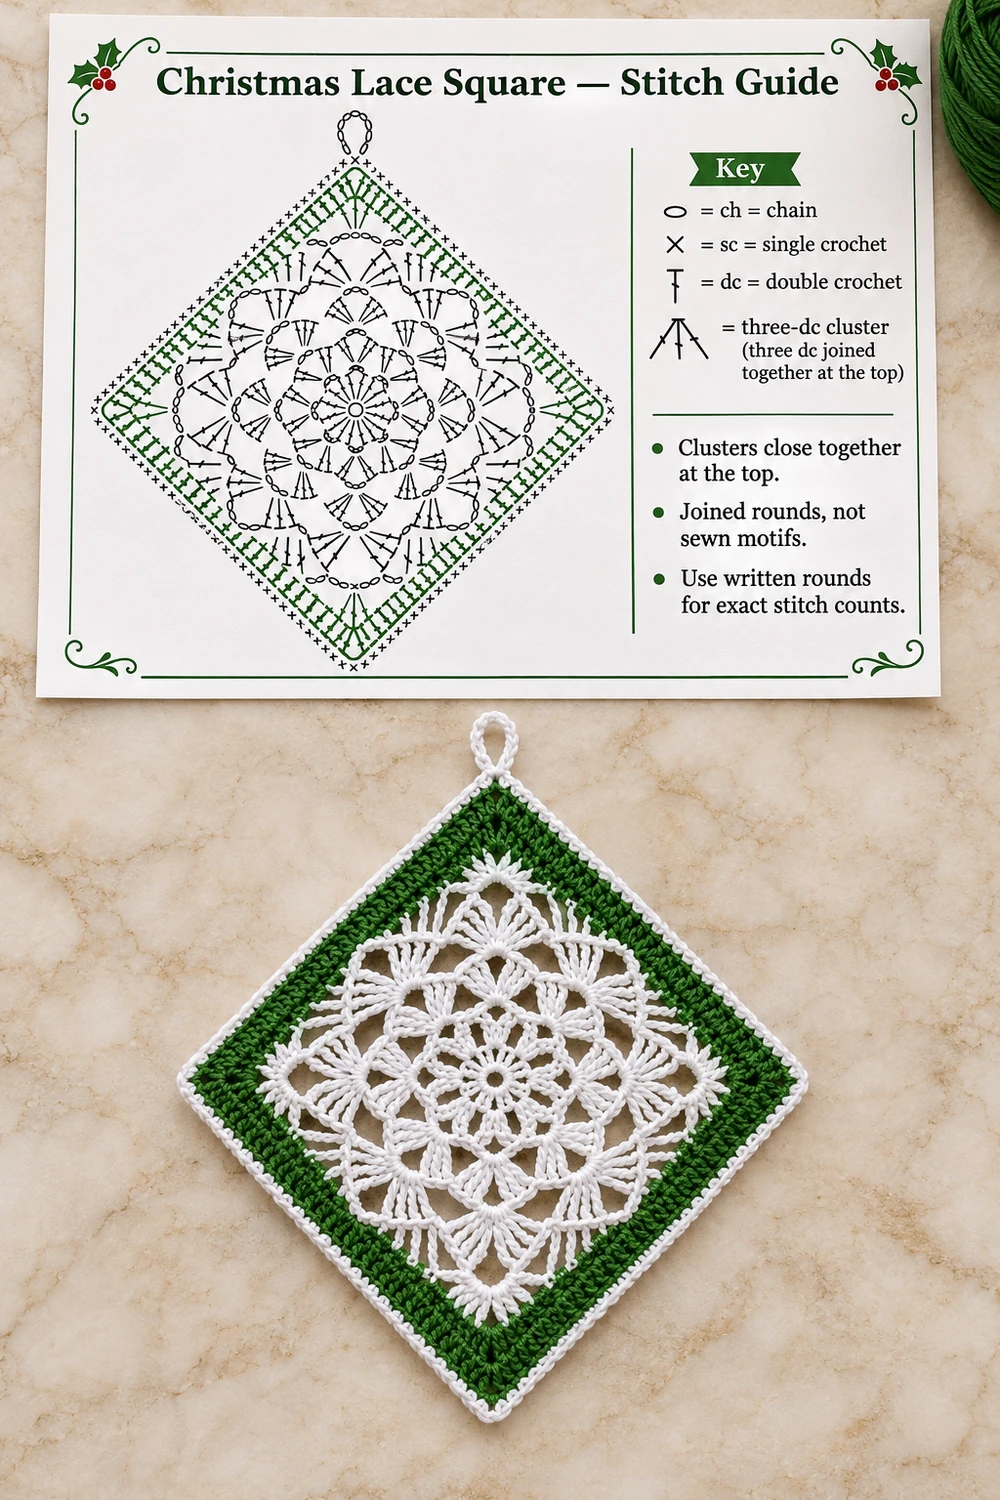
The same instructions also make the green version: replace the red framing yarn with forest green and keep the medallion, outer edge, and hanging loop white. This is an original interpretation inspired by the reference photograph, rather than the original pattern behind that image. The center and frame are crocheted in joined rounds; there is no separate snowflake to sew onto the square.
Lace Medallion Christmas Square Materials
- Smooth fine cotton in white and red; use forest green instead of red for the second colorway. Allow approximately 20–25 g white and 10–15 g colored cotton per square as a purchasing estimate, not measured consumption.
- A 2.25 mm crochet hook, or a hook appropriate for firm but flexible fabric with your cotton.
- Scissors, a tapestry needle, four removable markers, a blocking mat, and rustproof pins.
- Optional fabric stiffener compatible with the yarn, if you want a firmer hanging ornament.
Difficulty: Intermediate. The stitches are familiar, but the transition from eight lace petals to four square corners needs careful placement. Estimated size: approximately 5–6 inches (13–15 cm) along one side with fine cotton, excluding the loop. This is an estimate; no measured gauge or finished sample is available. The stitch arithmetic has been reviewed, but the pattern has not been physically tested.
Choose the same yarn weight for both colors. A heavy red frame around a much finer white center may buckle, while a very thin colored yarn may draw the lace inward. Smooth cotton makes the small chain spaces easier to identify and gives the narrow outer edge a crisp outline.
How the Square Is Constructed
First, make a small white circle. Eight two-stitch clusters divide that circle into eight sections. The next round adds a raised three-double-crochet cluster in every section, giving the center its eight-petal appearance. Two different sizes of chain arch then prepare the medallion for squaring.
The first square round alternates four corners with four side fans. Two neighboring petals therefore belong to each side of the finished square. A white double-crochet round straightens the edges, two colored rounds form the frame, and a white single-crochet round finishes it. The optional chain loop is made at one corner after the edging.
Work with the right side facing throughout. Do not turn between rounds. Beginning chains count only where stated, and joining slip stitches never count. If you tend to lose the corners, place a marker in every corner chain space as soon as it is made.
US Terms and Special Stitches
- ch: chain
- sl st: slip stitch
- sc: single crochet
- dc: double crochet
- st(s): stitch(es)
- sp(s): space(s)
- MR: magic ring
- dc2tog: double crochet two stitches together, worked over two different base stitches
- 3-dc cluster: three unfinished double crochets worked in the same space and closed together
Dc2tog: yarn over, insert into the next stitch, pull up a loop, yarn over and draw through two loops. Leave the remaining loops on the hook. Repeat that partial dc in the following stitch, then yarn over and draw through all three loops. Two old stitches become one cluster top.
3-dc cluster: work three partial dc into the same indicated space, leaving the final loop of each unfinished dc on the hook. With four loops remaining, yarn over and draw through all four. This makes one cluster top, not three separate stitches.
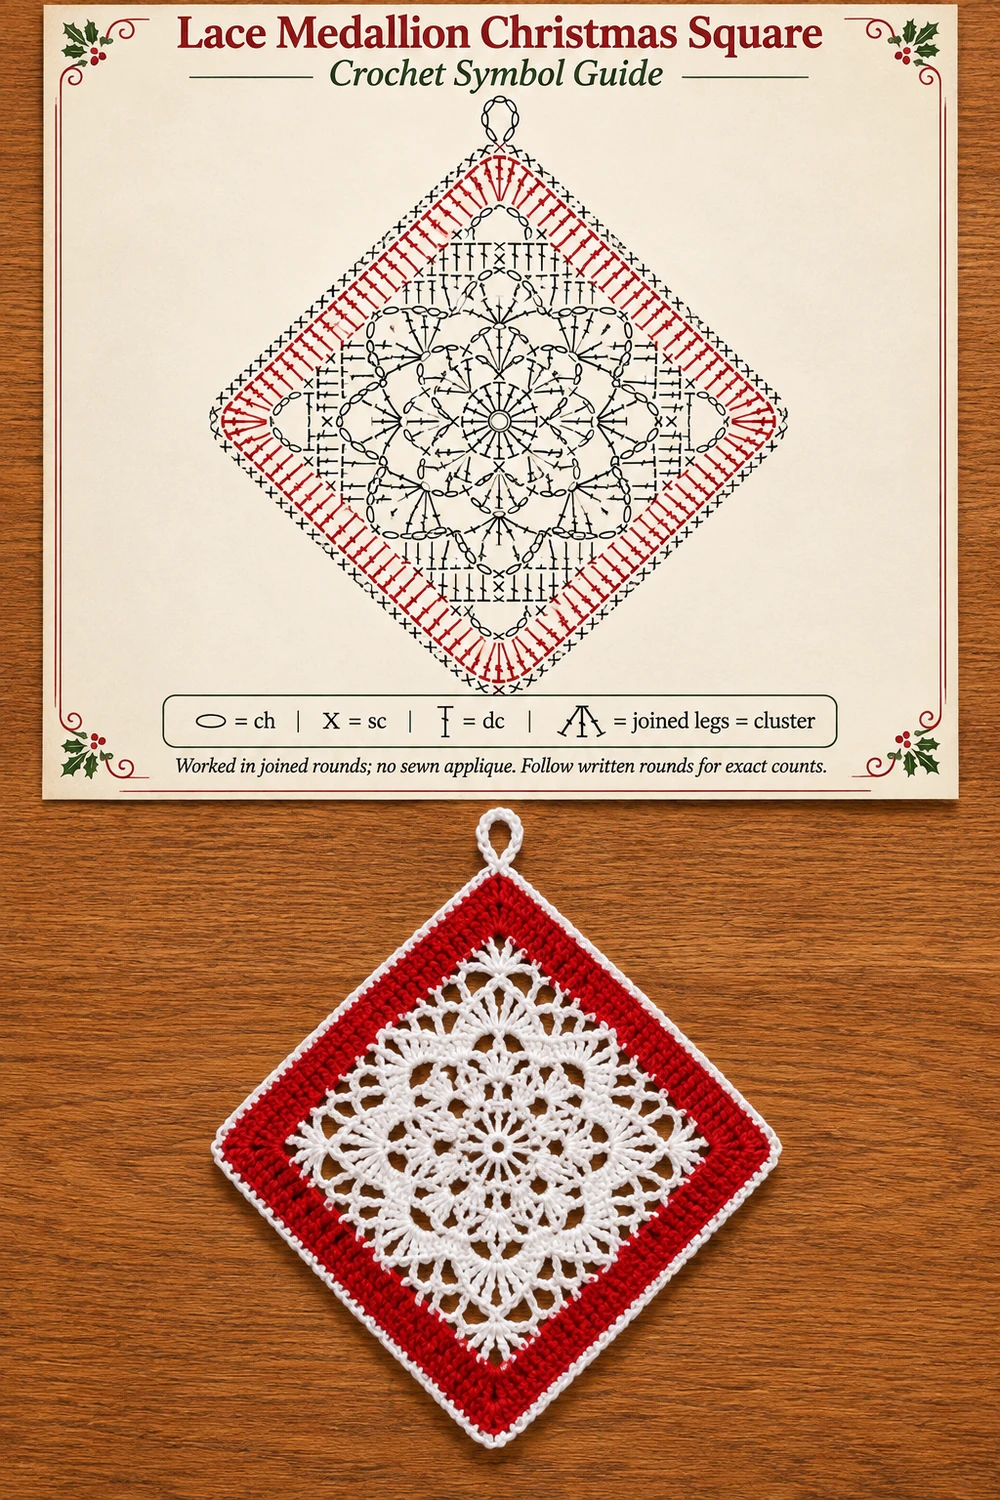
In crochet-symbol guides, an oval usually represents a chain, an X represents single crochet, and a T with one diagonal slash represents double crochet. Cluster legs meet at the top. The Craft Yarn Council abbreviation guide is a useful reference for the US terms used here.
Round-by-Round Count Check
| Round | Color | Completed count |
|---|---|---|
| 1 | White | 16 dc |
| 2 | White | 8 dc2tog and 8 ch-3 spaces |
| 3 | White | 8 clusters, 16 sc, and 16 ch-3 spaces |
| 4 | White | 16 sc, 8 ch-5 spaces, and 8 ch-3 spaces |
| 5 | White | 68 dc, 16 ch-1 spaces, and 4 ch-3 corners |
| 6 | White | 100 dc and 4 ch-2 corners |
| 7 | Red or green | 116 dc and 4 ch-2 corners |
| 8 | Red or green | 132 dc and 4 ch-2 corners |
| 9 | White | 140 sc and 4 ch-2 corners |
The side counts after squaring are 17, 25, 29, 33, and 35 for Rounds 5–9. Count along the edge from one corner space to the next, including the stitches at both ends of that side but not the chains inside the corner spaces. The hanging loop is additional and does not change the edging count.
Crochet the White Lace Medallion
Round 1: Foundation Circle
With white, make an MR. Ch 3, which counts as the first dc, then work 15 dc into the ring. Close the ring gently and join with a sl st to the top of the beginning ch 3. (16 dc)
Keep the center small but do not pull so hard that the first round cups. If you prefer a chain ring, ch 4, join into a ring, and work the same 16-dc round into that ring. The chain-ring option may leave a more visible center opening.
Round 2: Eight Divisions
Fasten off and rejoin white in the first dc. Ch 2, which does not count. Work dc2tog over that first dc and the next dc; ch 3. Repeat [dc2tog over the next 2 dc, ch 3] seven more times. Join with a sl st to the top of the first dc2tog. (8 dc2tog and 8 ch-3 spaces)
Every base stitch of Round 1 is used exactly once: eight pairs use all 16 dc. Place your first marker in the last ch-3 space if you need help finding the beginning of the following round.
Round 3: Cluster Petals
Sl st into the first ch-3 space. Ch 1, which does not count. In that space work (sc, ch 3, 3-dc cluster, ch 3, sc). Repeat the same complete sequence in each of the seven remaining ch-3 spaces. Join with a sl st to the first sc. (8 clusters, 16 sc, and 16 ch-3 spaces)
The two sc anchor opposite ends of each petal, and the three dc legs of the cluster rise together between them. Do not put a chain between neighboring petals beyond those already written. You will see two ch-3 arches beside every cluster.
Round 4: Prepare the Squaring Arches
Sl st into the first ch-3 arch immediately before a cluster. Ch 1. Work [sc in the ch-3 arch before the cluster, ch 5, sc in the ch-3 arch after that same cluster, ch 3] eight times. Join with a sl st to the first sc. (16 sc, 8 ch-5 arches, and 8 ch-3 valley spaces)
The ch-5 arch travels over the top of one petal. The shorter ch-3 space travels across the valley to the next petal. Mark every other ch-5 arch: arches 1, 3, 5, and 7 will become corners. The four unmarked ch-5 arches become side fans.
Turn the Medallion into a Square
Round 5: Four Corners and Four Fans
Fasten off and join white in the first marked ch-5 arch. Ch 3, which counts as the first dc. Work 2 dc, ch 3, and 3 dc into that same arch. This is the first corner. Ch 1, work 3 dc into the next ch-3 valley, ch 1, work 5 dc into the next unmarked ch-5 arch, ch 1, work 3 dc into the next ch-3 valley, and ch 1.
Repeat [(3 dc, ch 3, 3 dc) in the next marked ch-5 arch, ch 1, 3 dc in the next ch-3 valley, ch 1, 5 dc in the next unmarked ch-5 arch, ch 1, 3 dc in the next ch-3 valley, ch 1] three more times. Join to the top of the beginning ch 3. (68 dc, 16 ch-1 spaces, and 4 ch-3 corners)
Do not work into the sc anchors of Round 4. All the stitches of this round go around chain arches. Each corner contains six dc; each unmarked arch contains five. The total is 4 × 6 + 4 × 5 + 8 × 3 = 68 dc. Check that there is one side fan between every pair of corners before continuing.
Round 6: White Straightening Round
Fasten off and join white in any ch-3 corner. Ch 3, which counts as a dc; work 1 dc, ch 2, and 2 dc into the same corner. Work 1 dc in each dc along the next side and 1 dc in each ch-1 side space. At the next corner work (2 dc, ch 2, 2 dc). Continue around in the same way, working all four sides and all four corners. Join to the top of the beginning ch 3 and fasten off. (100 dc and 4 ch-2 corners)
There are 17 dc and four single-chain spaces along each old side. Those become 21 dc, and the two dc supplied by each neighboring corner add four more. Your new side therefore contains 25 dc. Avoid skipping the first dc after a corner; it can sit close to the corner group.
Add the Red or Green Frame
Round 7: First Colored Round
Join red in a ch-2 corner. Ch 3, which counts as the first dc, then work 1 dc, ch 2, and 2 dc into that same space. Work 1 dc in each dc along the side. At every remaining corner work (2 dc, ch 2, 2 dc), then continue with 1 dc in each side stitch. Join to the top of the beginning ch 3. (116 dc; 29 dc per side, plus 4 ch-2 corners)
Keep the red attached. For the green version, use forest green for both this round and the following round; all stitch placement stays the same. Do not change the white medallion rounds.
Round 8: Second Colored Round
Sl st into the next dc and into the corner space. Ch 3, work 1 dc, ch 2, and 2 dc into the corner. Work 1 dc in every side stitch and (2 dc, ch 2, 2 dc) in every remaining corner. Join to the top of the beginning ch 3 and fasten off. (132 dc; 33 dc per side, plus 4 ch-2 corners)
The positioning slip stitches at the start simply move the hook into the corner. They do not replace any side stitch. When you reach that side at the end of the round, work into the tops of the original dc beneath those positioning stitches, not into the slip stitches themselves.
White Edge and Corner Hanging Loop
Round 9: Fine Outer Edge
Join white in any ch-2 corner. Ch 1, then work (sc, ch 2, sc) into the same corner. Work 1 sc in each of the 33 dc along the next side. Repeat [(sc, ch 2, sc) in the next corner, sc in each dc along the side] three more times. Join to the first sc. (140 sc; 35 sc per side, plus 4 ch-2 corners)
For a square that will be joined to other motifs, fasten off here and omit the loop. For a hanging ornament, sl st into the first corner’s ch-2 space. Ch 18 and sl st back into that same corner space to make a loop. Fasten off with a generous tail.
Pass the tail through the chain-loop base and corner stitches several times with a tapestry needle, then weave it back through the white edging. Reinforcement is sewing with the finishing tail; the loop itself is crocheted chain. Keep the corner opening visible instead of drawing it into a tight knot.
Block the Ornament into Shape
Weave the remaining tails into matching colors on the back. Do not carry a long red tail across the open white lace, where it will be visible from the front. Wash or dampen the cotton according to its label, gently squeeze out excess water, and lay it on the blocking mat.
Pin the four corners into a square first. Adjust the sides until opposing edges are parallel, then open the lace arches with gentle fingertip pressure. Measure the diagonals if you want a simple symmetry check: they should be approximately equal. Pin the loop separately without stretching its base.
Leave the ornament until completely dry before unpinning. If using stiffener, follow the product’s dilution and drying instructions and try it on a small cotton swatch first. Keep it out of the tiny cluster openings as much as possible so the lace retains its texture. This pattern does not specify or test a particular stiffener.
Troubleshooting the Lace and Frame
The Corners Are Uneven
Return to the marked arches in Round 4. Corners must occupy every other ch-5 arch, with exactly one side fan between corners. Putting a corner in a ch-3 valley shifts the entire square and cannot be corrected by blocking.
The Center Cups
Check that Round 2 has eight ch-3 spaces and that Round 3 has two ch-3 spaces beside each cluster. A missing arch shortens the outer circumference. If the counts are correct but the chains are very tight, loosen your chain tension; blocking should refine the shape rather than force a deeply cupped center flat.
The Colored Frame Ruffles
Check the four side counts: 25 in Round 6, 29 in Round 7, and 33 in Round 8. Work the corner increases only inside the corner spaces. Extra dc in the first or last side stitch will produce too much fabric and make the frame wave.
A Side Has One Fewer Stitch
Look at the first stitch immediately after the corner and the stitch beneath the beginning chain. These are easy to overlook. In Round 6, each ch-1 side space receives exactly one dc, not three. Count each side before fastening off so you can correct a missed stitch without undoing another round.
Color Choices and Care
The red and green versions share every count. For a coordinated set, keep the same white cotton and hook for all centers and change only the two framing rounds. Work and block one ornament before making a batch so you can decide whether the scale suits your tree or gift wrapping.
Store the dry ornaments flat between clean sheets of tissue. If they become dusty, clean them according to the cotton and stiffener labels, then block again. Keep open lace away from sharp hooks that can snag the chains. These squares are decorations; this recipe does not establish heat protection for using them as potholders.
More Christmas Crochet Ideas
For another lacy tree decoration, try the Picot Fan Crochet Snowflake. If you prefer an applied motif on a square, see the Holly and Berries Granny Square or the Christmas Bauble Granny Square.