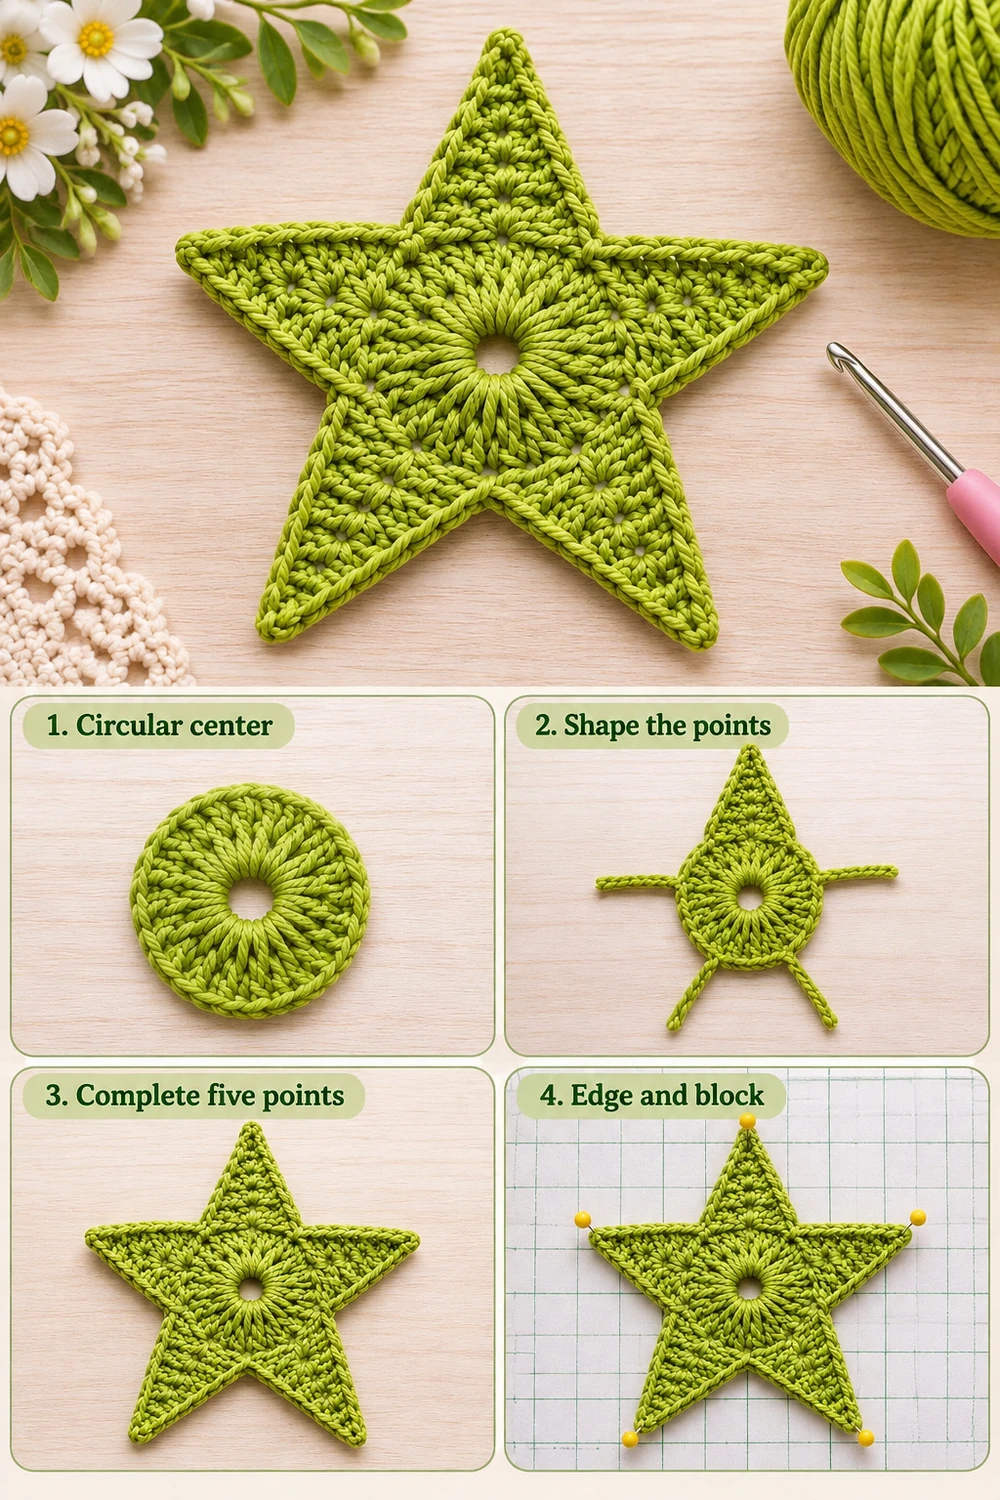
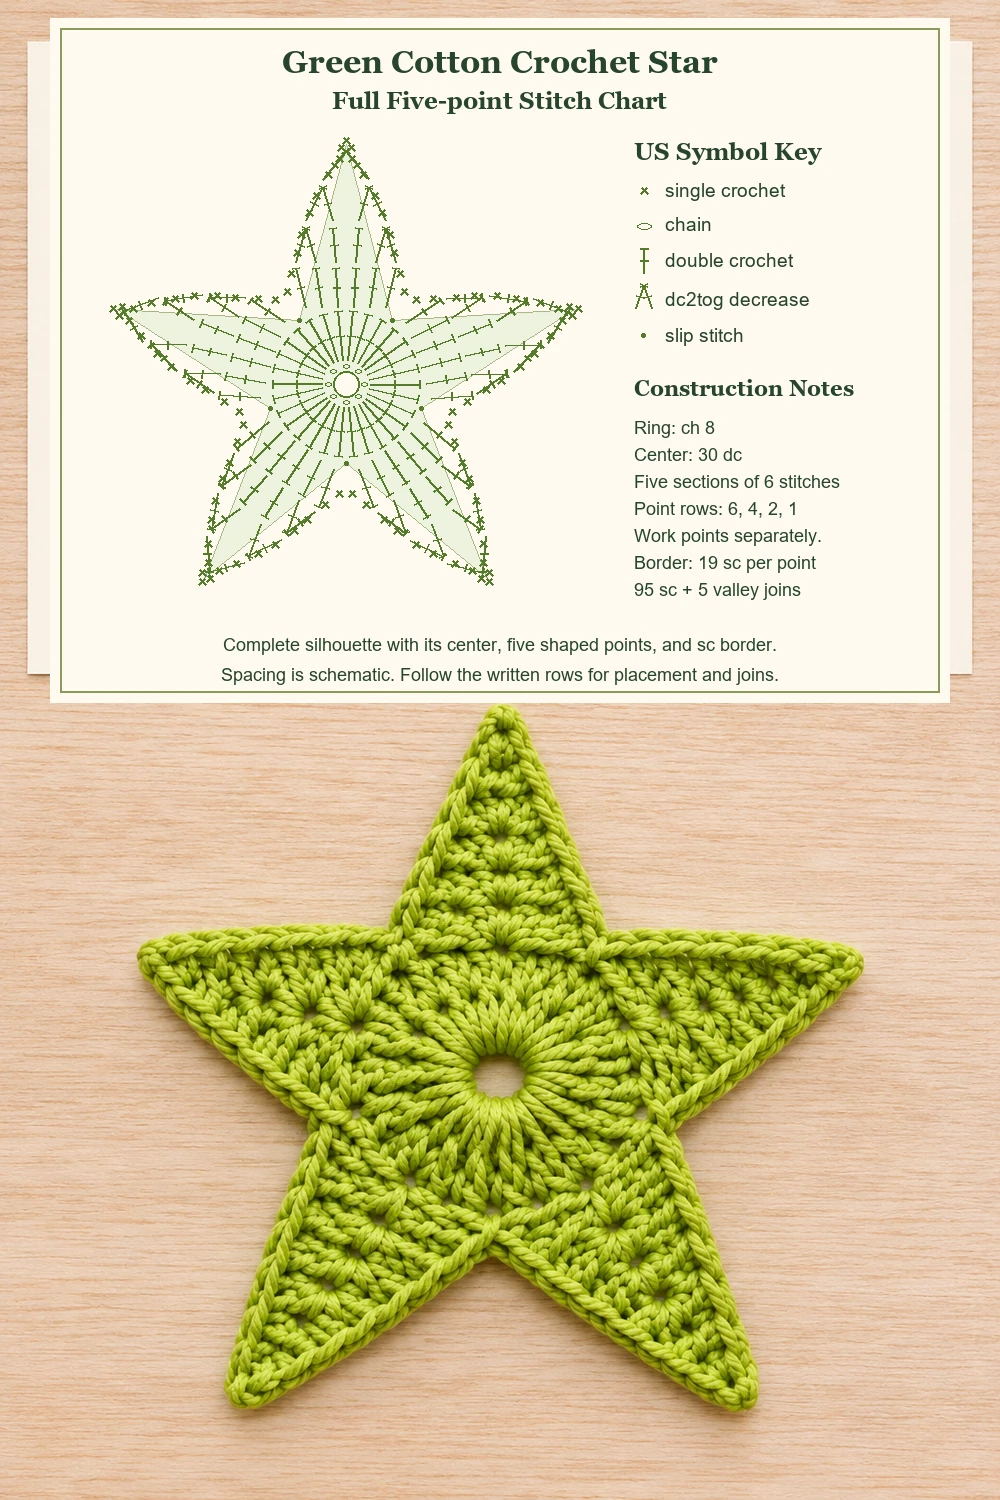
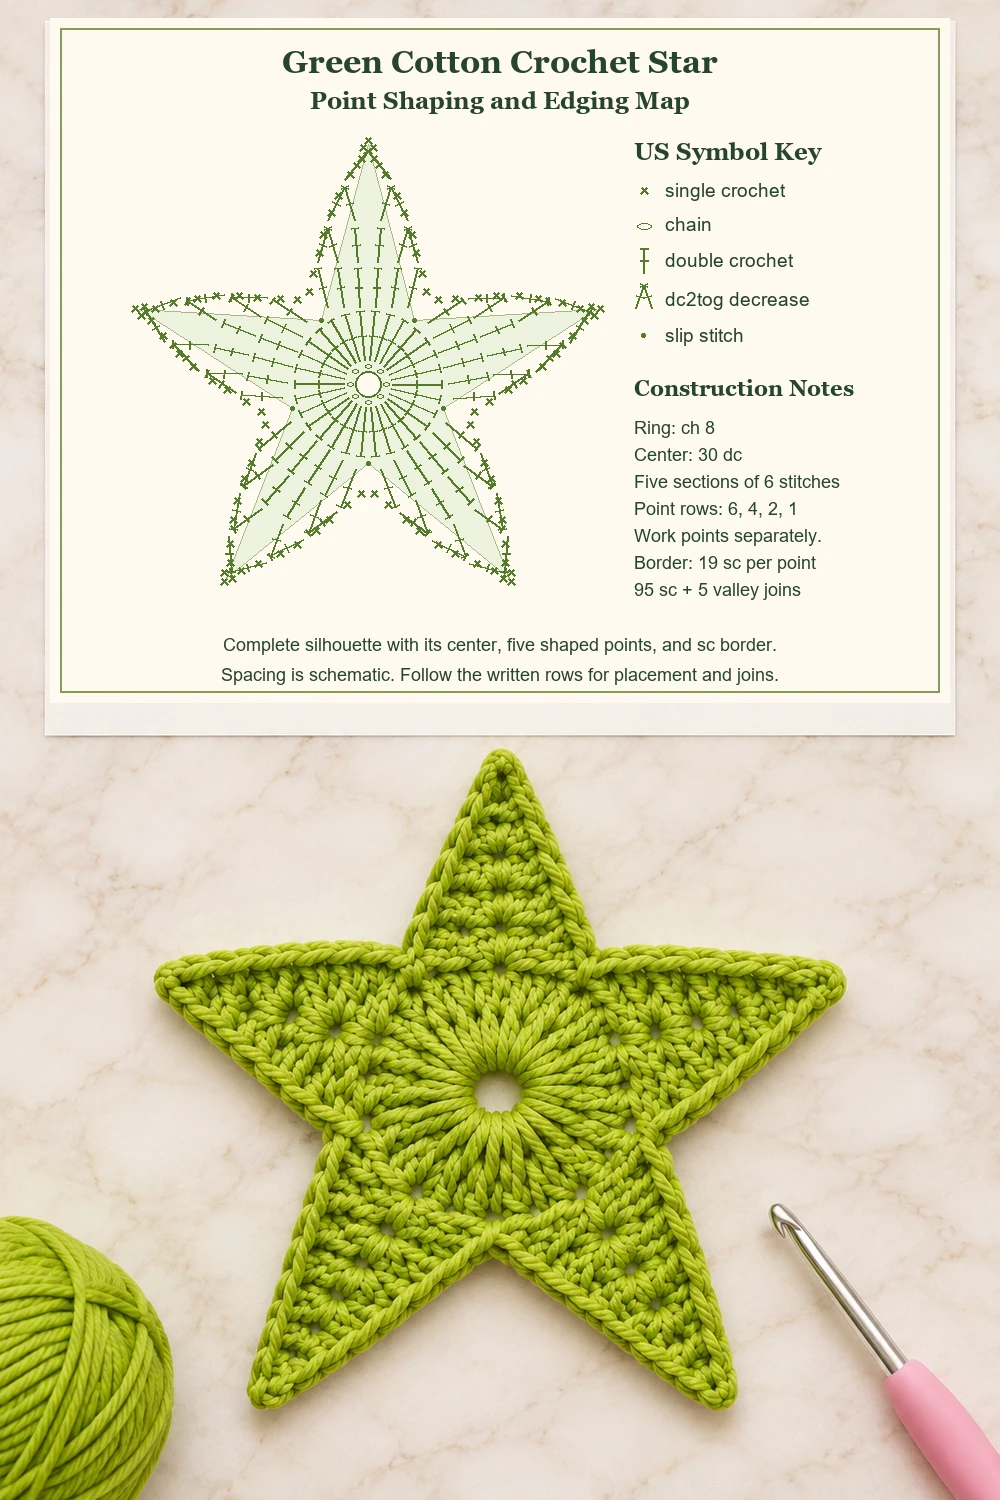
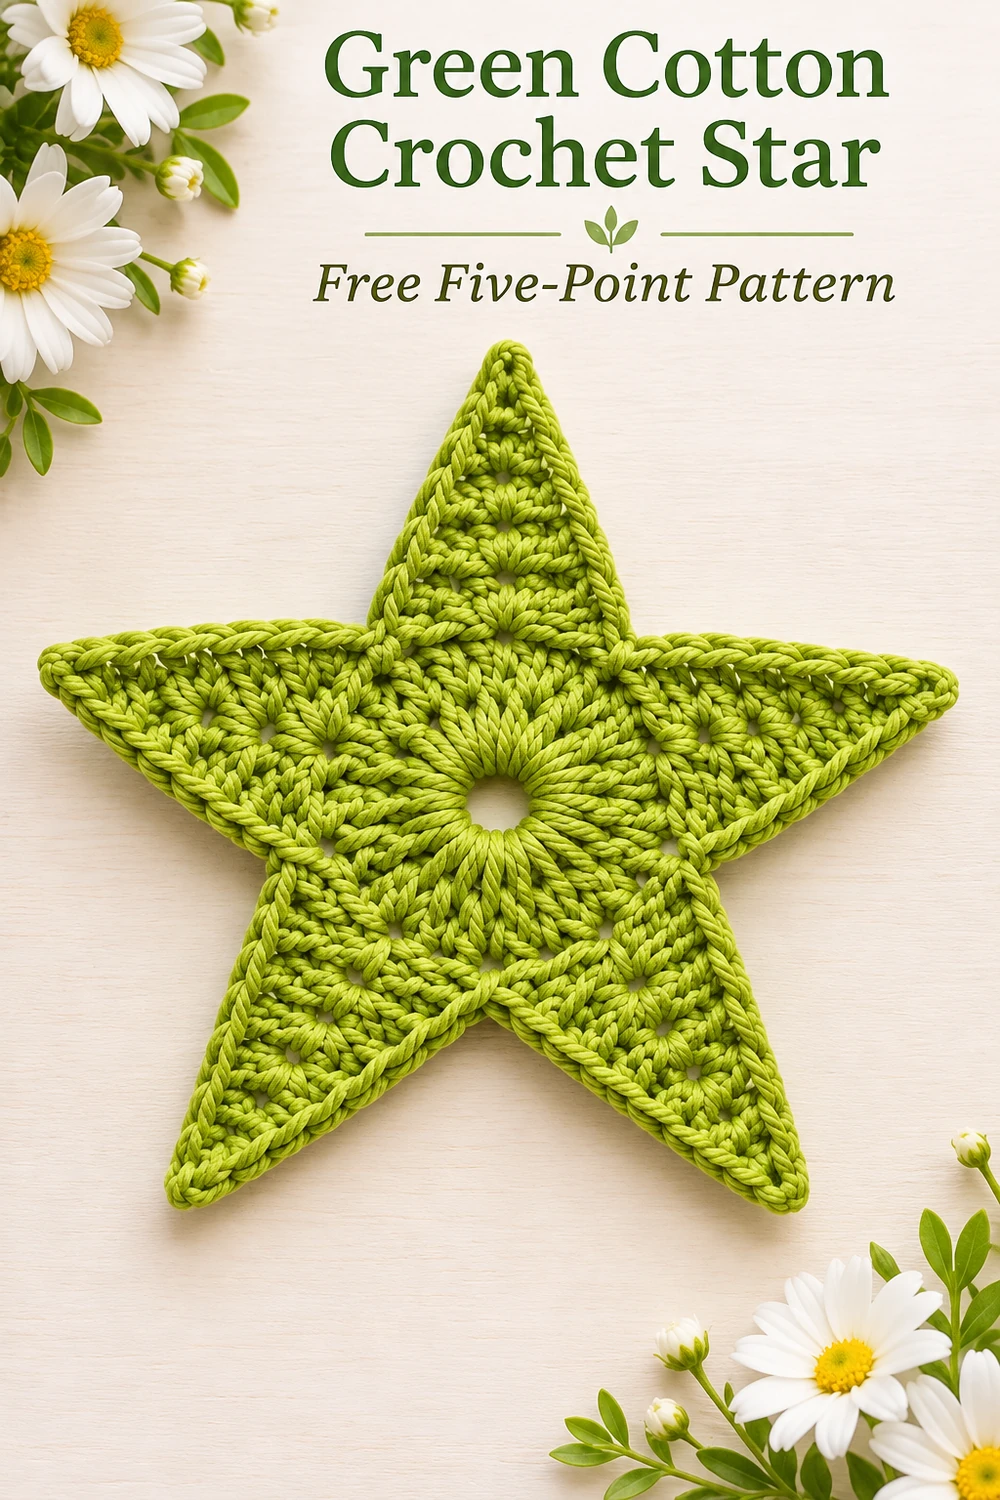
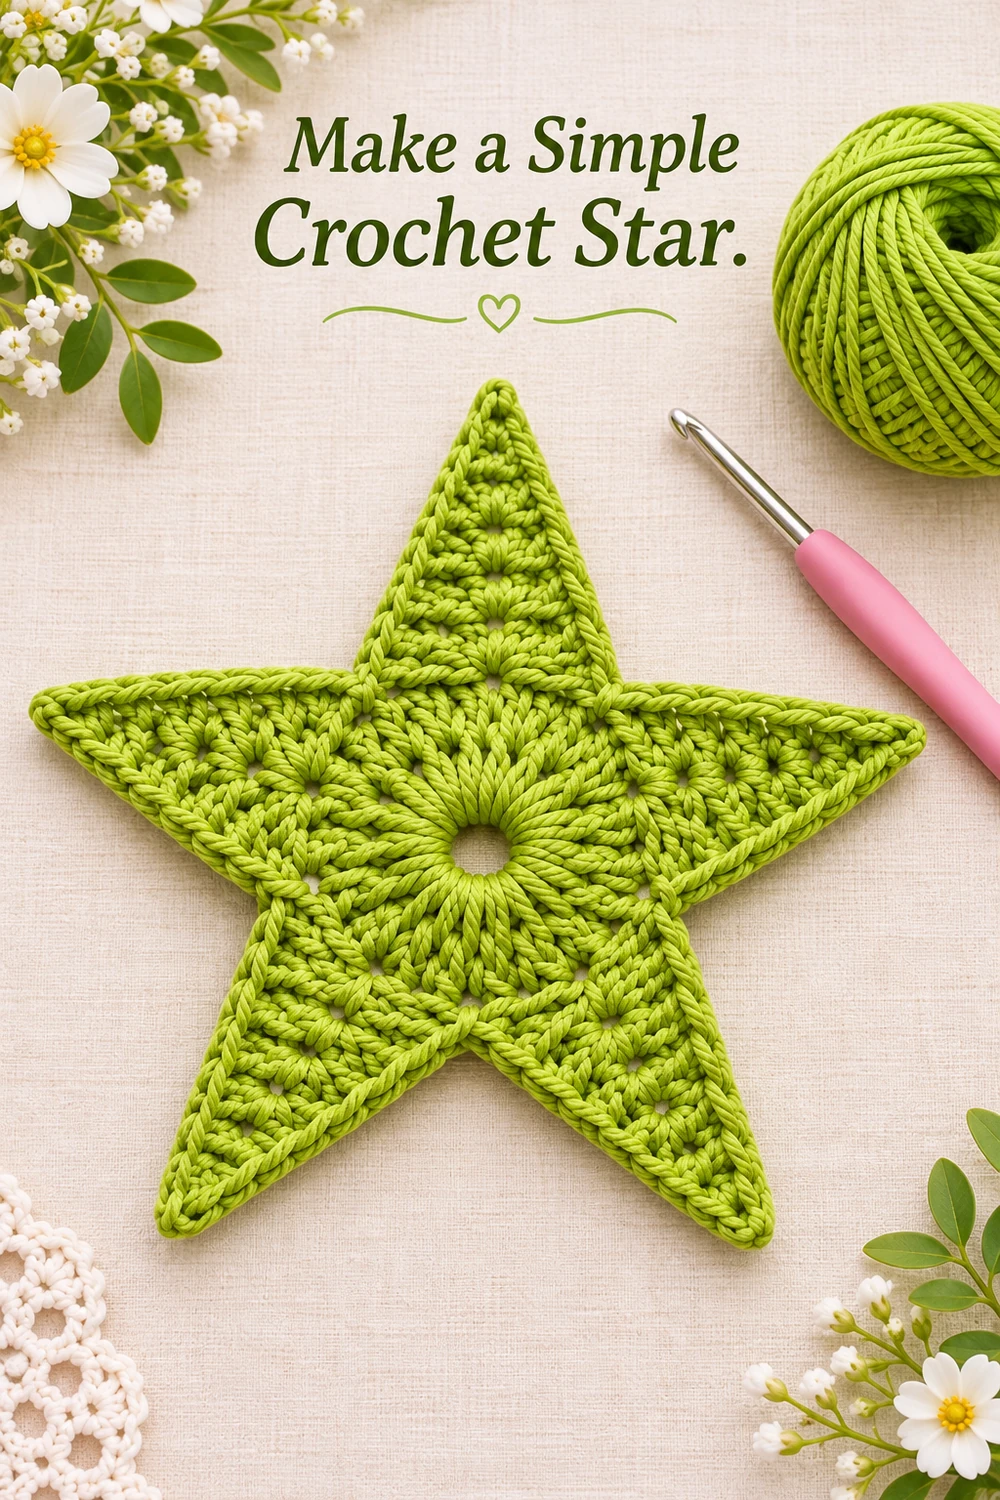
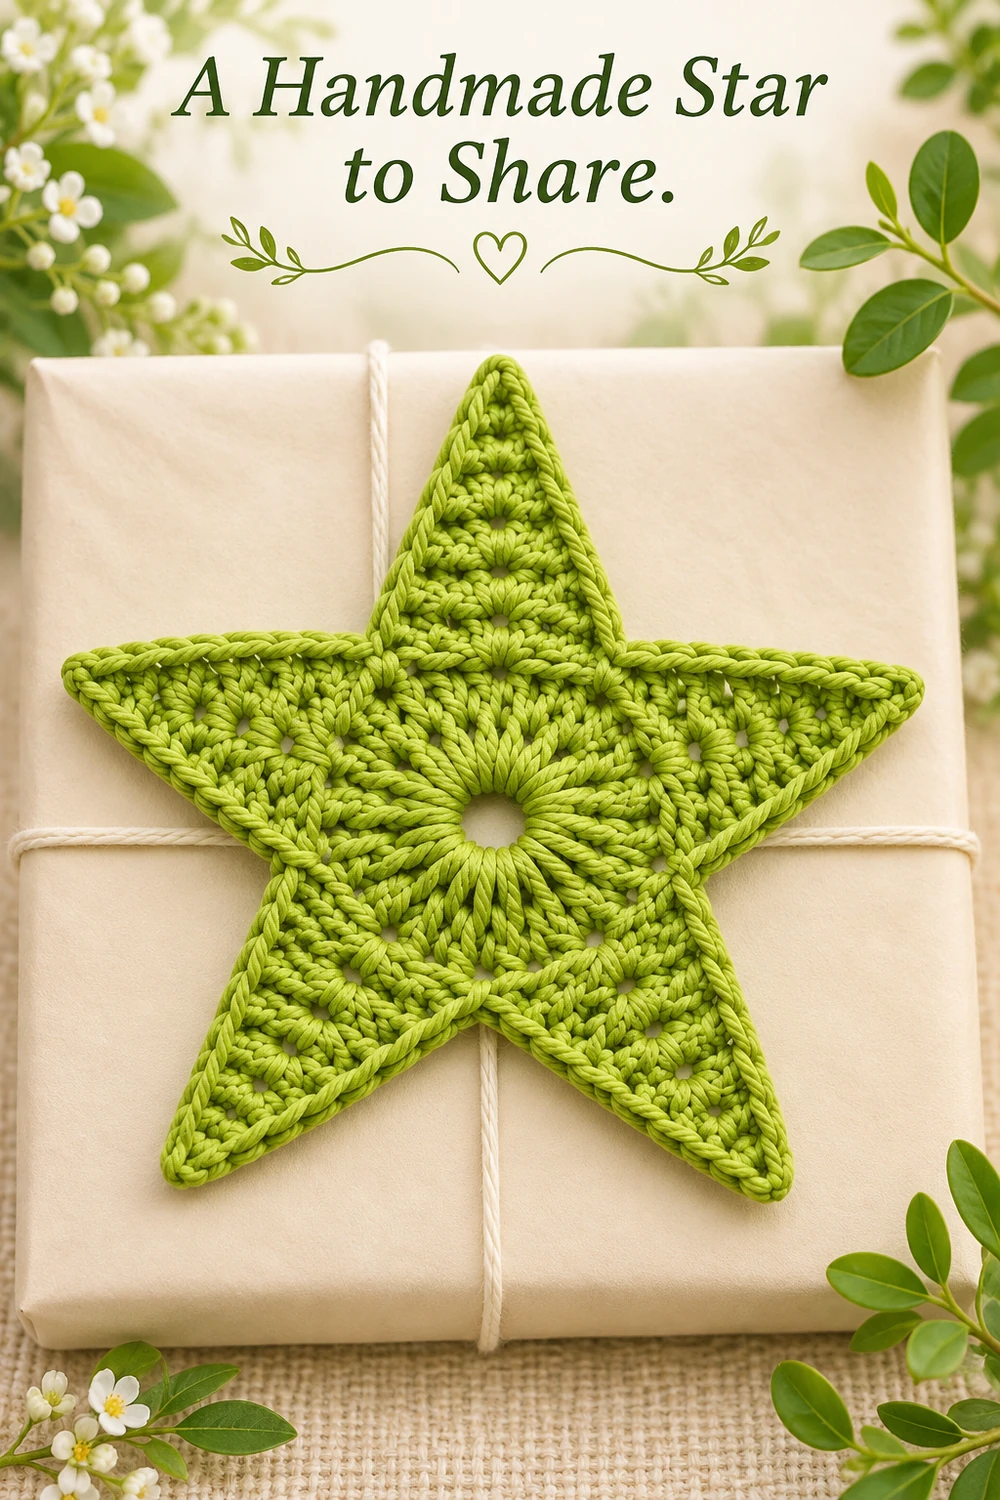
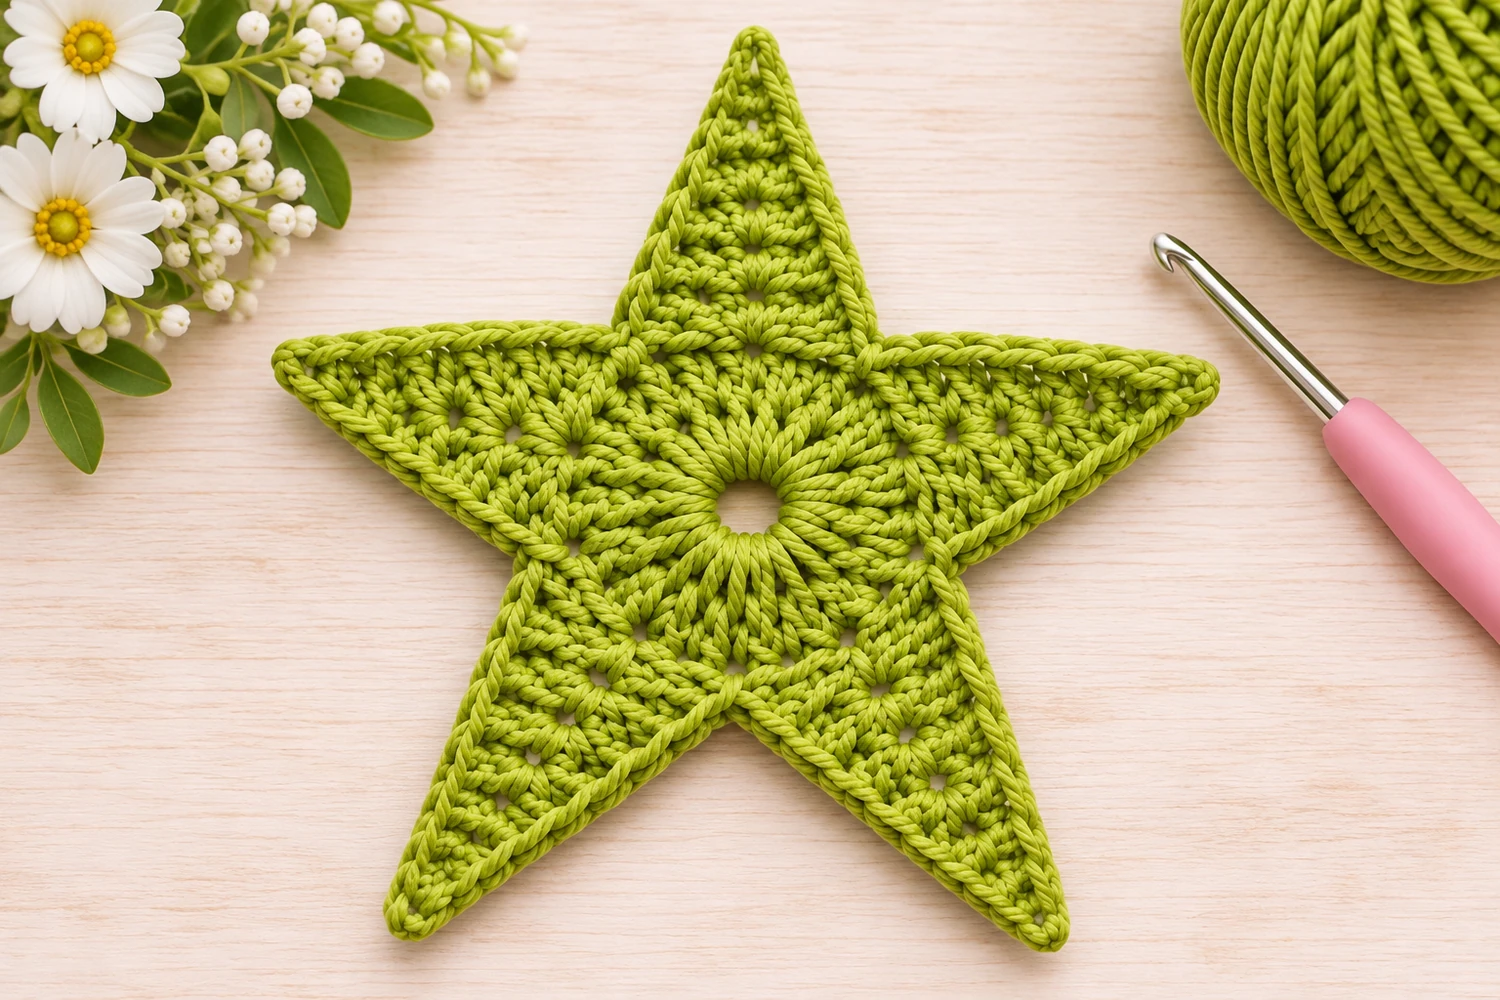
This green cotton crochet star has five filled triangular points, a small open center, and a neat single crochet outline. The fresh apple-green color keeps the stitch texture easy to see, while the simple shape works as a gift decoration, an appliqué, or a flat decorative motif.
The center is worked in one joined round. Each point is then shaped separately in four short rows, and a continuous border finishes the outside. This original interpretation is inspired by the supplied image; it is not the photographer’s pattern or a transcription of the diagram printed beneath the reference. The stitch counts have been checked mathematically, but the pattern has not been physically tested. The styled photographs illustrate the intended result.
Green Cotton Crochet Star Materials
- Smooth DK cotton in apple green or a similar fresh yellow-green shade.
- Approximately 30–45 yd (27–41 m) as a planning allowance, not measured consumption.
- A 3.5 mm hook as a starting option, adjusted to produce clear, fairly firm double crochet stitches.
- A tapestry needle, scissors, and five removable stitch markers.
- A blocking mat and rustproof pins.
- Optional matching sewing yarn if you plan to attach the star to another project.
Skill level: Confident beginner to intermediate. Estimated size: about 5–6 in (13–15 cm) across after blocking. Yarn, hook, and tension will change this measurement. There is no fixed gauge requirement, but all five points should be worked with the same yarn and hook.
How This Five-point Star Is Built
A chain ring keeps the small center opening visible. Thirty double crochet stitches radiate from that ring. Dividing them into five groups of six gives each point an equal foundation without adding stitches between the groups.
The point rows follow the same sequence every time: six stitches, then four, then two, then one. Double crochet decreases narrow both edges. Starting chains provide height only, so they do not increase the number of stitches in a row.
The final edging runs up one slope, around the tip, and down the other slope of each point. Slip stitches at the five inward valleys keep those joins distinct. No stuffing, embroidery, beads, or ribbon is needed for the model shown.
US Crochet Abbreviations
- ch = chain.
- sl st = slip stitch.
- sc = single crochet.
- dc = double crochet.
- dc2tog = double crochet two stitches together.
- st(s) = stitch(es).
- RS = right side; WS = wrong side.
Beginning ch 2 does not count as a dc anywhere in the pattern. Joining slip stitches also stay outside the working counts. The center is worked without turning; the individual points are turned after each row.
Double crochet
Yarn over once, insert the hook into the indicated stitch or ring, yarn over, and pull up a loop. Yarn over and pull through two loops twice. A completed dc has its own top V. These are the tops you will count when dividing the center and working the point rows.
Double crochet two together
Yarn over, insert the hook into the next stitch, yarn over, and pull up a loop. Yarn over and pull through two loops, leaving two loops on the hook. Yarn over, insert the hook into the following stitch, yarn over, and pull up a loop. Yarn over and pull through two loops. Three loops remain. Yarn over and pull through all three to finish the decrease.
One dc2tog uses two base stitches and produces one stitch at the top. It is a decrease across two neighboring stitches, not two partial dc worked into the same stitch.
Round Center
Foundation ring
Ch 8. Check that the chain is not twisted, then sl st into the first chain to form a ring. Keep this ring open; do not substitute a tightly closed magic ring if you want the small circular opening in the reference.
Center Round 1
Ch 2 for height. Work 30 dc into the ring, inserting the hook under the whole chain ring rather than into individual chain links. Join with a sl st to the first actual dc. Fasten off. 30 dc.
Spread the stitches evenly around the ring with your fingers. They should radiate from the center opening without leaving one large gap beside the join. Weave the starting tail securely along the backs of several stitches while keeping the opening clear.
Mark the five point foundations
Number the center dc from 1 through 30, starting with the first actual dc. Place markers in stitches 1, 7, 13, 19, and 25. Each marker identifies the beginning of a six-stitch section:
- Point 1 uses center stitches 1–6.
- Point 2 uses center stitches 7–12.
- Point 3 uses center stitches 13–18.
- Point 4 uses center stitches 19–24.
- Point 5 uses center stitches 25–30.
These five groups use every center stitch once. There are no skipped stitches or shared foundation stitches between points. Keep the RS of the center facing you at the start of every point.
Work the Five Triangular Points
Use a separate length of green yarn for each point. Joining again at the next section gives all five points the same row direction and keeps a traveling strand from crossing the back of a valley.
- Point Row 1, RS: Join with a sl st in the marked first dc of the section. Ch 2. Dc in that same stitch and in each of the next 5 dc. Leave all other center stitches unworked. 6 dc.
- Point Row 2, WS: Ch 2, turn. Dc2tog across the first 2 dc, dc in each of the next 2 dc, then dc2tog across the last 2 dc. 4 dc.
- Point Row 3, RS: Ch 2, turn. Dc2tog across the first 2 stitches, then dc2tog across the last 2 stitches. 2 dc.
- Point Row 4, WS: Ch 2, turn. Dc2tog across both remaining stitches. 1 dc. Fasten off, leaving a tail for weaving in.
Repeat all four rows on the remaining four marked sections. Remove a section marker only after checking that its first row uses exactly six center stitches. You should finish with five matching triangular points.
Point count checkpoint
Row 2 consumes six base stitches: two in the first decrease, two separate dc, and two in the last decrease. It produces four tops. Row 3 consumes those four tops in two decreases, and Row 4 consumes the final two tops in one decrease.
Across the five points, the row totals are 30 dc in Row 1, 20 stitches in Row 2, 10 in Row 3, and five tip stitches in Row 4. Keep each decrease’s top V visible so it is easy to find in the following row.
Single Crochet Outline
Lay the star RS up. Identify a valley between two points. This is the small gap between the two neighboring center dc at the ends of adjacent six-stitch sections, not the central chain ring.
Join green with a sl st between those two center dc posts, just below their top loops. Ch 1. Follow this sequence around each point:
- Work 2 sc around the outer row-end edge of Point Row 1 on the rising slope.
- Work 2 sc around the outer row-end edge of Row 2, then 2 sc around Row 3, then 2 sc around Row 4. This gives 8 sc up the slope.
- Work 3 sc into the top V of the single tip stitch from Point Row 4.
- Work 2 sc around each of the four row ends on the descending slope, from Row 4 down through Row 1. This gives 8 sc down the slope.
- Sl st between the next two neighboring center dc posts at the valley, just below their top loops.
Repeat around all five points. On the last valley, join to the original joining slip stitch rather than adding a sixth valley. Fasten off and weave in the border tails.
Border count: 19 sc per point: 8 on each slope and 3 in the tip. Five points give 95 sc, with five valley joining slip stitches around the outline. The initial attachment counts as the first valley join; do not add an extra working stitch there.
Placing stitches along the row ends
Insert around the edge post or turning chain of each row, depending on which end faces the outside. Work into the space beside that post without splitting its strands. The same two-stitch allowance is used at every row end, including the final one-stitch tip row.
The three stitches in the tip belong in the top V, while the side stitches go around its edge posts. Keeping those insertion points separate prevents a crowded knot. Relax the valley slip stitches so they define the dip without pulling neighboring points together.
Weaving in the Point Tails
Use a tapestry needle to weave each point tail down through the backs of several solid stitches. Change direction once before trimming. Keep the yarn inside that point rather than carrying it across a valley or the open center.
After the border is complete, check the back for loose loops and visible traveling strands. The star is a single flat layer, so tidy ends matter on both sides, especially if you plan to use it as a hanging decoration later.
Blocking and Finishing
Follow the care instructions for your cotton. If damp blocking is suitable, moisten the star gently, press excess water into a towel without twisting, and lay it RS up on a flat blocking mat.
- Arrange the circular center without stretching its hole wider.
- Position the five outer tips at equal distances from the center.
- Pin the middle sc of each three-sc tip group to define a pointed outline.
- Adjust the five inward valleys so the points look evenly spaced.
- Let the star dry fully before removing the pins.
A starting radius of roughly 2.5–3 in (6.5–7.5 cm) gives the estimated span, but use the natural size of your fabric. Blocking should refine the shape rather than stretch one point far beyond the others. The border should remain smooth along both slopes.
Ways to Use the Finished Star
Place it on a wrapped gift as a removable decoration, sew it onto a fabric project as an appliqué, or use several along a decorative garland. If sewing it down, tack the center and the bases of the points before securing the tips so the shape does not shift.
The reference shows the star itself without a hanger or extra trim. If you later choose to add a cord, attach it to a reinforced tip rather than a loose yarn tail. Keep any hanging decoration away from young children. This pattern is decorative and does not establish protection from heat.
Troubleshooting
I cannot divide the center evenly
Recount only the actual dc tops. The starting ch 2 and joining slip stitch do not count. Thirty dc divide into five groups of six; do not compensate for an incorrect center by giving one point a wider foundation.
A point has an extra stitch at its edge
Check whether the turning ch 2 was counted as a dc. Work the first decrease into the first two actual stitch tops, then leave the turning chain outside the count. The rows must read 6, 4, 2, and 1.
The border ripples
First check the two-sc allowance at every row end and the three-sc allowance at each tip. Extra border stitches create local waves. If the count is correct, compare the border tension with the body and keep the sc stitches firm enough to follow the edge.
The valleys pull inward too tightly
Loosen the slip stitches between points. They should sit between the two adjacent center posts without gathering the center round. Check that the border has not skipped a row end on the descending slope.
Care and storage
Clean according to your yarn label, then reshape and dry flat. Store the star flat so the five points are not folded for long periods. If it is sewn to another item, follow the care needs of the finished combination.
More Crochet Stars to Try
The Lavender Lace Crochet Star offers an open mesh alternative. For a folded construction, explore the Interwoven Crochet Star. The Two-Round Crochet Star is another option with grouped center stitches and fan points.