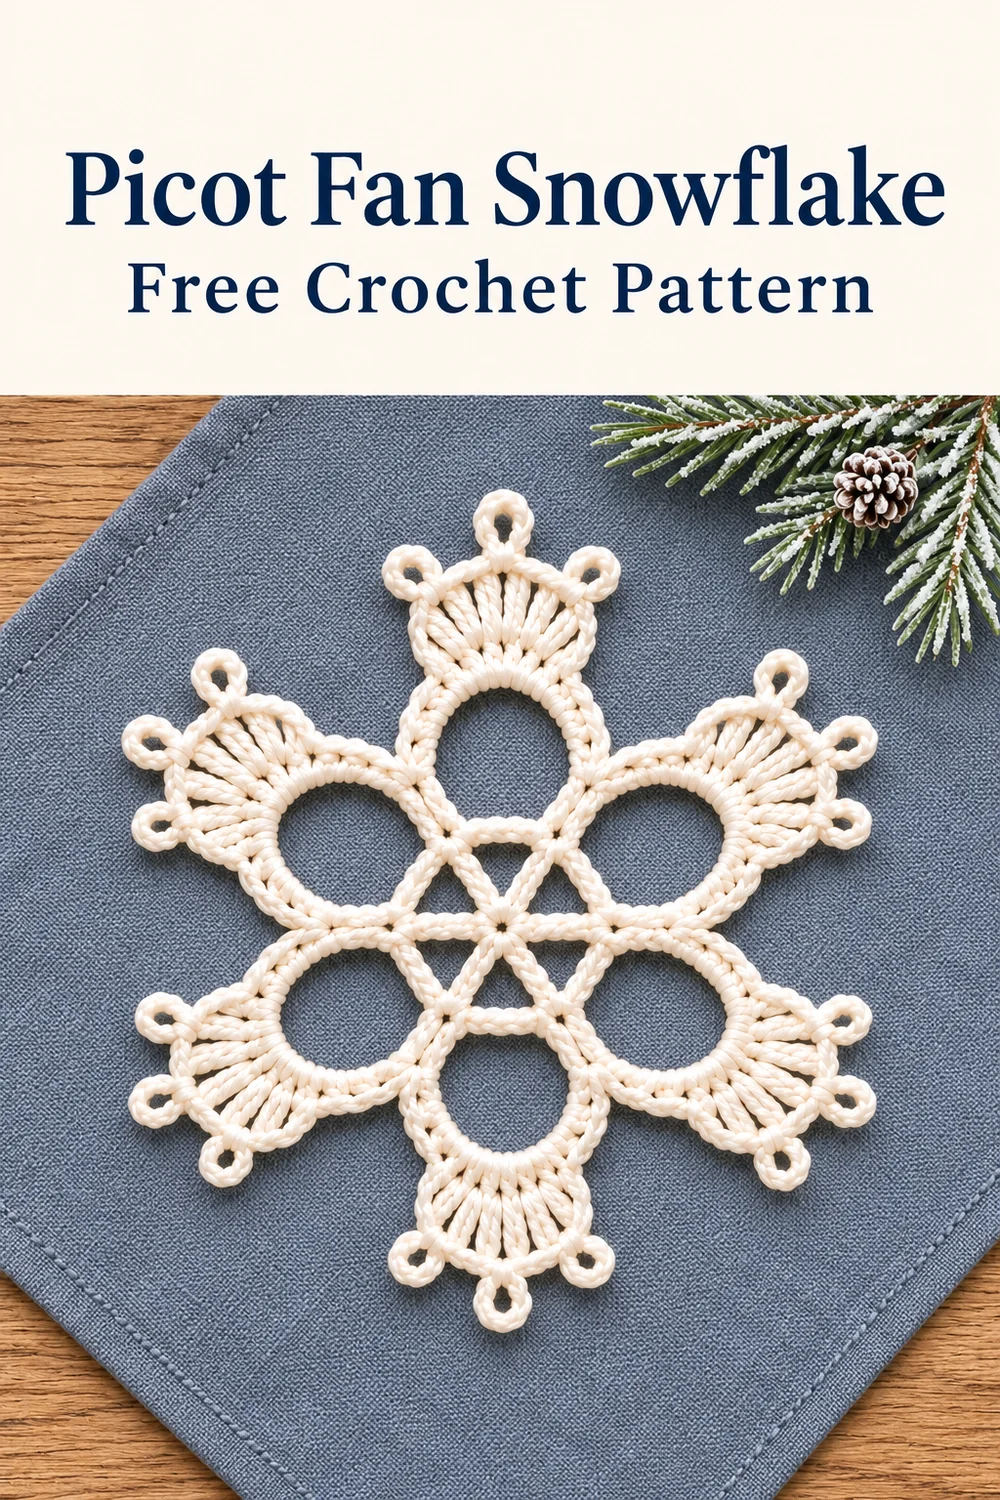
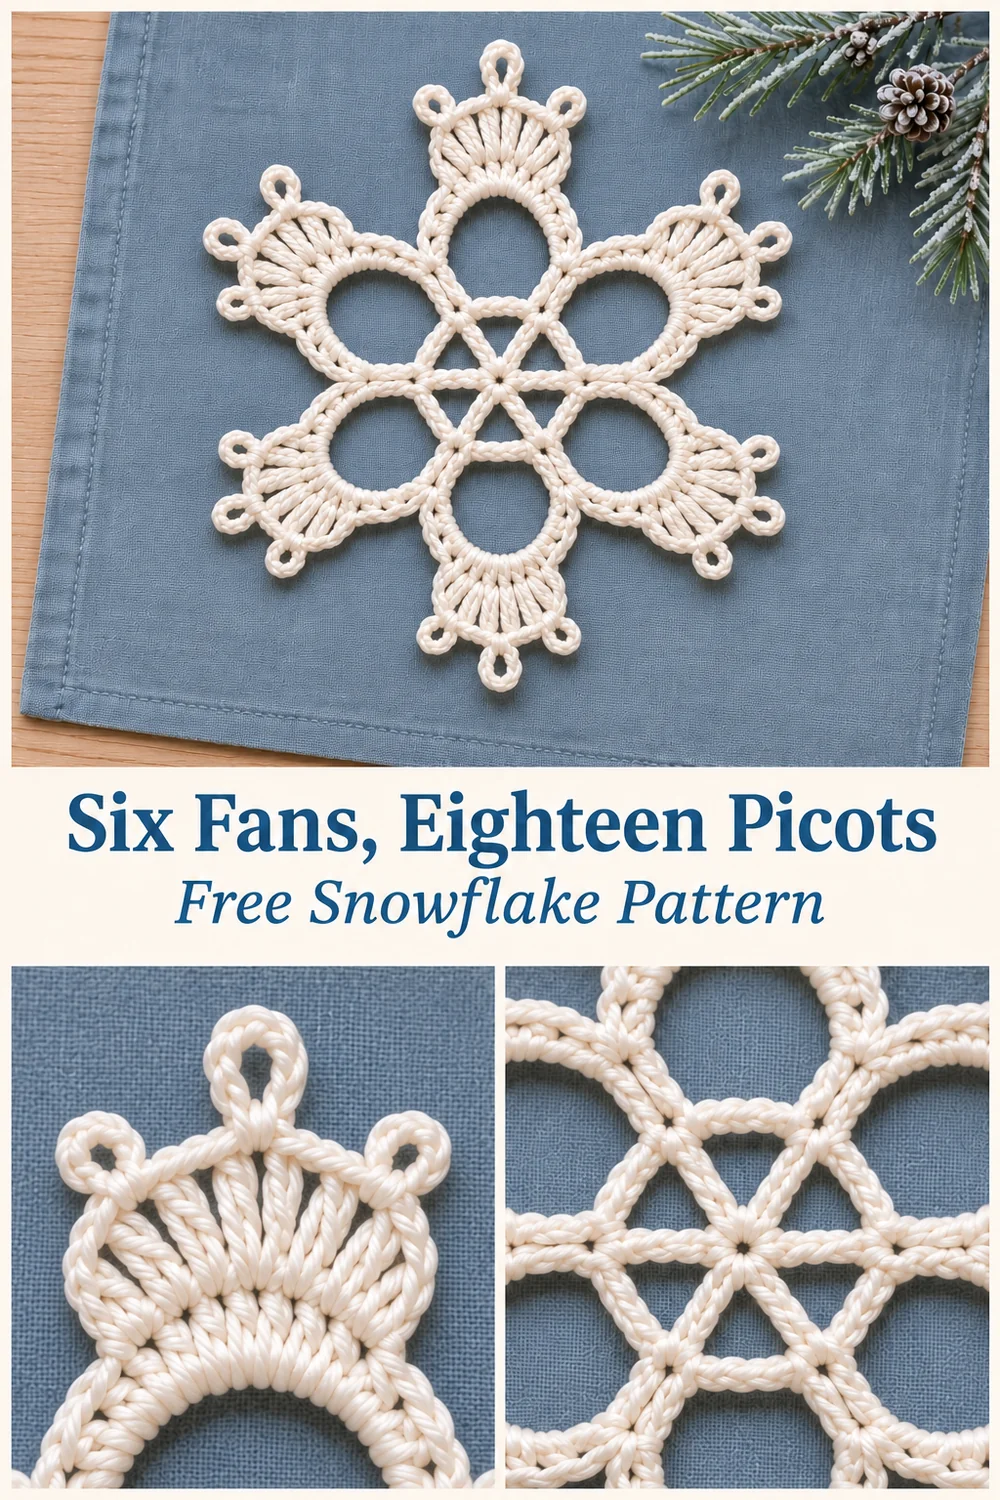
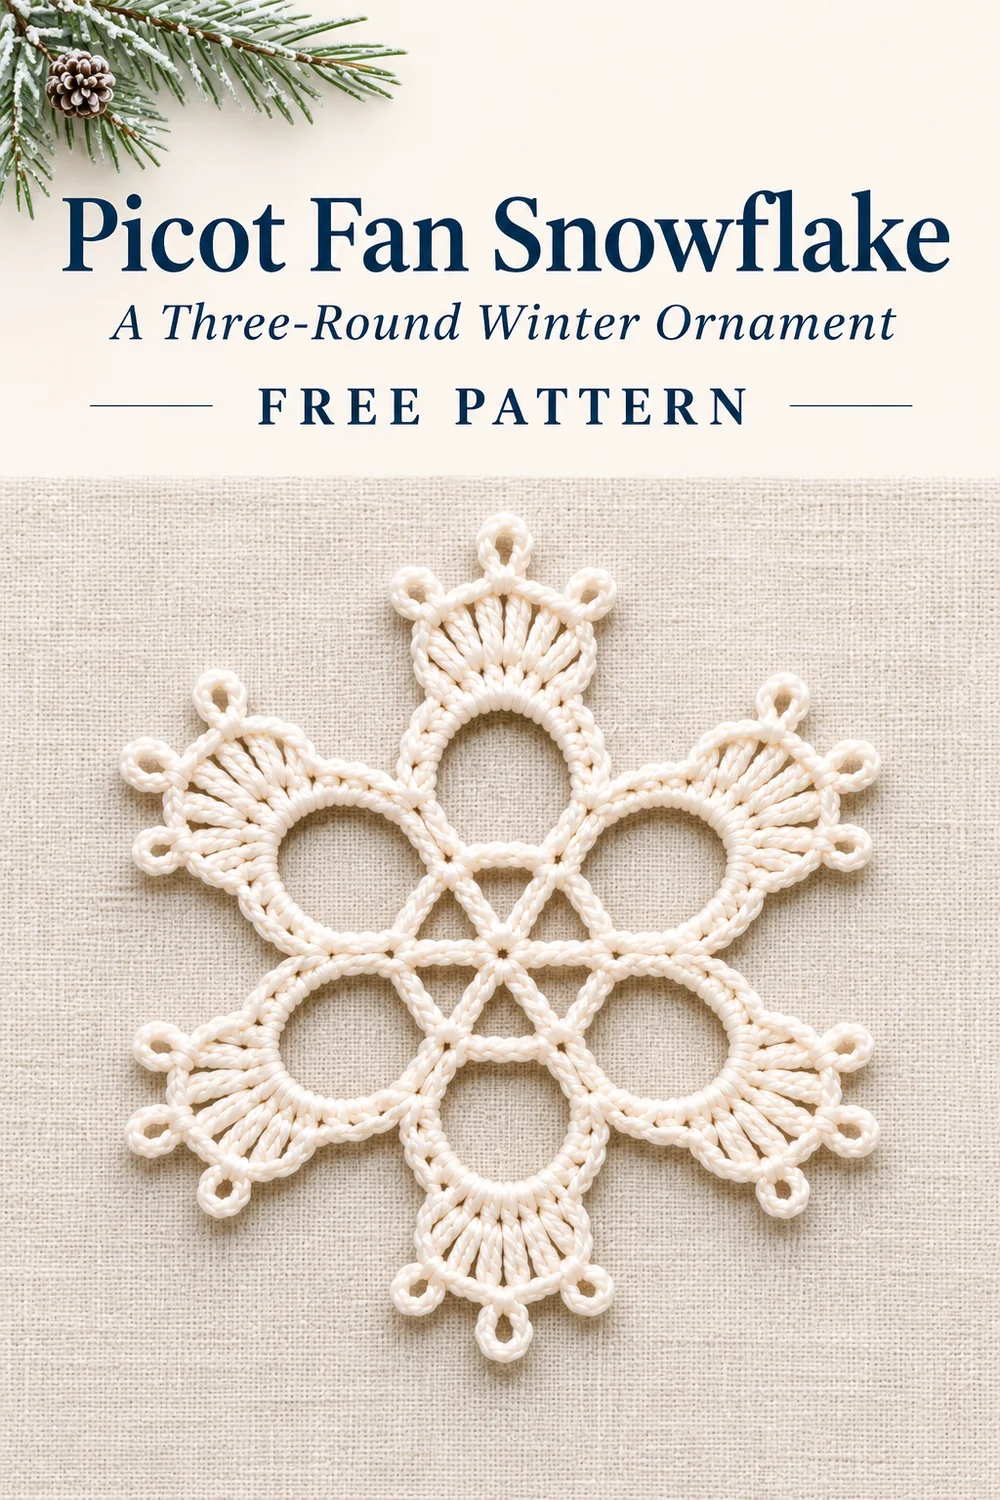
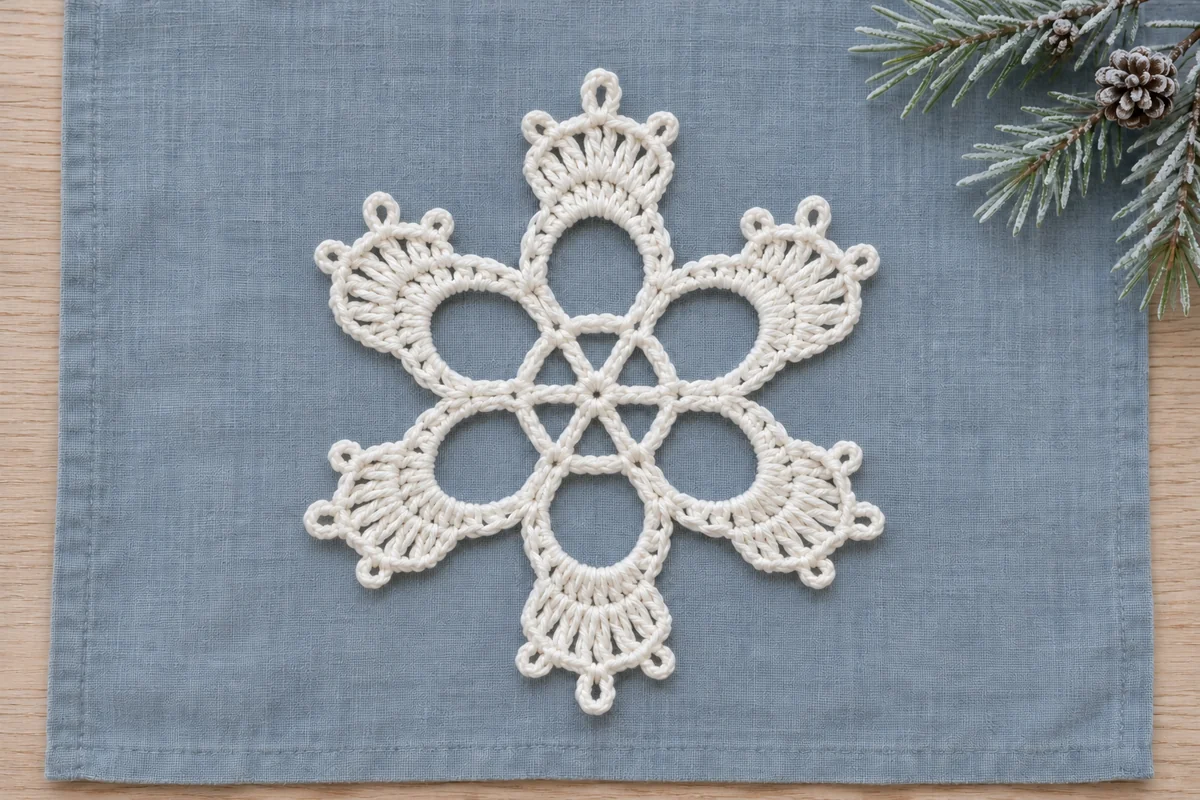
This picot fan crochet snowflake has six open arms and a small spoke center. Each arm finishes with three loops: two short picots framing a longer one. White cotton shows the openings clearly against a dark branch, blue fabric, or a wrapped gift.
Three joined rounds build the whole motif. The first establishes six double crochet spokes, the second makes six chain arches, and the third fills those arches with graduated fans. You make the picots while working each fan, so there is no separate edging round to sew or attach.
The pattern below is an original interpretation inspired by the reference photograph. It follows its own written stitch counts rather than reproducing the photograph’s exact recipe or chart. The arithmetic has been checked; the design has not been physically crocheted or tested.
Picot Fan Crochet Snowflake Materials
- Smooth white or ivory cotton yarn, or crochet thread for a finer ornament.
- A hook suitable for the yarn or thread you choose.
- Scissors, a tapestry needle, and a removable stitch marker.
- A blocking surface and rustproof pins.
- Optional thin hanging cord and a fabric stiffener compatible with the yarn.
Choose a smooth strand if you want to see the chain loops easily. A fuzzy yarn can blur the picots, especially where the three loops sit close together. Use the same yarn and hook throughout the motif. No measured gauge, finished diameter, or yarn consumption is supplied; your materials and tension determine those values.
US Terms and Special Stitches
- MR = magic ring
- ch = chain
- sl st = slip stitch
- sc = single crochet
- hdc = half double crochet
- dc = double crochet
- tr = treble crochet
- st(s) = stitch(es)
- sp(s) = space(s)
The Craft Yarn Council abbreviation guide lists the standard US terms. All rounds face the same way; do not turn. Only the first three chains at the beginning of Round 1 count as a dc. Beginning ch 1 in Rounds 2 and 3 does not count as a stitch.
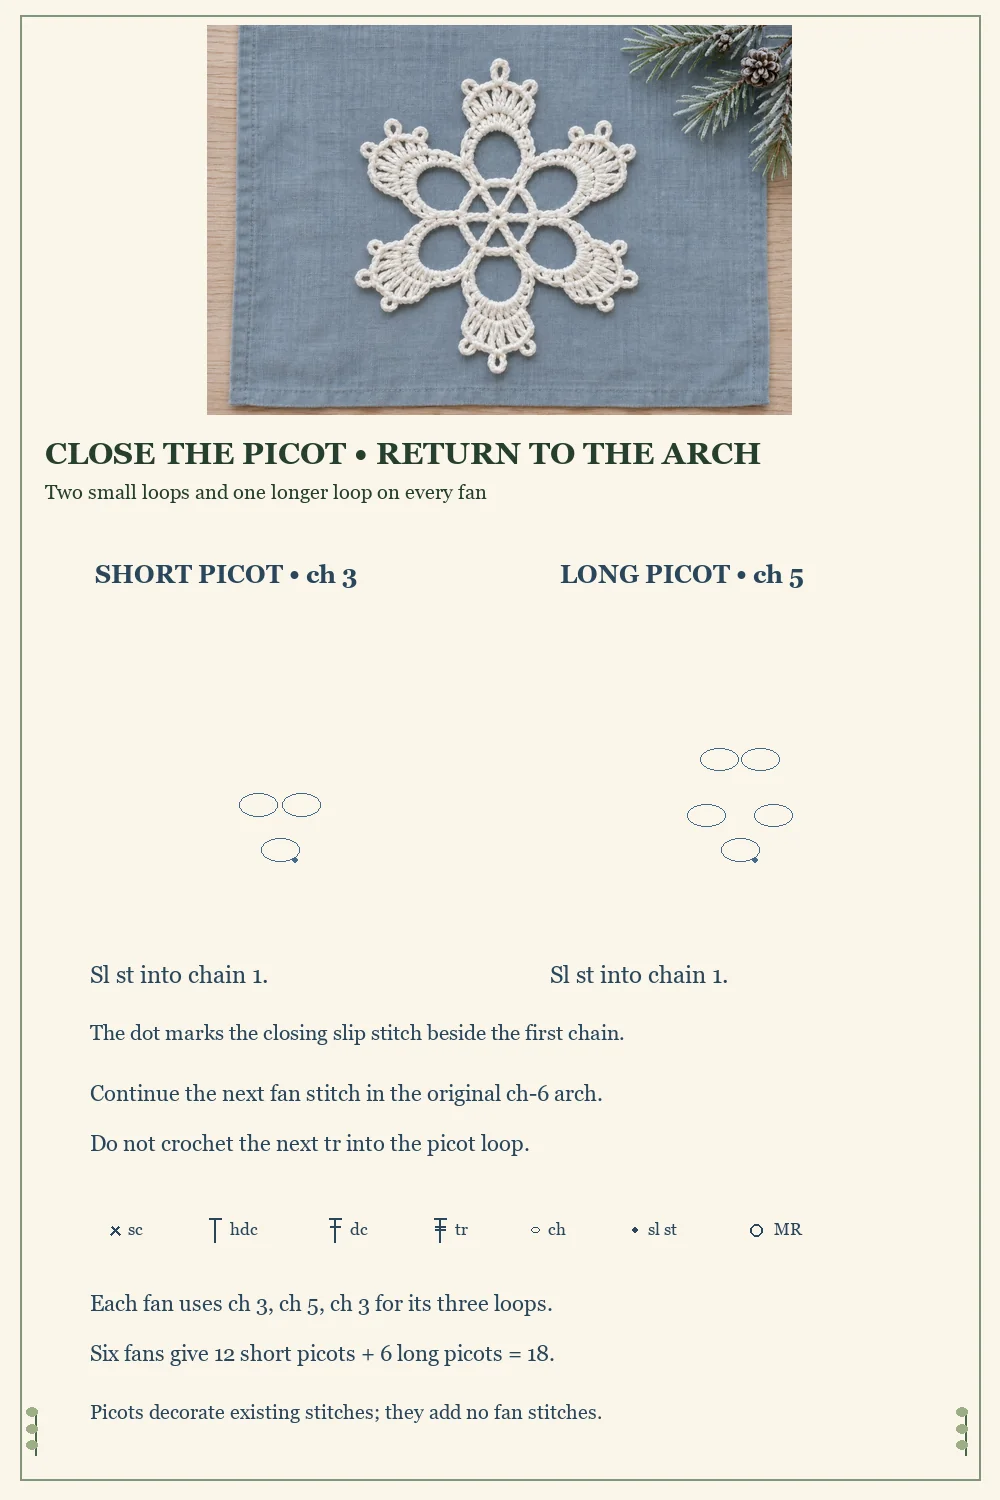
Short picot: ch 3
Ch 3, then sl st into the first of those three chains. This closes the small loop. Continue with the next stitch in the original chain arch. Do not work that next stitch into the picot itself.
Long picot: ch 5
Ch 5, then sl st into the first of those five chains. The longer loop forms the main tip. Keep its closing slip stitch relaxed enough that you can open the loop during blocking. It is a decorative loop, not an extra fan stitch.
Treble crochet
Yarn over twice, insert the hook in the indicated space, yarn over and pull up a loop. Yarn over and pull through two loops three times. Each fan uses two separate tr stitches; do not close them together as a cluster.
Round Counts Before You Begin
| Round | Working stitches | Spaces or decoration |
|---|---|---|
| 1 | 6 dc, including beginning ch 3 | 6 ch-2 spaces |
| 2 | 6 sc | 6 ch-6 arches |
| 3 | 12 sc, 12 hdc, 12 dc, 12 tr | 6 ch-2 gaps and 18 picots |
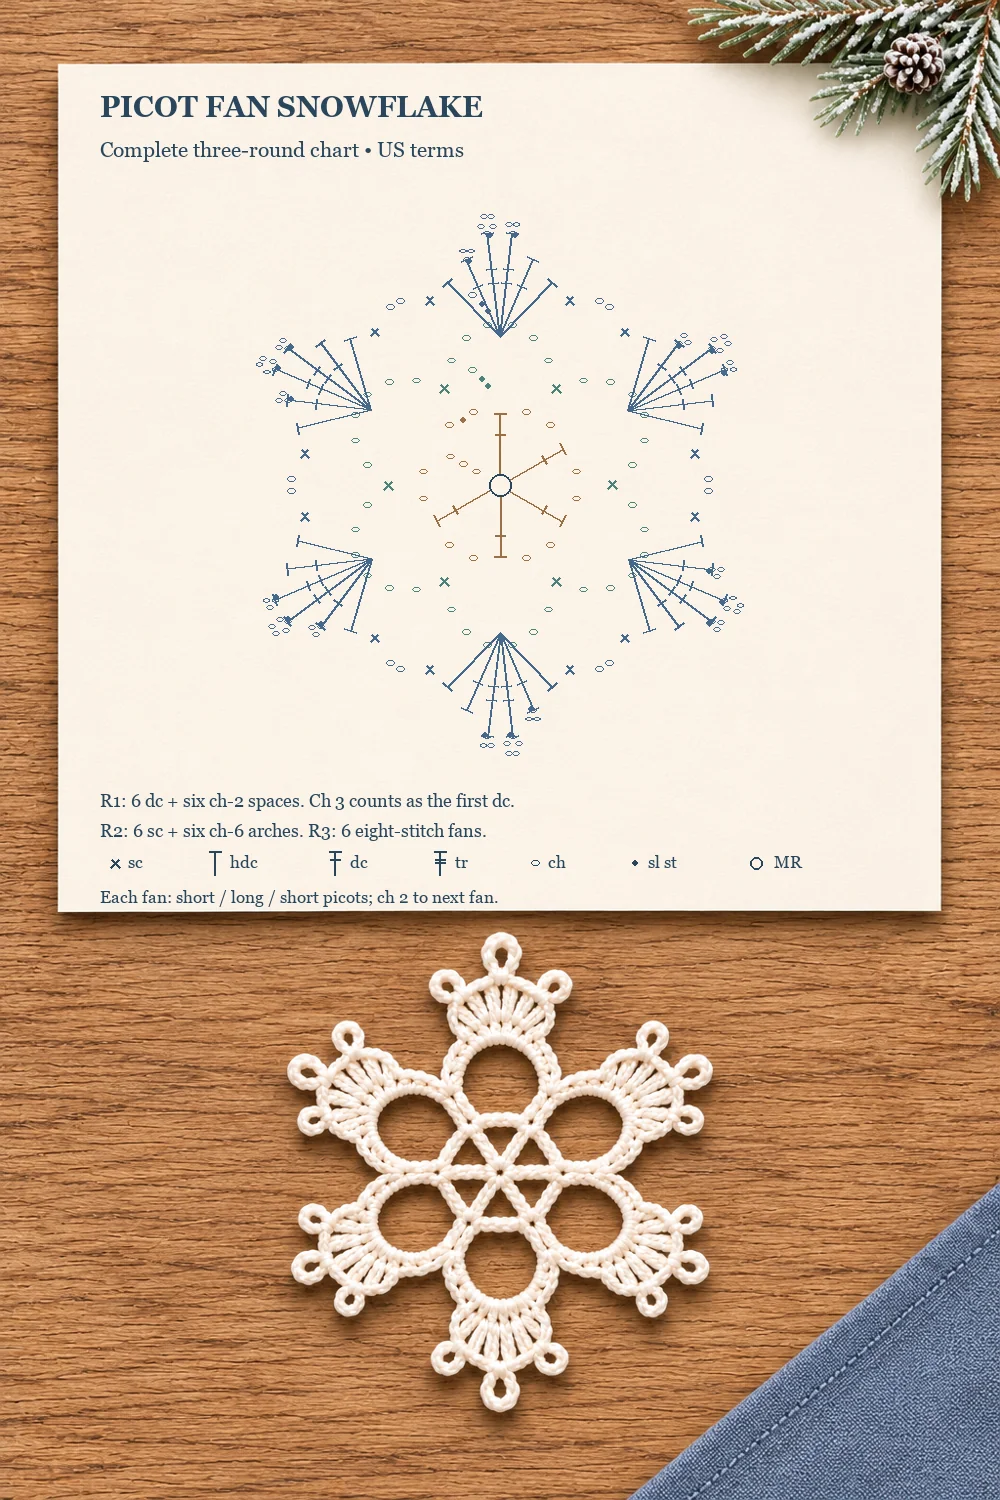
Every Round 3 fan contains eight working stitches: two each of sc, hdc, dc, and tr. Six fans therefore give 48 working stitches altogether. Each fan also has two ch-3 picots and one ch-5 picot. Joining slip stitches, picot-closing slip stitches, and beginning chains stay outside the working-stitch totals.
Picot Fan Crochet Snowflake Pattern
Round 1: six spokes
Make an MR. Ch 5; the first three chains count as one dc, and the remaining two form the first ch-2 space. Repeat [dc in the ring, ch 2] five times. Gently close the ring, then join with a sl st to the third chain of the beginning ch 5. 6 dc and 6 ch-2 spaces.
Spread the six spokes evenly around the ring. Do not join to the fifth beginning chain: that would put the join at the end of the space instead of at the top of the first dc. Mark the third chain before continuing if you find the two locations hard to distinguish.
Round 2: six open arches
Sl st into the first ch-2 space. Ch 1 and sc in that same space. Repeat [ch 6, sc in the next ch-2 space] five times. Ch 6 once more, then join with a sl st to the first sc. 6 sc and 6 ch-6 arches.
The final ch 6 closes the sixth section of the round; it does not need another sc before the join. Count all six arches before starting the fans. Round 2 works around the ch-2 spaces, leaving the individual dc tops unworked.
Round 3: six fans with three picots each
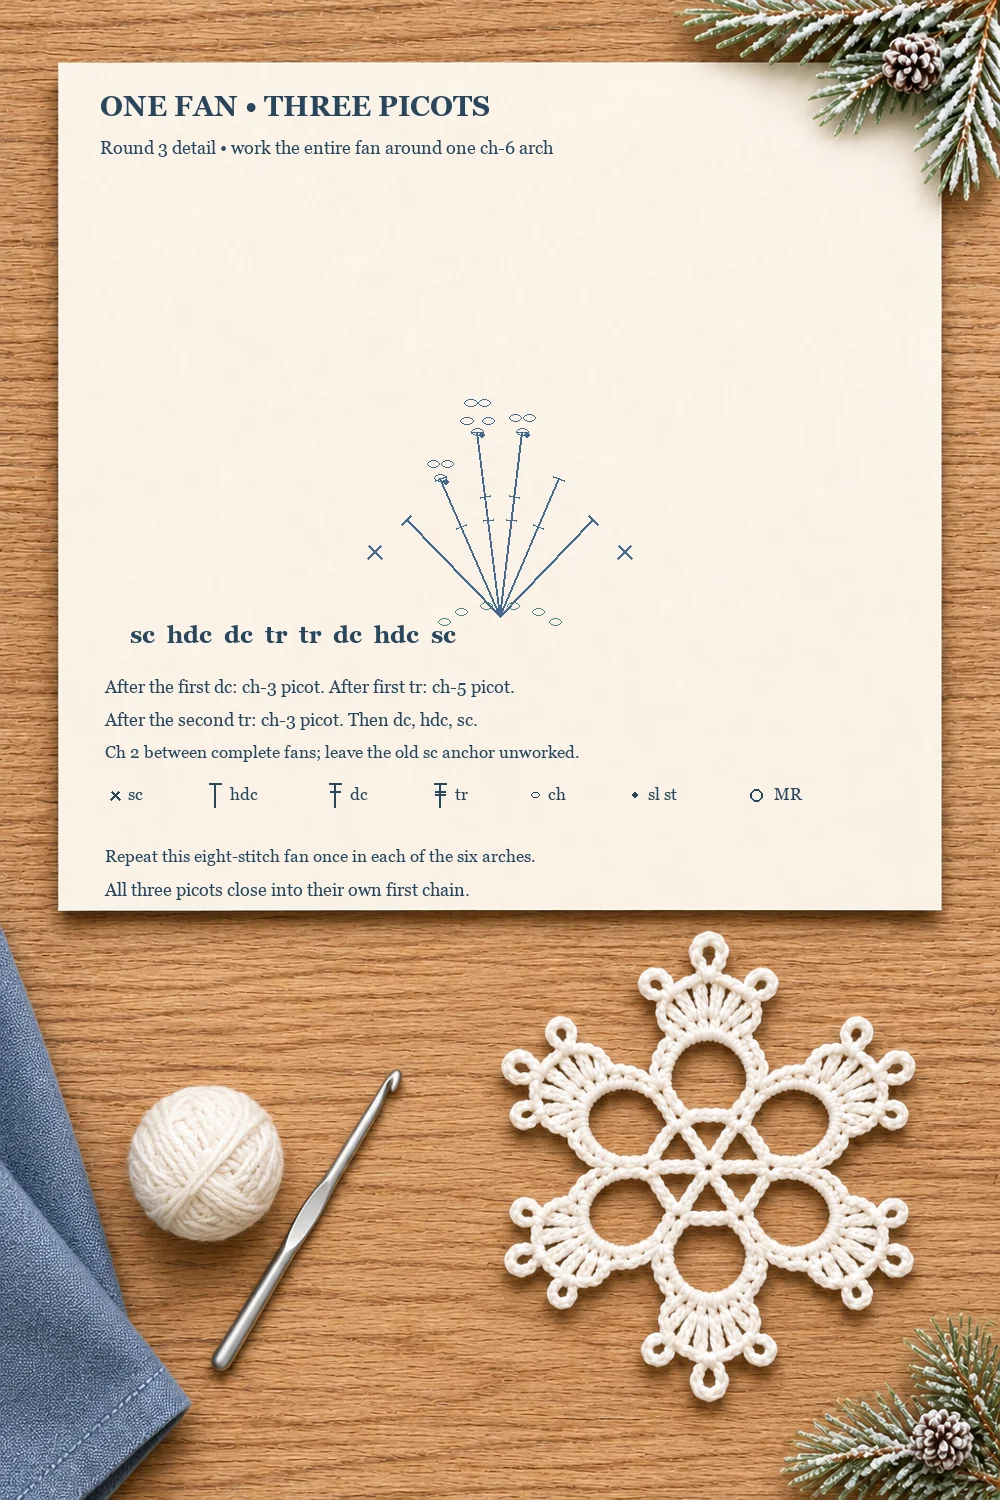
Sl st into the first ch-6 arch and ch 1. Work this full fan around that same arch, in the order shown:
- Sc.
- Hdc.
- Dc, then make a short ch-3 picot.
- Tr, then make a long ch-5 picot.
- Tr, then make a short ch-3 picot.
- Dc.
- Hdc.
- Sc.
Ch 2 to cross to the next arch. Repeat [work the full eight-stitch fan with its three picots in the next ch-6 arch, ch 2] five times. Join with a sl st to the first sc of Round 3. Fasten off. 6 fans: 12 sc, 12 hdc, 12 dc, 12 tr, 6 ch-2 gaps, and 18 picots.
All eight stitches of a fan go around one arch, not into its six individual chains. After closing a picot, return the hook to that same arch for the next tall stitch. Leave the Round 2 sc anchors unworked; the ch-2 gaps bridge past them.
The last fan also needs its ch 2 before joining. Check the join area carefully: it should have one gap between the last and first fans, matching the other five gaps. Do not add a seventh fan to fill the small opening at the beginning chain.
Check the Six Repeats
Look at one arm from the center outward. It should contain a spoke-and-space foundation, one outer chain arch, and one fan. At the outside of the fan, find the short, long, short picot sequence. The long picot is made after the first tr; the second short picot follows the second tr.
For the final round, six repeats of eight working stitches give 48 stitches. The picot chains total 66: six times (3 + 5 + 3). The six connecting gaps add another 12 chains. These chains shape the lace, but they are not included in the sc, hdc, dc, or tr counts.
Finishing the Picot Fan Crochet Snowflake
Secure the center and tails
Thread the MR tail through the backs of several center stitches, change direction, and weave it through again before trimming. Follow solid stitches when hiding the outer tail so it does not show through an open arch. Keep the ends secure without drawing a fan inward.
Open the lace with gentle blocking
If the yarn label permits damp blocking, lightly dampen the motif and press out excess water without wringing. Lay it on the blocking surface. Arrange the six long picots around the center, then line up each pair of opposite arms. Six equal directions make the snowflake easier to balance than pulling one tip at a time.
Pin the long picots first. Open the two short picots beside each one, keeping the fan itself flat. Adjust the chain arches gently so the openings look similar. Let the piece dry completely before removing the pins. Blocking can settle small tension differences; it cannot remove an extra fan or replace a missing arch.
Optional stiffening and hanger
For a firmer hanging ornament, use a stiffener intended for your chosen fiber and follow its directions. Try it on a small yarn scrap first to check its effect on color and texture. Avoid a heat treatment that the yarn label does not allow.
Pass a thin cord through the bases of the two tr stitches beneath one main picot, then tie it into a loop. Supporting the cord below the picot reduces the pull on its small closing chain. Lift the snowflake gently and check that the fan stays flat before displaying it. A separate cord is optional and is not part of the crochet-round counts.
Troubleshooting
There are only five arches
Check the end of Round 2. After the five repeats, you still need the final ch 6 before joining to the first sc. Adding another sc instead can hide the missing arch without fixing the foundation for the fans.
A picot has become a long chain bridge
Close each picot into its own first chain before continuing. The ch-3 and ch-5 sequences are small loops attached to individual fan stitches. Only the plain ch 2 after the completed fan connects one arm to the next.
One fan is fuller than the others
Count its working stitches, ignoring all picot chains. The order is sc, hdc, dc, tr, tr, dc, hdc, sc. An extra dc or tr changes both fullness and the position of the loops. Check the short, long, short sequence before moving to the next arch.
The center pulls into a cup
First check the six spokes and six ch-2 spaces in Round 1, then the six ch-6 arches in Round 2. If the counts are correct, look for unusually tight chain tension. Remake a tight section before blocking rather than stretching the tall fan stitches to compensate.
Can I make a matching set?
Keep the yarn, hook, and chain tension consistent between motifs. Shape the first finished snowflake, then use its arrangement as a visual guide when pinning the next ones. Store dry ornaments flat, with the picots separated so they do not catch on one another.
More Winter Crochet
For a raised center, try the puff stitch snowflake. The red and cream floral snowflake uses contrasting rounds, while a two-round crochet star adds a different outline to an ornament set.
Pins and Picot Fan Crochet Snowflake Charts
The first paper chart shows all three rounds. The second enlarges one fan and its connecting gap. The final diagram focuses on closing the short and long picots. Chart colors distinguish rounds and stitch groups; the written ornament uses one yarn color. Follow the written joins and counts, and shape the finished lace to suit the fabric you make.