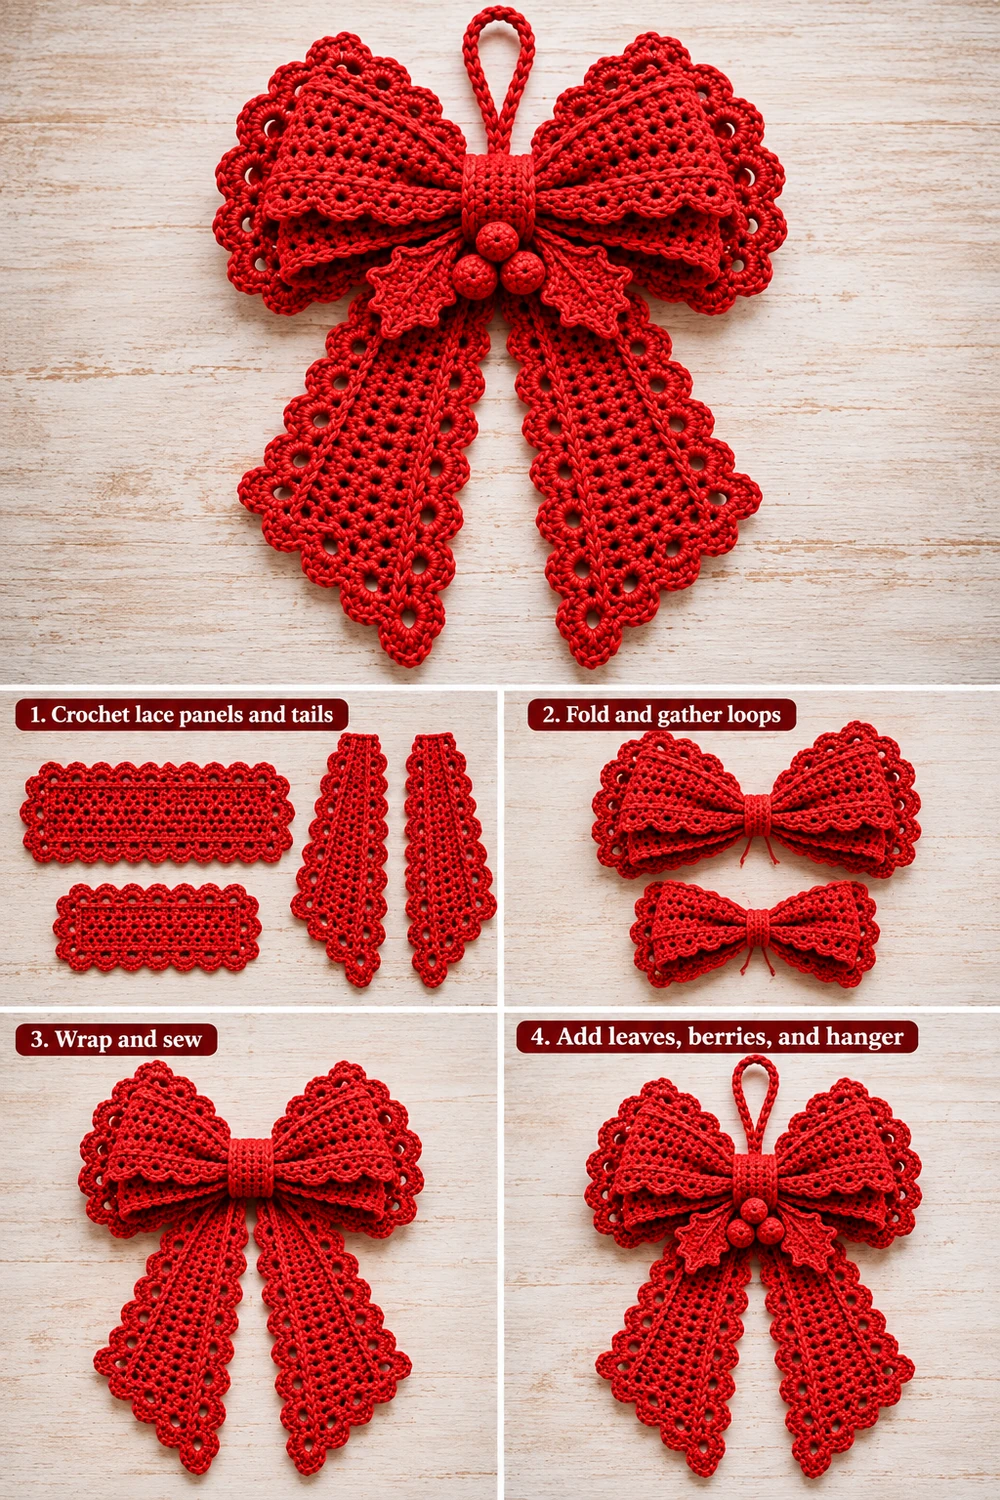
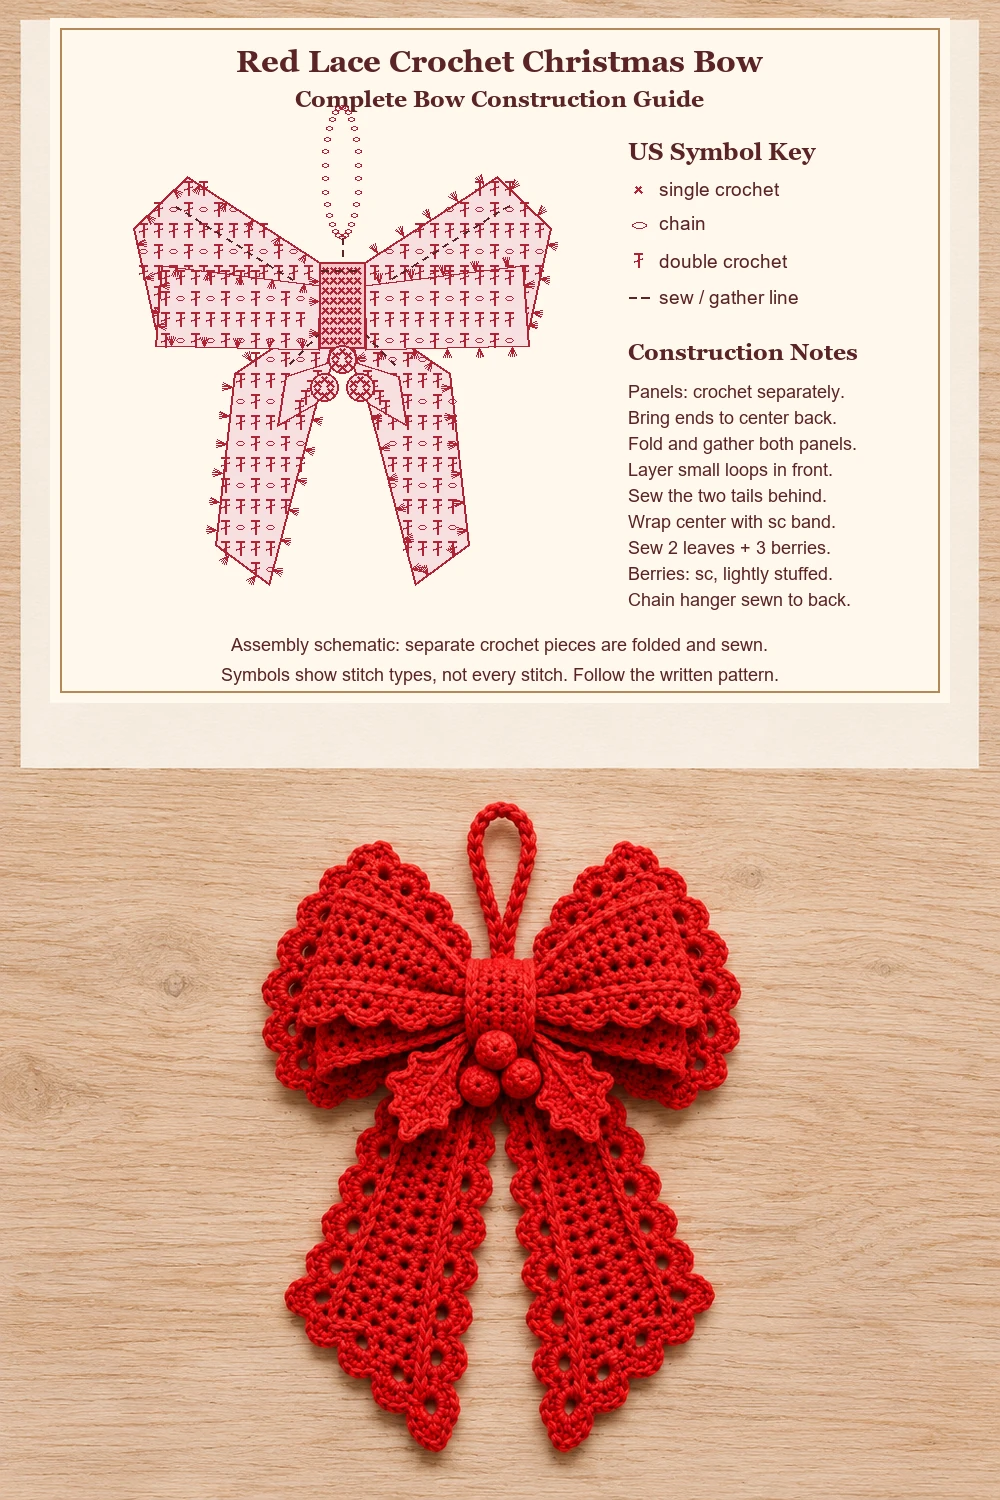
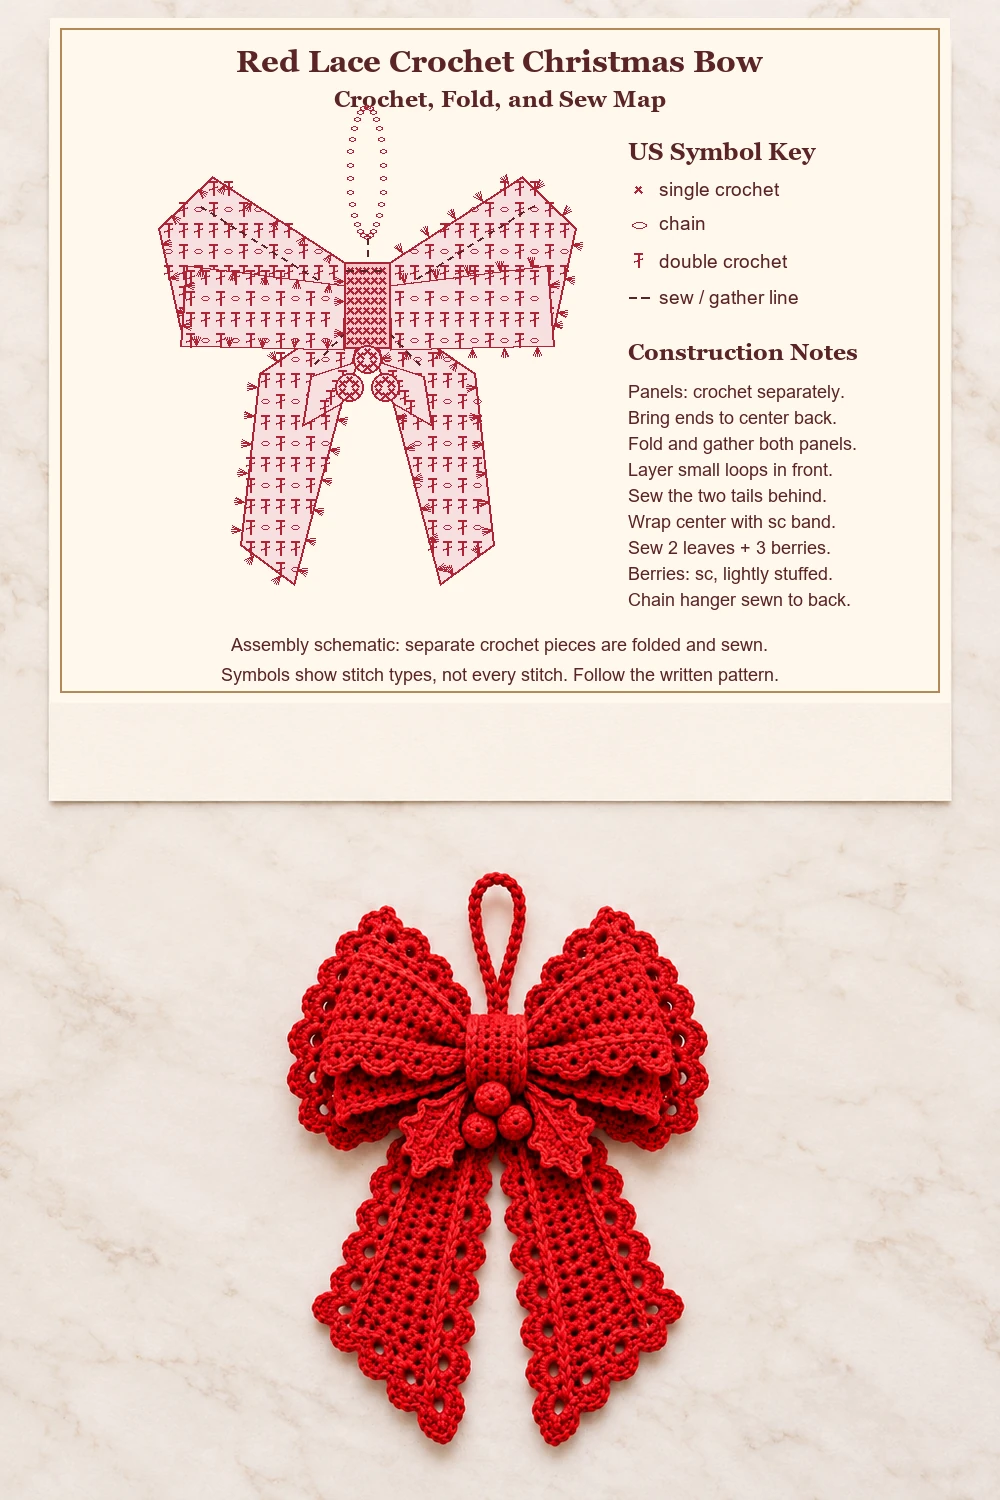
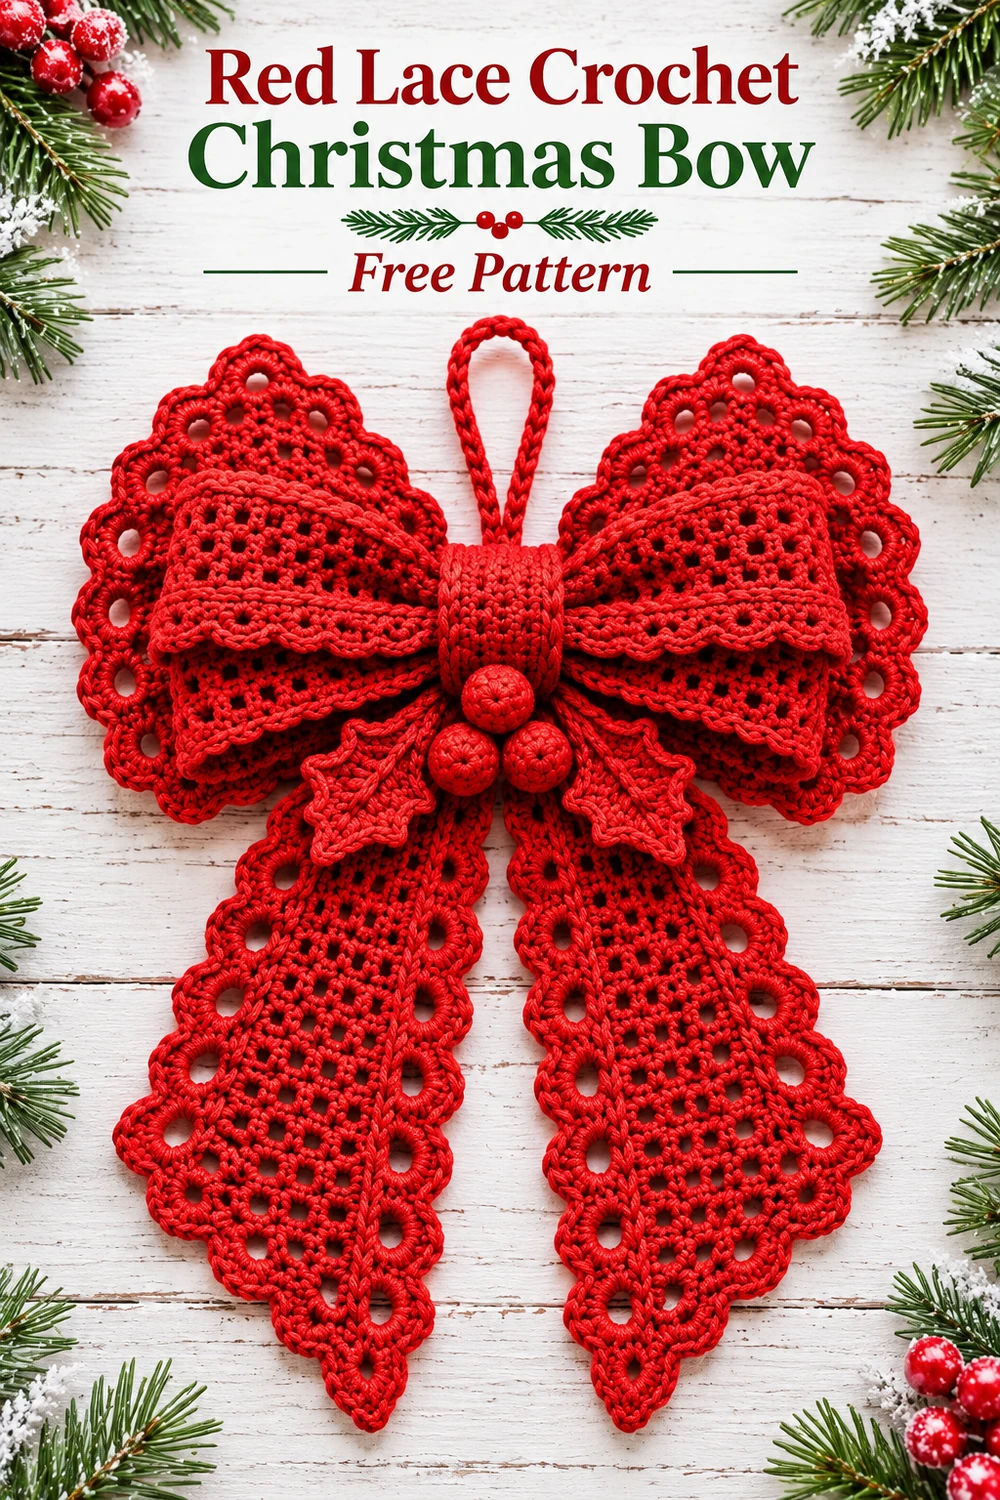
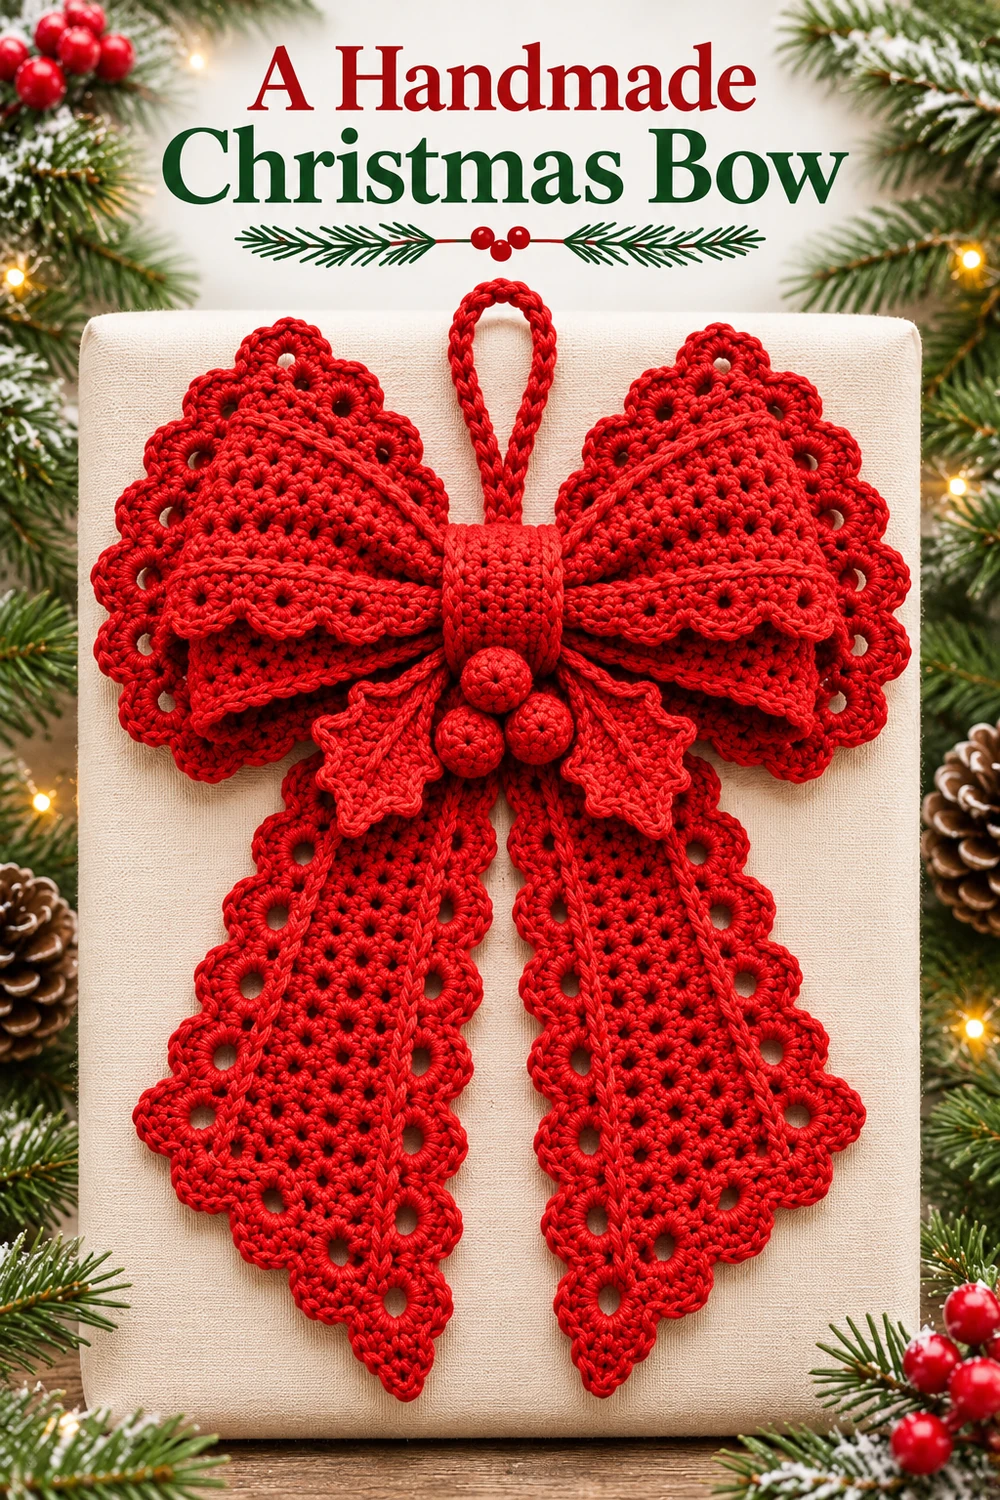
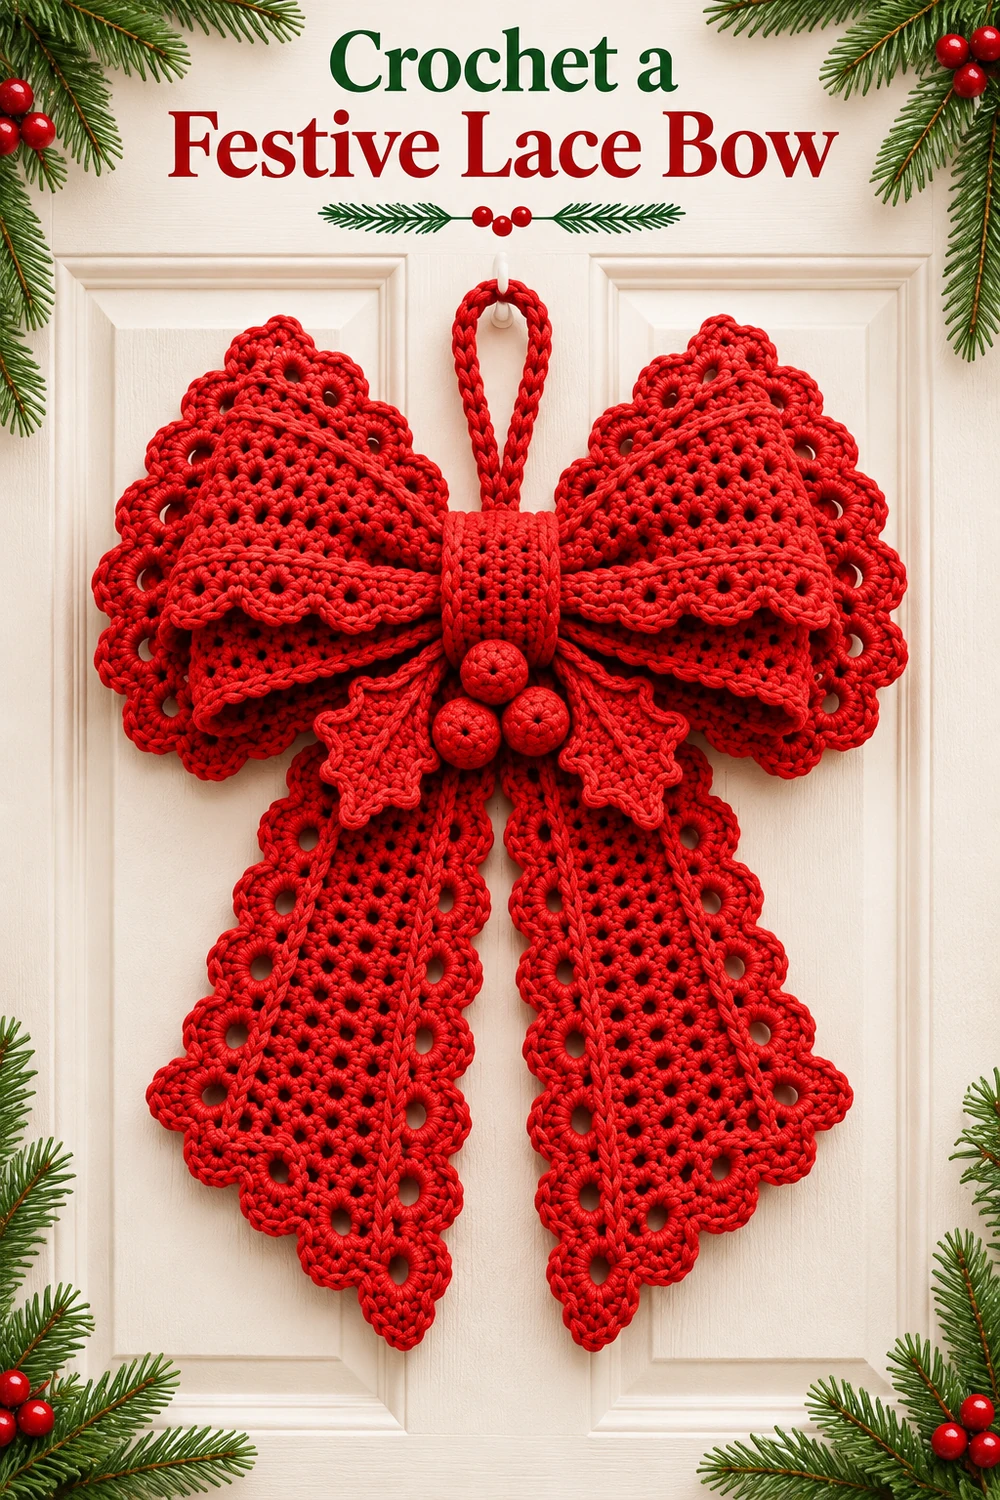
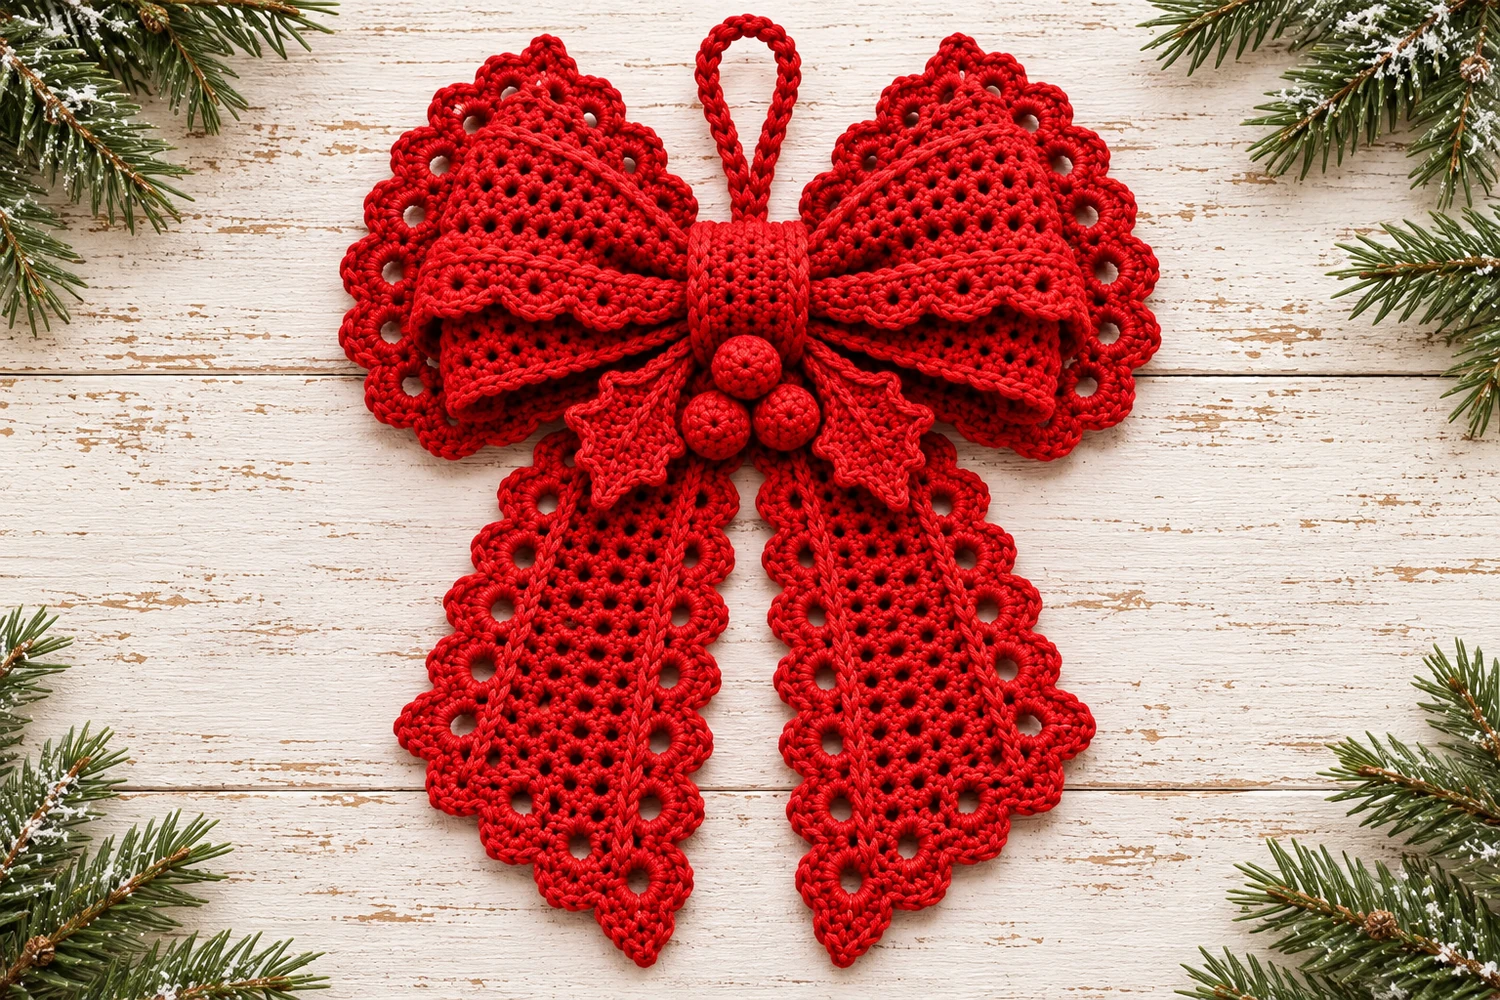
This red lace crochet Christmas bow combines broad layered loops, two long tapered tails, scalloped edges, and three little crochet berries. A wide center band holds the folds together, with two small red leaves tucked beneath the berries. The matching chain loop lets the finished bow hang from a wreath, a branch, or an indoor hook.
The bow is assembled from separate crocheted pieces. Two rectangular panels are folded into loops, the tails are sewn behind them, and the center band covers the joins. This original interpretation is inspired by the reference image, not the photographer’s original pattern. The stitch arithmetic has been checked, but the pattern has not been physically tested. The styled photographs illustrate the intended arrangement.
Red Lace Crochet Christmas Bow Materials
- Smooth red DK cotton, approximately 180–220 g as a purchasing allowance rather than measured consumption. Use one yarn family for every part.
- A 3 mm crochet hook as a starting option, adjusted for a flexible fabric with clear eyelets.
- A tapestry needle, scissors, removable markers, and matching red yarn for gathering and sewing.
- A small amount of fiberfill for the three crochet berries.
- A blocking mat and rustproof pins.
Difficulty: Intermediate. Estimated size: approximately 7–8 in (18–20 cm) wide and 11–13 in (28–33 cm) long, excluding the hanger. These are design estimates, not measurements from a tested sample. Your yarn, tension, and the depth of the folds determine the result.
Pieces and Construction
Make one large lace rectangle, one smaller lace rectangle, two matching tapered tails, one center band, two small leaves, three berries, and one chain hanger. Every visible component is red crochet. The bow shape comes from folding, gathering, and sewing the panels; it is not crocheted as one continuous bow-shaped fabric.
The lace alternates a solid double crochet row with an eyelet row. Each chain space replaces one skipped stitch, so the working width stays constant. Single crochet establishes an even perimeter before the scallops are added.
Block the panels and tails before assembly. This keeps the eyelets open and makes it easier to compare the two tails. Leave the finished loops soft enough to fold; a stiffened panel would be difficult to gather neatly.
US Crochet Abbreviations
- ch = chain; sl st = slip stitch.
- sc = single crochet; hdc = half double crochet.
- dc = double crochet.
- dc2tog = double crochet two stitches together.
- dc3tog = double crochet three stitches together.
- sc2tog = single crochet two stitches together.
- MR = magic ring; st(s) = stitch(es); sp = space.
Beginning ch 2 and ch 1 do not count as stitches. Turn after each flat row. Joining slip stitches stay outside the stitch totals.
Decreases and picots
For dc2tog, work an unfinished dc in each of the next two stitches, stopping each before its final pull-through. With three loops remaining, yarn over and draw through all three. For dc3tog, work three unfinished dc in three neighboring stitches, then draw through the four remaining loops.
For sc2tog, draw up a loop in each of the next two stitches, yarn over, and pull through all three loops. A small leaf picot is ch 3 followed by a sl st under both top loops of the stitch just completed.
Large Lace Panel
- Row 1: Ch 65. Dc in the third chain from the hook and each remaining chain. 63 dc.
- Row 2: Ch 2, turn. Dc in the first st, then [ch 1, skip 1 st, dc in the next st] 31 times. 32 dc and 31 ch-1 spaces.
- Row 3: Ch 2, turn. Dc in every dc and work 1 dc under every ch-1 space. 63 dc.
- Rows 4–15: Repeat Rows 2–3 six times, finishing with a solid Row 15. Eyelet rows have 32 dc and 31 spaces; solid rows have 63 dc.
Fasten off. The panel has fifteen rows and a consistent width of 63 stitch positions. Mark its center along both long edges for later folding.
Smaller Lace Panel
- Row 1: Ch 53. Dc in the third chain from the hook and each remaining chain. 51 dc.
- Row 2: Ch 2, turn. Dc in the first st, then [ch 1, skip 1 st, dc in the next st] 25 times. 26 dc and 25 ch-1 spaces.
- Row 3: Ch 2, turn. Dc in every dc and in every chain space. 51 dc.
- Rows 4–11: Repeat Rows 2–3 four times, ending with a solid Row 11.
Fasten off and mark the center of both long edges. This panel is shorter and narrower than the first, so its folded loops sit inside the larger pair.
Single Crochet Borders for Both Panels
Work a continuous foundation border around each rectangle with its right side facing you. Across the upper stitch edge and lower foundation-chain edge, work one sc per stitch position, except work 3 sc in each corner position. These corner stitches belong to the long edges.
Along each short side, work 2 sc around every row end. At the middle row end of that side, work 3 sc instead of 2. Do not add extra corner stitches in the side-row-end spaces.
- Large panel: 67 sc on each long edge, plus 31 sc on each short edge: 196 sc.
- Smaller panel: 55 sc on each long edge, plus 23 sc on each short edge: 156 sc.
Join to the first sc and fasten off. Count this round before adding the scallops; both totals must divide evenly by four.
Scalloped Edging
Join red in any foundation-border sc. Ch 1. Work [sl st in the next sc, skip 1 sc, 5 dc in the next sc, skip 1 sc] around, beginning the first working sl st in the same sc as the yarn join. Join to that first working sl st and fasten off.
Each repeat uses four base stitches and forms one five-dc shell. The large panel has 49 shells; the smaller panel has 39 shells. The joining slip stitch is not an additional repeat. Shape the shells evenly around the corners without inserting extra fans.
Two Long Tapered Tails
Make two identical pieces. Each tail begins at its attachment edge and narrows only after the long lace section.
- Row 1: Ch 17. Dc in the third chain from the hook and each remaining chain. 15 dc.
- Row 2: Ch 2, turn. Dc in the first st, then [ch 1, skip 1 st, dc in the next st] 7 times. 8 dc and 7 spaces.
- Row 3: Ch 2, turn. Dc in every dc and every chain space. 15 dc.
- Rows 4–25: Repeat Rows 2–3 eleven times, finishing with a solid Row 25.
- Row 26: Ch 2, turn. Dc2tog, dc in the next 11 sts, dc2tog. 13 stitches.
- Row 27: Ch 2, turn. Dc2tog, dc in the next 9 sts, dc2tog. 11.
- Row 28: Ch 2, turn. Dc2tog, dc in the next 7 sts, dc2tog. 9.
- Row 29: Ch 2, turn. Dc2tog, dc in the next 5 sts, dc2tog. 7.
- Row 30: Ch 2, turn. Dc2tog, dc in the next 3 sts, dc2tog. 5.
- Row 31: Ch 2, turn. Dc2tog, dc in the next st, dc2tog. 3.
- Row 32: Ch 2, turn. Dc3tog across all 3 sts. 1 tip stitch. Fasten off.
Tail border and scallops
Join at the attachment edge. Across its fifteen foundation positions, work 3 sc in each end position and 1 sc in each of the thirteen between them. This gives 19 sc. Along each long side, work 2 sc around each of the 32 row ends, except work 3 sc around the Row 16 end. Each side has 65 sc.
At the bottom tip, work 3 sc into the top of the final dc3tog. Mark the middle sc. Join the border and fasten off. The complete perimeter is 152 sc: 19 at the attachment edge, 65 on each side, and 3 at the tip.
Add the same scalloped edging used on the panels, making 38 shells per tail. To place a shell over the bottom point, begin the first working slip stitch two foundation stitches before the marked middle tip sc. The next skipped stitch is followed by 5 dc in the marked tip stitch. Continue the four-stitch repeat around and join.
Center Band
- Row 1: Ch 10. Sc in the second chain from the hook and each remaining chain. 9 sc.
- Rows 2–22: Ch 1, turn, sc in all 9 sts. Fasten off, leaving a long sewing tail.
Keep this strip flexible. It wraps around the gathered center with its two short ends meeting behind the bow. Check its fit after arranging the loops and tails; if necessary, add or remove rows while keeping nine stitches in every row.
Two Small Red Leaves
Make two. As you work each three-dc group in the following instructions, make a small picot immediately after its first and third dc, anchoring each picot to that dc top. Ch 9. Working into the chain, sc in the second chain from the hook, hdc in the next chain, dc in each of the next 3 chains, hdc in the next, and sc in the next. In the final chain work (sc, small picot, sc).
Continue along the unused underside of the foundation chain: sc in the next chain, hdc in the next, dc in each of the next 3 chains, hdc in the next, and sc in the last. Join to the first sc. Fasten off with a sewing tail.
Including the end picot, each leaf has five picots. Its actual stitch count is 16: 6 sc, 4 hdc, and 6 dc. These leaves are separate crocheted decorations, not folded ribbon ends.
Three Crochet Berries
Make three small red balls in continuous rounds, using a marker for the first stitch. The berries are the only stuffed parts.
- Round 1: Work 6 sc in a MR. 6.
- Round 2: Work 2 sc in each st. 12.
- Round 3: Sc in every st. 12.
- Round 4: Sc2tog six times. 6. Add a tiny amount of fiberfill.
- Round 5: Sc2tog three times. 3. Fasten off, pass the tail through the remaining front loops, and draw closed.
Leave a sewing tail on each berry. Avoid packing them firmly; small, lightly filled berries sit better against the flexible bow than heavy solid balls.
Block the Flat Pieces
Follow the yarn care instructions. If damp blocking is suitable, moisten both panels, tails, leaves, and band, press out excess water, and lay them flat. Match the two tails in width and length and open the scallops gently. Let everything dry completely before folding.
Do not block the stuffed berries flat. Keep the loop panels supple so they can form soft folds around the center band.
Fold and Assemble the Bow
- Lay the large rectangle wrong side up. Bring both short ends inward to meet at the middle of the rectangle. Sew those short ends together, creating a flattened tube with the seam at the center back.
- Keep that seam centered on the back. Pinch the middle of the flattened piece into three accordion folds and wrap red yarn around the gathered middle several times. Secure it with a few stitches. This creates the large left and right loops.
- Fold, seam, and gather the smaller panel the same way. Place it in front of the large pair, slightly lower, so both scalloped layers remain visible. Sew the gathered centers together.
- Place the two tails behind the gathered center with their attachment edges overlapping slightly. Angle them outward just enough to leave a narrow gap between the pointed ends. Sew both attachment edges securely to the back of the loop assembly.
- Wrap the single crochet band around the middle. Join its short ends with whipstitches at the back, enclosing the panel gathers and tail joins. Keep the band snug without flattening the loops completely.
The folds and gathering create the layered bow shape. Fan the loops outward by hand after securing the band. Adjust the front layer so it sits inside the broad back loops rather than hiding their scalloped outline.
Leaves, Berries, and Hanger
Sew the two leaves below the center band, pointing diagonally down and outward. Attach their bases firmly while leaving their pointed ends slightly raised. Arrange the three berries in a triangle above the leaf bases: one higher berry and two just beneath it. Sew through the berry fabric and sturdy stitches beneath the band.
For the hanger, ch 30 and fasten off with tails at both ends. Fold the chain into a loop and sew both ends securely to the upper back of the center band. Take several passes through the band and gathered panel center. Lift the bow by its loop before trimming the sewing tails to check balance and support.
The hanger is crocheted, the berries are stuffed crochet balls, and all joins are sewn. No fabric ribbon, beads, or metal fittings are needed for this version.
Finishing and Troubleshooting
The eyelet rows change width
Count each ch-1 space as one stitch position. On a solid row, work one dc under that space. Beginning chains do not count. The panel widths must remain 63 and 51 positions, and each straight tail row must remain fifteen.
The scallops do not meet evenly
Recount the single crochet foundation before making the shells. The required totals are 196, 156, and 152 for each tail. Each shell repeat uses four foundation stitches. Do not add an extra repeat at the joining slip stitch.
One loop looks larger
Check that the seam lies at the exact middle of the flattened tube before gathering. If it has shifted to one side, one loop receives more fabric. Reposition the seam and gathering before closing the center band.
The bow hangs forward
Move the chain attachment slightly higher on the back and secure it through the structural gathered center. The outer lace edge alone cannot support the whole bow. Keep the berries lightly filled and the front band snug.
Care and storage
Dust gently and follow the yarn’s cleaning instructions. Reshape the folds and tails after cleaning and dry with the loops supported. Store in a box with space around the scallops so the layers are not crushed. Keep the hanging loop and small decorative parts away from young children and place the bow away from flames or hot bulbs.
More Christmas Crochet Decorations
Try the Ribbed Crochet Christmas Bow for a different gathered texture, or the long-tail Christmas crochet bows for a tied ribbon construction. The Burgundy and Gold Crochet Snowflake also uses separate crocheted decorations attached by sewing.