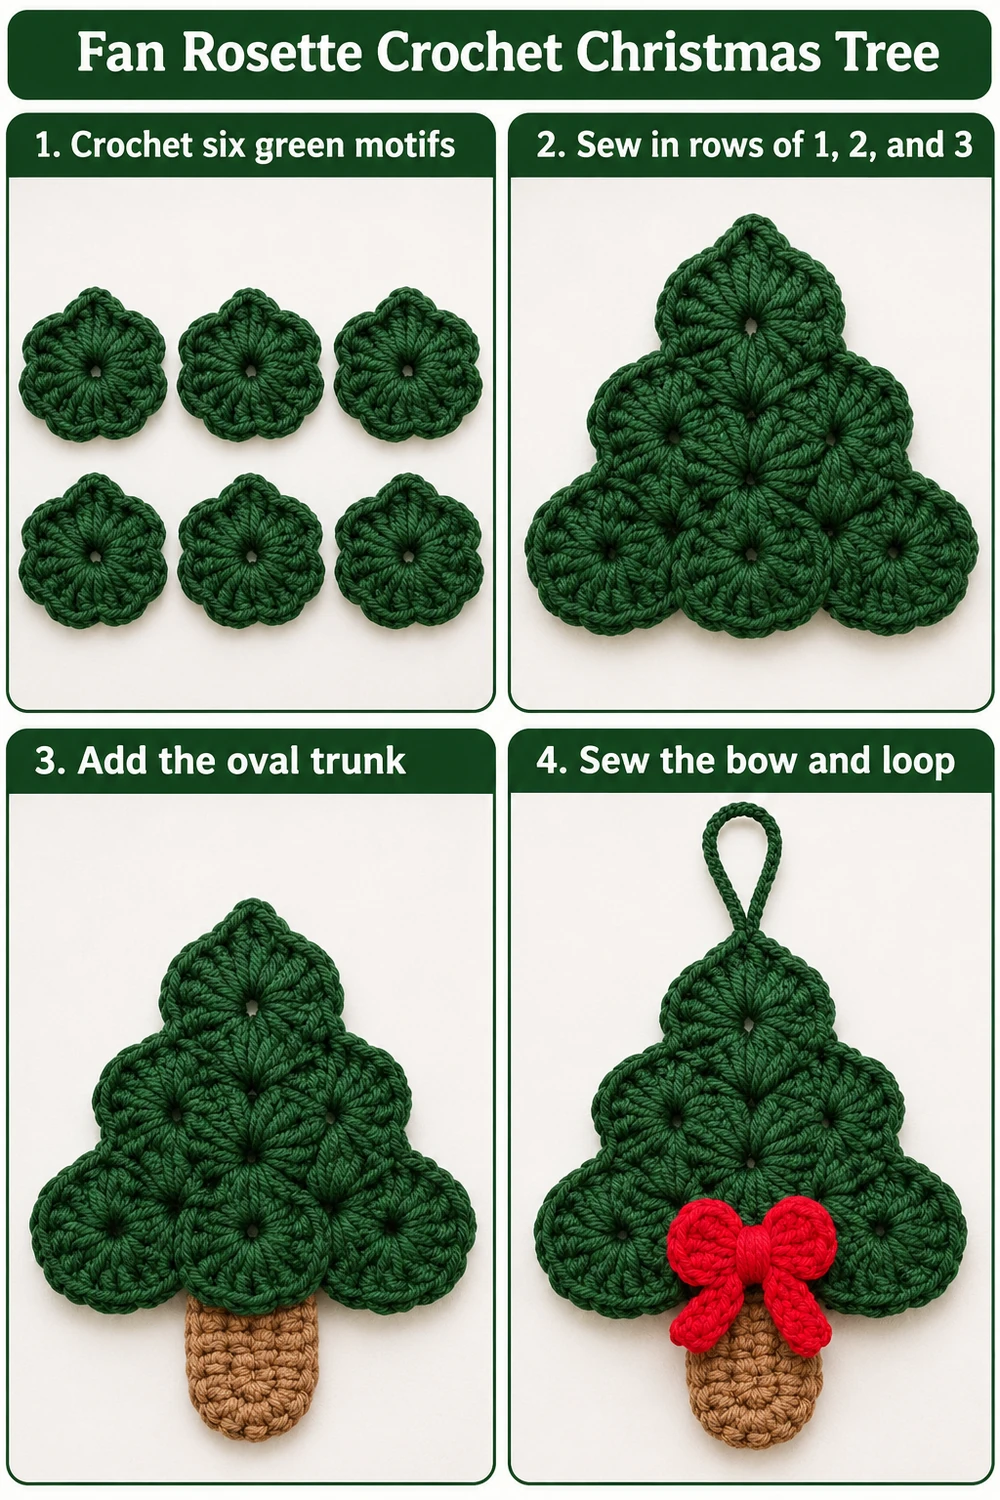
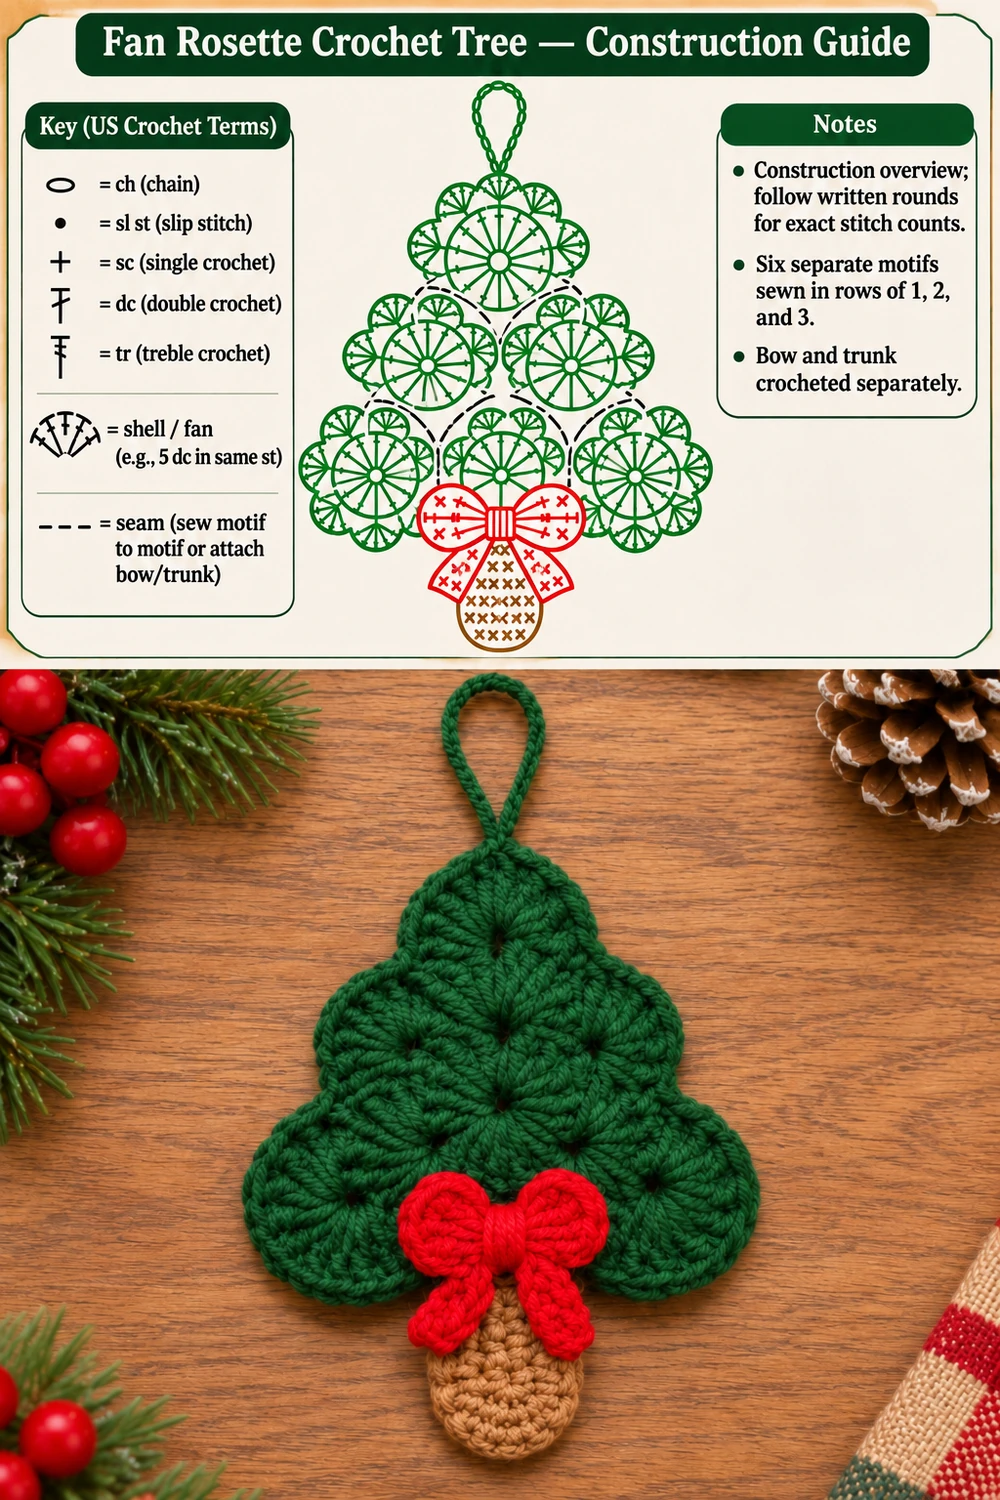
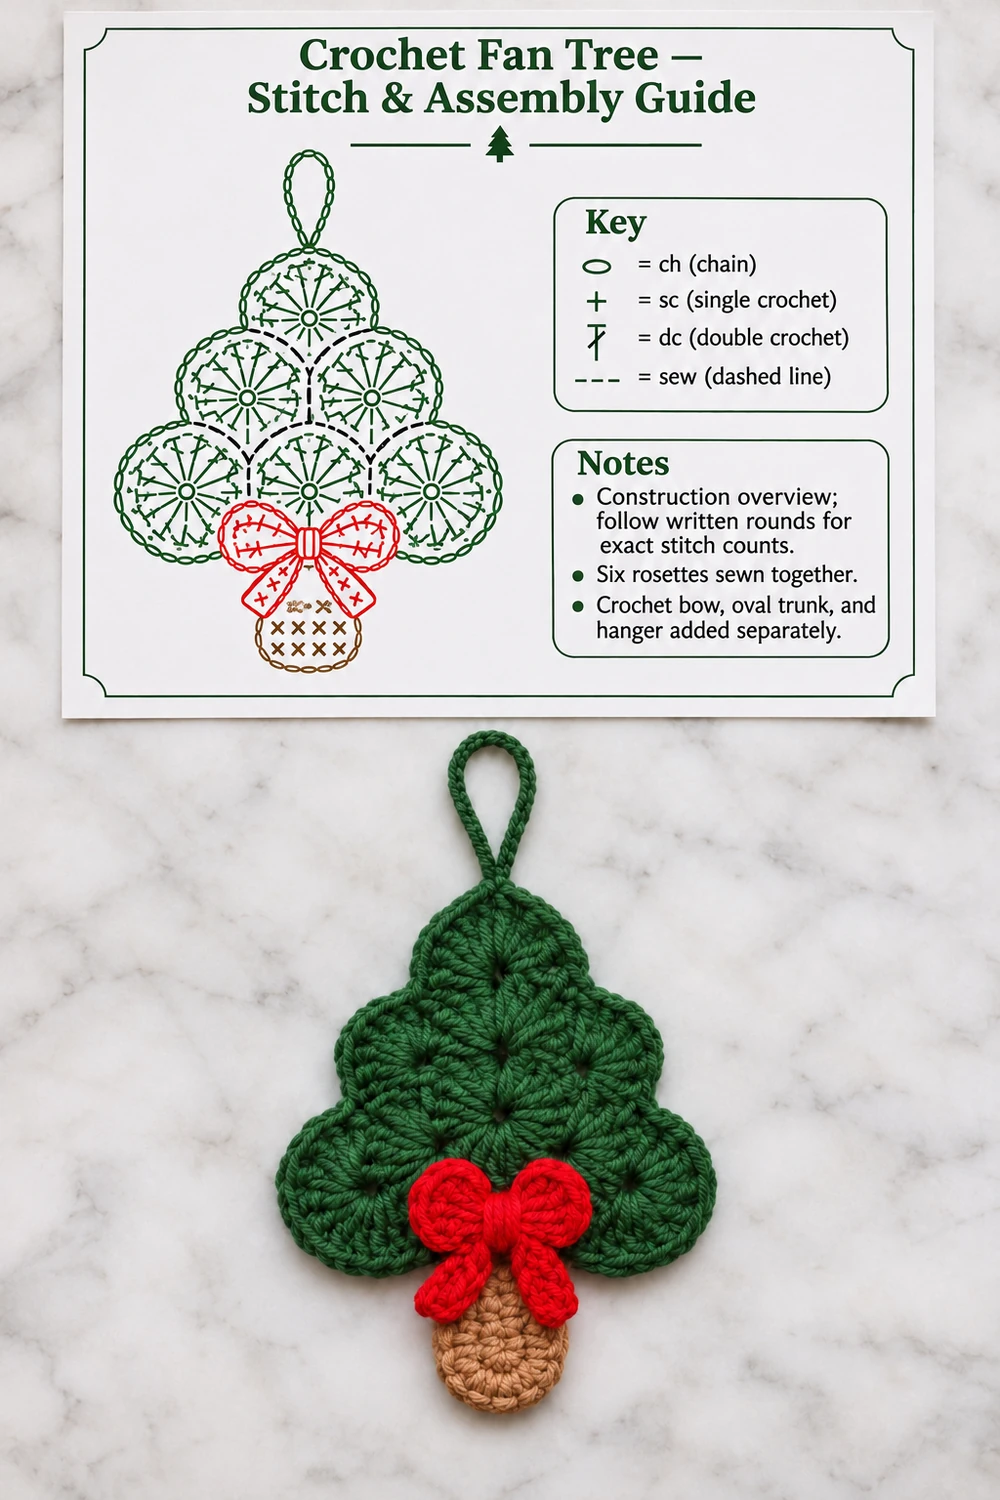
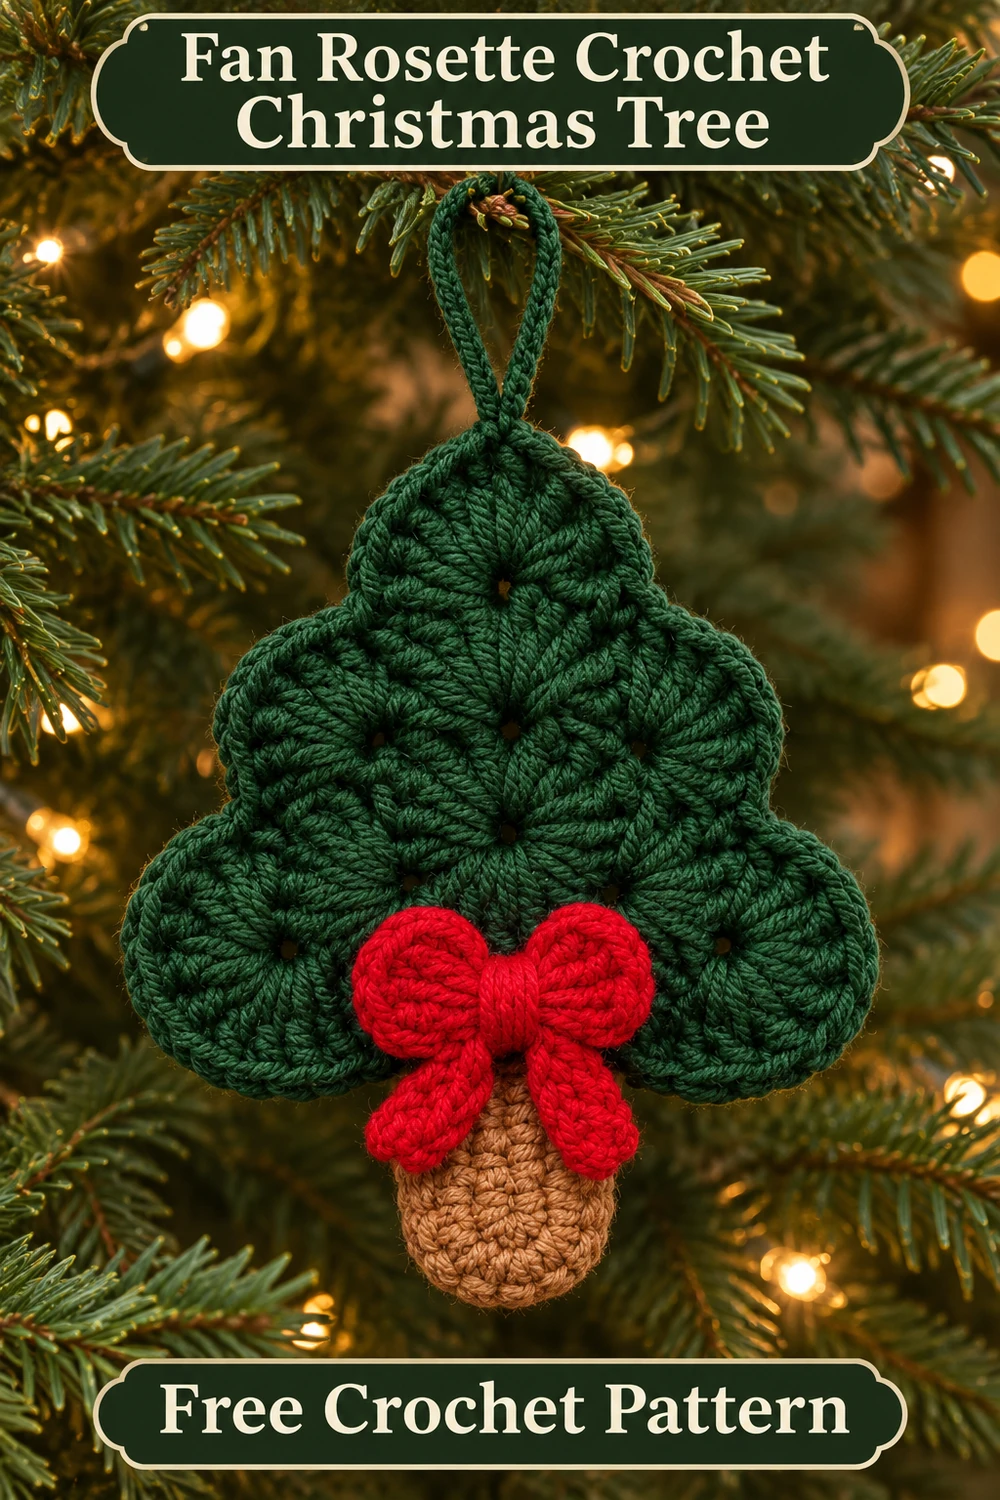
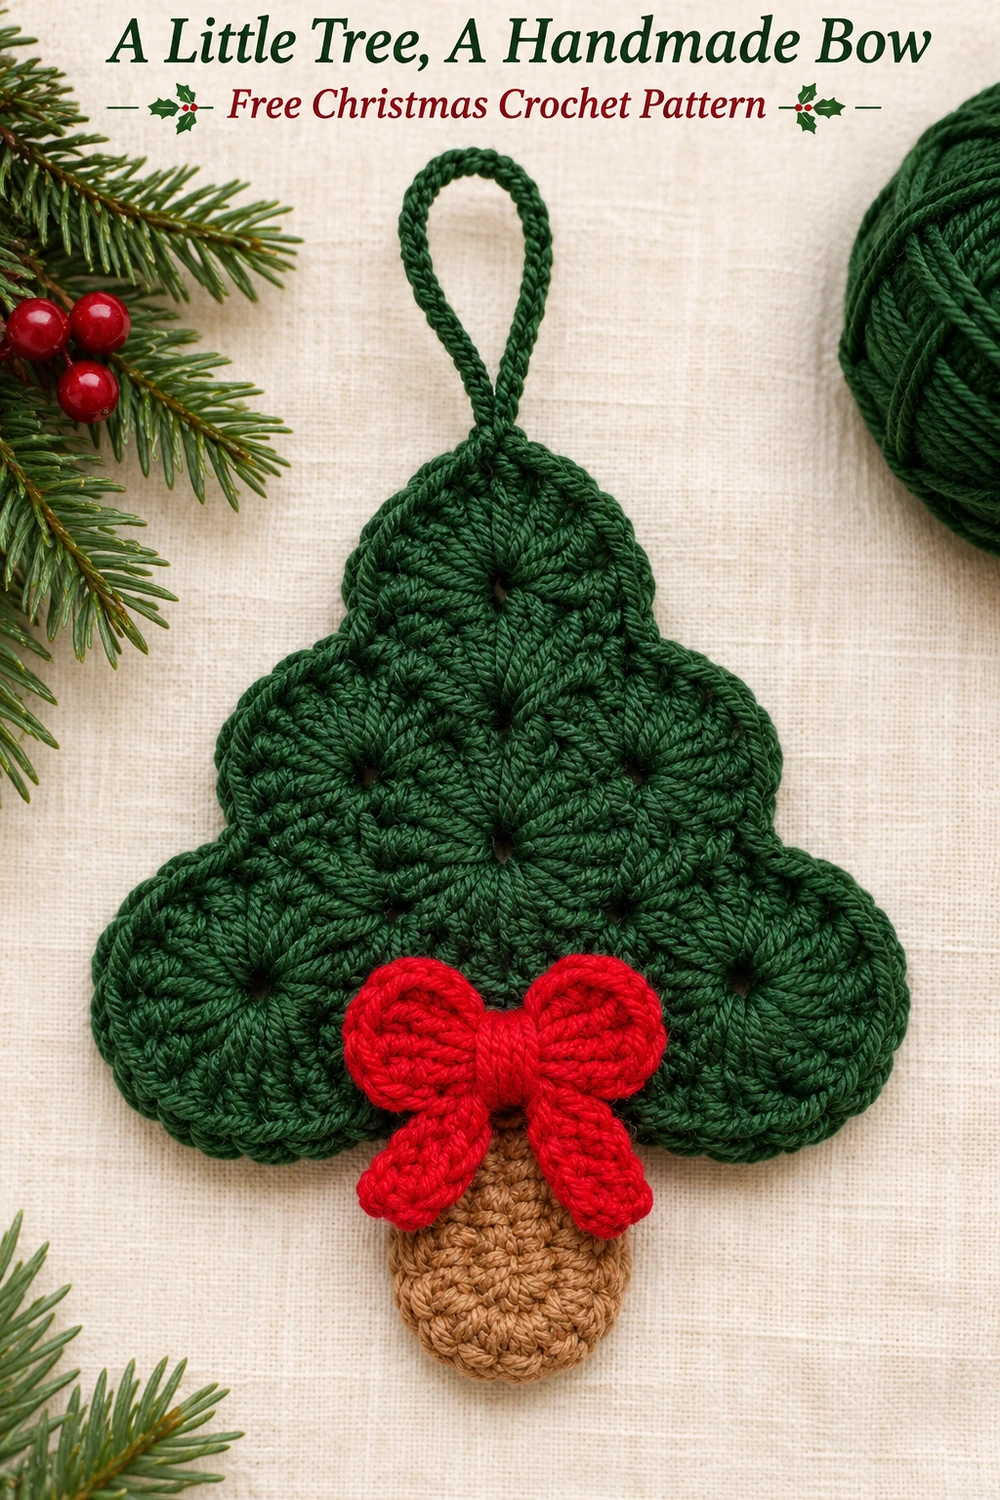
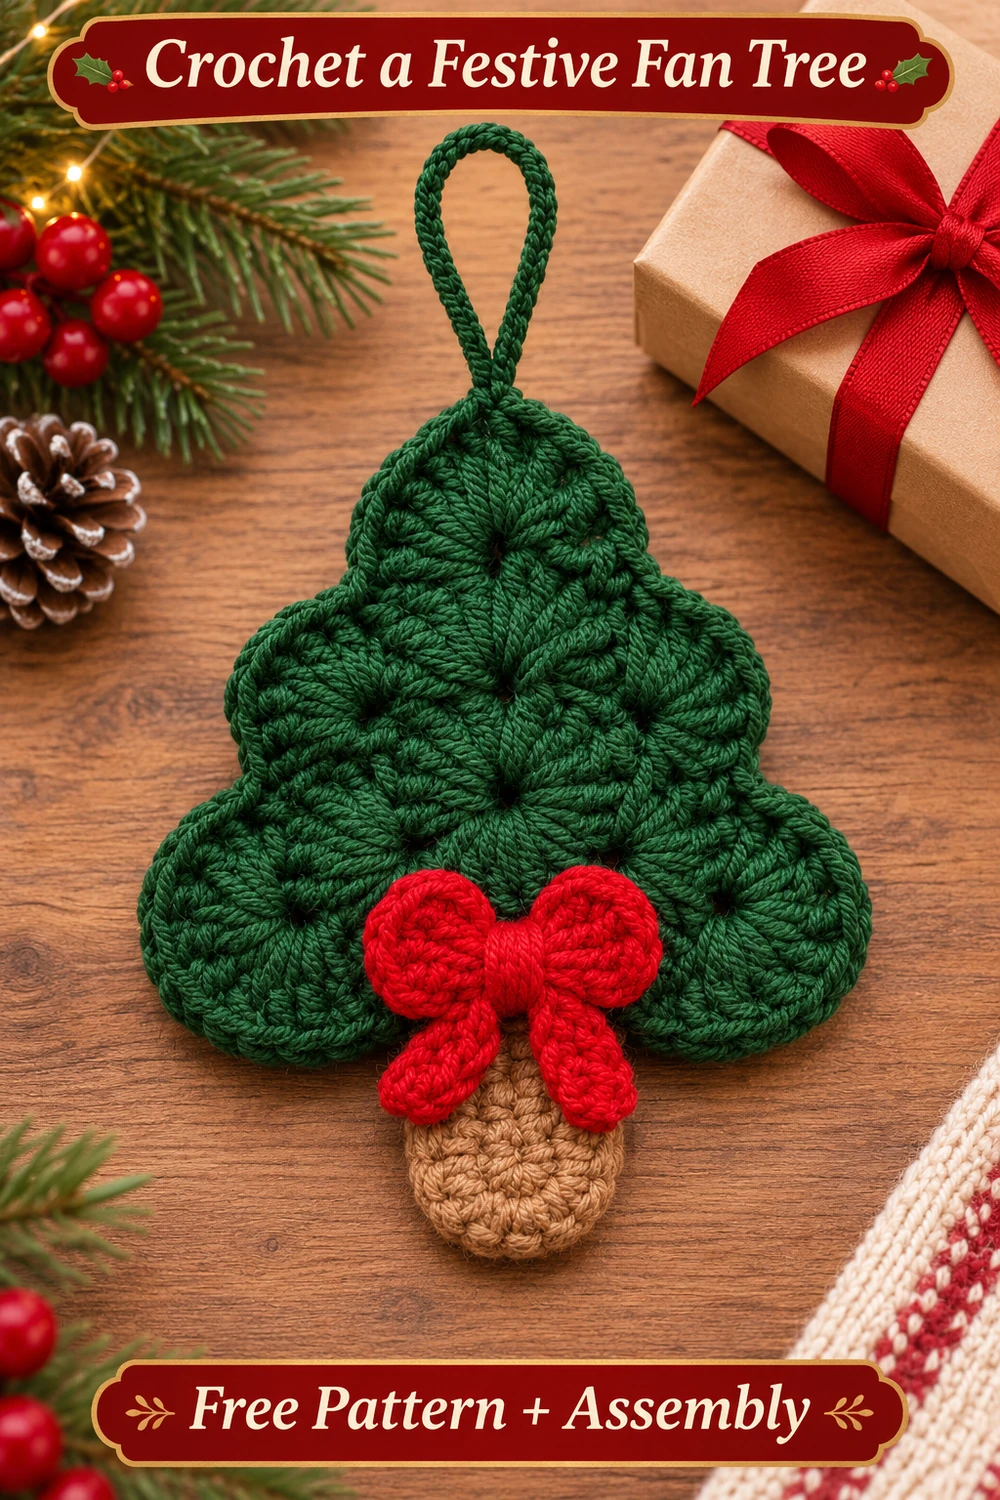
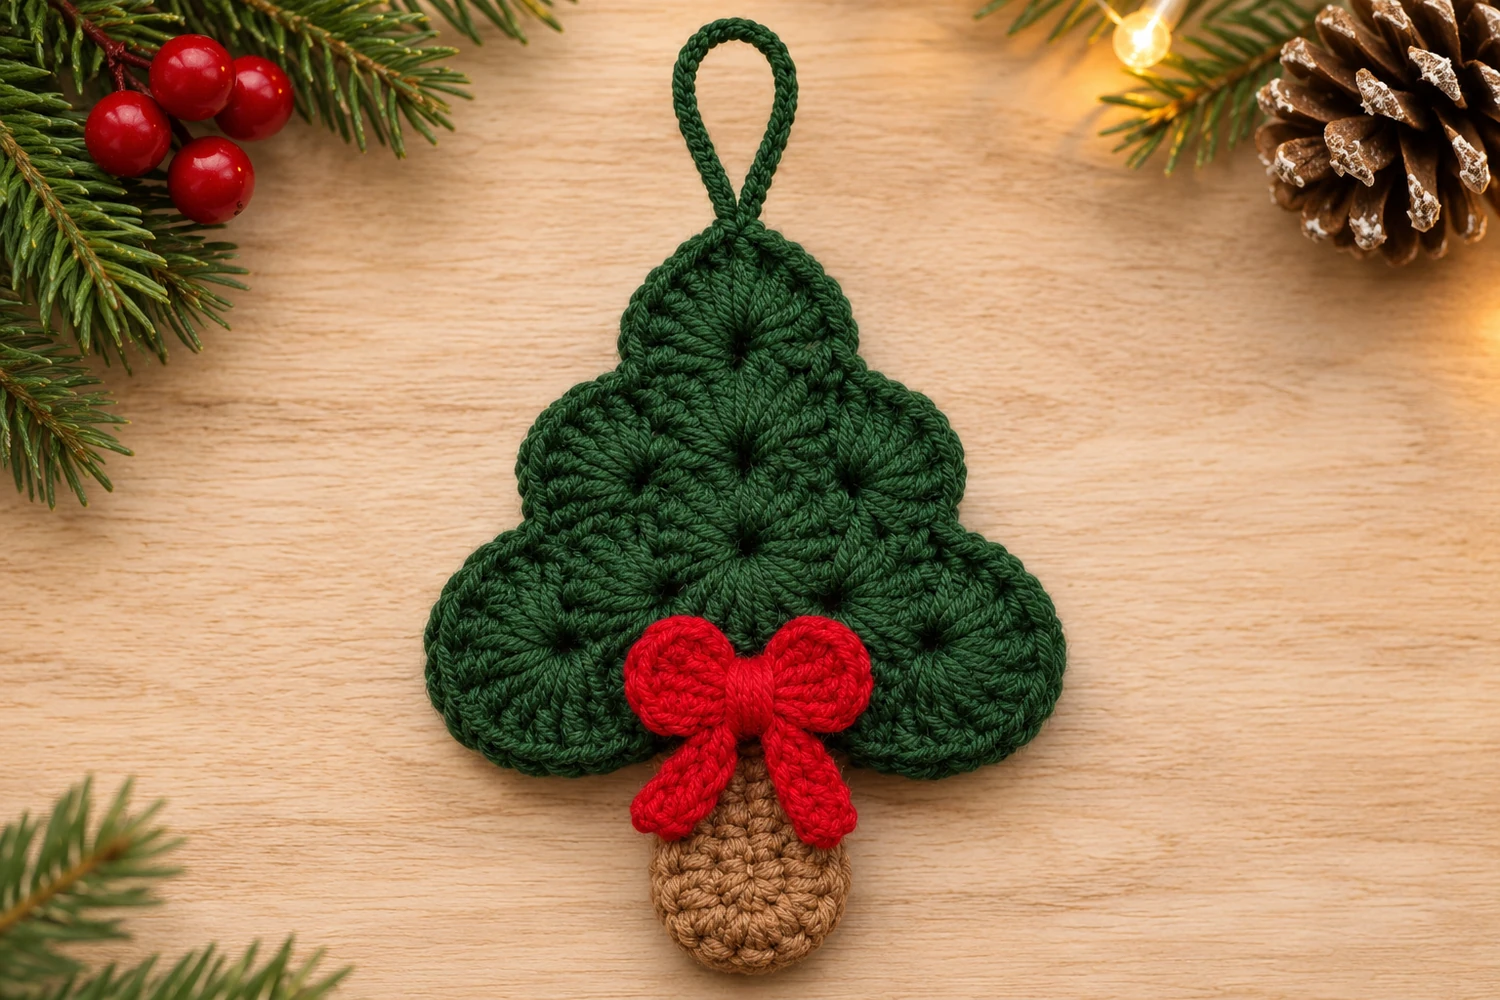
This fan rosette crochet Christmas tree combines a dark green, scalloped crown with a bright red crochet bow and a small tan trunk. Six dense motifs form the triangular outline, giving the ornament its raised radial texture and rounded branch edges.
Make the motifs separately and sew them into rows of one, two, and three. The bow, trunk, and hanging loop are added afterward. This original pattern is inspired by the reference photograph, rather than the original recipe behind it. Every decorative part is crocheted; the bow is not satin ribbon, and there are no beads or hidden wire supports.
Fan Rosette Crochet Christmas Tree Materials
- Smooth sport-weight or light DK cotton in forest green, bright red, and tan. Allow approximately 25–35 g green, 10 g red, and a small amount of tan as planning quantities, not measured consumption.
- A 2.75 mm crochet hook, adjusted for your yarn and tension.
- A blunt tapestry needle, scissors, removable markers, rustproof pins, and a blocking mat.
Difficulty: Intermediate. The motifs use basic stitches, but arranging their scallops and sewing the bow components needs care. Estimated finished size: approximately 4–5 inches (10–13 cm) across the crown, excluding the hanger. This is an estimate, not a measured sample. Yarn and tension determine the actual size. The arithmetic has been checked on paper; this pattern has not been physically tested.
Before You Start
Use the same green cotton and hook for all six motifs. Small changes in tension become obvious when the pieces are arranged side by side. Make one complete motif before making the other five, and check that it rests reasonably flat after gentle blocking.
The red bow should stand out without covering the entire lower row. If your red yarn is much thicker than the green, choose a finer red cotton for the bow or a suitable smaller hook. The tan trunk is a single flat oval, with its upper end hidden behind the crown.
There is no stuffing in this ornament. Its structure comes from the dense stitch groups, a compact arrangement of motifs, and several short sewing joins. Do not add extra embellishments to disguise an unstable join; secure the motifs themselves first.
US Crochet Terms and Notes
- ch: chain
- sl st: slip stitch
- sc: single crochet
- hdc: half double crochet
- dc: double crochet
- inc: 2 sc in the same stitch
- st(s): stitch(es)
- MR: magic ring
A fan in the green edging is five separate dc worked into one stitch. The dc are not closed together as a cluster. A small point is ch 2 followed by a sl st into the first of those two chains. The point is added decoration and does not consume another base stitch.
Beginning ch 3 counts as a dc in the green motifs. Beginning ch 1 does not count elsewhere. Joining slip stitches are excluded from round totals. The Craft Yarn Council abbreviation guide explains the standard US names used here.
Counts and Components
| Piece | Quantity | Count |
|---|---|---|
| Green fan rosette | 6 | Round 1: 12 dc; Round 2: 24 dc; Round 3: 6 fans of 5 dc and 6 anchoring sl sts |
| Upper motif point | 1 | One added ch-2 point on a fan center |
| Tan oval trunk | 1 | 10 sc, then 16 sc; 16 edging sl sts |
| Red bow loop | 2 | 11 sts, then 13 sc |
| Red bow tail | 2 | 16 sc around a short foundation chain |
| Red center band | 1 | 3 sc across for 8 rows |
| Green hanger | 1 | Ch 30, folded into a loop and sewn securely |
The green motifs are placed in a triangle, not stacked into three solid strips. Label them A at the top, B and C in the middle row, and D, E, and F along the bottom. This makes the sewing sequence easier to follow.
Crochet Six Green Fan Rosettes
Round 1: Dense Center
With forest green, make an MR. Ch 3, which counts as the first dc, and work 11 dc into the ring. Pull the ring closed and join with a sl st to the top of the beginning ch 3. (12 dc)
Close the center enough to leave only a tiny opening. Do not pull the ring so hard that its stitches bunch into a cone. Secure the starting tail through the back of several stitches after the motif is finished.
Round 2: Widen the Motif
Ch 3, counting as the first dc, and work 1 dc into the same stitch. Work 2 dc into each of the remaining 11 stitches. Join to the top of the beginning ch 3. (24 dc)
Every stitch receives two dc. The beginning ch 3 is already one of the two stitches in the first increase; do not add two more dc beside it.
Round 3: Six Scalloped Fans
Work [sl st in the next stitch, skip 1 stitch, 5 dc in the next stitch, skip 1 stitch] 6 times. Join to the first anchoring sl st. Fasten off with a generous sewing tail. (6 fans, 30 dc, and 6 anchoring sl sts)
Each repeat uses four stitches from Round 2, so six repeats use all 24. The anchoring slip stitch between fans draws a shallow valley, while the five dc produce the rounded lobe. Keep the anchors relaxed enough that the motif can lie flat.
A Small Point on the Upper Motif
On one motif only, add a small point after the third dc of one fan: work ch 2, sl st into the first of those chains, then finish the remaining two dc of that fan. Continue the round normally. This motif becomes A, with the point facing upward. Its 30-dc count stays the same.
Make the other five motifs without that extra point. Weave the short starting ends into the backs and keep the long finishing tails for joining.
Block and Lay Out the Crown
Dampen the six motifs according to the yarn label and lay them on a blocking mat. Ease each into an even round shape with six distinct fans. Do not stretch the valleys into large holes. Let the motifs dry completely before assembly.
Place A at the top with its point upward. Set B and C below it, side by side, with their upper edges touching the lower left and lower right edges of A. Place D, E, and F beneath them to make the widest row.
Rotate the motifs so the outside fans create a continuous rounded outline. At interior joins, neighboring fan edges may overlap very slightly, but the center openings should remain visible. Keep all intended front faces upward. Photographing the arrangement for your own reference can help you restore it if a piece moves.
Sew the Six Motifs Together
Use matching green tails and a tapestry needle. Sew adjacent fan edges together with small whip stitches, catching firm stitch loops on both motifs. Join only the touching sections; do not flatten an entire motif under its neighbor.
Join B to C first, then attach A across their upper edges. Join D to E and E to F to make the bottom row. Attach that row to the middle: D meets B, E meets both B and C, and F meets C.
At every join, use several short stitches rather than one long strand across a gap. Check the front as you sew and keep the tension even. The interior meeting points should close neatly without turning the whole crown into a bowl.
Secure the tails on the back and weave them through matching green fabric. These are sewn assembly lines, not extra crochet rounds. The separate motifs and their fan counts do not change when they are joined.
Crochet the Tan Oval Trunk
With tan, ch 5. Work around both sides of this foundation chain.
Round 1: starting in the second chain from the hook, sc in each of the next 3 chains. Work 3 sc in the last chain. Rotate the chain and work 1 sc into each of the next 2 unused underside chain positions, then 2 sc into the final underside position at the starting end. Join to the first sc. (10 sc)
Number these stitches 1–10 if needed. The three-sc far end occupies stitches 4, 5, and 6. The starting end curves through stitches 9, 10, and 1.
Round 2: ch 1, inc in st 1, sc in sts 2 and 3, inc in each of sts 4–6, sc in sts 7 and 8, and inc in each of sts 9 and 10. Join. (16 sc)
Edging: sl st loosely in each of the 16 sts. Join and fasten off with a sewing tail. The six increases of Round 2 add six stitches to the original ten. Keep the oval flat and unstuffed.
Position the oval vertically behind the lower center of the crown, with its rounded end extending downward. Sew the upper portion to the back of motif E and the nearby joins. Leave enough trunk visible to show the tan oval below the green branches.
Crochet the Red Bow Loops
Make two matching loops in red. Each is a small oval whose narrow starting end will be gathered into the center band.
Round 1: ch 6. Starting in the second chain from the hook, work sc, hdc, dc in each of the next 2 chains, and 3 hdc in the last chain. Rotate and work along the unused underside: dc in each of the next 2 positions, hdc in the next, and sc in the last. Join to the first sc. (11 sts)
The far end contains the three hdc at positions 5, 6, and 7. Mark the middle one, stitch 6.
Round 2: ch 1, sc in each stitch, but work 3 sc into marked stitch 6 instead of one. Join and fasten off with a tail. (13 sc)
Flatten the two ovals and point their narrow ends toward each other. Do not fold each oval into a tube or stuff it. The small center band will pinch the inner ends and give the finished loops their bow shape.
Make Two Red Bow Tails
For each tail, ch 8. Starting in the second chain from the hook, sc in each of the next 6 chains. Work 3 sc in the last chain. Rotate and work sc in each of the next 5 unused underside positions, then 2 sc in the final position at the starting end. Join and fasten off with a tail. (16 sc)
The count is 6 + 3 + 5 + 2 = 16. Make the second tail alike. These narrow rounded pieces will hang diagonally downward from the bow center. Keep them short enough that part of the tan trunk remains visible.
Center Band and Bow Assembly
With red, ch 4. Row 1: sc in the second chain from the hook and the next 2 chains. Turn. (3 sc)
Rows 2–8: ch 1, sc in each of the 3 sts. Turn after each row. Fasten off with a long tail. (3 sc per row)
Overlap the narrow ends of the two red loop ovals slightly and sew them together. Place the two tails behind this meeting point, angled downward left and right, and sew their upper ends to the joined loop bases.
Wrap the center band around the joined bases and tails. Sew its short ends together on the back. The band should gather the bow center without crushing the outer loops. This is a wrapped and sewn crochet band, not a tied ribbon knot.
Place the bow on the lower center of the green crown, just above the visible trunk. Sew the back of its center band securely to motif E and adjacent solid stitches. Leave the outer loop edges and tail tips free so they retain their shape.
Add the Green Hanging Loop
With green, ch 30 and fasten off with a tail at each end. Bring the two ends together to make a hanging loop. Sew both ends behind the top motif near the small point, passing through several solid dc stitches.
Reinforce the attachment with another sewing pass and bury the tails securely. The small ch-2 point alone should not carry the ornament’s weight. Hold the loop gently and check that the crown hangs with its center line upright.
Finishing Checks
Lay the tree flat and check the arrangement from top to bottom: one motif, two motifs, three motifs, then the short tan trunk. The red bow should sit low on the crown and cover its own attachment stitches while leaving the fan texture visible around it.
Gently tug each motif join and the bow center. Add another short sewing pass wherever a connection moves freely. Trim and bury all tails; do not leave long threads across the center openings. This is a decorative ornament with a long loop and sewn parts, not a toy for young children.
Troubleshooting
The Fans Are Too Tight
Check that every edging repeat uses four old stitches: one slip-stitch anchor, one skipped stitch, one five-dc fan, and one skipped stitch. Missing a skip changes the spacing. If the count is right but the edge cups, relax the anchoring slip stitches and block gently.
The Crown Looks Like a Rectangle
Check the arrangement before sewing. The top motif sits over the gap between the middle two, and the widest row contains three motifs. Offset the rows instead of placing their centers in three straight vertical columns.
The Bow Hides the Trunk
Move the trunk slightly lower or raise the bow center before securing the final stitches. Keep the bow tails angled outward. Do not add another trunk piece below the existing oval to compensate for placement.
The Motifs Will Not Lie Flat Together
Block them separately first and rotate their fan edges to find natural contact points. Avoid pulling widely spaced motifs together with one long seam. Several small touching joins give a flatter crown than a tightly gathered center.
Care and Storage
Spot-clean or gently wash according to the cotton label, then reshape and dry flat. Support the bow loops with your fingers while damp and keep heavy objects off them during storage. Do not hang the wet ornament from its loop, because the joined motifs may stretch unevenly.
Store the dry tree flat and inspect the hanger, motif joins, and bow attachment before seasonal display. Repair a loose connection while it is small rather than letting it pull neighboring fans out of shape.
More Christmas Crochet Trees
For a lighter layered design, try the Pearl and Satin Crochet Tree. The Granny Square Christmas Tree uses overlapping square motifs, while the Christmas Tree Crochet Cutlery Holder brings a tree silhouette to the table.