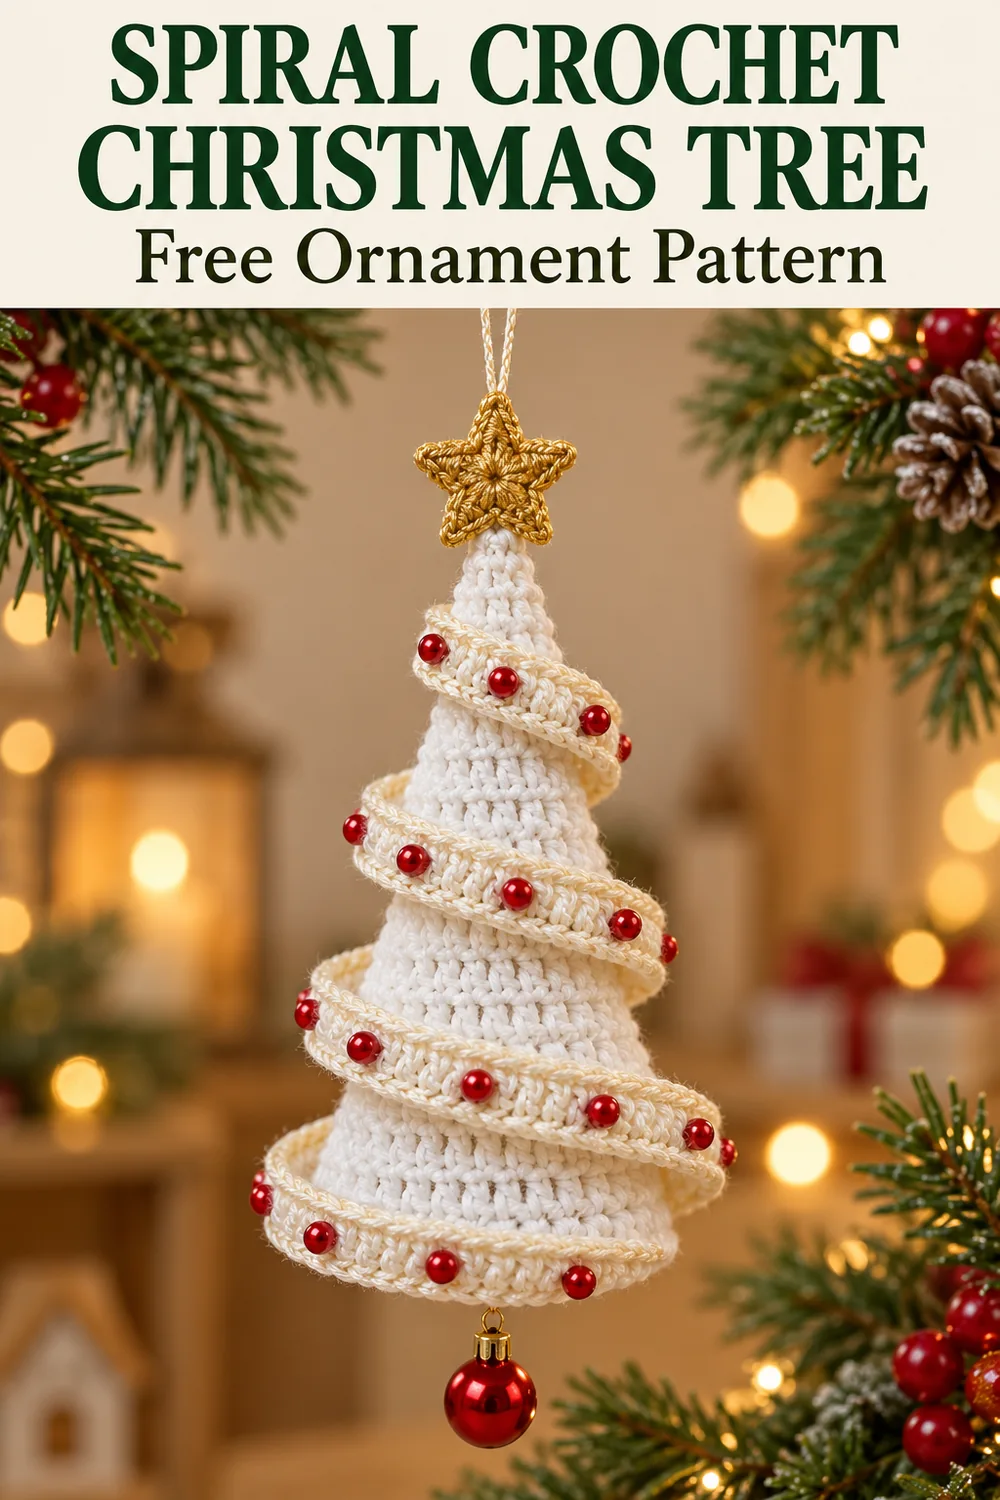
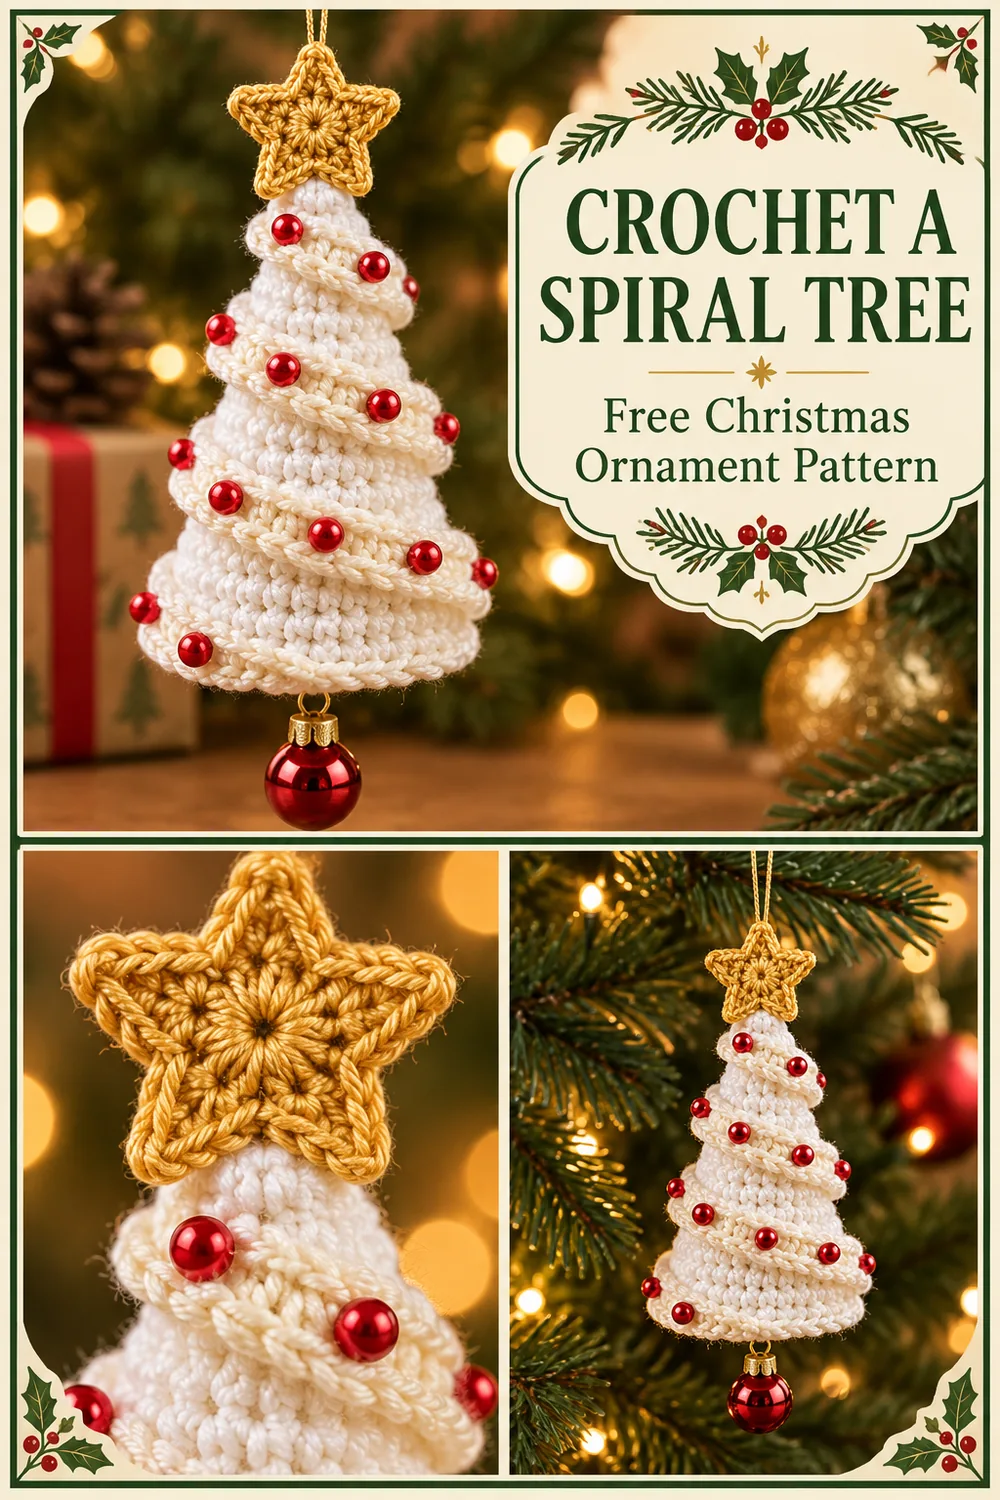
A spiral crochet Christmas tree combines a firm little cone with a separate ribbon that winds around it. White yarn keeps the shape snowy, while a gold star and red accents give the ornament its festive outline.
This original interpretation uses a stuffed single-crochet core and a flared double-crochet strip sewn along its inner edge. It is inspired by the reference ornament, rather than a reconstruction of its exact stitches. The ribbon is fitted during assembly, so the spacing of the turns can change with your yarn.
Make the cone first, then pin the complete ribbon before sewing it down. If you prefer a flat decoration, the smiling crochet Christmas tree applique offers a different construction. Here, the core supports the spiral and the hanging loop.

Materials for a spiral crochet Christmas tree
- Smooth sport or DK yarn in white, plus small amounts of cream and gold. Use the same yarn weight for the cone and ribbon.
- A hook appropriate for your yarn; 3 mm is a starting choice for DK, adjusted until the cone fabric holds filling without large gaps.
- Polyester filling, a blunt yarn needle, scissors, removable markers and pins.
- Strong cord for the hanger, a sewing needle and thread for optional red beads, and an optional lightweight plastic bauble.
This is a decorative ornament, with intermediate assembly after straightforward crochet. Finished dimensions, gauge and yarn consumption have not been established from a physical sample. The pattern has not been physically tested; the counts below describe the written construction. Images show the intended styling and schematic guidance, not a tested stitch-for-stitch sample.
US abbreviations and working notes
ch = chain; sc = single crochet; hdc = half double crochet; dc = double crochet; sl st = slip stitch; st/sts = stitch/stitches; inc = 2 sc in one stitch; sc2tog = single crochet two stitches together. See the Craft Yarn Council abbreviation guide for standard US terminology.
Work the cone in continuous rounds without joining. Mark the first stitch and move the marker each round. For sc2tog, insert into the next stitch and pull up a loop, repeat in the following stitch, then yarn over and pull through all three loops. One decrease consumes two stitches and produces one.
The ribbon is worked in turned rows. Its starting chains do not count as stitches. Work the first stitch of Row 2 into the first sc, rather than into the turning chain. The star is a separate small motif.
Spiral crochet Christmas tree: free written pattern
1. Crochet the white cone
- Round 1: Make a magic ring and work 6 sc into it. Tighten the ring. 6 sc.
- Rounds 2–3: Sc in each stitch around. 6 sc each round.
- Round 4: Inc in each stitch. 12 sc.
- Rounds 5–6: Sc around. 12 sc each round.
- Round 7: [Sc, inc] 6 times. 18 sc.
- Rounds 8–9: Sc around. 18 sc each round.
- Round 10: [Sc in next 2 sts, inc] 6 times. 24 sc.
- Rounds 11–12: Sc around. 24 sc each round.
- Round 13: [Sc in next 3 sts, inc] 6 times. 30 sc.
- Rounds 14–15: Sc around. 30 sc each round.
- Round 16: [Sc in next 4 sts, inc] 6 times. 36 sc.
- Rounds 17–18: Sc around. 36 sc each round.
Before closing the base, thread the hanging cord through several stitches near the tip from inside. Tie and secure its ends inside the cone, leaving a loop above the tip. Add filling gradually, keeping the top narrow. If using a bottom bauble, secure a separate cord through several stitches near the base; leave its loop outside and its knot inside.
2. Close the base
Round 19: [Sc in next 4 sts, sc2tog] 6 times — 30 sc.
Round 20: [Sc in next 3 sts, sc2tog] 6 times — 24 sc.
Round 21: [Sc in next 2 sts, sc2tog] 6 times — 18 sc.
Round 22: [Sc, sc2tog] 6 times — 12 sc.
Round 23: Sc2tog 6 times — 6 sc.
Top up the filling before the last round. Cut the yarn, pass the tail through the front loops of the six remaining stitches and draw closed. Secure and bury the tail. Do not pack the cone so firmly that it bulges between increase rounds.
3. Make the flared ribbon
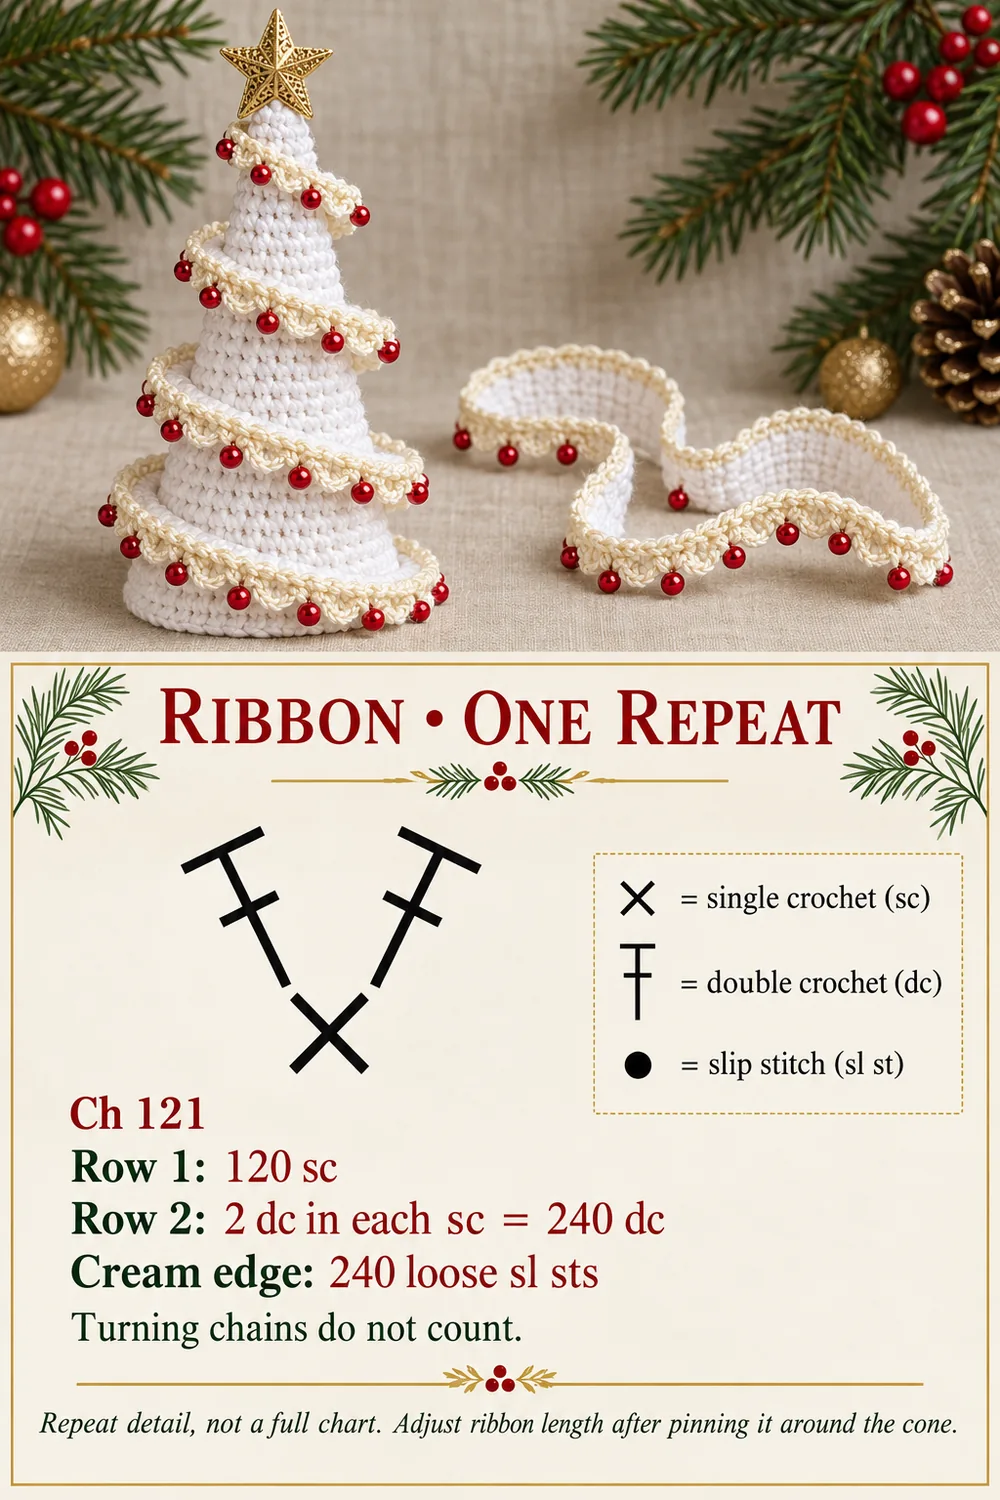
With white, ch 121. Leave a sewing tail at the start.
Row 1: Sc in the second chain from the hook and in every remaining chain. 120 sc. Ch 2 and turn.
Row 2: Work 2 dc in each sc across. 240 dc. Fasten off. The extra stitches make the outer edge flare and curl; do not try to block it into a straight flat strip.
With the right side facing you, join cream at the first dc of Row 2. Work one loose sl st into each dc top across, including the first: the joining sl st in that first top is the first edging stitch. 240 sl sts. Fasten off. Keep these loops loose so the cream edge does not draw the ribbon inward.
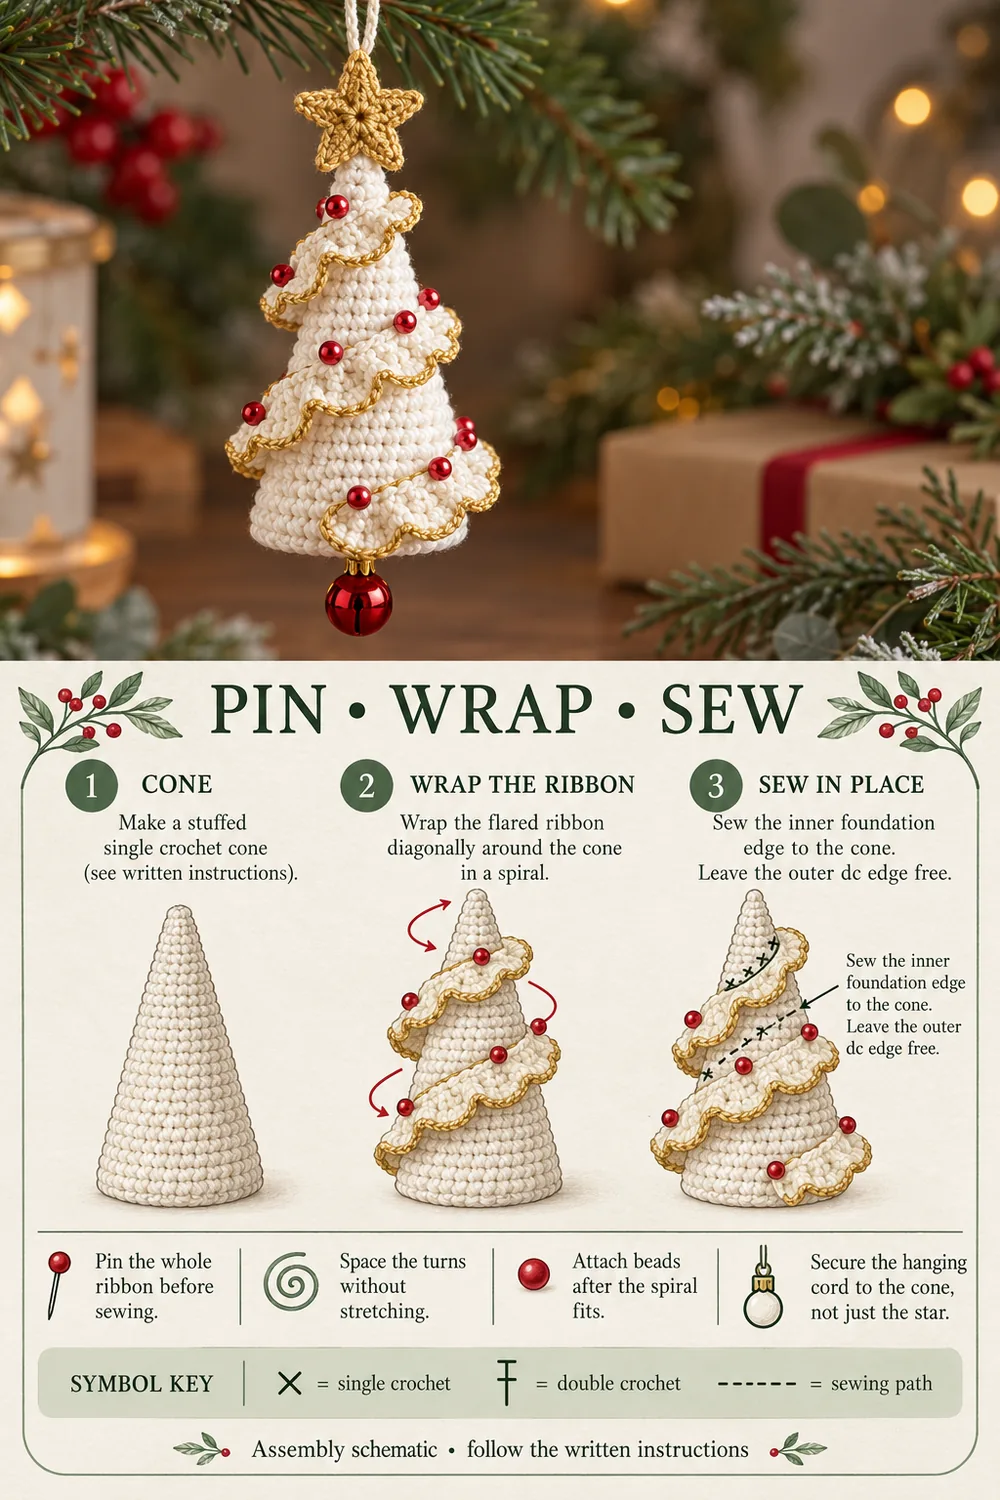
The 120-stitch foundation is a starting length, not a guaranteed number of coils. Pin it to the finished cone before weaving in the ribbon ends. If too long, pin the excess separately, count how many foundation stitches are actually needed, then remake the strip with that shorter foundation. If too short, remake it longer. Keep the original strip intact until the replacement fits. For any foundation of N sc, use N + 1 chains, then 2N dc and 2N edging sl sts.
4. Wrap and sew the spiral
Set the narrow foundation edge near the cone tip, leaving space for the star. Wind it diagonally downward, pinning the foundation edge against the cone. Let the wider dc edge project outward. Distribute the ribbon along the cone before choosing the final spacing: neither the number of turns nor the exact silhouette is fixed.
With matching yarn, sew through the foundation chain loops and nearby cone stitches. Work along the entire inner edge with small relaxed stitches. Avoid catching the free outer edge. Remove pins as you sew and turn the ornament to check the back as well as the front.
5. Crochet a small gold star
Center: Make a magic ring, ch 1, work 10 sc into it and join to the first sc. 10 sc. Ch 1 and the join do not count.
Points: Starting in the first center stitch, repeat the following five times: sl st in the next unused center stitch, ch 5, sl st in the second chain from the hook, sc in the next chain, hdc in the next chain, dc in the last chain, then sl st in the next unused center stitch. Each repeat uses two center stitches and makes one four-stitch return along its chain.
Check: 5 repeats × 2 center stitches = all 10 center stitches. Each point has 1 sl st, 1 sc, 1 hdc and 1 dc along its chain, plus two anchoring sl sts in the center. Fasten off and secure the ring tail. Shape the five points gently. Sew the star to the cone tip; keep the hanging cord attached to the cone itself.
6. Add the red accents
After fitting the ribbon, sew an optional red bead near every tenth dc along the outer edge: positions 10, 20 and so on through 240 give 24 beads for the unshortened strip. Fasten each bead securely with thread. An embroidered red dot can replace each bead. Clip the lightweight bauble to the bottom cord loop and check that it does not pull the base out of shape.
Keep beaded ornaments and detachable decorations away from young children and pets. For a simpler display, omit both beads and bauble and embroider red accents instead.
Count check before finishing
| Section | Count rule |
|---|---|
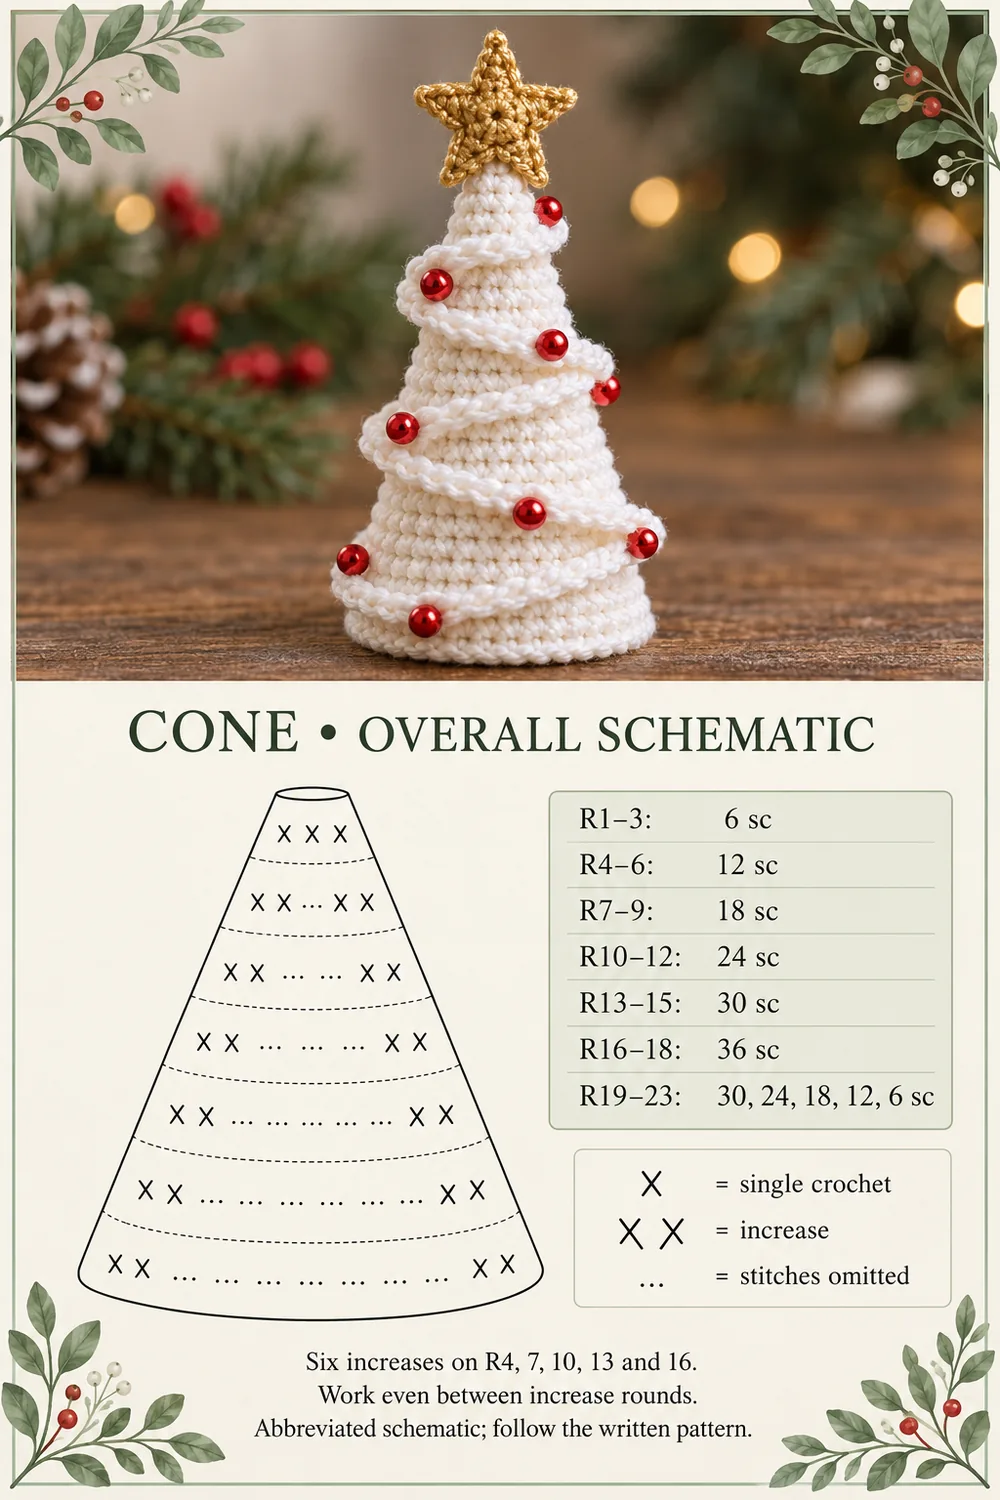
| Cone growth | 6 increases on R4, 7, 10, 13 and 16: 6 → 12 → 18 → 24 → 30 → 36 |
| Base closure | 6 decreases per round: 36 → 30 → 24 → 18 → 12 → 6 |
| Ribbon | 120 sc × 2 = 240 dc; 240 edging sl sts |
| Gold star | 10 center sc divided into 5 groups of 2 |
Solving shape and tension problems
The ribbon looks crowded
Unpin it and spread the turns farther apart. Check that you sewed the foundation edge to the cone and left the dc edge free. A strip that remains too long needs shortening; folding spare length underneath creates a bulky patch.
The cone has an unexpected ridge
Count the stitches at each marked round and check for an increase worked into the marker gap twice. The rounds between increases remain even. Also remove excess stuffing before changing the crochet.
The cream edge curls tightly inward
Loosen the slip stitches or use a slightly larger hook for that edge. There should be one edging stitch for each dc top. The intended flare comes from the two dc in every sc, while the edge should simply outline it.
The tree hangs crooked
Check the cord attachment at the tip, redistribute filling and compare the ribbon on both sides. A heavy bauble can stretch the bottom: use a lighter decoration or omit it. The star is decorative and should not bear the ornament’s weight.
Color changes and care
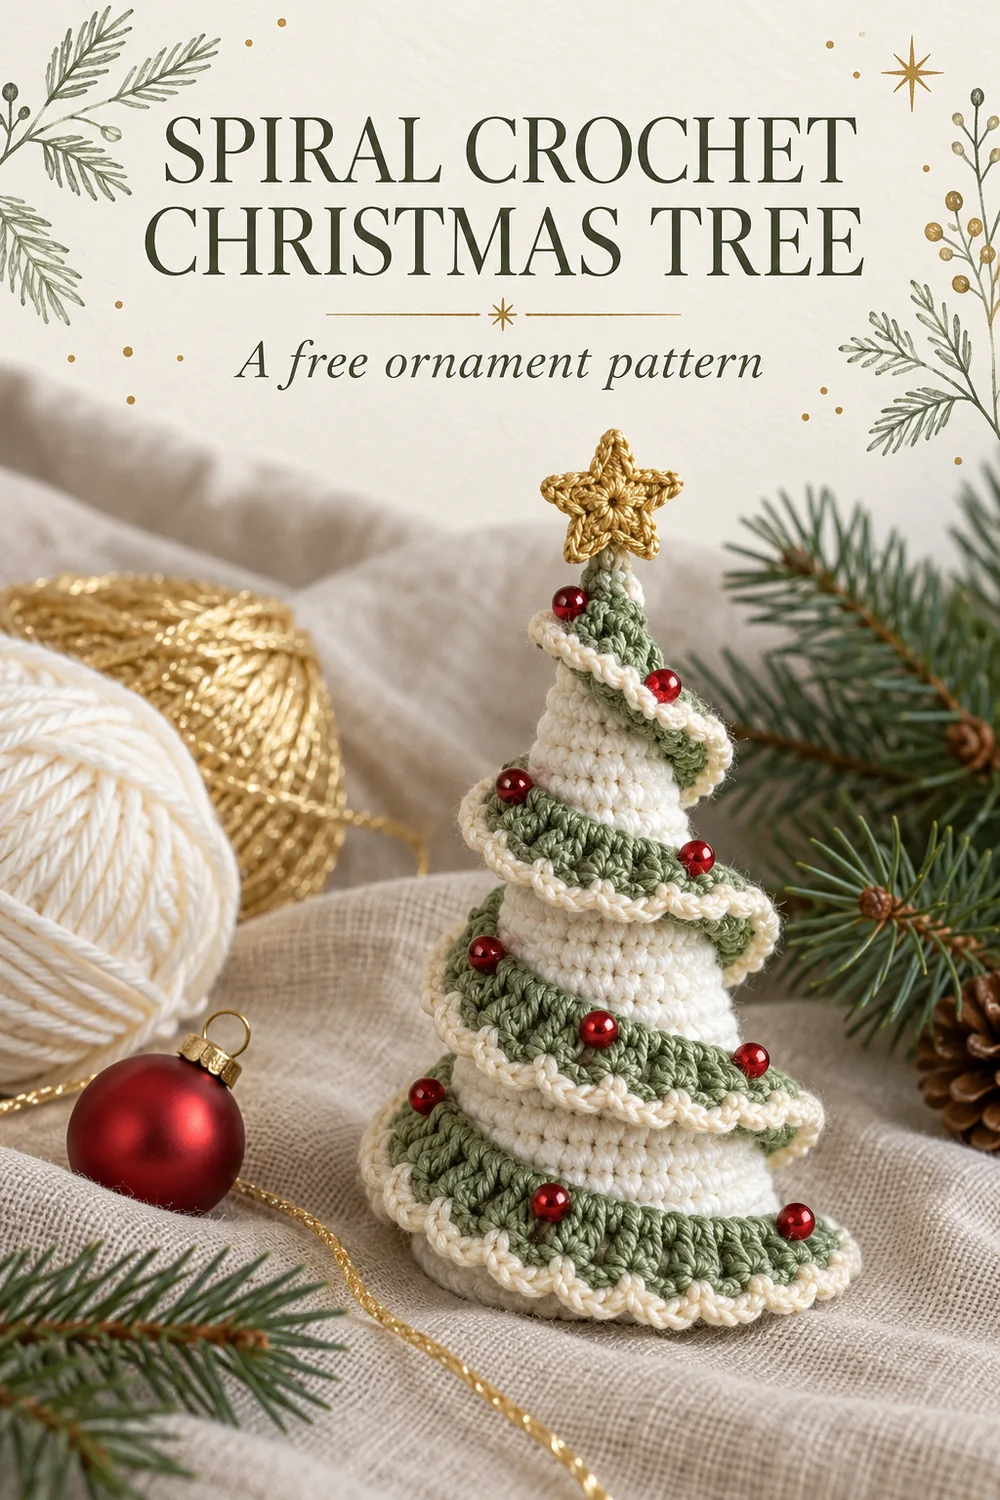
A sage ribbon on a white cone gives more contrast, as shown in the editorial image. Cream, white or gold edging can all be used with the same stitch counts. The picture details illustrate styling; use the written rows for the actual ribbon and gold star.
Clean according to the yarn and trim labels, avoiding soaking decorations that cannot be washed. Store the ornament with tissue supporting the free ribbon edge. For another dimensional decoration, try the layered crochet pinecone; for an open flat ornament, see the floral crochet snowflake.
Spiral crochet Christmas tree: pins and diagram guides
The first three images offer styling ideas. The final three explain the cone, ribbon repeat and assembly. The overall cone schematic deliberately omits stitches and is not a complete tested chart; its count table and the written instructions provide the totals.