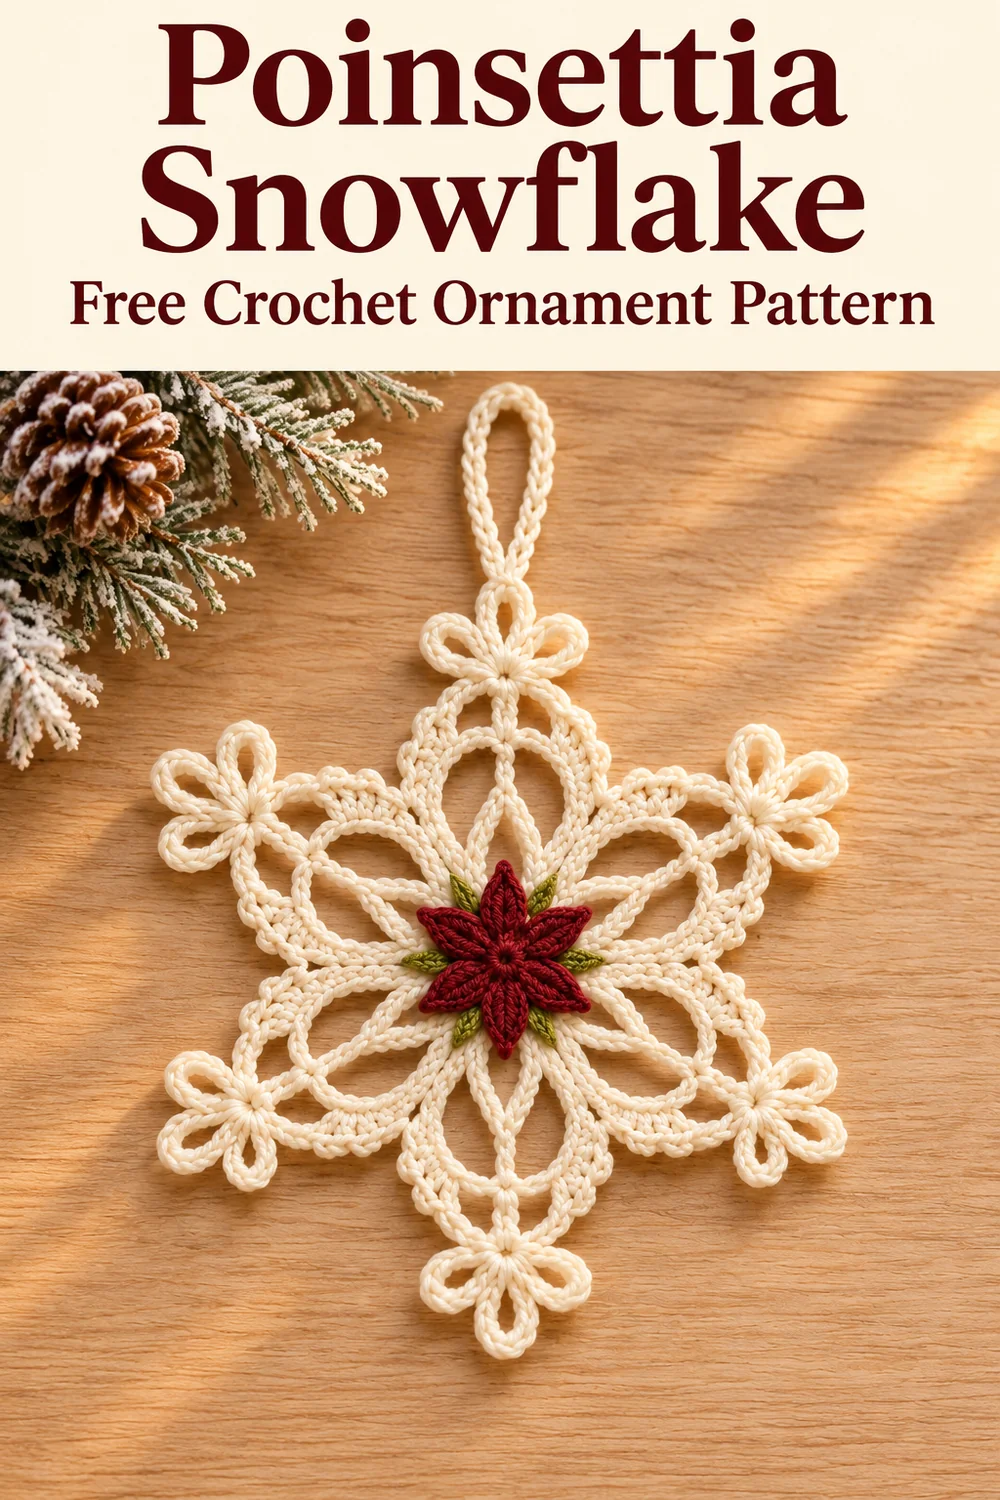
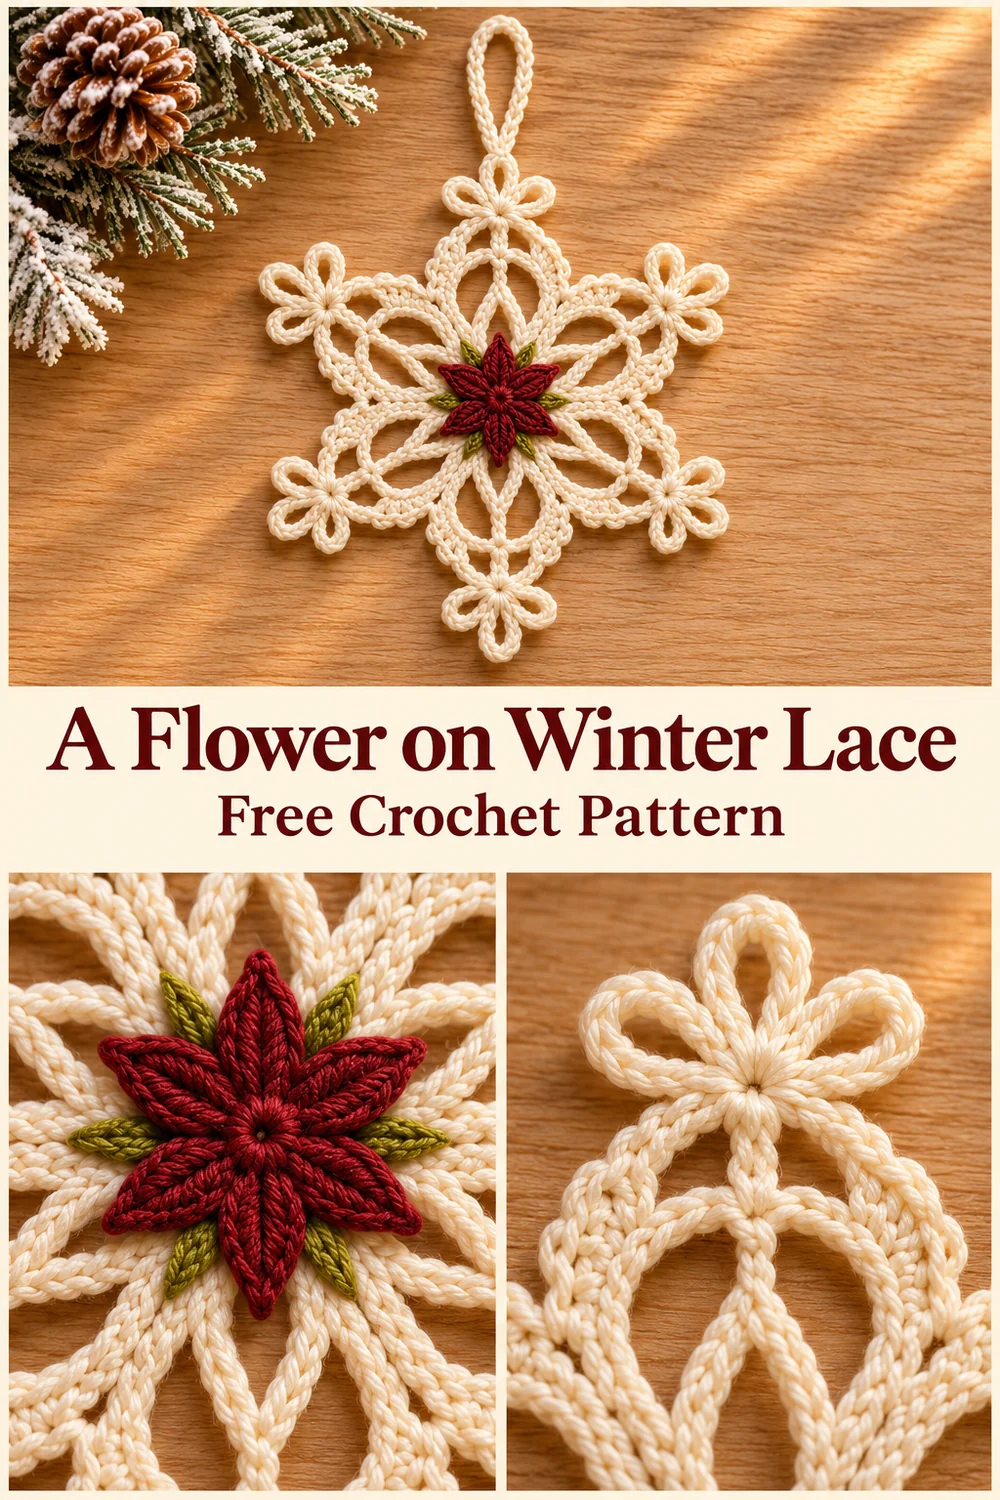
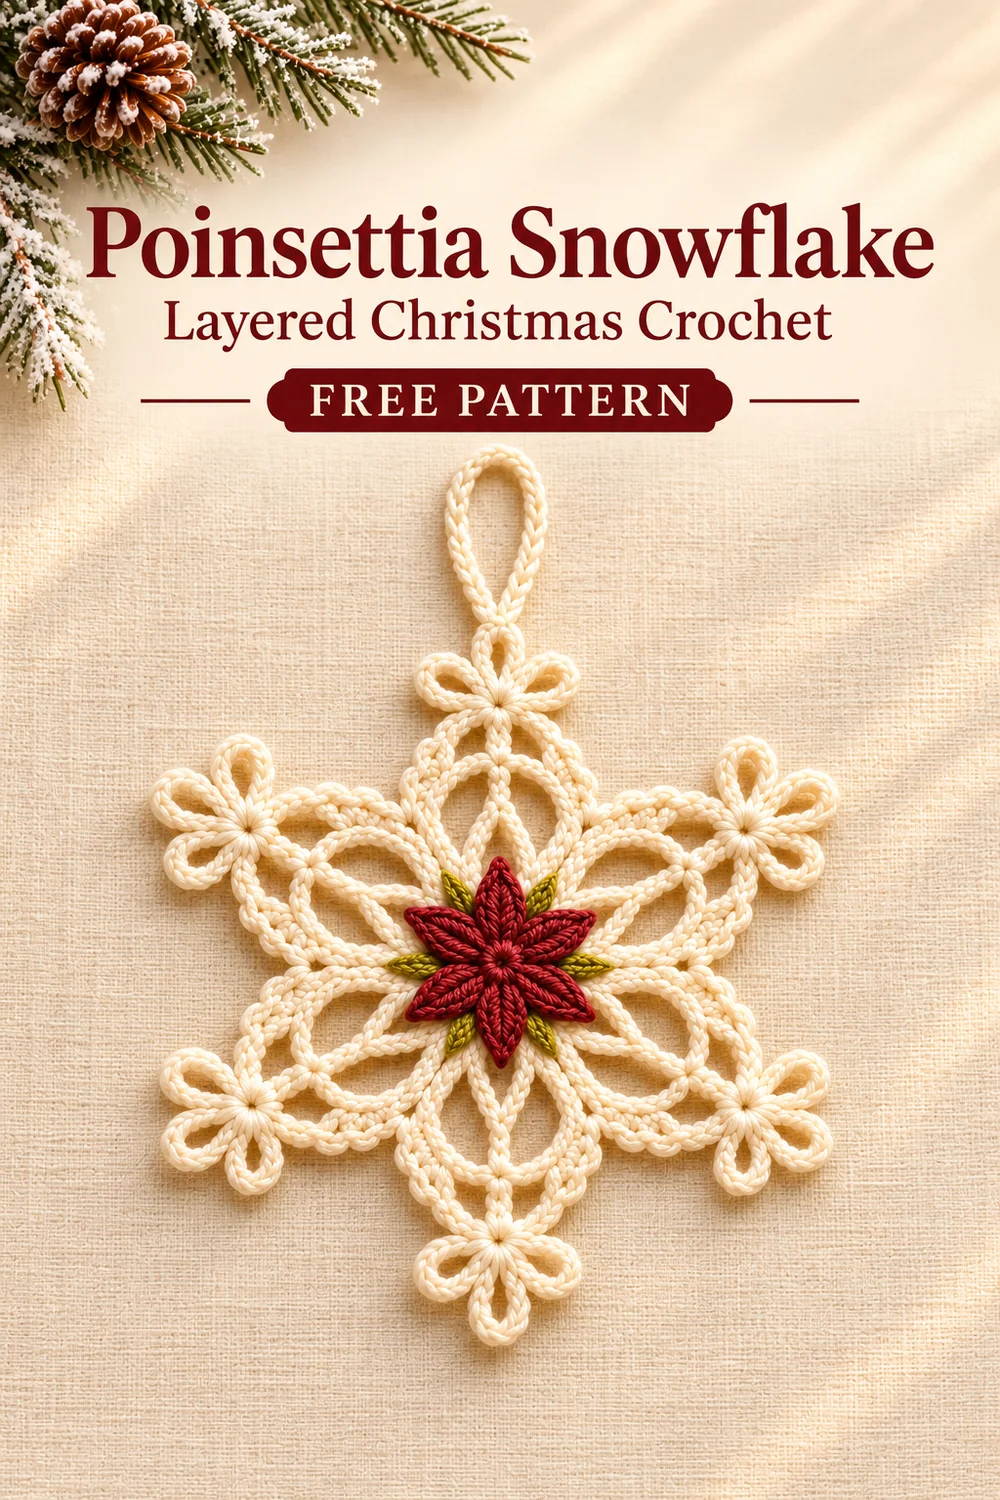
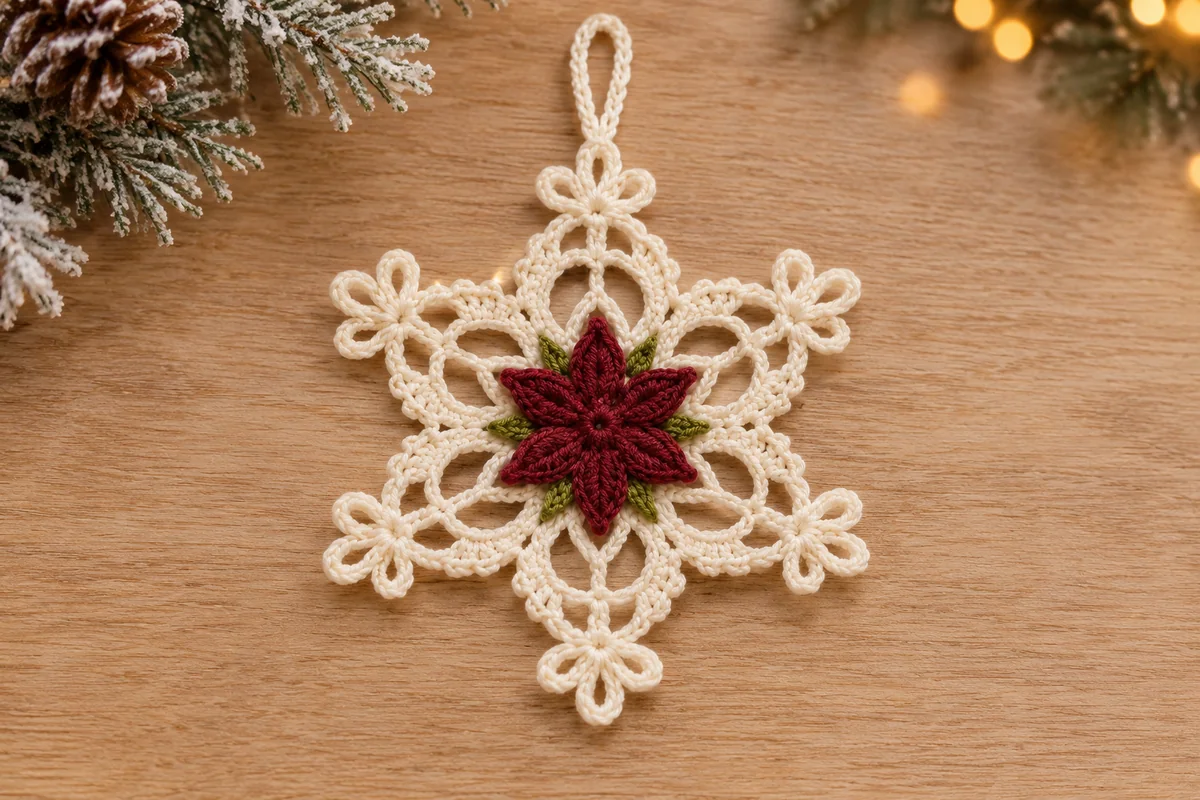
This poinsettia crochet snowflake combines a cream lace base with a small burgundy flower and olive leaf tips at its center. Six looped crowns finish the outer arms, while a separate cream chain makes the hanger. The colored center is sewn on after the crochet pieces are complete.
Make the snowflake, green backing, and red flower separately. This lets you shape the lace before adding the denser center. The green layer has six longer points; the smaller red layer sits above it, leaving the leaf tips visible between the petals.
The pattern is an original interpretation inspired by the reference photograph. Its written counts and charts describe this construction rather than the exact photographed recipe. The arithmetic has been checked, but the design has not been physically crocheted or tested. The styling photographs illustrate the intended layered appearance.
Poinsettia Crochet Snowflake Materials
- Smooth cream cotton yarn for the lace and hanger.
- Small amounts of burgundy red and olive green yarn of a similar weight, or slightly finer yarn for a lighter center.
- A hook suited to the yarn, a tapestry needle, scissors, and stitch markers.
- A blocking surface and rustproof pins.
- Optional fabric stiffener compatible with your yarn.
A smooth strand makes the open arches and small crown loops easier to identify. Avoid a much heavier red yarn: a thick center may cover the lace or pull the ornament forward when hanging. Finished dimensions, gauge, and yarn use depend on the materials and tension; no measured values are specified here.
US Terms and Special Stitches
- MR = magic ring
- ch = chain
- sl st = slip stitch
- sc = single crochet
- hdc = half double crochet
- dc = double crochet
- st(s) = stitch(es)
- sp(s) = space(s)
The Craft Yarn Council abbreviation guide explains the standard US names. Beginning chains do not count as working stitches anywhere in this pattern. Work all rounds with the same side facing you; do not turn. Join to the first working stitch, not to a beginning chain.
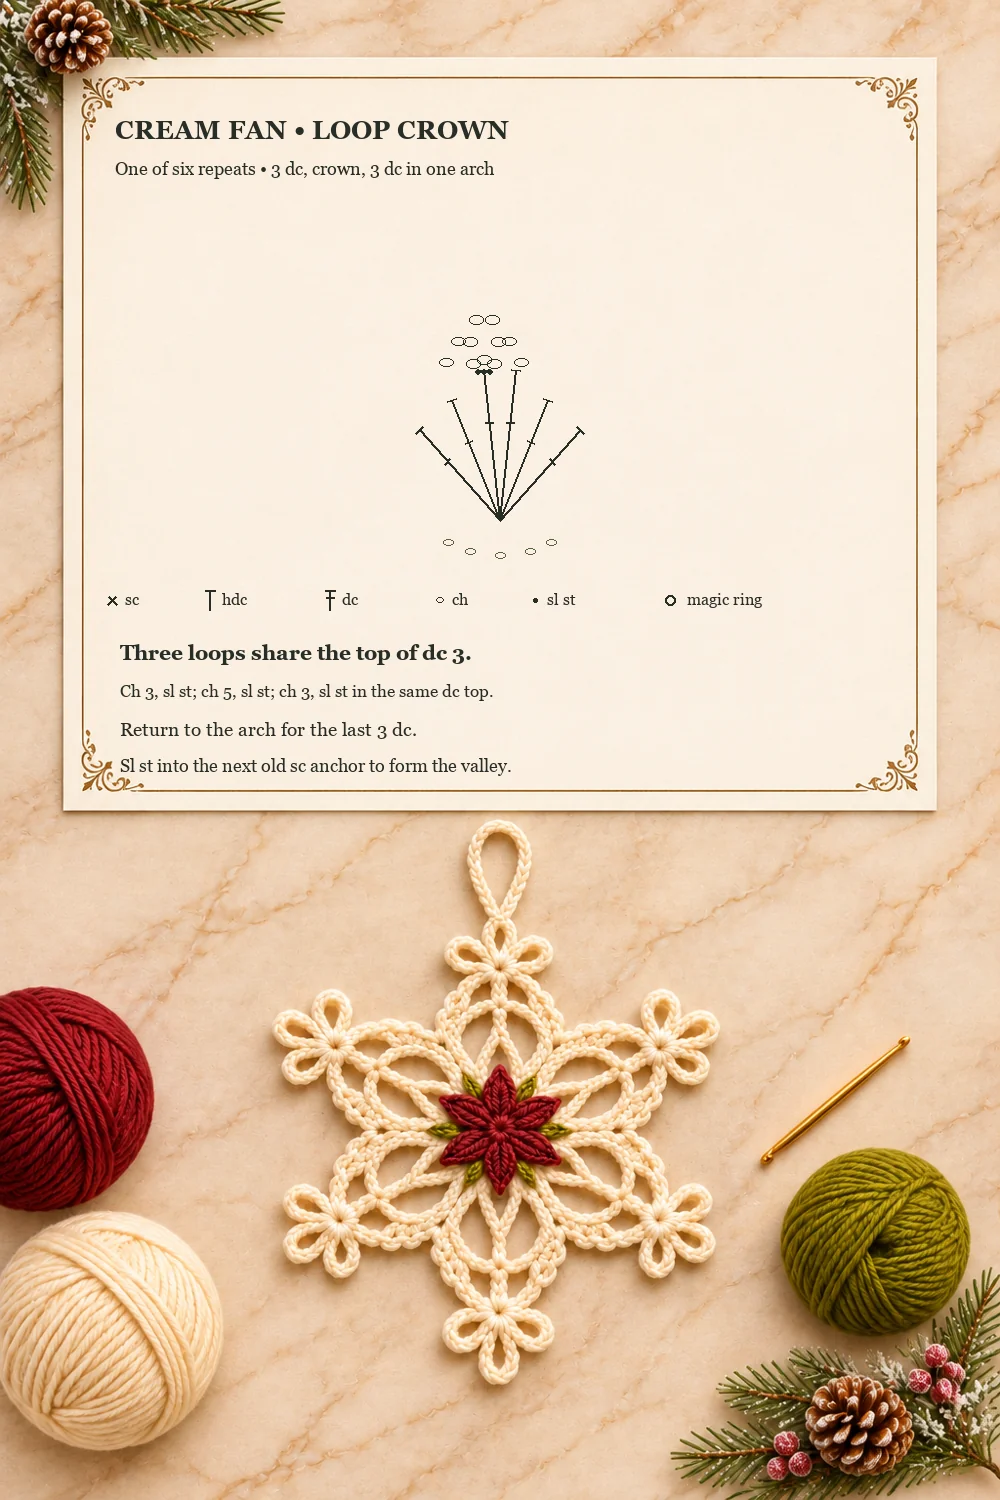
Three-loop crown
After the third dc of a cream fan, identify that dc’s top V. Ch 3 and sl st under both loops of that same V. Ch 5 and sl st into the same original dc top. Ch 3 and sl st there once more. The three loops share one anchor, with the longer loop in the middle. Continue the remaining three dc in the original arch below.
Do not close the second loop into the first loop. Each closure returns to the same third dc top. Keep the slip stitches relaxed so the hook can enter the anchor three times without splitting the yarn.
Poinsettia Crochet Snowflake: Cream Base
Round 1: twelve-stitch center
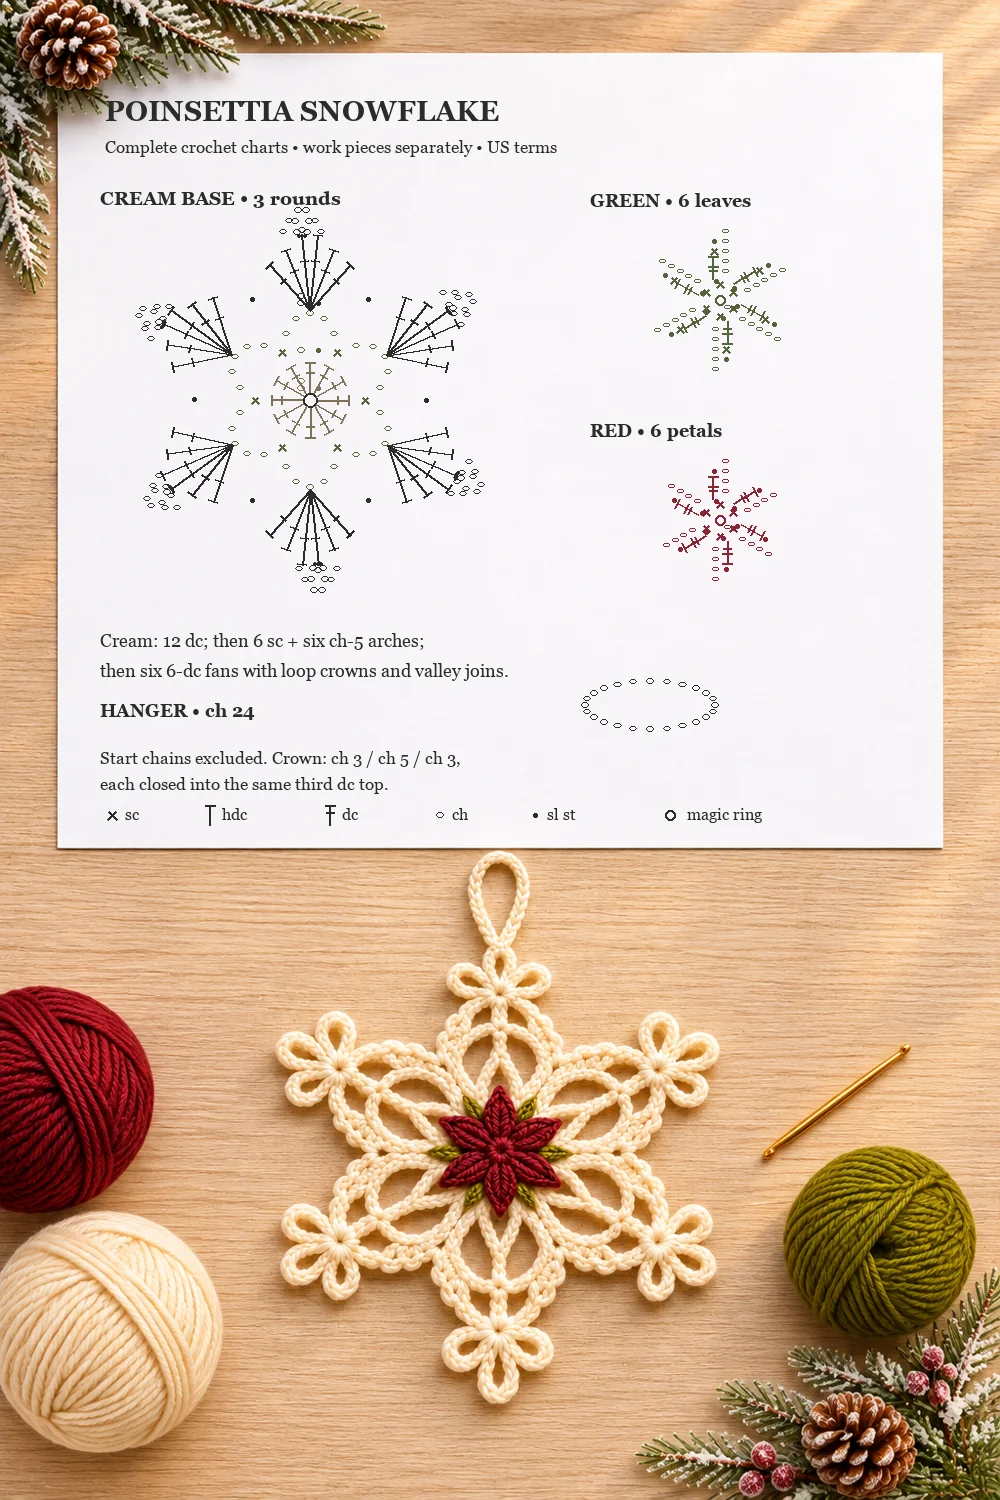
With cream, make an MR and ch 2 without counting it as a dc. Work 12 dc into the ring. Join to the first dc and fasten off. Close the ring gently. 12 dc.
Round 2: six arches
Attach cream with a sl st in any center dc. Ch 1, then sc in that same dc. Repeat [ch 5, skip the next dc, sc in the following dc] five times. Ch 5, skip the final dc, and join to the first sc. Fasten off. 6 sc and 6 ch-5 arches.
Every repeat uses two center stitches: one receives a sc and one is skipped. Six repeats use all twelve dc. Count the arches before making the outer fans; an extra sc in the final skipped stitch would change the foundation.
Round 3: six crowned fans
Attach cream with a sl st in any ch-5 arch and ch 2 without counting it. In that arch, work 3 dc, three-loop crown, 3 dc. Sl st into the next Round 2 sc anchor to form a valley.
Work [the same six-dc crowned fan in the next ch-5 arch, sl st in the next sc anchor] five times. After the sixth valley, join with a separate sl st to the first dc of the first fan. Fasten off. 36 dc, six crowns, and six valley slip stitches.
The crowns contain eighteen small loops altogether: twelve ch-3 loops and six ch-5 loops. They do not add dc stitches to the fans. The attachment slip stitch and final joining slip stitch are additional to the six valley anchors.
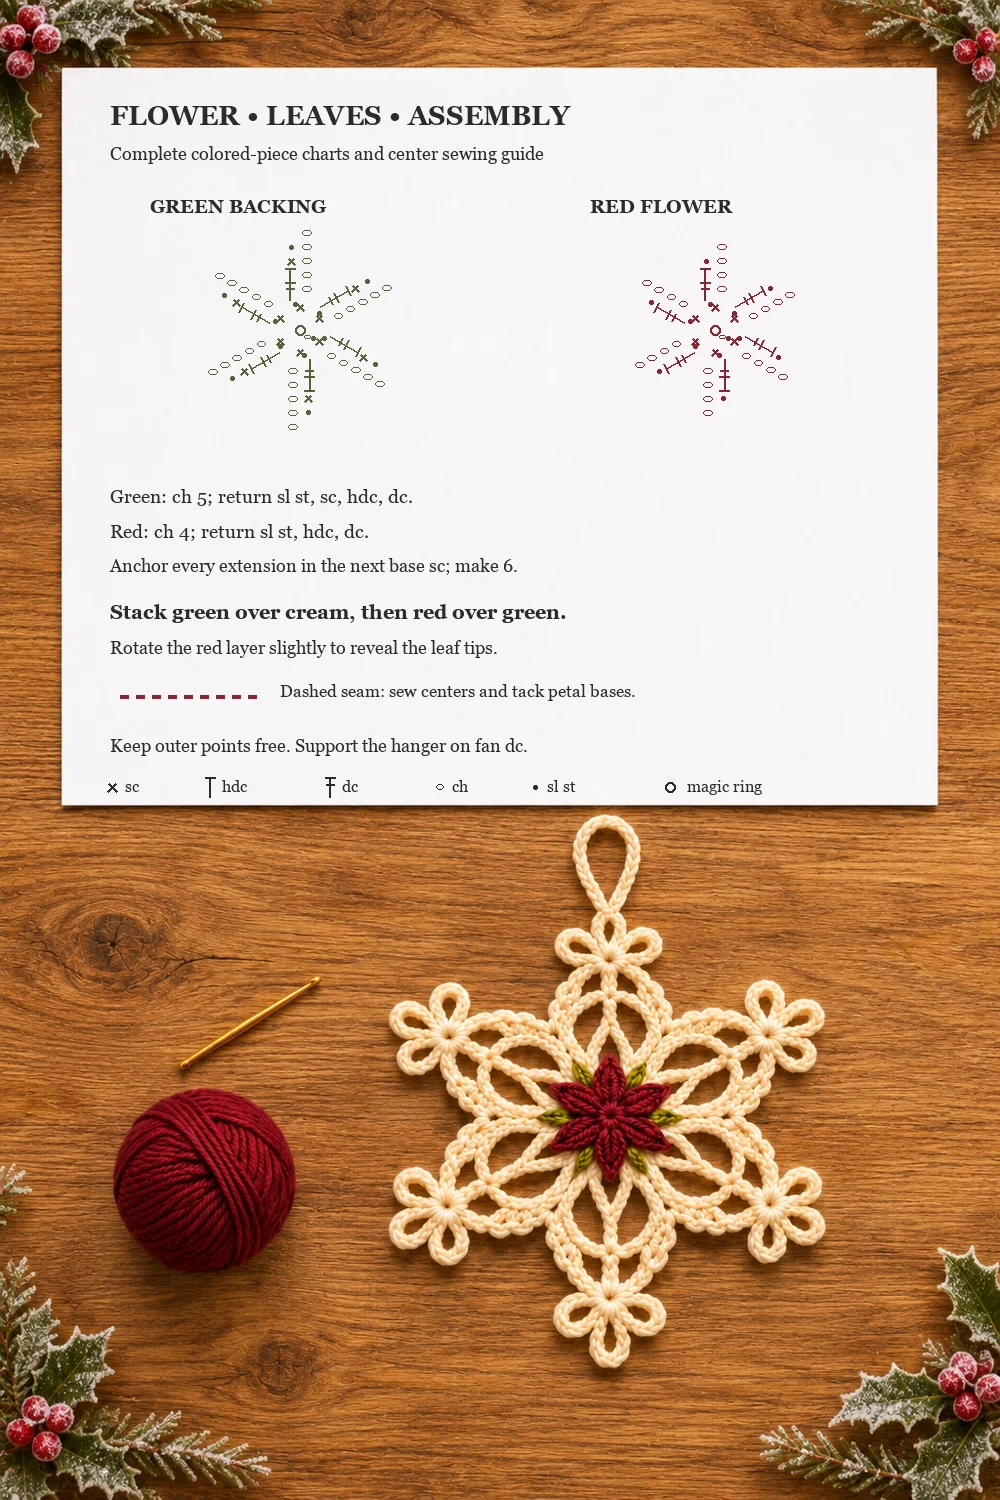
Green Leaf Backing
Round 1
With olive green, make an MR, ch 1, and work 6 sc into the ring. Join to the first sc. Close the ring. 6 sc.
Round 2: six pointed leaves
With the hook at the first sc, repeat this leaf six times: ch 5, sl st in the second chain from the hook, sc in the next chain, hdc in the next chain, dc in the last chain, then sl st in the next base sc.
The sixth leaf ends in the original first base sc. Fasten off with a sewing tail. Six leaves, each with five foundation chains and four return stitches. The return sequence is sl st, sc, hdc, dc; the following slip stitch anchors the leaf to the base.
Leave the skipped chain at each tip free. The return stitches go along the newly made chain, not into the center ring. Spread the six points flat before adding the red layer.
Red Flower Layer
Round 1
With burgundy, make an MR, ch 1, and work 6 sc into the ring. Join to the first sc and close the ring. 6 sc.
Round 2: six small petals
With the hook at the first sc, repeat this petal six times: ch 4, sl st in the second chain from the hook, hdc in the next chain, dc in the last chain, then sl st in the next base sc.
The sixth petal ends in the original first base sc. Fasten off with a sewing tail. Six petals, each with four foundation chains and three return stitches. Each petal has one return sl st, one hdc, and one dc; its anchoring slip stitch is separate.
The shorter foundation makes the red layer smaller than the green backing when worked in similar yarn and tension. The points are a stylized flower interpretation. Arrange them by hand before sewing rather than expecting the layers to settle into position on their own.
Hanger and Assembly
With cream, ch 24 and fasten off with a tail at each end. This remains an open chain strip until both ends are sewn to the ornament. Set it aside while arranging the center layers.
- Weave in the cream starting tails. If the yarn allows it, lightly dampen and block the lace base flat before sewing on the applications. Arrange six evenly spaced fans, then open each short-long-short crown gently.
- Place the green backing over the cream center. Keep its ring centered and spread its six leaf points evenly.
- Place the red flower above the green backing. Rotate it slightly so the olive points remain visible between the red petals. Pin the two layers without stretching them.
- With the green tail, take small stitches through the green center and solid cream center stitches. Add light tacks near the bases of the leaves if they twist. Leave the outer leaf tips free.
- Sew the red center through the green backing and cream base, then tack each petal near its base. Keep the petal tips free so the layered outline remains visible.
- Fold the cream chain into a loop. Sew its ends separately to the backs of the dc beside one crown. Support the loop with solid fan stitches rather than attaching it only to a tiny crown loop.
Lift the ornament by the hanger before hiding the sewing tails. If the flower leans forward, flatten the layers on the table and add another small center stitch. Tighten it only enough to secure the layers; a tight seam can draw the cream center into a cup.
Count Check
| Piece | Check before assembly |
|---|---|
| Cream base | 12 dc; then 6 sc and 6 arches; then 36 dc and 6 crowned fans |
| Green backing | 6 base sc; 6 ch-5 leaf extensions; one sl st, sc, hdc, dc return per leaf |
| Red flower | 6 base sc; 6 ch-4 petal extensions; one sl st, hdc, dc return per petal |
| Hanger | 24 chains, with both ends sewn to the back |
The cream crowns use 66 chains altogether: six times (3 + 5 + 3). The green extensions use 30 chains, and the red extensions use 24. Starting chains and joining slip stitches remain separate from the working-stitch counts.
Troubleshooting and Finishing
The lace has five or seven fans
Check the six sc anchors and six arches in cream Round 2. Each arch receives one fan and the next sc receives one valley slip stitch. Do not treat the old joining slip stitch as another anchor or add a fan beside the beginning ch 2.
The flower covers too much cream lace
Check that the red layer uses ch 4 for every petal, while the green layer uses ch 5 for every leaf. If the correct counts still produce a heavy center with your yarn, remake the colored layers in a finer strand before sewing them down.
A leaf or petal twists
Confirm that the return stitches run down the new chain and finish in the next base sc. Returning to the same base sc repeatedly would crowd the points. Keep the return slip stitch loose and flatten each point before beginning the next one.
The crown loops are tangled
Separate the loops gently after each fan. All three close into the third dc top, with the ch-5 loop between the two ch-3 loops. Avoid pulling a sewing tail or hanging cord through these small loops.
Optional stiffening and storage
Use a product suitable for the fiber and follow its instructions, testing it on a scrap first. Check that burgundy yarn is colorfast before dampening the assembled layers. Store the ornament flat and dry, with the hanger tucked behind it and the crowns separated.
More Christmas Crochet
The red and cream floral snowflake builds its colors into the lace rounds. Try the blue trefoil snowflake for a lighter two-round motif, or pair this layered ornament with a granny square Christmas tree.
Poinsettia Crochet Snowflake Charts and Pins
Three Pin designs are followed by three tabletop chart scenes. The complete sheet draws all crochet pieces separately, including the hanger. The second sheet enlarges a cream fan and its crown. The third explains the colored layers and assembly seams. Dashed sewing guides are finishing instructions, not additional crochet stitches.