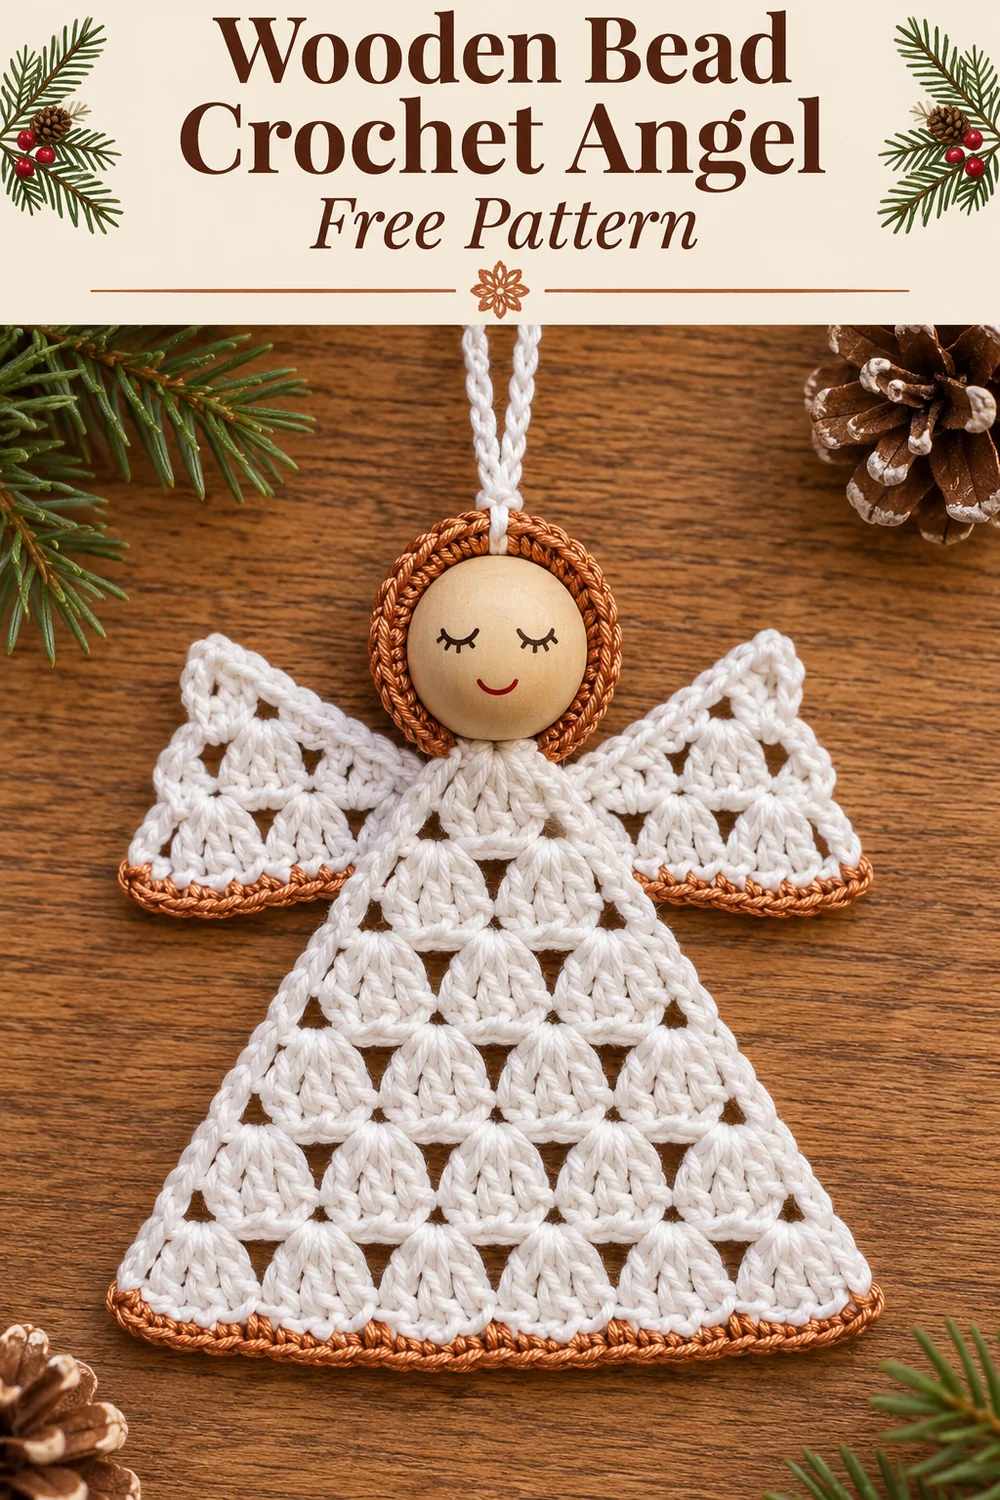
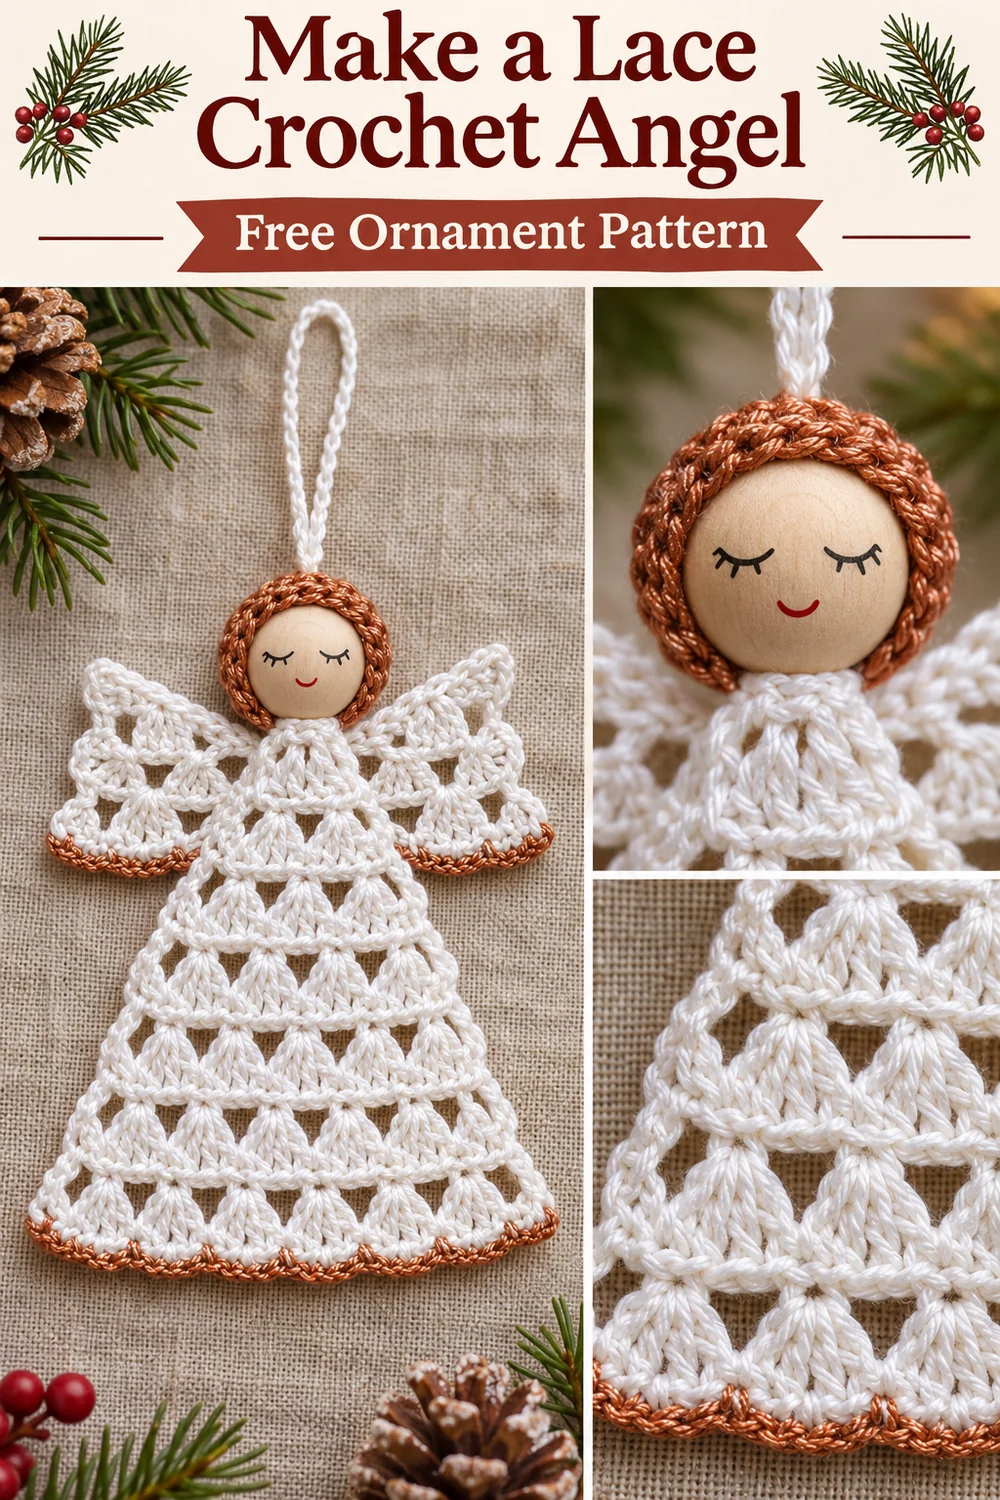
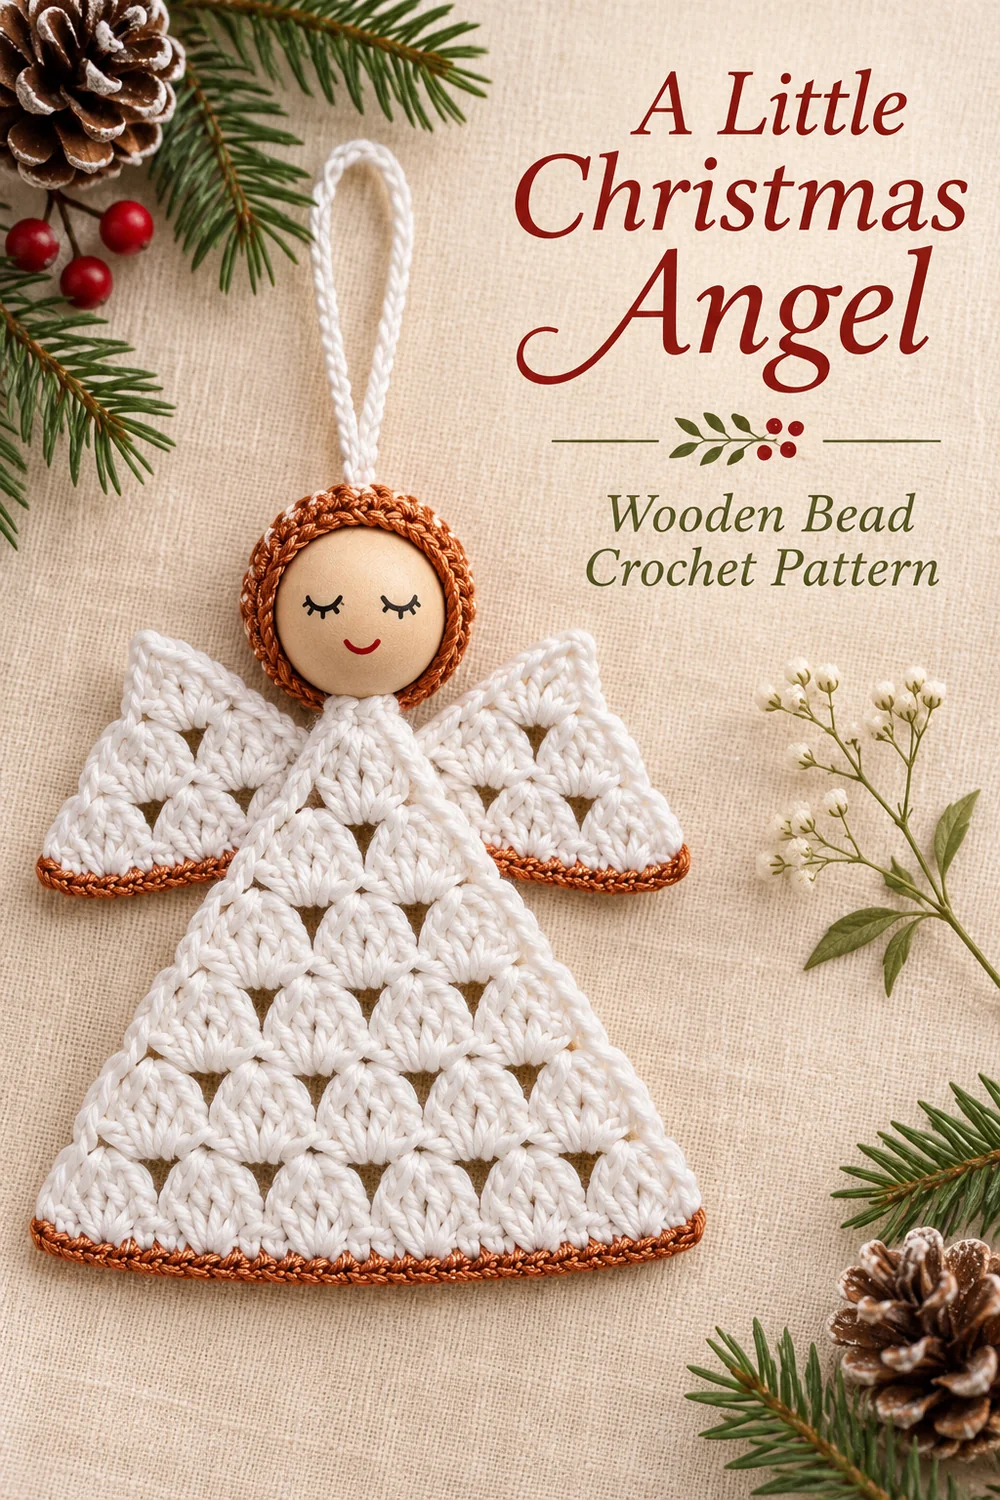
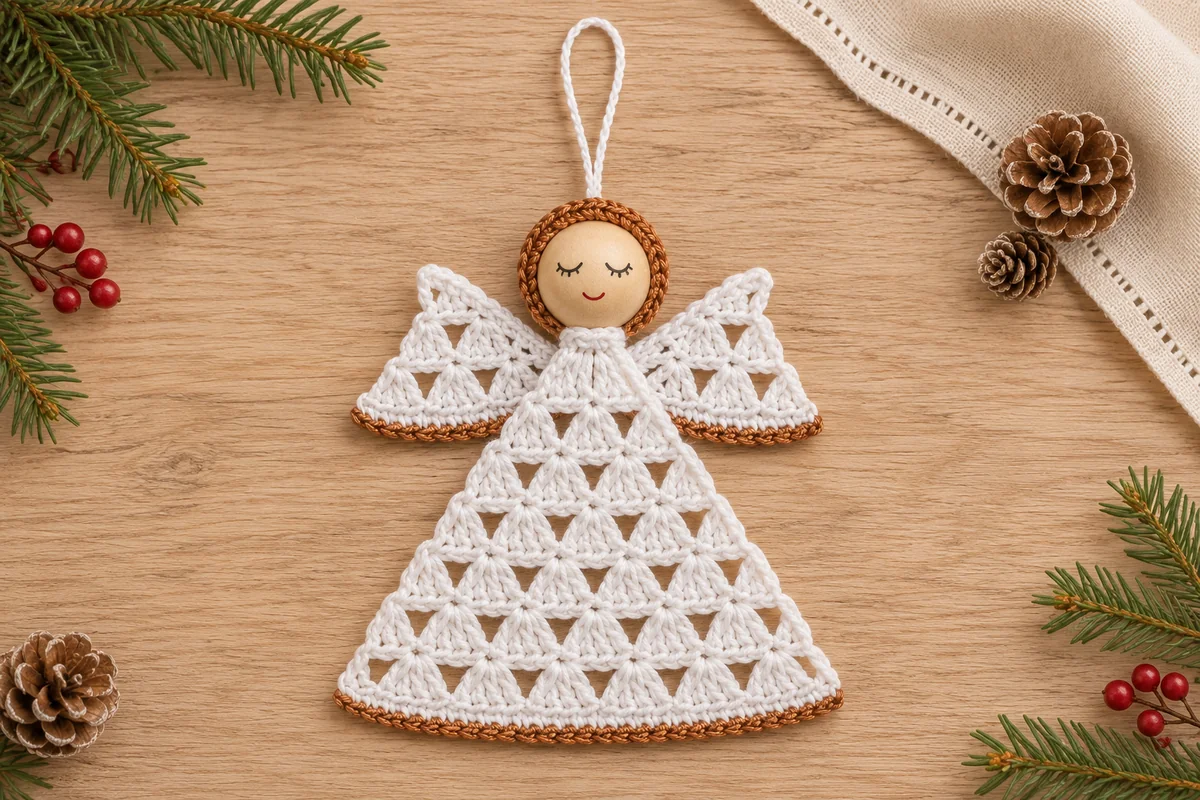
This wooden bead crochet angel pairs a simple painted face with white granny clusters and a narrow copper edge. The dress and two wings are flat triangles, so the ornament has open spaces without needing a stuffed body. A separate chain passes through the bead and anchors to the crochet at the neck.
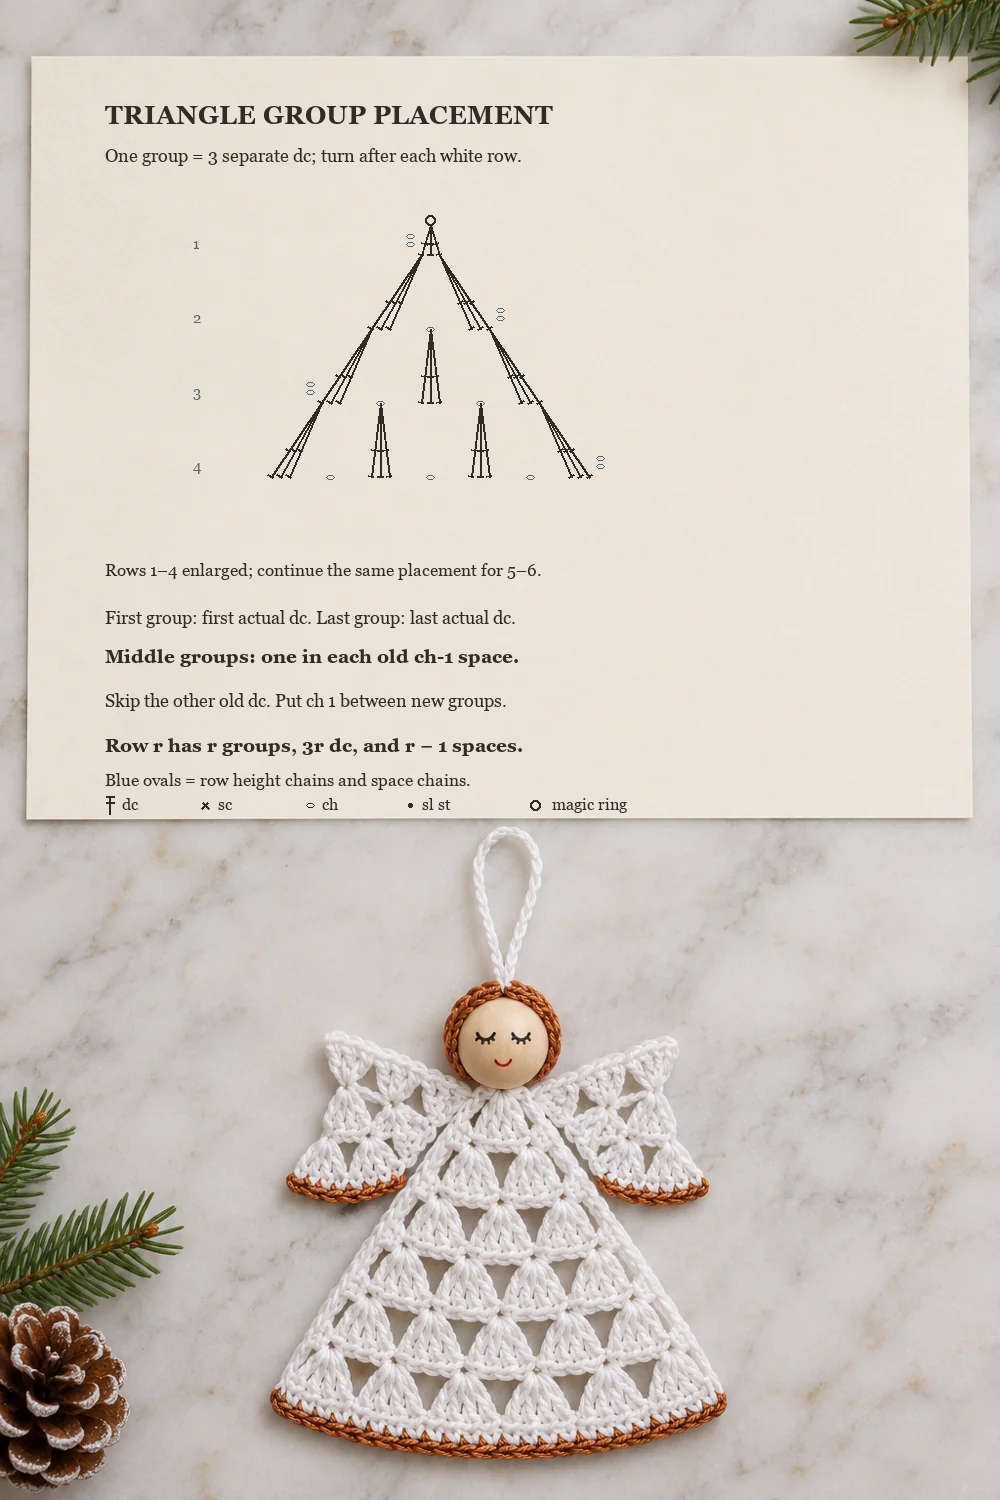
Make one six-row triangle for the dress and two three-row triangles for the wings. All three start with the same small group of double crochet stitches. Each new row gains one group, making the larger panel easy to count before you add the copper hem.
This is an original interpretation inspired by the reference, rather than the exact recipe for the photographed angel. The written stitch arithmetic and accompanying charts have been checked; the design has not been physically crocheted or tested. The photographs illustrate the intended materials, silhouette, and styling.
Wooden Bead Crochet Angel Materials
- Smooth white cotton yarn for the dress, wings, bead frame, and hanger. Fine cotton gives a light lace effect; choose the yarn weight you prefer.
- Copper-colored yarn of a similar thickness for the three lower edges and bead frame. A soft metallic blend is an option if it bends easily around the hook.
- A crochet hook suited to the yarn, a tapestry needle, scissors, and removable stitch markers.
- One lightweight wooden bead with a hole large enough to accept the two hanger tails. Choose a bead that sits comfortably above the narrow dress tip.
- Optional craft paint or fine permanent markers for a simple face, plus rustproof pins and a blocking surface.
Check the bead hole with your yarn and needle before making the hanger. The head is supported by the cord through its hole; the decorative crochet frame is not intended to carry the weight by itself. This is a hanging decoration with a small bead, not a toy.
No measured gauge, finished size, or yarn quantity is specified. Yarn, hook, and bead choices change the proportions. Use the row counts below and compare the components against one another before sewing.
US Crochet Abbreviations
- MR = magic ring
- ch = chain
- sl st = slip stitch
- sc = single crochet
- dc = double crochet
- st(s) = stitch(es)
- ch-1 sp = chain-one space
- group = three separate dc worked into one indicated stitch or space; do not close them together as a cluster stitch
Use the Craft Yarn Council US abbreviation guide if you need a reminder of the terms. The ch 2 at the start of every triangle row is a height chain and is excluded from the dc count. Mark the first and last actual dc so those chains do not become extra edge stitches.
Wooden Bead Crochet Angel Pattern
White dress triangle: six turned rows
Row 1. Make an MR. Ch 2 and work 3 dc into the ring. Pull the ring closed, leaving the row open. 1 group, 3 dc, no ch-1 spaces. The ring end is the narrow neck tip.
Row 2. Turn and ch 2. Work 3 dc into the first actual dc, ch 1, skip the middle dc, and work 3 dc into the last actual dc. 2 groups, 6 dc, 1 ch-1 space.
Row 3. Turn and ch 2. Work 3 dc into the first dc, ch 1, 3 dc into the old ch-1 space, ch 1, and 3 dc into the last dc. Leave the other old dc unworked. 3 groups, 9 dc, 2 ch-1 spaces.
Row 4. Turn and ch 2. Work 3 dc into the first dc. Repeat [ch 1, 3 dc into the next old ch-1 space] twice. Ch 1 and work 3 dc into the last dc. 4 groups, 12 dc, 3 ch-1 spaces.
Row 5. Turn and ch 2. Work 3 dc into the first dc. Repeat [ch 1, 3 dc into the next old ch-1 space] 3 times. Ch 1 and work 3 dc into the last dc. 5 groups, 15 dc, 4 ch-1 spaces.
Row 6. Turn and ch 2. Work 3 dc into the first dc. Repeat [ch 1, 3 dc into the next old ch-1 space] 4 times. Ch 1 and work 3 dc into the last dc. 6 groups, 18 dc, 5 ch-1 spaces. Fasten off white.
After Row 2, each row uses the first dc, every old ch-1 space, and the last dc as its insertion points. Do not work a group into each old dc. The six dress rows contain 63 dc and 15 ch-1 spaces altogether, with 12 separate height chains.
Copper dress hem
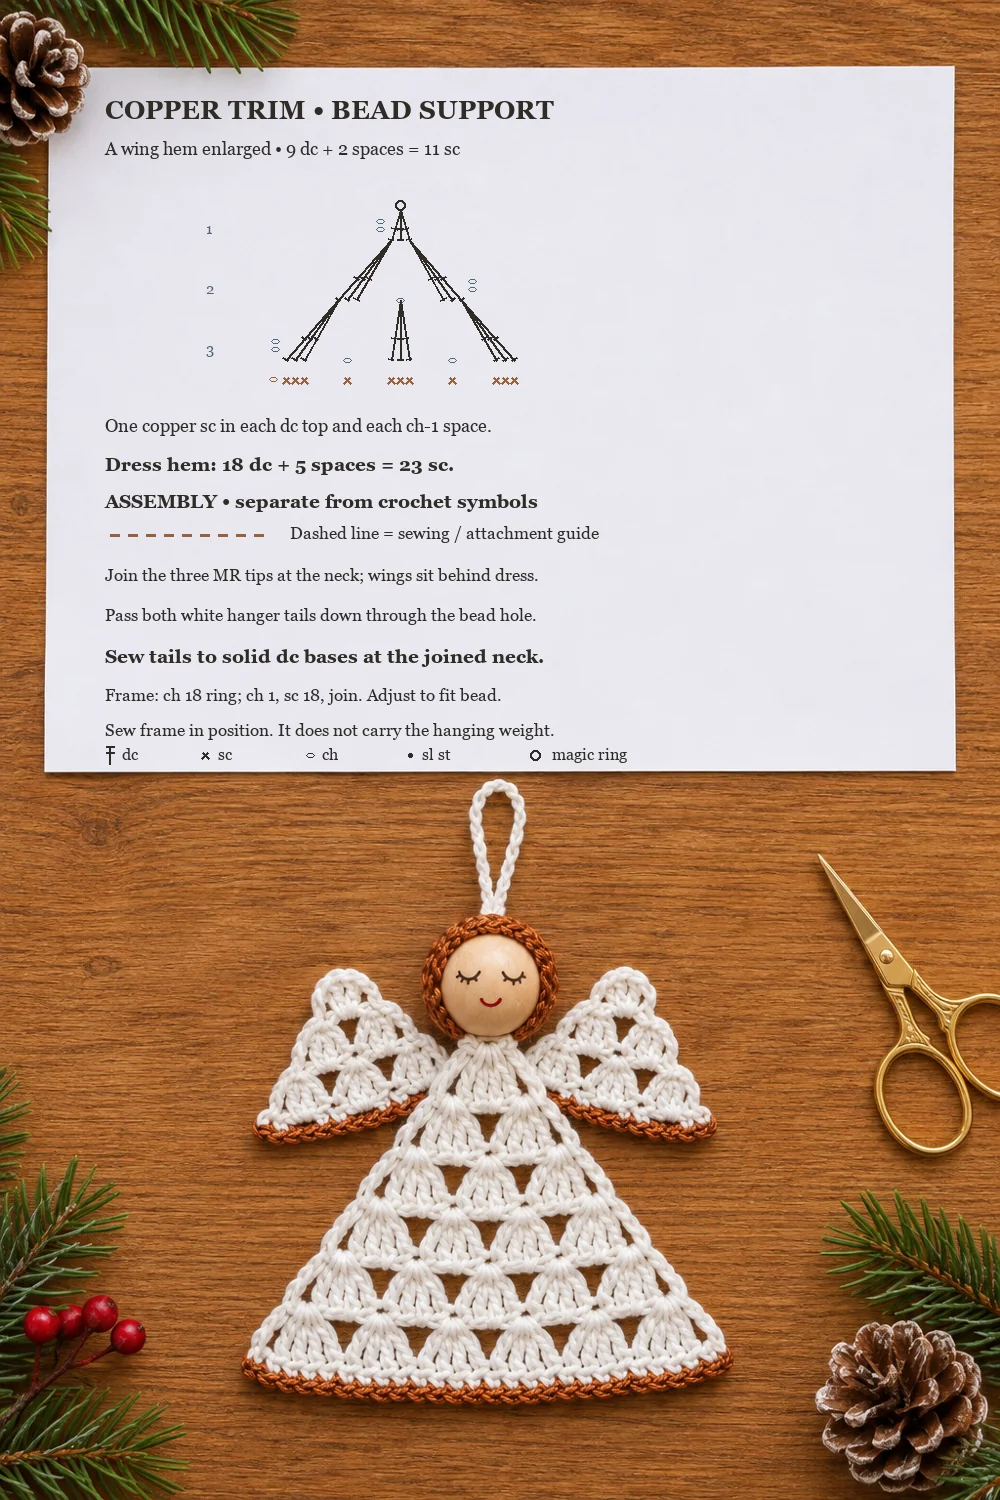
With the dress facing you, attach copper to the first dc at one end of Row 6. Ch 1, sc in that same dc, and sc in the next 2 dc. Repeat [sc in the next ch-1 space, sc in each of the next 3 dc] 5 times. 23 sc: 18 over dc tops and 5 in spaces. Fasten off. The starting ch 1 is excluded. Leave the two sloping sides untrimmed.
Keep these sc relaxed so the white groups can spread. Put only one sc into each ch-1 space. Adding several stitches in each opening makes the copper edge longer than the row underneath.
Two white wing triangles
For each wing, work Rows 1–3 of the dress instructions, then fasten off white. Each wing has 3, 6, and 9 dc across its three rows, with 0, 1, and 2 ch-1 spaces. That is 18 dc, 3 space chains, and 6 height chains per wing.
Attach copper to the first dc of the third row. Ch 1, sc in each of the first 3 dc, then repeat [sc in the next ch-1 space, sc in each of the next 3 dc] twice. 11 sc per wing. Fasten off. Keep a white tail at the ring end for sewing. The ring tip goes at the shoulder; the copper edge faces outward.
Copper frame for the wooden bead
With copper, ch 18. Without twisting the chain, sl st into its first chain to make a ring. Ch 1 and work 1 sc into each of the 18 foundation chains. Sl st into the first actual sc. 18 sc. Fasten off with a sewing tail. Both joining slip stitches and the starting ch 1 are separate from the sc count.
Place this ring around the face of the bead. It should frame the face without hiding it. The complete chart shows this 18-chain version. If it does not fit your bead, remake the foundation with a different chain count and keep one sc per chain; record the revised count for your own version. Do not stretch a tight frame over the bead or rely on it to grip the head.
White hanging chain
Ch 30 and fasten off, leaving a useful tail at both ends. Fold the chain into a loop. Thread both tails down through the bead hole so the crocheted loop stays above the head and the tails emerge at the neck. Use a needle that passes through freely, or thread the tails separately.
Assemble the Wooden Bead Crochet Angel
- Block the three white triangles flat according to the yarn label, protecting the metallic yarn from heat. Let them dry before adding the wooden bead.
- Lay the dress with its MR neck tip upward and copper hem downward. Place one wing behind each shoulder, with its MR tip meeting the dress MR. Angle the broad copper edges outward, keeping the two wings at matching heights.
- Use the white sewing tails to join the three ring tips securely. Add a small tack through the back of each wing and a nearby dress stitch so a wing cannot rotate freely. Leave the outer edges loose.
- Set the bead directly above the neck. Sew both hanger tails through several solid dc bases at the joined neck, return through the seam, and secure the ends. The chain through the bead should carry the head and crochet together.
- Set the copper frame around the face. Sew its lower edge to the neck seam and use a small copper thread tack behind the bead to keep the ring centered. Avoid covering the bead hole or pinching the hanger.
- If you want a face, add small closed eyes and a tiny smile with a marker suitable for wood. Let it dry fully before allowing the frame to touch it. Check the ornament over a soft surface, then weave in all ends.
Keep the neck seam compact. Sewing across large chain spaces pulls the lace toward the head; using the solid dc bases gives the joined tips a firmer anchor. If the head tips forward, shorten the exposed hanger tails between bead and seam rather than tightening the decorative frame.
Troubleshooting the Lace Angel
The triangle gains too many groups
Count the spaces from the previous row before you begin. New groups go into the two outer dc and each space between them. For example, Row 5 starts from the three spaces in Row 4 and adds an edge group at either end, making five groups. The turning ch 2 is never an additional insertion point.
The hem curls or pulls inward
Check for one copper sc over every white dc and one in every space: 23 for the dress or 11 for each wing. If the count is correct but the edge still pulls, undo the trim and remake it more loosely. Different yarn fibers can behave differently even when their stated weight is similar.
The wings look uneven
Compare their row counts and copper edges before sewing. Both need three white rows and eleven copper sc. Pin the ring tips together behind the neck, then adjust the angle of each whole triangle. A wing sewn farther down the dress will appear smaller even with identical counts.
The bead slips away from the neck
The hanger tails must pass through the bead and attach to the crocheted neck. A frame sewn only around the face does not replace that support. Check the cord path and the neck attachments before trimming any ends.
More Christmas Crochet Ornaments
For a version with a crocheted head, see the flat crochet angel ornament. The crochet angel with halo uses a hollow dress and separate cape. A poinsettia crochet snowflake adds a different lace shape to the same display.
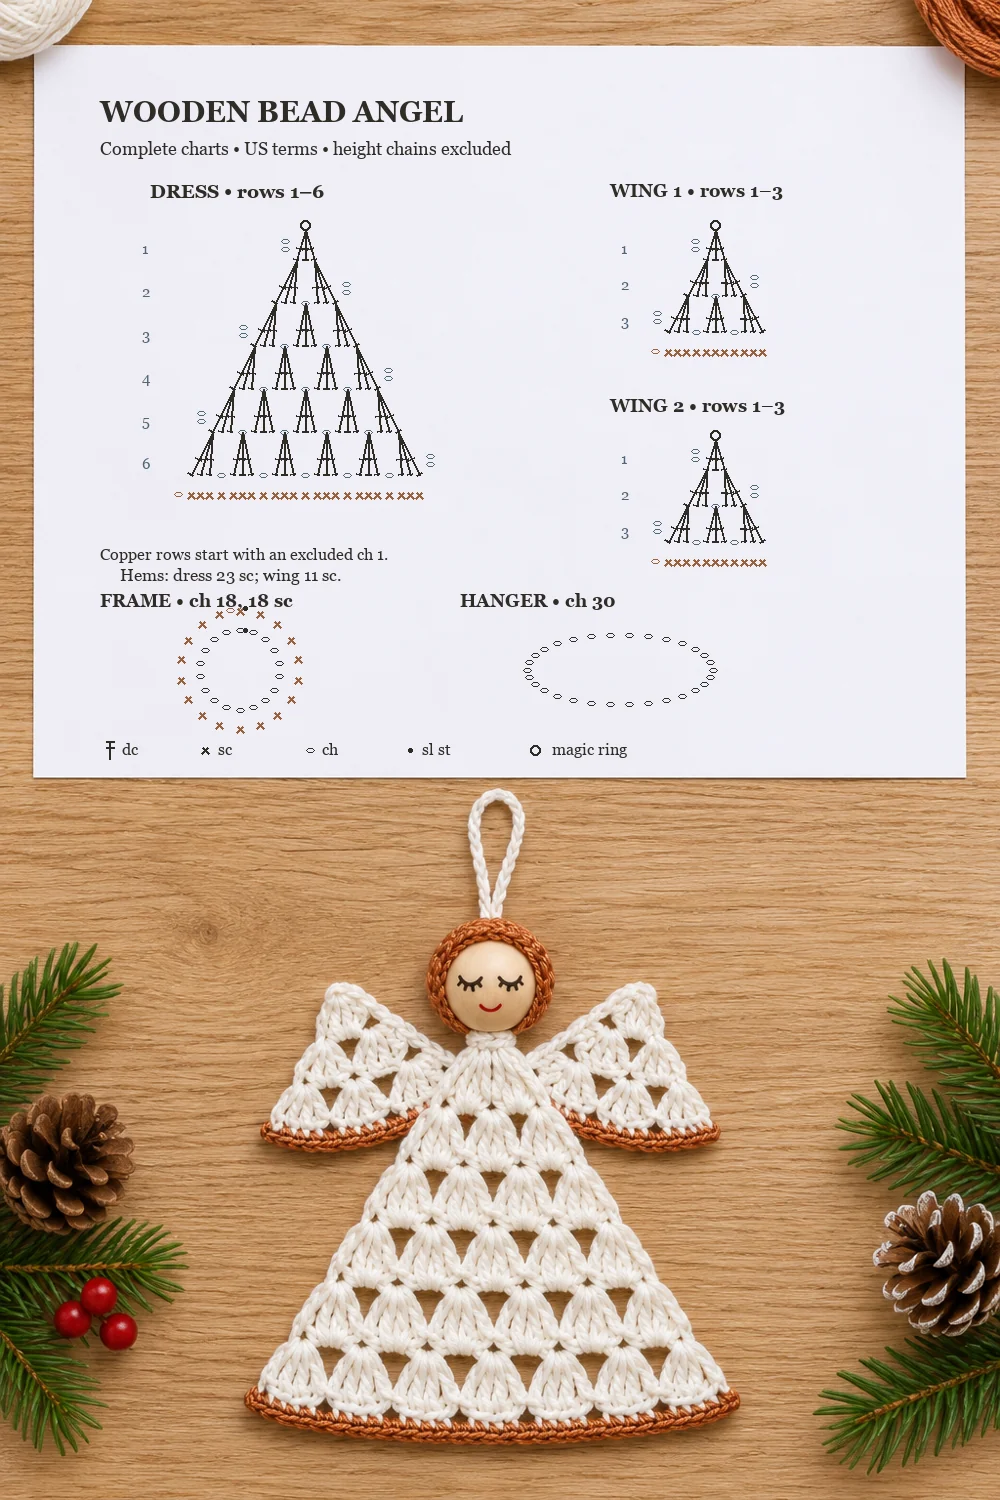
Pins and Wooden Bead Crochet Angel Charts
The three paper charts show the complete component stitches, the triangle row placement, and the trim and assembly details. Dashed sewing guides are labeled separately from crochet symbols. Follow the written pattern for orientation and the bead-fitting adjustment; the complete chart uses the standard 18-chain frame.