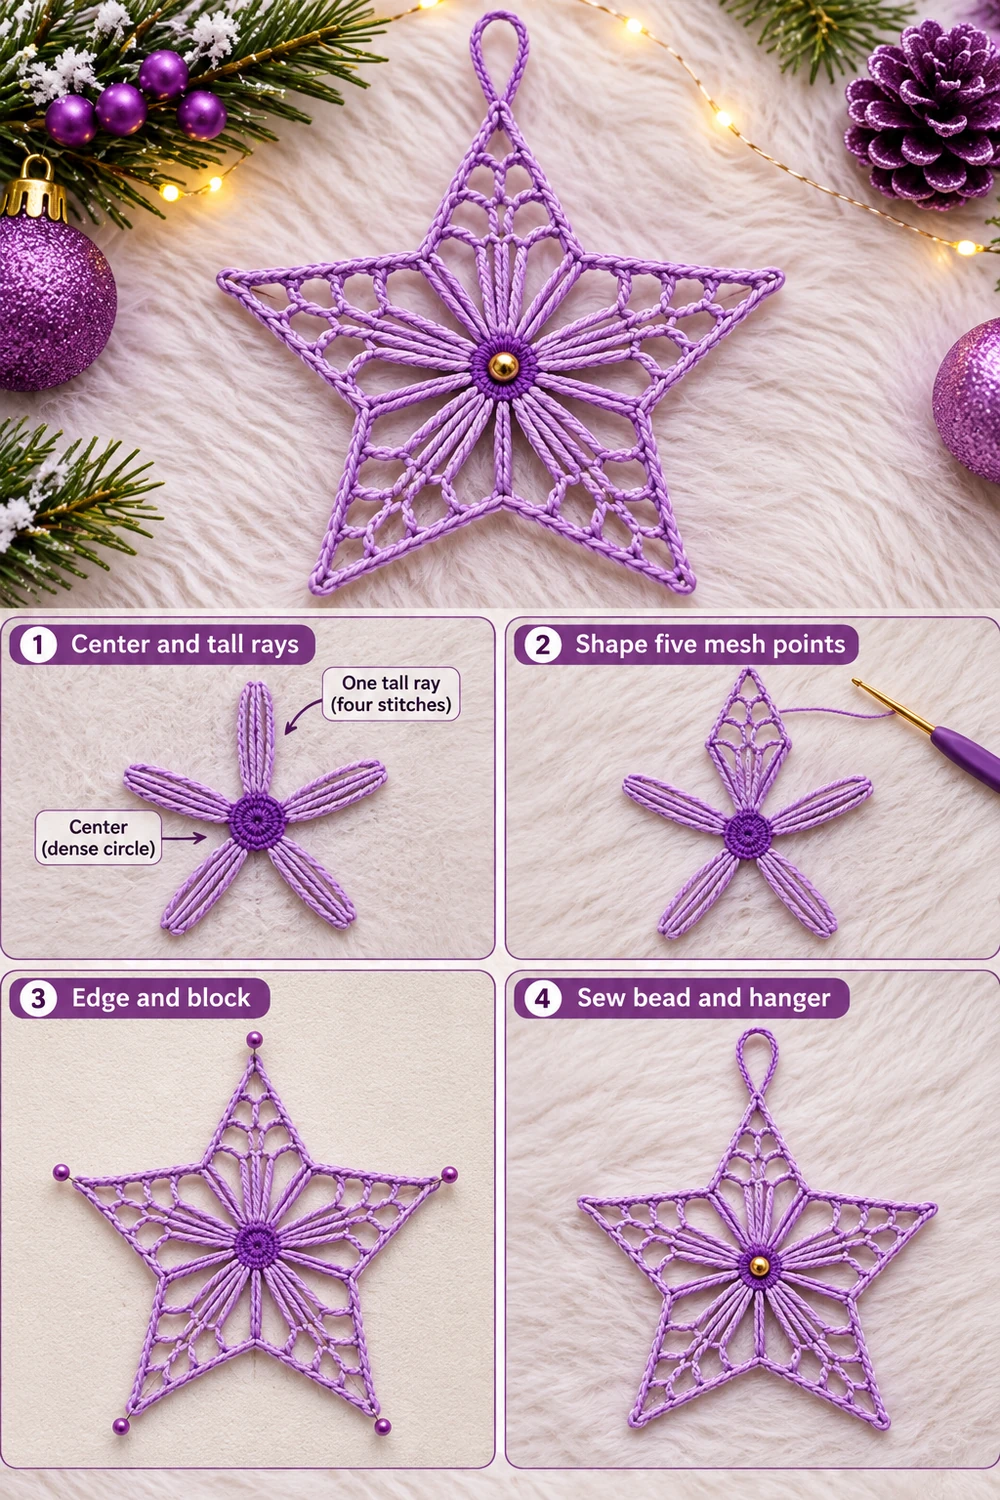
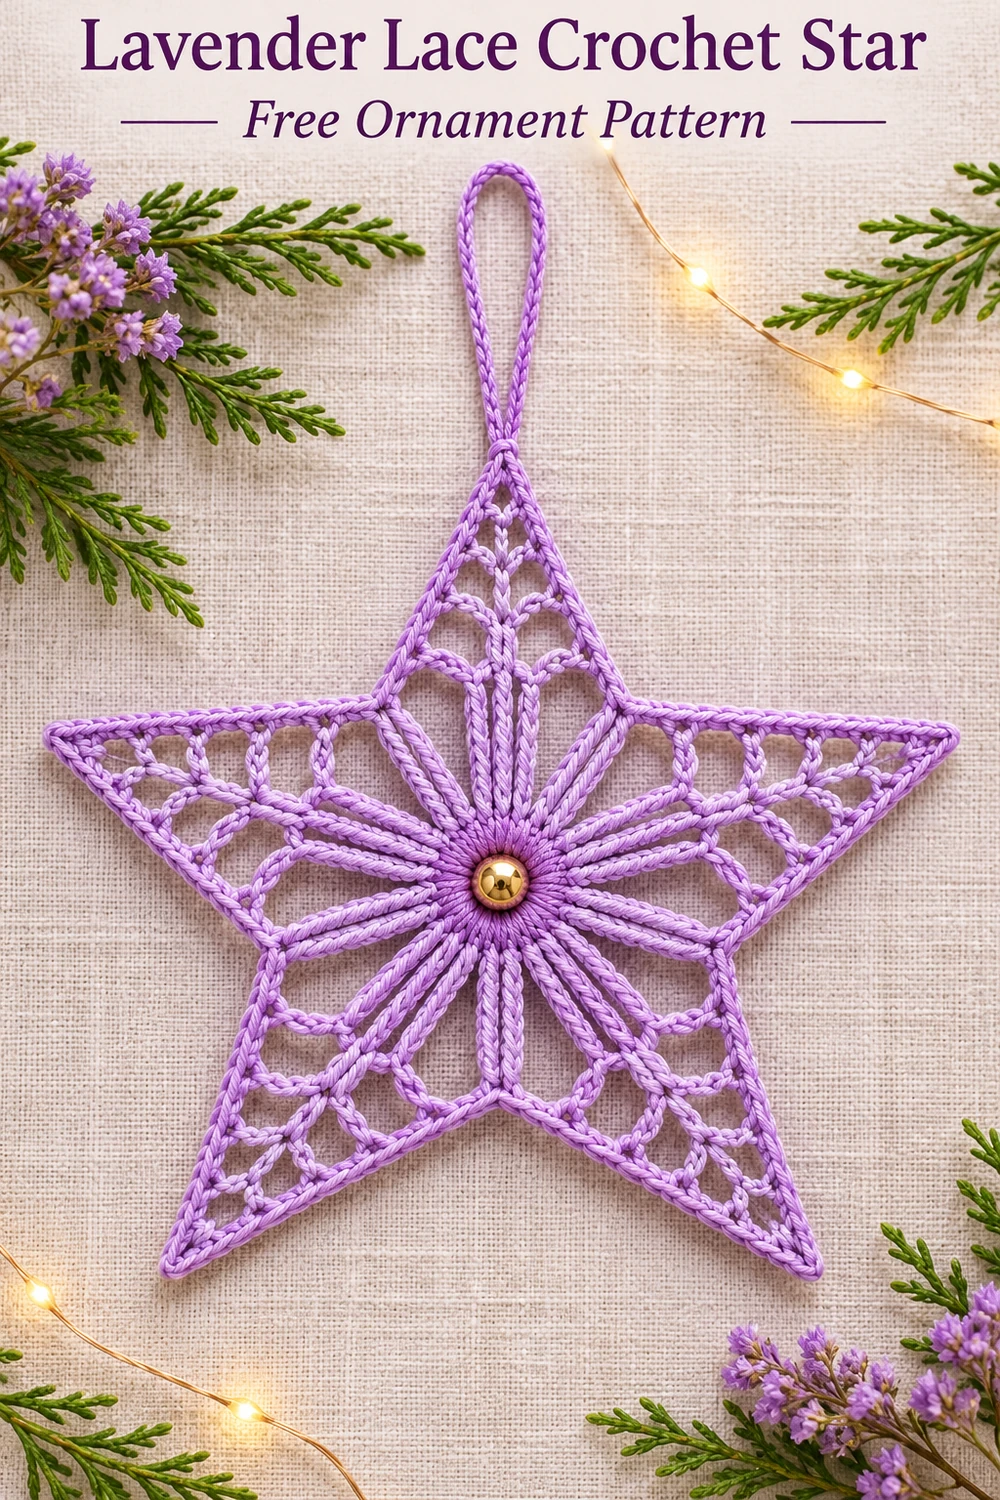
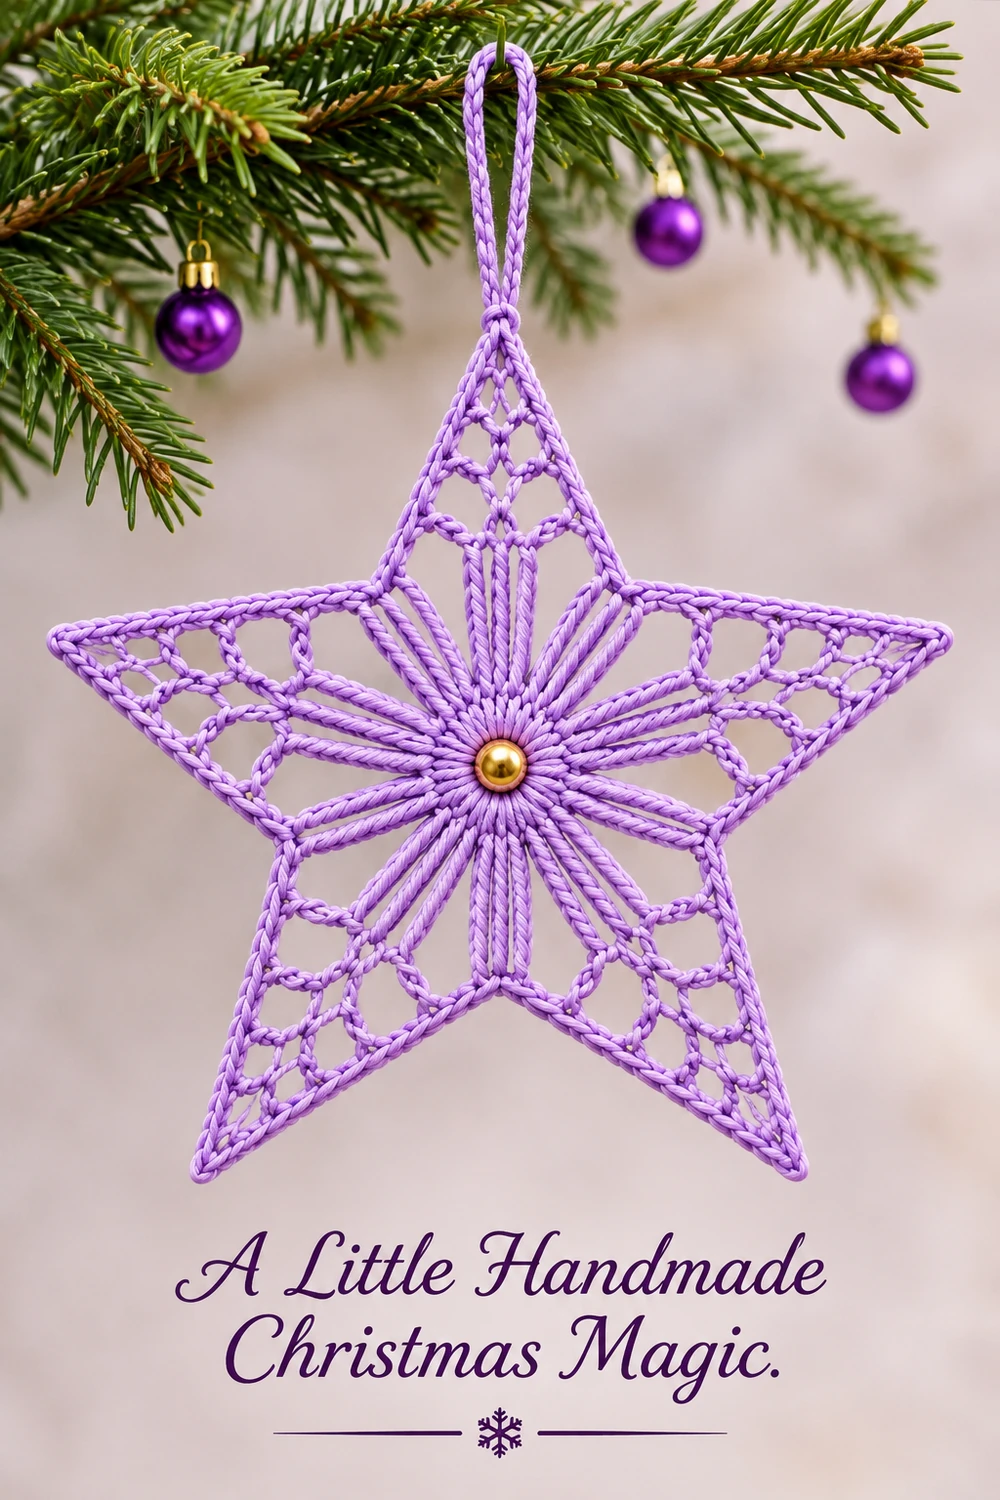
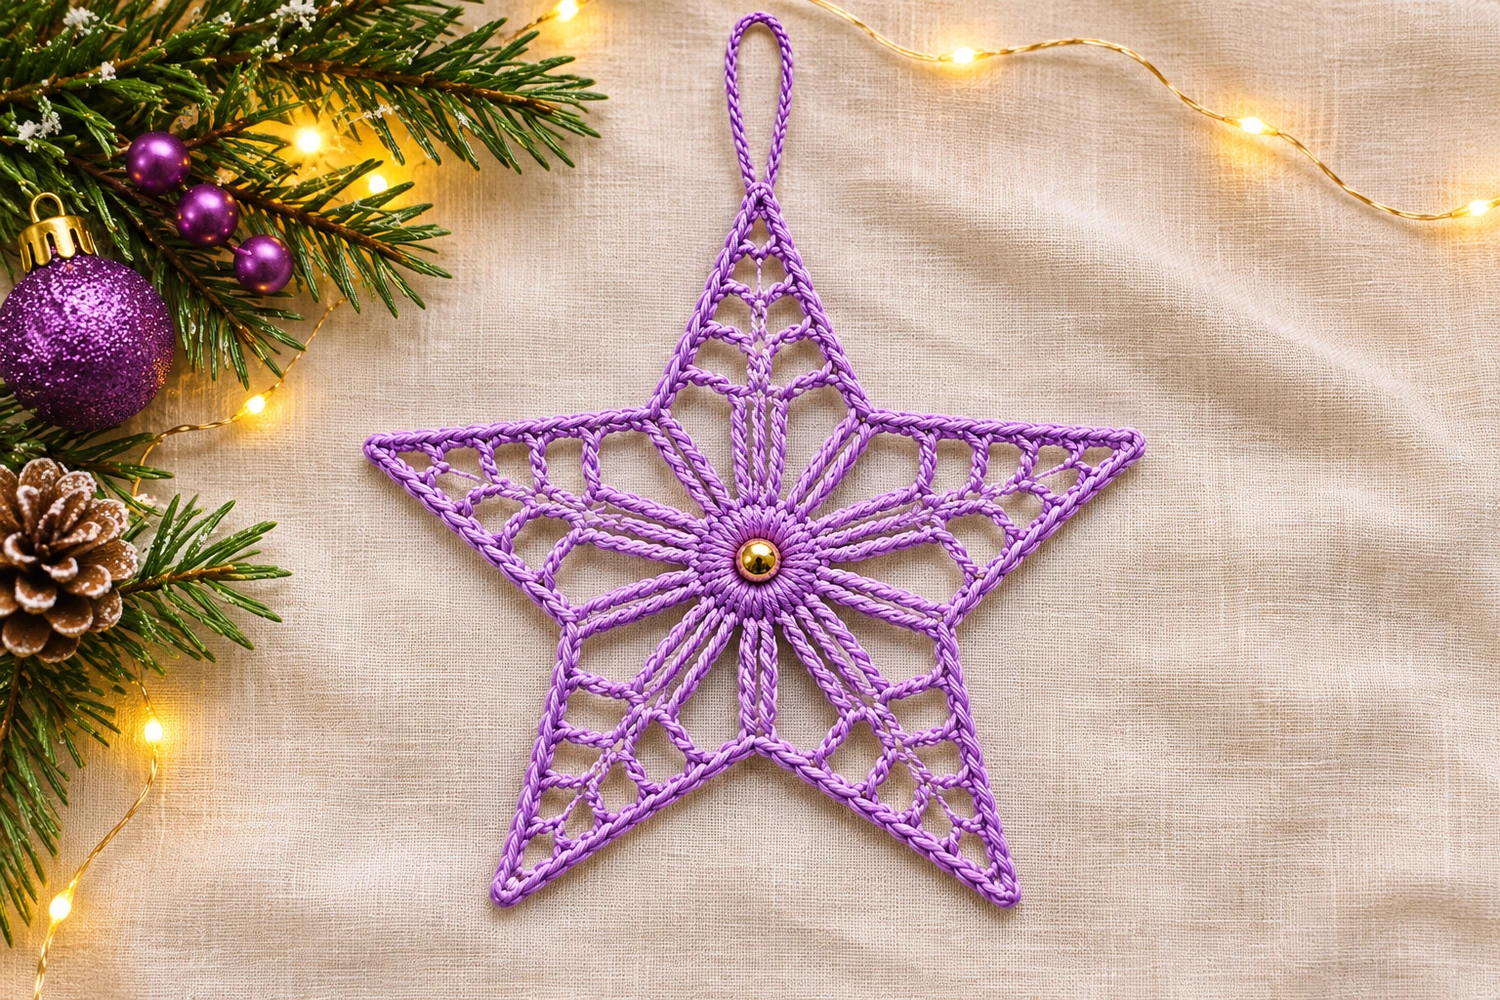
This lavender lace crochet star pairs five pointed mesh sections with long stitches radiating from a compact center. A single gold bead adds a small highlight, and a matching chain loop lets the ornament hang from a Christmas branch. The open spaces keep the silhouette light and allow the background to show through.
The pattern begins with a ring of single crochet, followed by five groups of tall stitches. Each group supports a separate mesh point. A continuous edging connects the outline, and the bead and hanger are sewn on after blocking. This original interpretation is inspired by the reference image; it is not the photographer’s pattern. The stitch arithmetic has been checked, but the pattern has not been physically tested. The styled images illustrate the intended appearance.
Lavender Lace Crochet Star Materials
- Smooth lavender cotton yarn in sport or DK weight. Approximately 25–40 yd (23–37 m) is a planning allowance, not measured consumption.
- A 2.75–3.25 mm hook as a starting range. Adjust for your yarn so the tall stitches are defined and the chains remain flexible.
- One small gold bead approximately 6–8 mm wide, with a hole suitable for sewing thread.
- Matching lavender sewing thread, a needle that passes through the bead, and a blunt yarn needle for the yarn ends.
- Scissors, five removable stitch markers, a blocking mat, and rustproof pins.
- Optional fabric stiffener compatible with the yarn and its care instructions.
Difficulty: Intermediate. Estimated finished size: approximately 5–6 in (13–15 cm) across after blocking, excluding the hanger. Size and yarn use will vary with the materials and tension. Make one ornament before planning a matching set.
Understanding the Five-point Construction
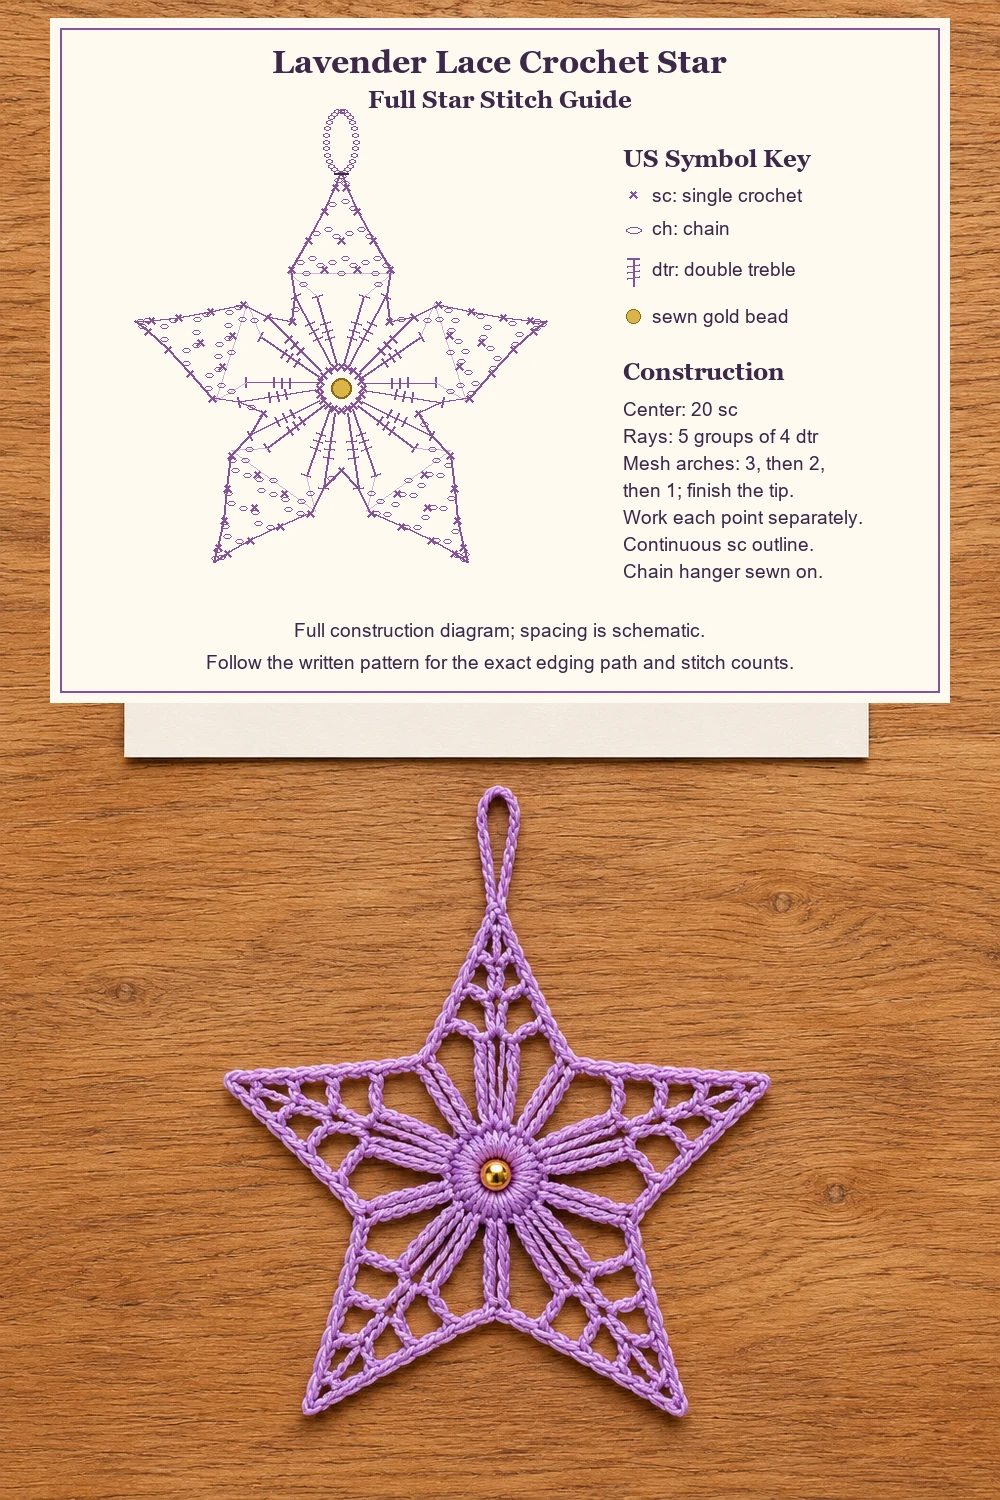
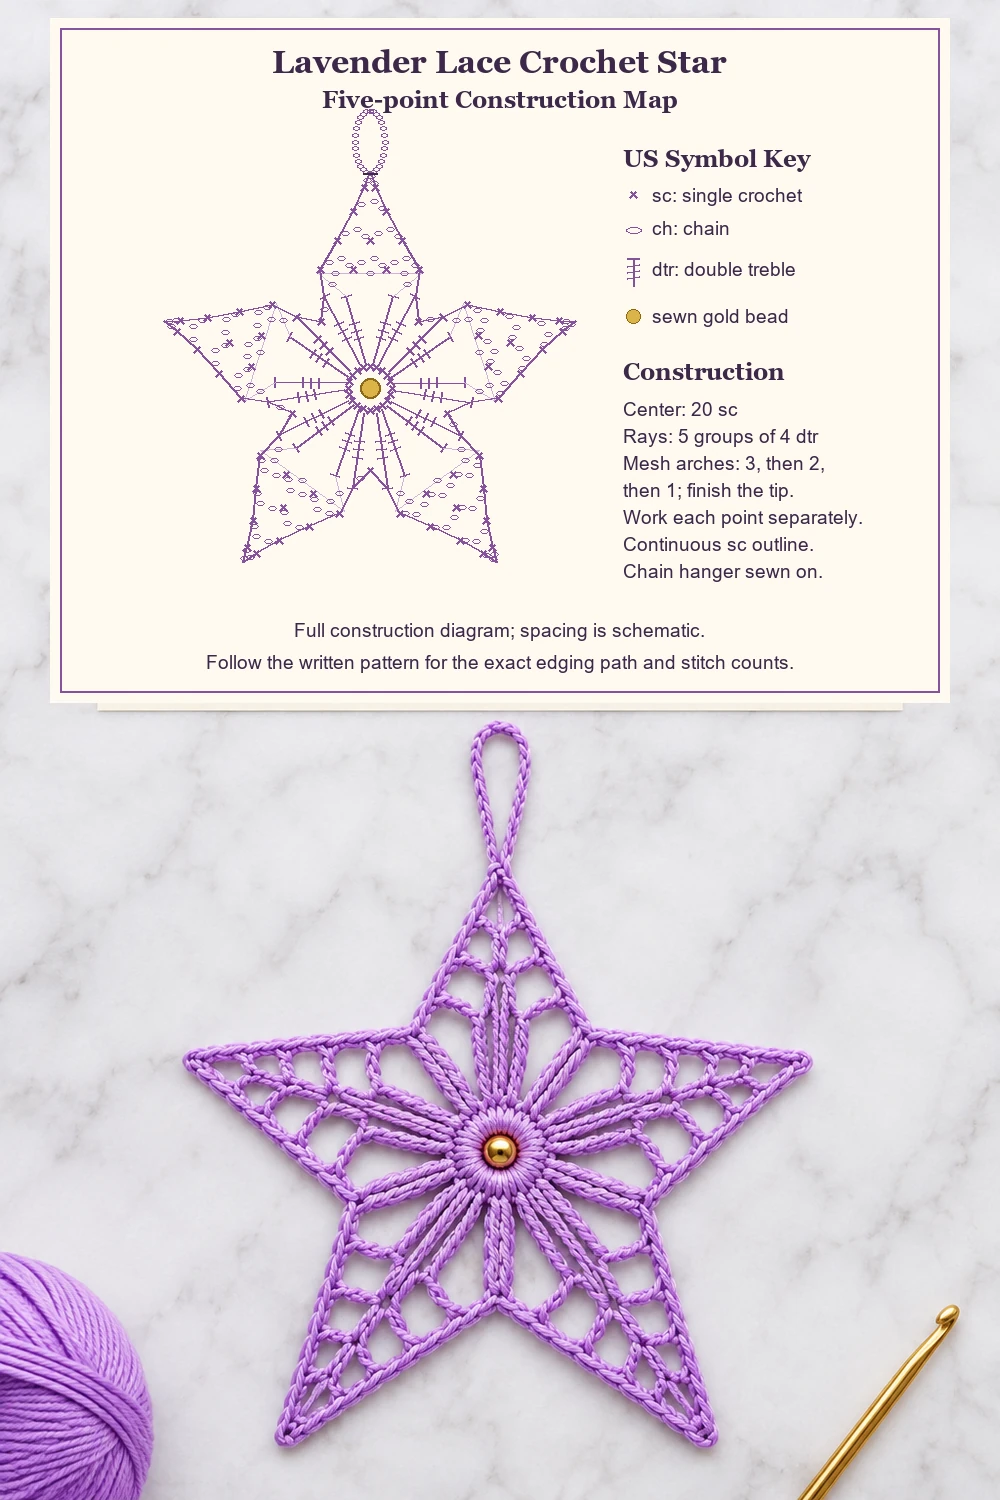
Each point has two parts. Four double treble stitches form its long inner rays: two on one side and two on the other. A ch-5 space between the middle rays becomes the foundation for a small triangle of chain mesh. A ch-1 space separates neighboring ray groups and marks the inward valley between points.
The mesh points are worked individually in four short rows. Each one starts with three arches, then narrows to two arches, then one. A final row creates the little tip opening. Fastening off between points gives each triangle a clear starting location and prevents a traveling chain from crossing an open space.
The final border follows the outside of the assembled shape. It does not run down the sides of the tall stitch posts toward the center. Keep the five valley markers in place until the border is complete; they distinguish the inner dips from the outer tips.
US Crochet Abbreviations
- MR = magic ring.
- ch = chain.
- sl st = slip stitch.
- sc = single crochet.
- dtr = double treble crochet.
- st(s) = stitch(es); sp(s) = space(s).
- RS = right side; WS = wrong side.
All starting chains in this pattern are height chains and do not count as stitches. Joining slip stitches also stay outside the counts. Work the center and rays in joined rounds without turning. Turn after each row when shaping the individual mesh points.
How to make a double treble crochet
Yarn over three times. Insert the hook into the indicated stitch, yarn over, and pull up a loop. There are five loops on the hook. Yarn over and pull through two loops four times. One loop remains. Complete every dtr separately; these stitches are not a cluster and do not share a closed top.
The US double treble is taller than a US treble, which starts with two yarn overs. Work the first attempt slowly so the extra yarn overs do not slide off the hook. Keep the final pull-through relaxed; tight stitch tops can draw the ray groups inward.
Center Ring and Long Rays
Round 1: the center
With lavender, make a MR. Ch 1 and work 20 sc into the ring. Pull the tail until the center is compact, leaving only a tiny opening if necessary for the bead to rest over it. Join with a sl st to the first sc. 20 sc. The bead will be sewn across the front of this ring rather than threaded onto the working yarn.
Round 2: five ray groups
Ch 4 for height; this does not count. Beginning in the same sc as the join, repeat [dtr in each of the next 2 sc, ch 5, dtr in each of the next 2 sc, ch 1] five times. Join to the first actual dtr. Fasten off. 20 dtr, five ch-5 point spaces, and five ch-1 valley spaces.
Each repeat uses four sc from Round 1, so the five repeats use all 20 sc exactly once. Mark every ch-1 valley. The ch-5 space always lies between the second and third dtr of a point; do not confuse it with the short chain between groups.
Spread the five groups gently with your fingers. They may resemble five open fans at this stage. Do not force them into sharp points yet: the mesh rows supply the outer portion of each triangle.
Shape the Five Mesh Points
Make the following four-row section in each ch-5 space from Round 2. Start each point with the RS of the center facing you. Work under the whole chain space, not into individual chain links. Use a new length of lavender for each point and leave tails long enough to weave in securely.
- Point Row 1: Join yarn with a sl st in the ch-5 space. Ch 1. Work (sc, ch 3, sc, ch 3, sc, ch 3, sc) into that same space. Slide the four sc along the chain space so they sit in order. 4 sc and three ch-3 arches.
- Point Row 2: Ch 1, turn. Sc in the first ch-3 arch, ch 3, sc in the next ch-3 arch, ch 3, sc in the last ch-3 arch. Leave the sc stitches of the previous row unworked. 3 sc and two ch-3 arches.
- Point Row 3: Ch 1, turn. Sc in the first ch-3 arch, ch 3, sc in the second ch-3 arch. 2 sc and one ch-3 arch.
- Point Row 4: Ch 1, turn. Work (sc, ch 3, sc) into the only ch-3 arch. 2 sc and one ch-3 tip space. Fasten off.
Repeat these rows in the remaining four ch-5 spaces. You should have five matching mesh triangles. All five have the same three-to-two-to-one arch progression; the points are not made by increasing the number of arches as you move outward.
Weave the point tails into the backs of the nearest sc stitches and along the dense bases of the ray groups. Avoid carrying a loose tail across an open mesh window. Leave the valley markers in place.
Continuous Single Crochet Outline
Lay the star RS up with one mesh point facing upward. On each point, identify the two outermost sc of Point Row 1, the first and last sc of Row 2, and the two sc of Row 3. These are the three edge stitches on each slope. The middle sc of Row 2 is inside the mesh and is not part of the outside border.
Join lavender with a sl st in any marked ch-1 valley. Ch 1. Follow the outside boundary toward the next point, using the following sequence five times:
- Work 1 sc in the marked ch-1 valley.
- Work 1 sc in the top of each of the next 2 dtr on the rising side of the ray group.
- Work 1 sc in the outer edge sc of Point Rows 1, 2, and 3 on that slope, in order. This gives 3 sc up the mesh edge.
- Work 1 sc in the first outer sc of Point Row 4.
- Work 3 sc into the ch-3 tip space.
- Work 1 sc in the other sc of Point Row 4.
- Work 1 sc in the edge sc of Point Rows 3, 2, and 1 on the descending slope, in that order.
- Work 1 sc in the top of each of the next 2 dtr, reaching the next marked valley.
Each complete point repeat contains 16 sc: one valley stitch, four stitches over the tall ray tops, six along the mesh slopes, two in Row 4 stitches, and three at the tip. Five repeats give 80 sc. After the fifth repeat, join to the first sc and fasten off. Do not add another sc in the starting valley.
Keep the edging relaxed as it steps between the mesh row ends. It follows the outside edge without filling every chain opening. Remove the valley markers after checking all five repeats.
Blocking the Lace Star
Block before sewing on the gold bead. Follow the care instructions for your yarn. If damp blocking is suitable, moisten the motif gently, remove excess water without twisting, and place it RS up on a flat blocking mat.
- Pin the small center first without stretching it into a large hole.
- Place the five outer tips at equal distances from the center.
- Pin the five inward valleys so the spaces between neighboring points look balanced.
- Open the mesh arches lightly and straighten the tall rays with your fingers.
- Allow the ornament to dry completely before removing the pins.
For a starting layout, arrange the five tips about 2.5–3 in (6.5–7.5 cm) from the center, then adjust to the natural size of your work. Do not stretch tightly to reach a measurement. If a stiffener is desired, test it on a yarn scrap and apply it according to its own label before adding the bead.
Sew the Gold Bead and Hanging Loop
Gold center bead
Use matching sewing thread and a needle that passes through the bead hole. Bring the thread from the back through the dense center ring, pass through the bead, and return through the ring on the opposite side. Make several passes through the bead and crochet, taking care not to split a single yarn strand repeatedly. Secure the thread at the back and bury the ends in the center stitches.
The gold center is a purchased bead, not a crochet stitch or an embroidered knot. It should rest against the front of the ring and should not pull the rays into a cup. Check both sides before tightening the final thread knot.
Lavender chain hanger
With lavender, ch 28. Fasten off, leaving a sewing tail at each end. Bring the ends together to form a loop. Sew both ends to the back of the upper point, through the three sc worked into its tip space and the adjacent firm edging stitches. Weave the tails down along the back of the outline.
Hold the ornament by the loop to check its balance. If it tilts, adjust the position of the chain ends before securing the final tails. The loop is a separate crocheted chain sewn onto the finished star; it is not part of the five-point outline count.
Finishing Tips and Troubleshooting
One point looks wider than the others
Check the point rows before blocking. Row 1 needs four sc and three arches, Row 2 needs three sc and two arches, and Row 3 needs two sc and one arch. Accidentally working into a sc as well as an arch usually creates an extra mesh column.
The rays twist or bunch together
Check that every dtr has three starting yarn overs and four pull-through-two steps. Use the same hook position and stitch height throughout. Gently spread the stitches in their correct order before adding the mesh. Blocking can straighten the rays but cannot replace a missing stitch.
The edging pulls a point sideways
Confirm that you used the outer edge sc of Rows 1–3 rather than an interior anchor. Keep the same number of edge stitches on both slopes. Tight border stitches can pull across the small gaps between row ends; relax those stitches before continuing.
Can I make this with crochet thread?
Yes, using a hook suited to the thread and the same stitch sequence. The ornament will be smaller, and the bead should be scaled down to suit the center. The quoted dimensions apply only as estimates for the suggested yarn range, not as guaranteed measurements for every material.
Care and storage
Dust the ornament gently. Clean according to the yarn, bead finish, thread, and any stiffener used. Store flat between layers of tissue so the chain mesh is not crushed. This is a decorative ornament with a small sewn bead and a hanging loop, so keep it out of reach of young children.
More Christmas Ornaments to Crochet
For another five-point design, try the Blue Lace Crochet Star with its graduated fans and white border. The Interwoven Crochet Star creates its shape by folding and weaving a strip. Pair either with the Snowflower Lace Crochet Tree for a varied collection of handmade ornaments.
Visual Tutorial, Full Star Charts, and Pinterest Images
The charts show the full five-point silhouette, the tall ray groups, mesh progression, and continuous border. The gold bead and sewn-on hanger are identified separately. Use the written instructions for the precise stitch locations and counts. The visual tutorial, two tabletop charts, and three Pinterest images are grouped below after the complete recipe.