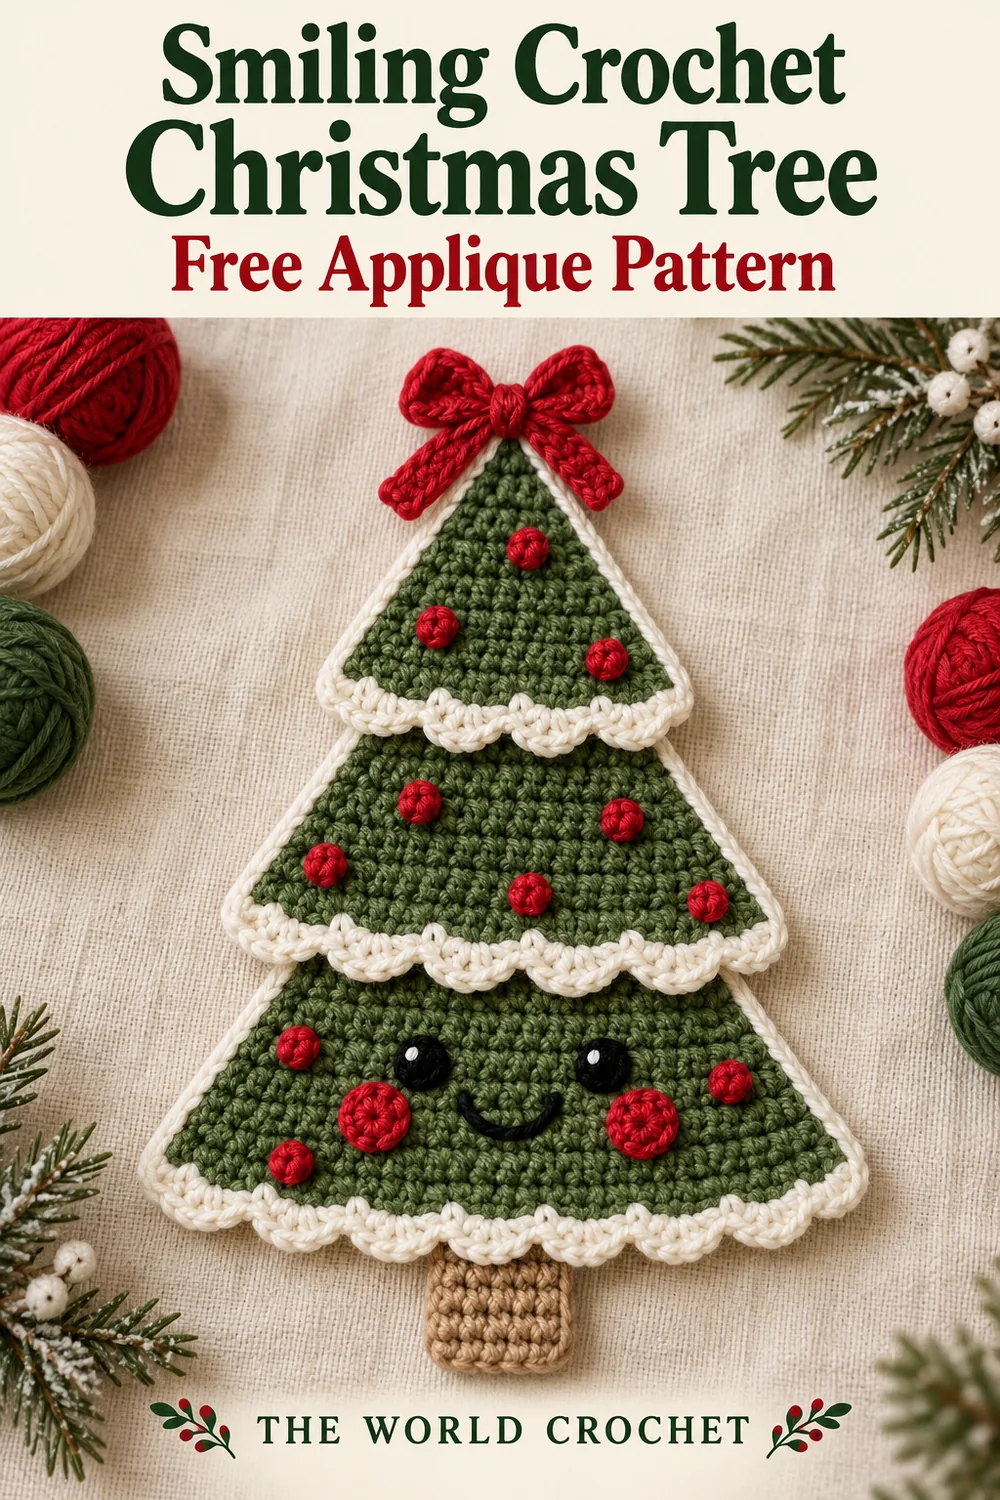
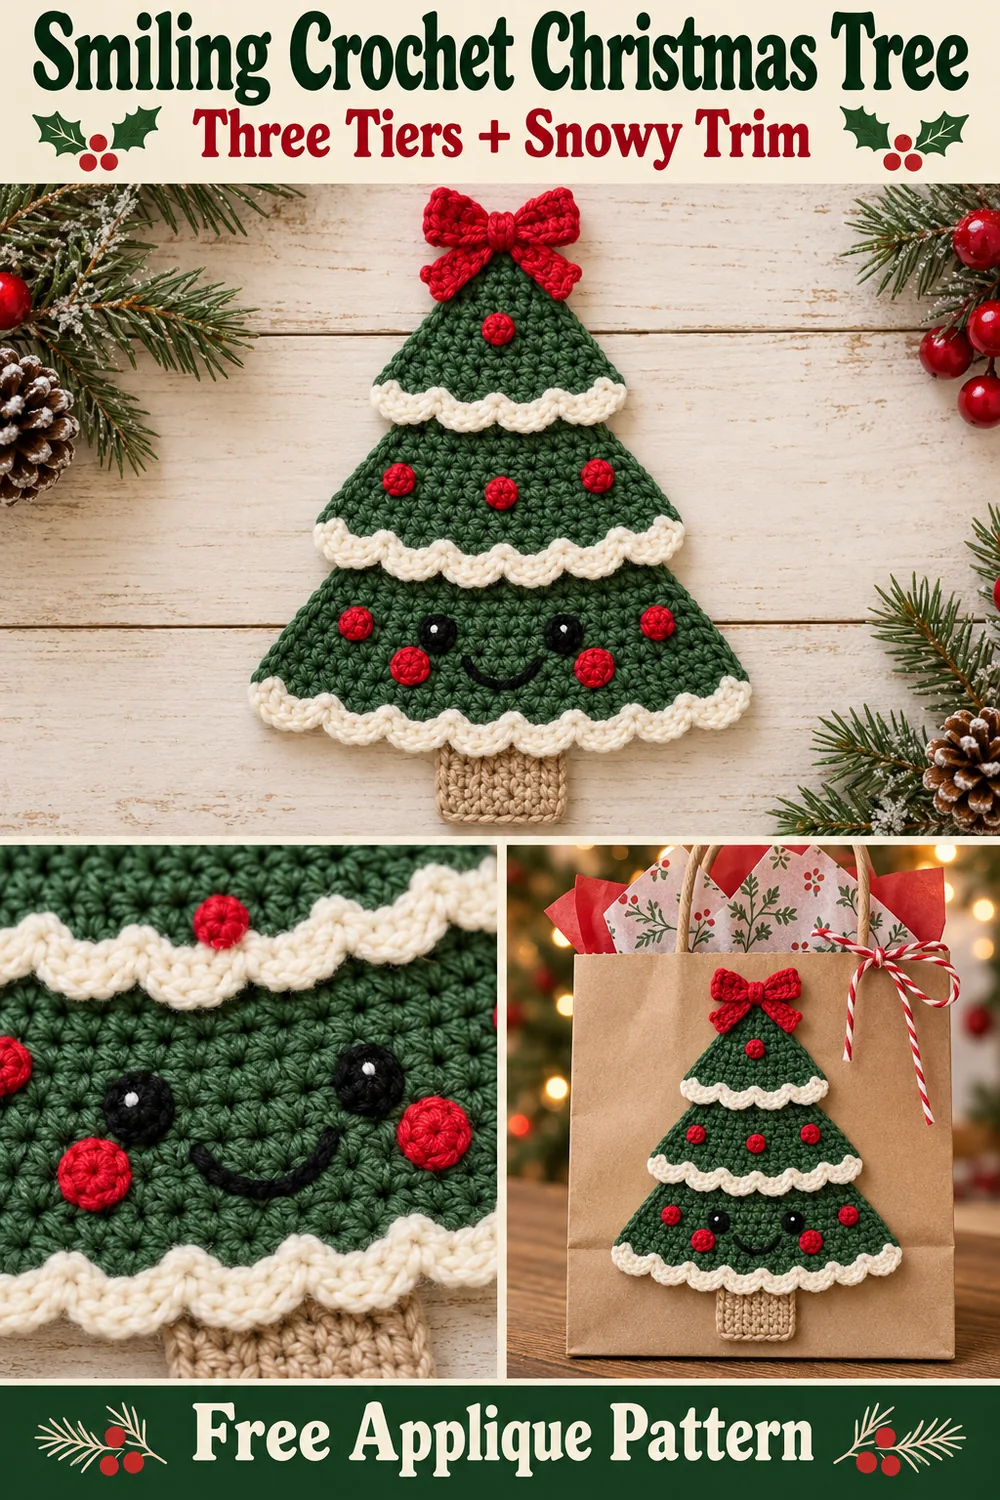
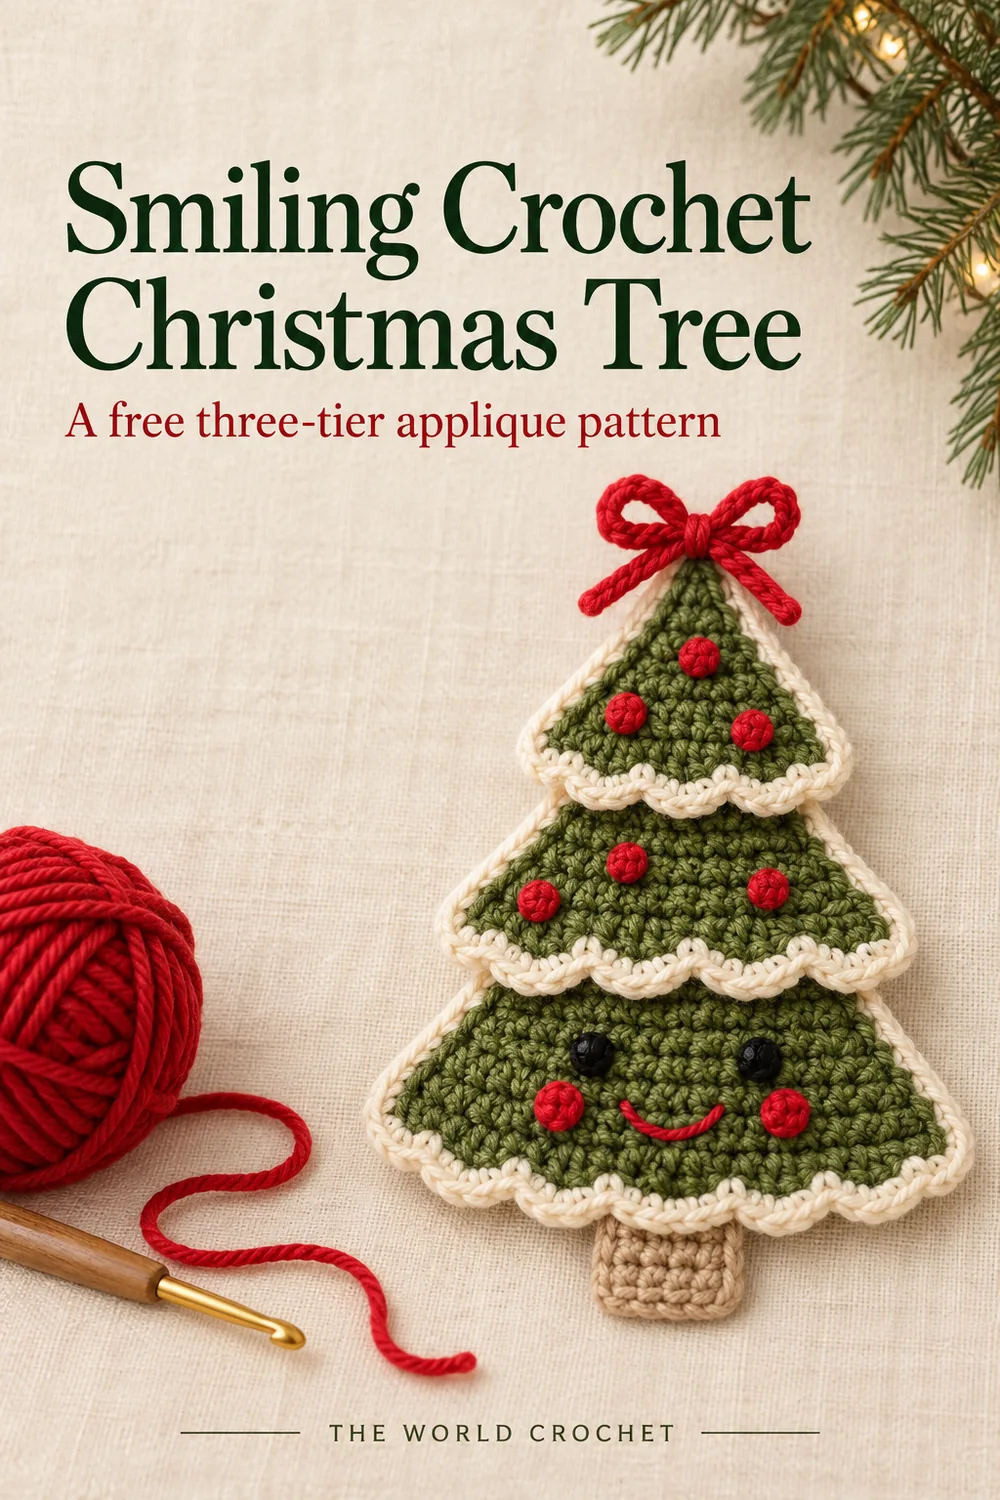
This smiling crochet Christmas tree is a flat applique built from three green triangles. White outlines separate the tiers, two small scalloped bands suggest snow, and a red bow sits above the friendly face on the largest triangle.
The pattern is an original interpretation inspired by the reference photograph, rather than its exact recipe. The stitch arithmetic has been reviewed, but the design has not been physically crocheted or tested. Make one set of triangles and pin the pieces together before deciding on the final overlap.
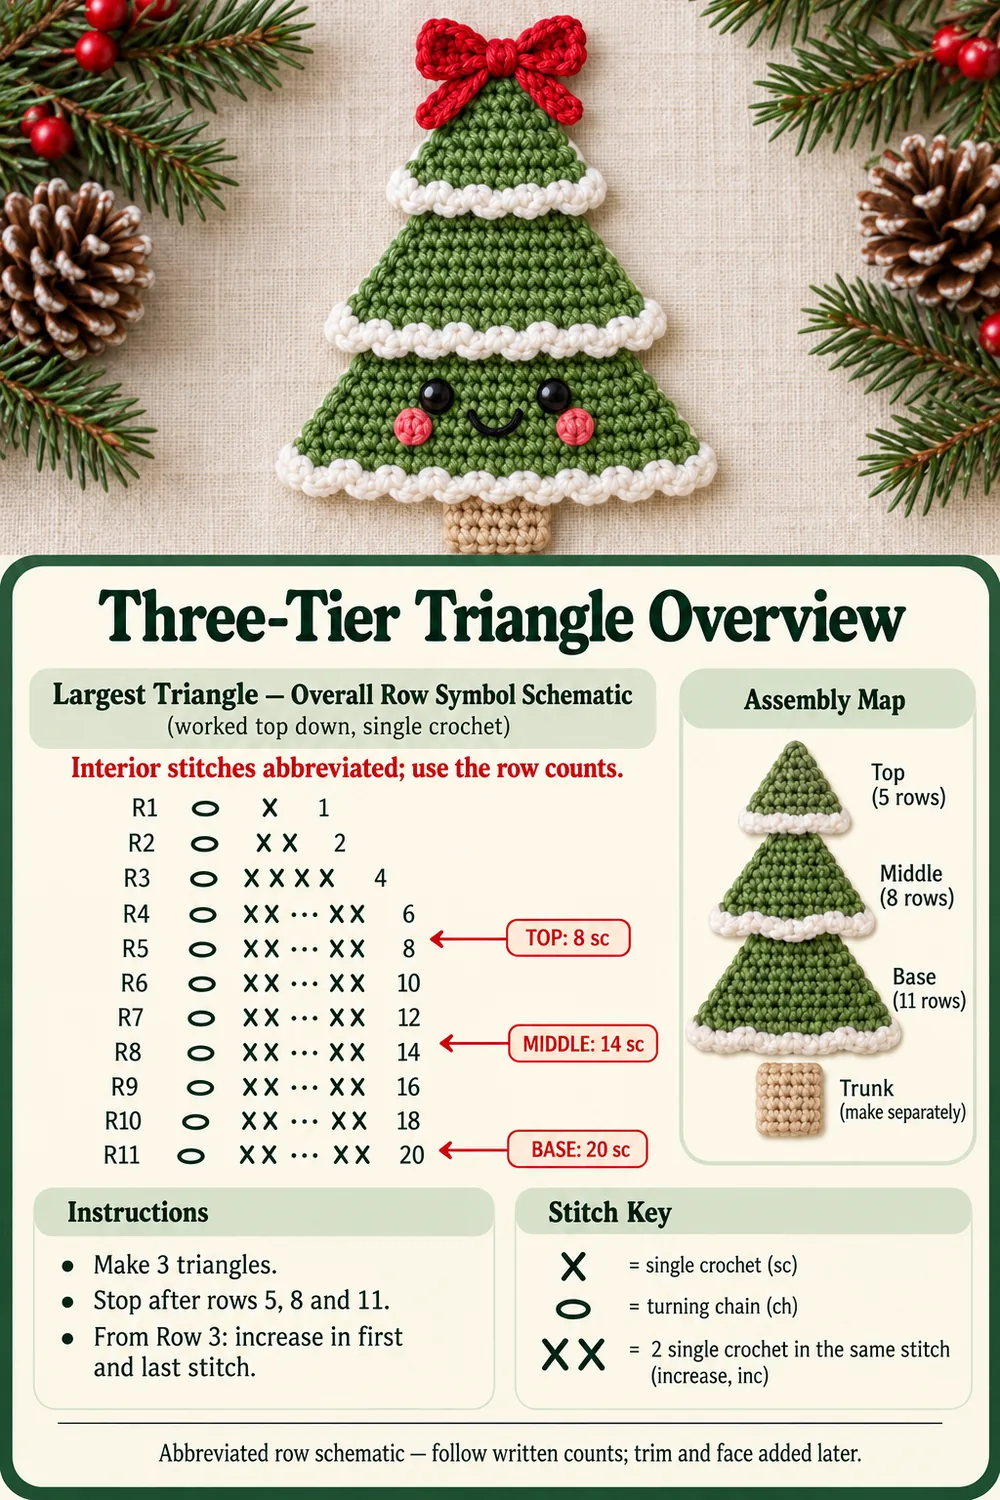
Each green tier starts at its point and grows downward. The same row sequence makes all three sizes: stop after Row 5 for the top, Row 8 for the middle and Row 11 for the base. Add the outlines and face before sewing the tiers together, while the backs are easy to reach.
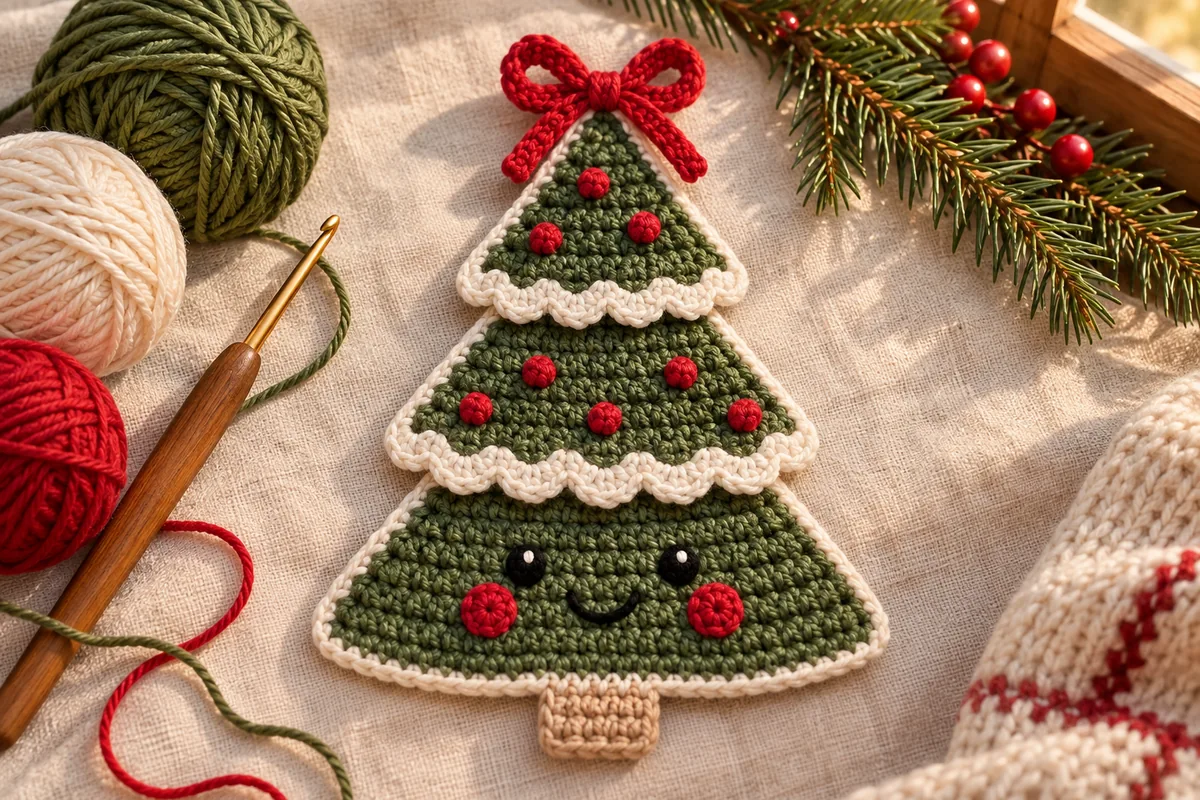
Materials for a smiling crochet Christmas tree
- Smooth DK cotton in moss green, white or ivory, red and beige.
- Black yarn for the eye circles and smile; a slightly finer black strand is an option if DK eyes feel too large on your own triangle.
- A 3 mm hook as a starting point, adjusted to your yarn for a firm, flexible fabric.
- A yarn needle, scissors, removable markers and pins or clips for assembly.
- Optional separate cord if you want to use the applique as a hanging decoration.
The applique is made without stuffing. No measured gauge, finished dimensions or yarn consumption is available for this untested version. Make the first tree before planning a batch or choosing a bag, card or fabric panel to decorate.
All four colored yarns should be close in thickness. White that is much heavier than the green can make the border curl, while very fine white may disappear between the tier edges. Keep the hook and green yarn consistent across the three triangles.
US abbreviations and stitch notes
ch = chain; sl st = slip stitch; sc = single crochet; hdc = half double crochet; st/sts = stitch/stitches; MR = magic ring; inc = 2 sc in one stitch. The Craft Yarn Council crochet abbreviations guide provides the standard US names.
Half double crochet: yarn over, insert the hook, yarn over and draw up a loop, yarn over and pull through all three loops. Three hdc worked in one stitch make one small snow scallop.
Turn after each triangle row except the final row for that size. Ch 1 before the next row; this turning chain never counts as a stitch. Work the first stitch in the first sc, not in the turning chain. The eye and cheek circles are joined rounds, while the triangles, trunk, bow and snow bands are worked in rows.
Smiling crochet Christmas tree: three green tiers
Make three separate triangles in green. Begin every triangle with the same first row and use the stopping points below. Leave a sewing tail when fastening off.
- Row 1: Ch 2, sc in the second chain from the hook. 1 sc. Turn.
- Row 2: Ch 1, inc in the only stitch. 2 sc. Turn.
- Row 3: Ch 1, inc in both stitches. 4 sc. Turn.
- Row 4: Ch 1, inc in the first stitch, sc in the next 2 stitches, inc in the last stitch. 6 sc. Turn.
- Row 5: Ch 1, inc in the first stitch, sc in the next 4 stitches, inc in the last stitch. 8 sc. Stop here for the top tier.
- Row 6: Ch 1, inc in the first stitch, sc in the next 6 stitches, inc in the last stitch. 10 sc.
- Row 7: Ch 1, inc in the first stitch, sc in the next 8 stitches, inc in the last stitch. 12 sc.
- Row 8: Ch 1, inc in the first stitch, sc in the next 10 stitches, inc in the last stitch. 14 sc. Stop here for the middle tier.
- Row 9: Ch 1, inc in the first stitch, sc in the next 12 stitches, inc in the last stitch. 16 sc.
- Row 10: Ch 1, inc in the first stitch, sc in the next 14 stitches, inc in the last stitch. 18 sc.
- Row 11: Ch 1, inc in the first stitch, sc in the next 16 stitches, inc in the last stitch. 20 sc. Stop here for the base tier.
When continuing beyond Row 5 or Row 8, turn before beginning the following row. From Row 3 onward, the two edge increases add two stitches per row. Row 2 is different because it has only one source stitch to increase.
| Tier | Last row | Green base width |
|---|---|---|
| Top | 5 | 8 sc |
| Middle | 8 | 14 sc |
| Base | 11 | 20 sc |
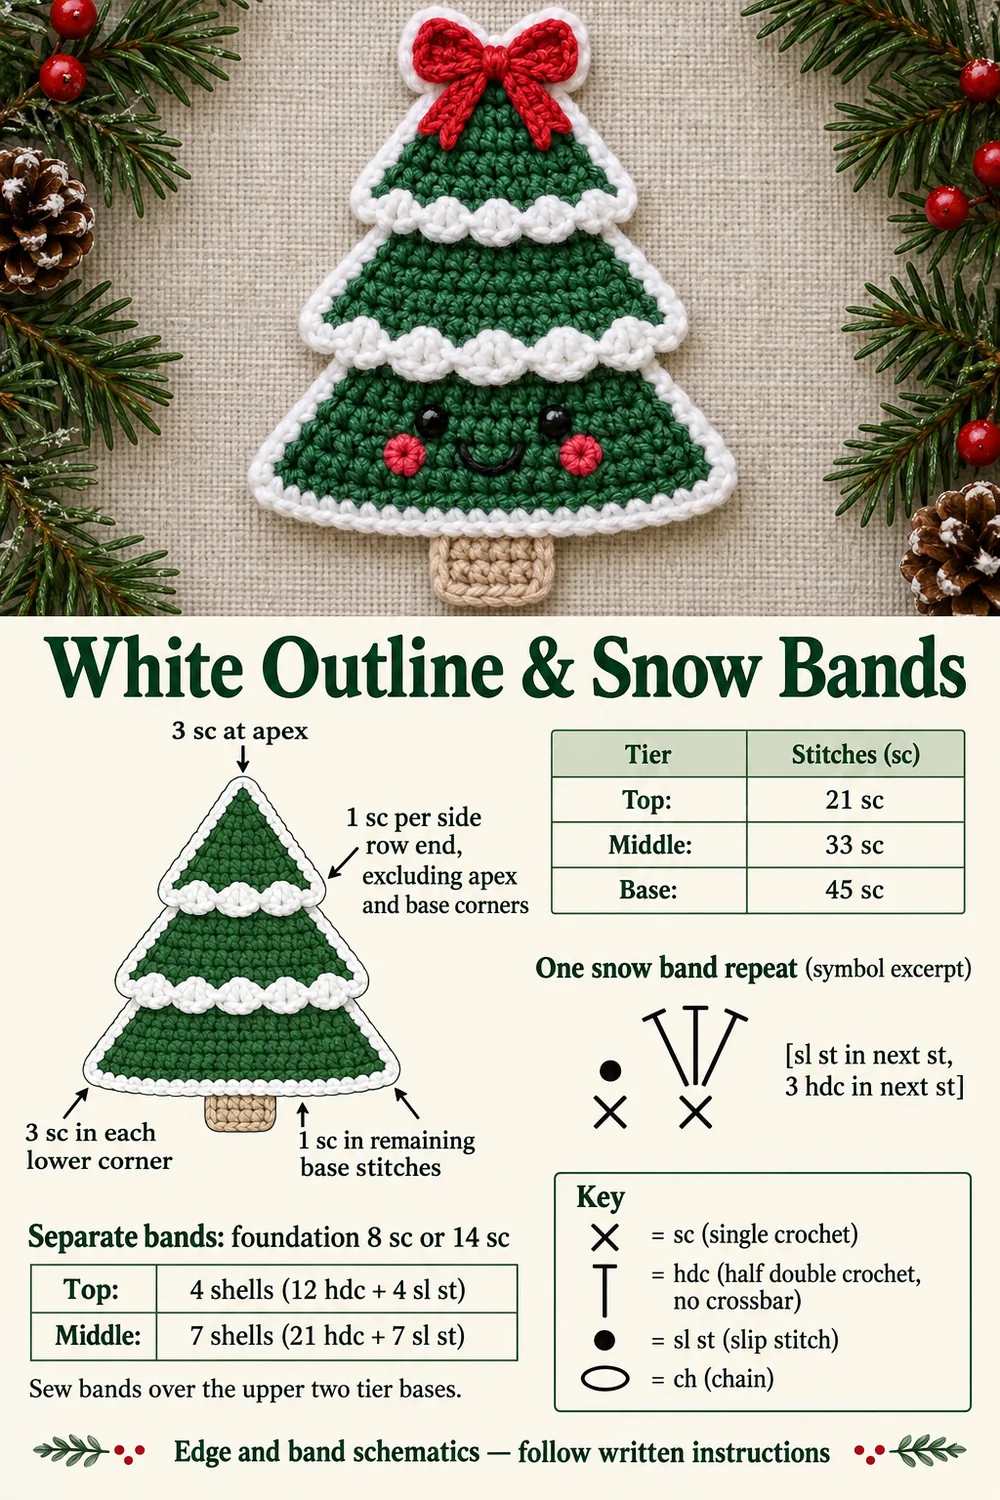
Outline each triangle in white
Fasten off green before starting the border. Identify the Row 1 apex and both ends of the last green row, which are the lower corners. The outline uses those three locations as its turns.
- Join white at the Row 1 apex stitch with a sl st. Ch 1 and work 3 sc in that apex.
- Work down one sloping side with 1 sc in each side row end from Row 2 through the penultimate row. Do not add a separate side stitch for the last row: its end stitch is the lower corner in the next step.
- Work 3 sc into the first lower-corner stitch of the last green row.
- Sc in every remaining base stitch except the opposite corner, then work 3 sc in that opposite corner.
- Work up the other sloping side, 1 sc per side row end from the penultimate row back through Row 2. Join to the first white sc and fasten off. Do not work the apex again.
Border counts: top 21 sc, middle 33 sc and base 45 sc. For a triangle with k rows and N base stitches, the count is 3 at the apex + 2(k − 2) along the slopes + 6 at the lower corners + (N − 2) across the base. This simplifies to N + 2k + 3.
Count before trimming the tails. The corner stitches are part of the base row, not additional row ends to work twice. Keep the outline flexible; forcing tight stitches into the sloping sides can shorten the triangle.
Make two separate snow bands
These bands are sewn over the lower edges of the top and middle tiers. The base tier keeps its plain white outline in the written version. The styled images explore variations in how full the snow looks; follow these two band instructions for this interpretation.
Top band
Row 1: With white, ch 9. Sc in the second chain from the hook and in each remaining chain. 8 sc. Turn.
Row 2: Ch 1. Repeat [sl st in the next stitch, 3 hdc in the next stitch] four times. 4 shells containing 12 hdc, plus 4 sl sts. Fasten off with a sewing tail.
Middle band
Row 1: With white, ch 15. Sc in the second chain from the hook and in each remaining chain. 14 sc. Turn.
Row 2: Ch 1. Repeat [sl st in the next stitch, 3 hdc in the next stitch] seven times. 7 shells containing 21 hdc, plus 7 sl sts. Fasten off with a sewing tail.
Each shell repeat uses two foundation stitches. Pin the straight foundation edge across the front of its matching tier base, letting the scallops hang downward. Sew along the straight edge only. Adjust its position rather than stretching the band to cover the triangle’s side corners.
Trunk, face circles and bow
Beige trunk
Row 1: Ch 7, sc in the second chain from the hook and in each remaining chain. 6 sc. Turn. Rows 2–4: Ch 1, sc in every stitch. 6 sc in each row. Turn after Rows 2 and 3. Fasten off with a sewing tail.
Two eyes and two cheeks
Make two black circles and two red circles. For each circle, make a MR, ch 1 and work 6 sc into it. Pull closed and join to the first sc with a sl st. 6 sc per circle. Fasten off with a tail for sewing. The joining stitch is excluded.
Use the red circles as cheeks. The black circles are yarn eyes, with an optional tiny white embroidery stitch for a highlight. Pin all four circles onto the largest tier before sewing. Leave room below the eyes for the smile and keep the cheeks inside the white outline.
Red bow
Row 1: Ch 7, sc in the second chain from the hook and in each remaining chain. 6 sc. Turn. Rows 2–3: Ch 1, sc across. 6 sc per row. Turn after Row 2. Fasten off.
Pinch the middle of the rectangle and wrap red yarn around it three times. Secure the wraps with a needle on the back, leaving a tail for attaching the bow. For optional tails, make two separate pieces: ch 7, then sl st in the second chain from the hook and in the remaining five chains. 6 sl sts per tail. Sew their upper ends behind the bow center.
Assemble the three-tier tree
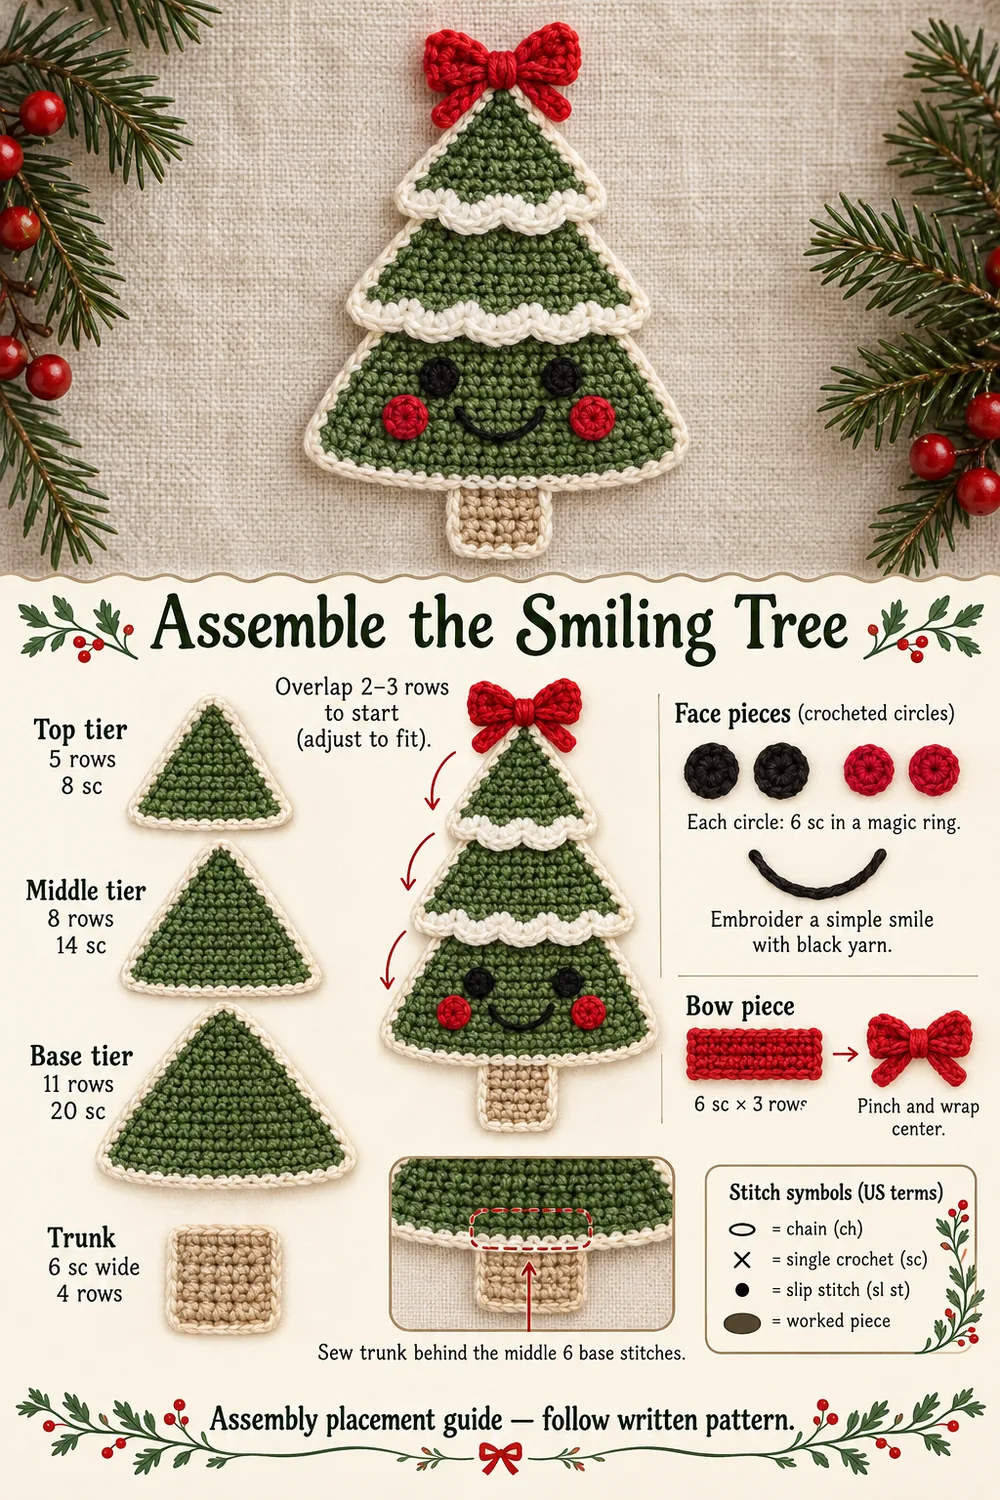
- Lay the largest triangle flat with its point upward. Center the middle triangle above it and overlap the upper two or three rows of the larger triangle as a starting arrangement.
- Add the smallest triangle above the middle, again overlapping enough to conceal the lower triangle’s point. Keep all three center lines aligned and check that each tier widens below the preceding one.
- Adjust the overlap until the lower tier has clear room for the face. Pin first: the starting row overlap is a placement guide, not a measured fit.
- Sew the middle tier to the base through the hidden overlap, then attach the top tier to the middle. Keep the scalloped edges free and the seam behind the visible snow bands.
- Sew the top edge of the trunk behind the middle six green stitches of the base row. On the 20-stitch base, these are stitches 8–13, leaving seven stitches on either side. Let the remaining trunk rows project below the tree.
- Sew the eye and cheek circles to the largest tier. Use short black backstitches to embroider a shallow curved smile between the cheeks. Attach the bow center securely to the top tier.
Add optional red French-knot berries to the top two tiers: three on the smallest and five on the middle is a starting layout. Bring the yarn up, wrap twice around the needle, insert beside the exit point and draw through while holding the wraps gently. Secure the tails behind the same tier. Omit or reposition a berry if it conflicts with an attachment seam.
Troubleshooting the smiling crochet Christmas tree
- A triangle stops widening: check both ends of the row. From Row 3 onward, work two sc in the first stitch and two in the last.
- The white outline has extra stitches: check that the last green row ends were treated as base corners, without additional side-row stitches in those same locations.
- A snow band twists: keep the slip stitches relaxed and confirm each shell uses the second stitch of a two-stitch repeat. Pin the foundation edge without flattening the scallops.
- The face is partly hidden: adjust the tier overlap before sewing. The face belongs on the largest tier, below the middle triangle’s lower edge.
- The tree bends at the seams: loosen the sewing stitches and catch both layers through the overlap without gathering either one.
Finish and use the applique
Weave every tail securely through the backs of matching stitches. Lay the tree down after each finishing step and correct any pulling before trimming. Follow the yarn label for cleaning, and reshape the tiers and snow bands gently while drying.
Attach the finished tree to a fabric gift bag, a decorative panel or another item that suits its actual size. For a hanging ornament, sew a separate cord through sturdy stitches at the back of the top tier, below the bow, so the bow itself does not carry the weight.
For other holiday projects, the Christmas tree granny square offers a square base, the Christmas crochet bows use a different bow construction, and the crochet snowman applique provides another flat character motif.
Tree images and construction diagrams
The three Pin layouts are followed by a photograph and overall triangle schematic, a white-outline and snow-band guide, and an assembly guide. Interior stitches are abbreviated in the overall diagram; the printed row totals and written instructions give the complete counts. These are teaching schematics, not tested full stitch charts. Styled photographs suggest the character and color placement rather than an exact stitch-by-stitch sample.