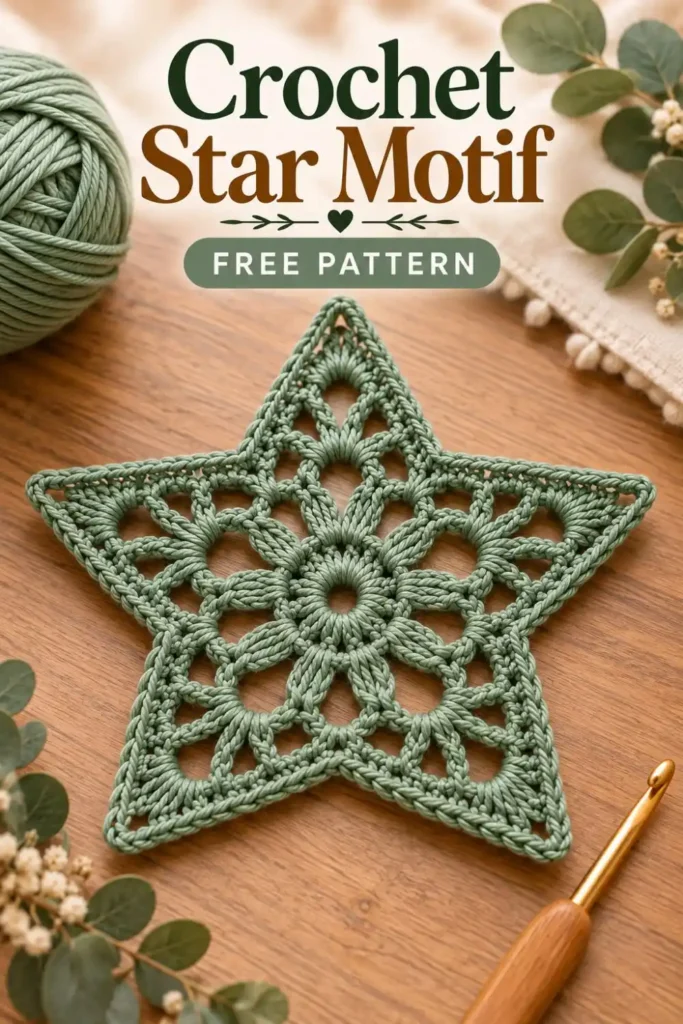
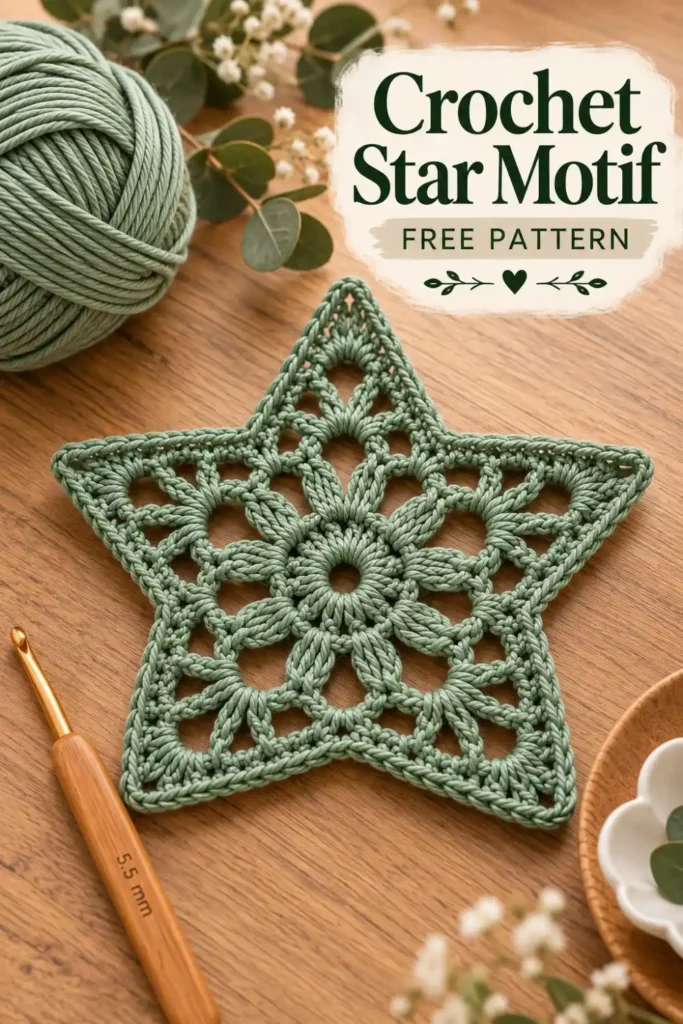
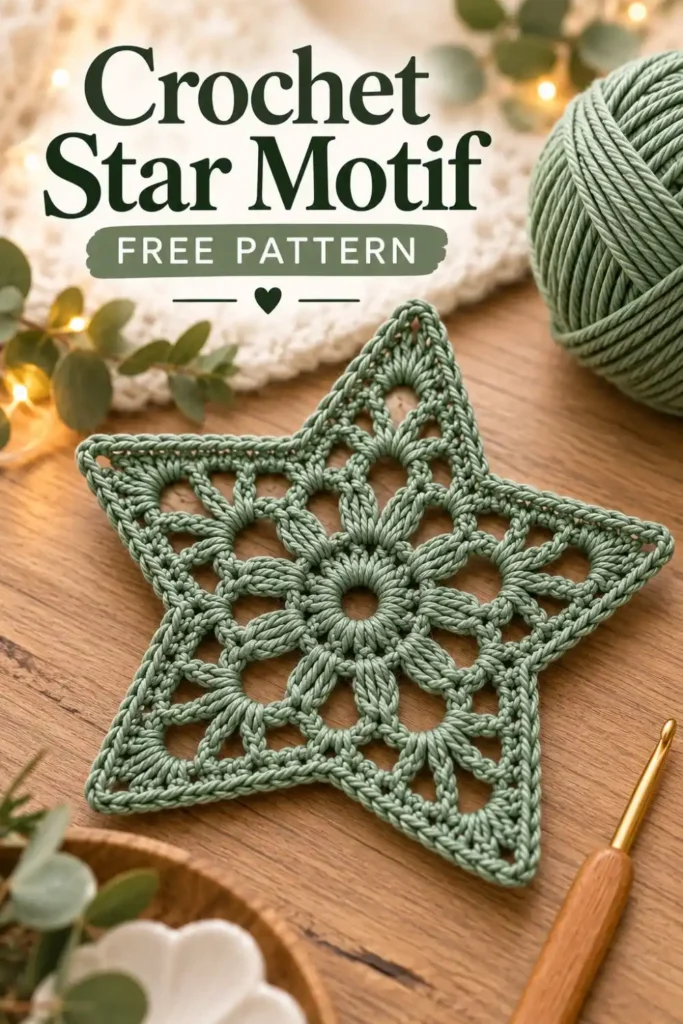
A good crochet star motif is one of those patterns that can become much more than a single project.
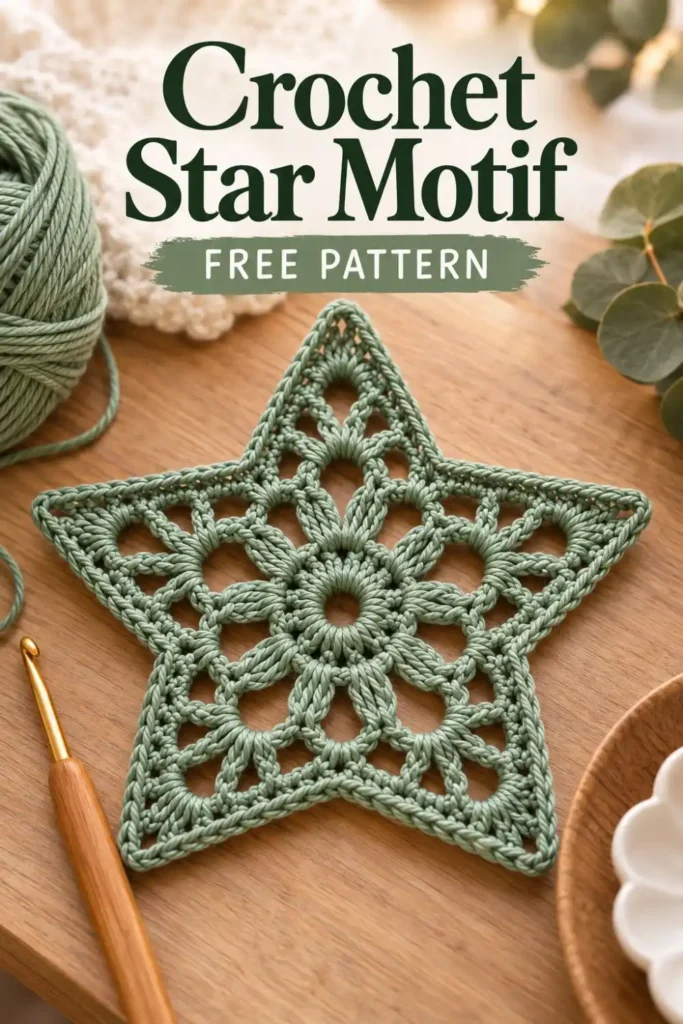
Worked with a smooth cotton yarn, this five-point star has an open center, delicate chain spaces and clearly defined points. It looks beautiful on its own, but it can also become a Christmas ornament, garland piece, gift topper, wall decoration or decorative appliqué.
The openwork construction keeps the star lightweight while still giving it enough structure to hold its shape after blocking.
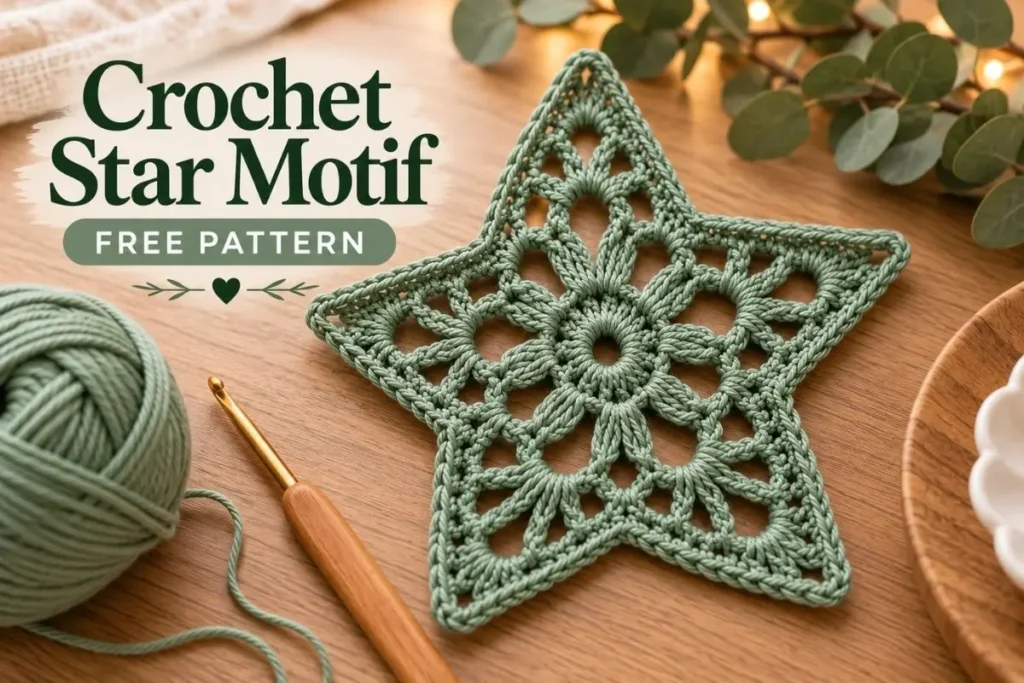
One of the things that makes this design especially useful is how easily the finished look changes with yarn choice. A small hook and fine cotton create a delicate ornament, while thicker yarn turns the same motif into a much larger decorative star.
The sage green version has a soft, modern feel, but traditional white, cream, red and metallic shades work just as well.
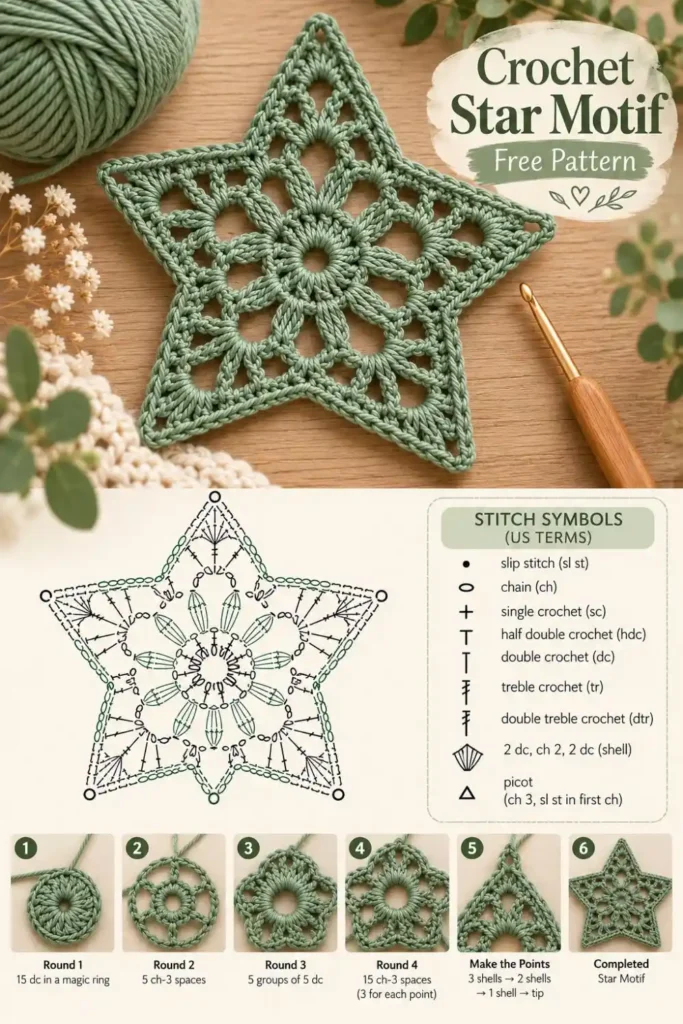
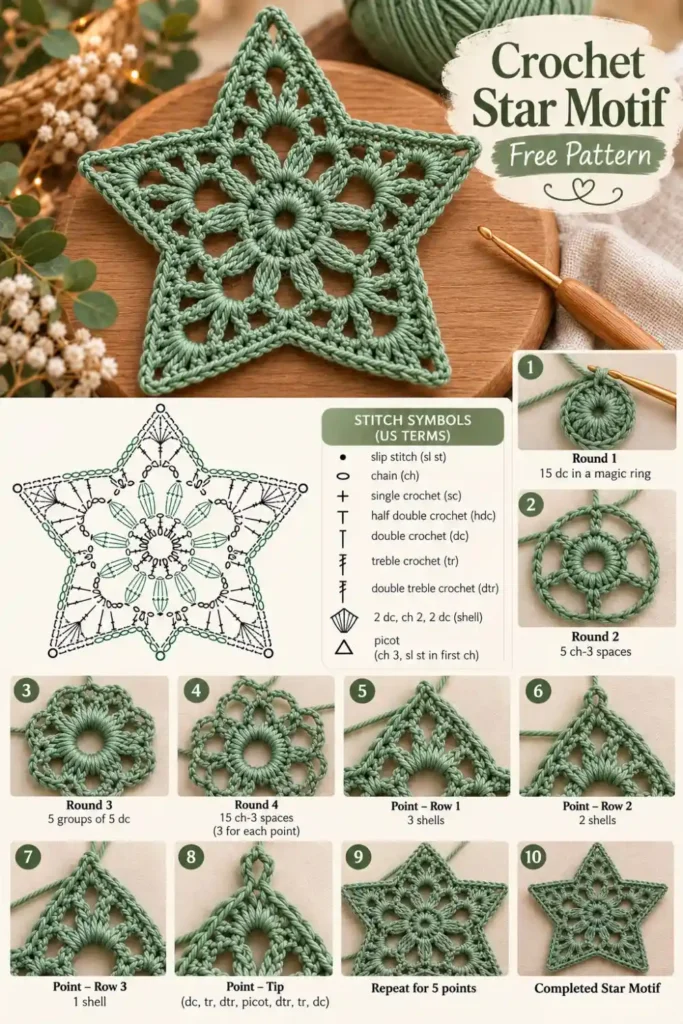
Crochet Star Motif Construction
The star begins with a small circular center.
Five evenly spaced sections are then created around that center. Those sections become the foundation for the five points of the star.
Each point is worked separately, beginning with three open shells and gradually narrowing until only one shell remains.
A tall-stitch tip finishes each point and gives the star its recognizable shape.
The construction is easier to understand once the center is complete because the repeating five-part structure becomes clearly visible.
Materials
You will need:
- Cotton, cotton-blend or smooth acrylic yarn
- Crochet hook appropriate for your yarn
- Yarn needle
- Scissors
- Blocking mat
- Rust-resistant pins
- Optional fabric stiffener
- Optional ribbon, twine or yarn for hanging
Yarn suggestion
For a motif similar in size and structure to the reference piece, a sport, DK or light worsted cotton yarn works particularly well.
Cotton helps the open spaces stay defined and usually responds very well to blocking.
Finished Size
Using DK-weight yarn and approximately a 3.5–4 mm crochet hook, the finished star should measure roughly:
6–7 inches (15–18 cm) across after blocking.
The exact measurement will depend on your yarn, hook and tension.
Gauge is not essential for this project.
Abbreviations
ch – chain
sl st – slip stitch
sc – single crochet
hdc – half double crochet
dc – double crochet
tr – treble crochet
dtr – double treble crochet
st / sts – stitch / stitches
sp – space
rnd – round
rep – repeat
Special Stitch
Shell
Work:
2 dc, ch 2, 2 dc
into the indicated space.
Crochet Star Motif Pattern
Center – Round 1
Make a magic ring.
Ch 3. This counts as the first dc.
Work 14 dc into the ring.
Pull the magic ring closed.
Join with a sl st to the top of the beginning ch 3.
15 dc
Round 2
Ch 1.
Sc in the same stitch.
Ch 3.
Skip the next 2 dc.
Sc in the next dc.
Repeat:
ch 3, skip next 2 dc, sc in next dc
around.
After the final ch 3, join with a sl st to the first sc.
You should have:
5 sc and 5 ch-3 spaces
Round 3
Sl st into the first ch-3 sp.
Ch 3. This counts as the first dc.
Work 4 dc in the same ch-3 sp.
Ch 2.
In each remaining ch-3 sp work:
5 dc, ch 2
Join with a sl st to the top of the beginning ch 3.
You should now have:
5 groups of 5 dc, separated by 5 ch-2 spaces.
Creating the Foundation for the Five Points
Round 4
Ch 1.
Sc in the first dc of the first 5-dc group.
Ch 3.
Skip the next dc.
Sc in the next dc.
Ch 3.
Skip the next dc.
Sc in the final dc of that group.
Ch 3 across the ch-2 space.
Sc in the first dc of the next 5-dc group.
Continue the same sequence around:
ch 3, skip 1 dc, sc in next dc, ch 3, skip 1 dc, sc in next dc, ch 3 across the next ch-2 space, sc in first dc of next group.
When you reach the final section, work the last ch 3 and join with a sl st to the first sc.
You should now have:
15 ch-3 spaces
These spaces are divided naturally into five groups of three.
Each group of three spaces will become one point of the star.
Making the First Star Point
Each star point is worked separately.
Use 3 consecutive ch-3 spaces for each point.
Point – Row 1
Join yarn with a sl st in the first ch-3 sp of one three-space section.
In the same space work:
ch 3, dc, ch 2, 2 dc
This creates the first shell.
Ch 1.
Work a shell in the next ch-3 sp.
Ch 1.
Work a shell in the third ch-3 sp.
Turn.
You should have:
3 shells
with two ch-1 spaces between them.
Point – Row 2
Sl st carefully across the first shell until you reach the first ch-1 space between the shells.
In that ch-1 sp work:
2 dc, ch 2, 2 dc
Ch 2.
In the next ch-1 sp work:
2 dc, ch 2, 2 dc
Turn.
You should now have:
2 shells
Point – Row 3
Sl st across the first shell until you reach the ch-2 space between the two shells.
In this ch-2 sp work:
2 dc, ch 2, 2 dc
Turn.
You now have:
1 shell
Forming the Point
Sl st across the shell until you reach its center ch-2 space.
In the same space work:
dc, tr, dtr
Ch 3.
Sl st into the first chain of the ch-3 to form a small picot.
Then work:
dtr, tr, dc
into the same ch-2 space.
Fasten off.
Your first star point is complete.
Complete the Remaining Four Points
Move to the next unused group of three ch-3 spaces.
Repeat:
- Point Row 1
- Point Row 2
- Point Row 3
- Point Tip
Continue until all five points are finished.
You should now have a five-point openwork star.
Weave In the Ends
Because each point is worked separately, you will have several yarn ends.
Use a yarn needle to weave each one securely through the back of the stitches.
Avoid pulling the ends too tightly because that can distort the open lace sections.
Trim any excess yarn.
Blocking the Crochet Star Motif
Blocking is an important part of this project.
Before blocking, the star may look softer, slightly curled or uneven. That is normal.
To block it:
- Gently wet the finished star.
- Press out excess water without twisting.
- Lay the star flat on a blocking mat.
- Pin the center first.
- Pull each of the five points outward.
- Pin each point into position.
- Adjust the open spaces so they look balanced.
- Allow the star to dry completely.
Take a moment to check that all five points extend approximately the same distance from the center.
Blocking transforms the motif from a soft crochet piece into a much more defined geometric star.
Optional: Add a Hanging Loop
If you want to use the motif as an ornament, choose one point to become the top.
Join yarn at the picot.
Ch approximately:
25–35
Sl st back into the same point.
Fasten off and weave in the ends.
You can also replace the crochet loop with:
- jute twine;
- narrow ribbon;
- metallic cord;
- cotton string.
How to Change the Size
One reason this crochet star motif is so versatile is that you can change its size without changing the construction.
Crochet Thread
Use crochet thread and a small hook for a delicate mini star.
These work beautifully as:
- gift tags;
- small tree ornaments;
- card embellishments.
Fingering or Sport Yarn
This creates a lightweight star suitable for:
- Christmas ornaments;
- garlands;
- window decorations.
DK or Light Worsted Yarn
A good choice when you want a more visible decorative motif.
It works well as:
- a larger ornament;
- wall decor;
- centerpiece decoration.
Bulky Yarn
With thicker yarn and a larger hook, the motif can become a statement piece for seasonal wall decor.
Keep in mind that thicker yarn may reduce some of the delicate lace effect.
Seven Ways to Use a Crochet Star Motif
A star motif doesn’t have to stay on the Christmas tree.
1. Christmas Tree Ornament
Add a simple hanging loop and use it as a lightweight handmade ornament.
If you prefer a more delicate Christmas star, the Crochet Lace Star Ornament has an airier design that works beautifully alongside this larger motif.
2. Crochet Garland
Make several stars and attach them to a long crochet chain, ribbon or decorative cord.
You can use one color for a minimal look or alternate several shades.
For smaller stars that are easy to make in multiples, the Quick & Charming Christmas Crochet Stars are another option that works particularly well in garlands.
3. Gift Topper
A small crochet star can replace a disposable ribbon or bow.
Tie it onto the package with twine and the ornament becomes part of the gift.
4. Wall Decoration
Use a larger hook and thicker yarn to create a decorative star for a craft room, nursery or seasonal display.
5. Table Decoration
Lay several stars across a Christmas or winter table arrangement.
Natural cotton, sage green and neutral tones work especially well for this use.
6. Appliqué
A smaller version can be sewn onto:
- bags;
- blankets;
- stockings;
- cushions;
- handmade gift bags.
7. Handmade Ornament Collection
Mix different star constructions rather than making every ornament identical.
For example, this openwork motif can be paired with the Christmas Star Crochet Pattern to create a collection where the colors match but the shapes and textures vary.
That gives the tree a coordinated handmade look without becoming repetitive.
Color Ideas
The sage green color gives the motif a modern, natural appearance, but there are plenty of other combinations to try.
Classic Christmas
Deep red or forest green
Winter White
White cotton with a white or silver hanging loop
Rustic
Cream, oatmeal or natural cotton
Elegant
White or cream with metallic gold edging
Scandinavian
Soft beige, sage green or muted gray
Pastel
Dusty pink, pale blue or lavender
For a complete set, choose two or three coordinating colors and repeat them throughout your handmade ornaments.
Optional Stiffening
If the star will be used as an ornament or hanging decoration, you may want it to hold a firmer shape.
Blocking alone may be enough when using cotton yarn.
For extra structure, apply a small amount of fabric stiffener according to the manufacturer’s instructions.
Pin the star into shape while it dries.
Avoid using too much product, especially with an openwork design, because the texture of the stitches is part of what makes the motif attractive.
Common Problems and Simple Fixes
My Star Points Look Uneven
Check that every point begins over exactly three ch-3 spaces.
Each point should also follow the same reduction:
3 shells → 2 shells → 1 shell → tip
Small differences can usually be corrected during blocking.
The Center Is Buckling
This can happen when tension is too tight.
Try gently blocking the star first.
If the center still refuses to lie flat, consider using a slightly larger hook on your next motif.
My Star Is Curling
Some curling before blocking is normal.
Cotton yarn usually responds very well to wet blocking.
The Open Spaces Look Too Small
Your chain stitches may be too tight.
Try keeping chains slightly looser than your regular stitches.
This will make the openwork areas more visible.
Can I Make the Star Without Blocking?
Yes, but blocking makes a noticeable difference.
It improves the symmetry, opens the lace sections and gives the five points a much cleaner shape.
Can I Use Acrylic Yarn?
Yes.
Acrylic yarn works, although cotton usually provides slightly better stitch definition.
For acrylic, gentle steam blocking can sometimes help shape the motif, but avoid touching synthetic yarn directly with a hot iron.
Can I Add a Border?
Yes.
A simple round of single crochet can be added around the outside if you prefer a firmer outline.
Work slowly around the valleys between the points and add extra stitches only where necessary to keep the edge flat.
Can I Add Beads?
Yes.
Small beads can be sewn onto the points or near the center after the star is complete.
For Christmas ornaments, metallic or pearl beads can add just enough detail without changing the crochet construction.
A Star You Can Use Beyond Christmas
Although stars naturally fit Christmas decorating, choosing a less traditional color makes this motif useful throughout the year.
Sage green, beige, dusty pink or natural cotton can turn it into a decorative piece for a nursery, craft room, wall display or handmade garland.
That versatility is what makes a good crochet star motif worth keeping in your pattern collection.
Make it small and delicate, enlarge it for home decor, or crochet several in coordinating colors.
Once you understand how the five-point construction works, there are plenty of ways to make the pattern your own.
Happy crocheting!