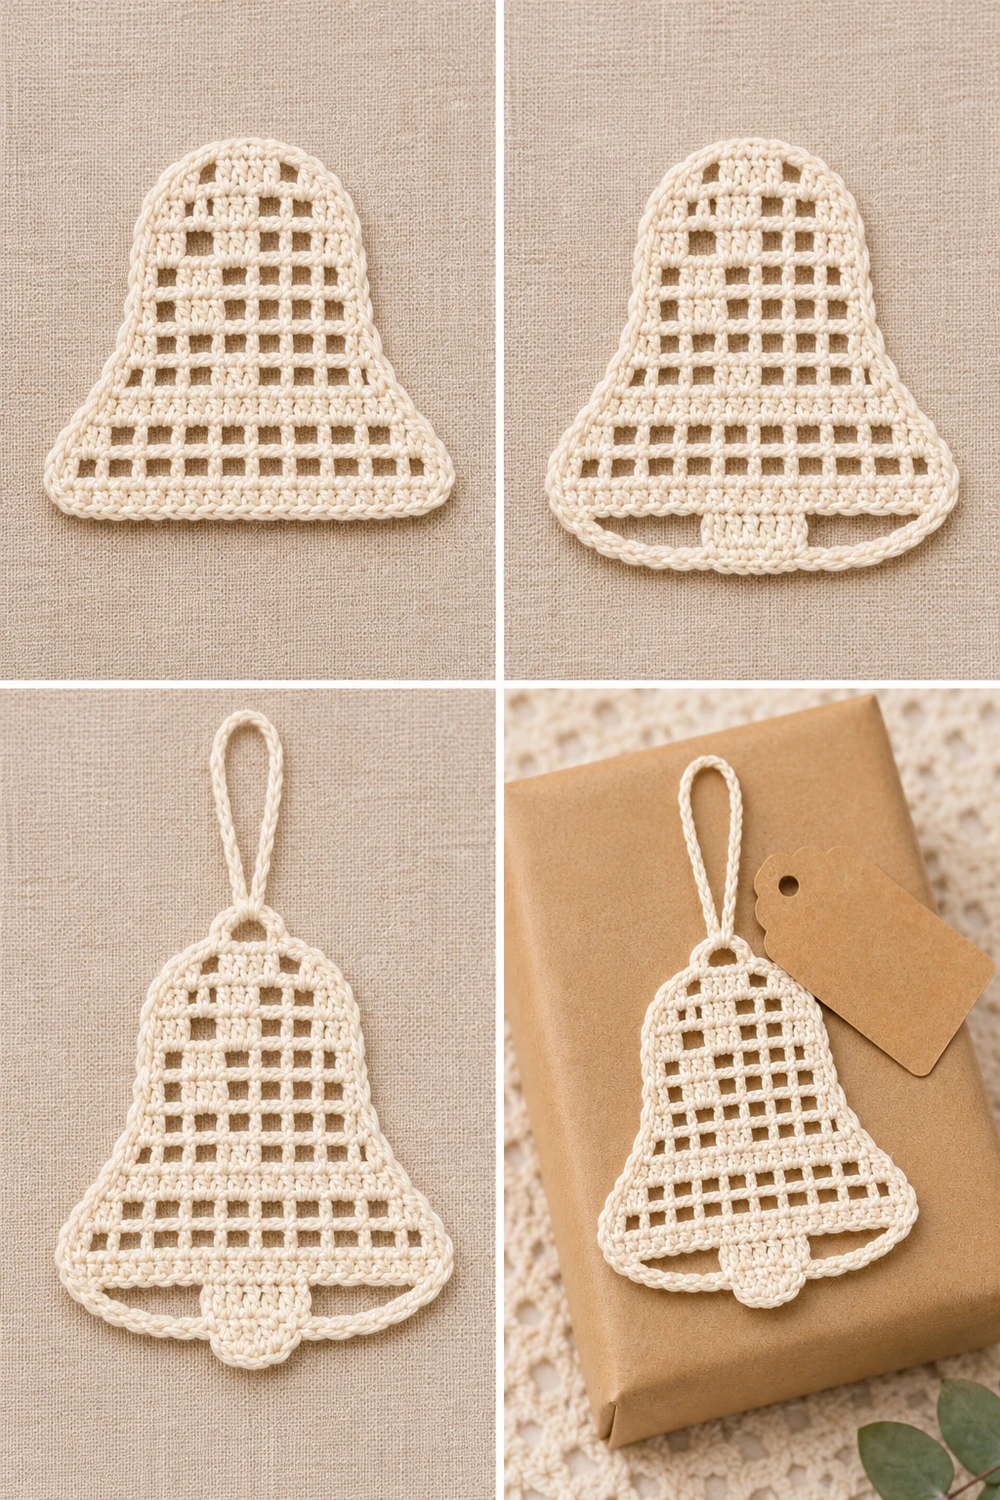
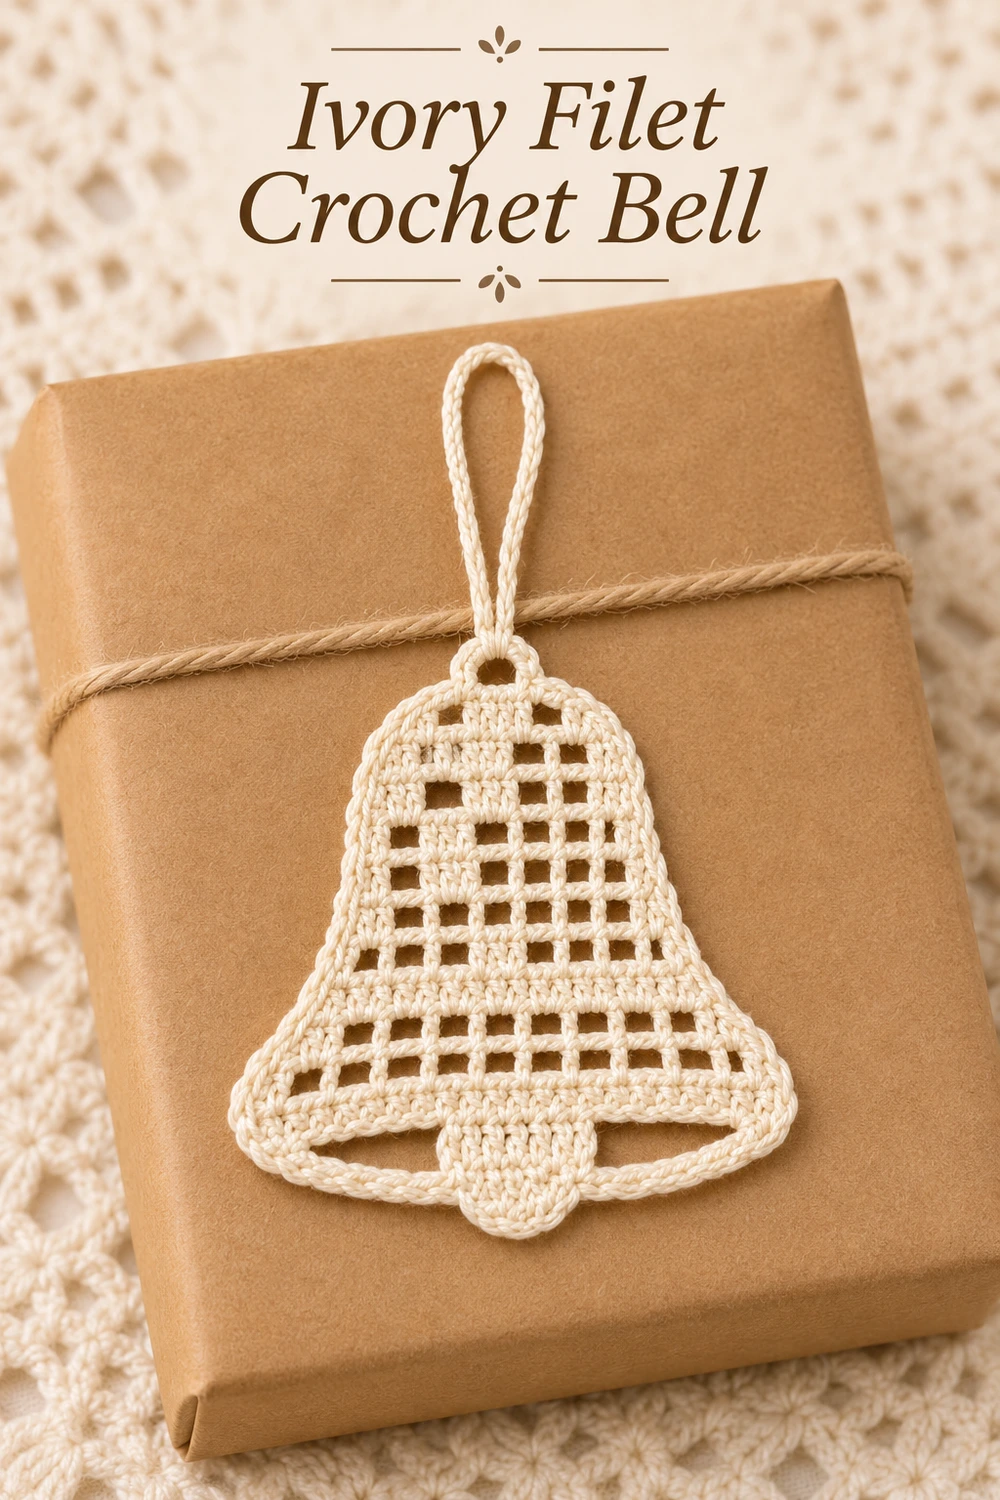
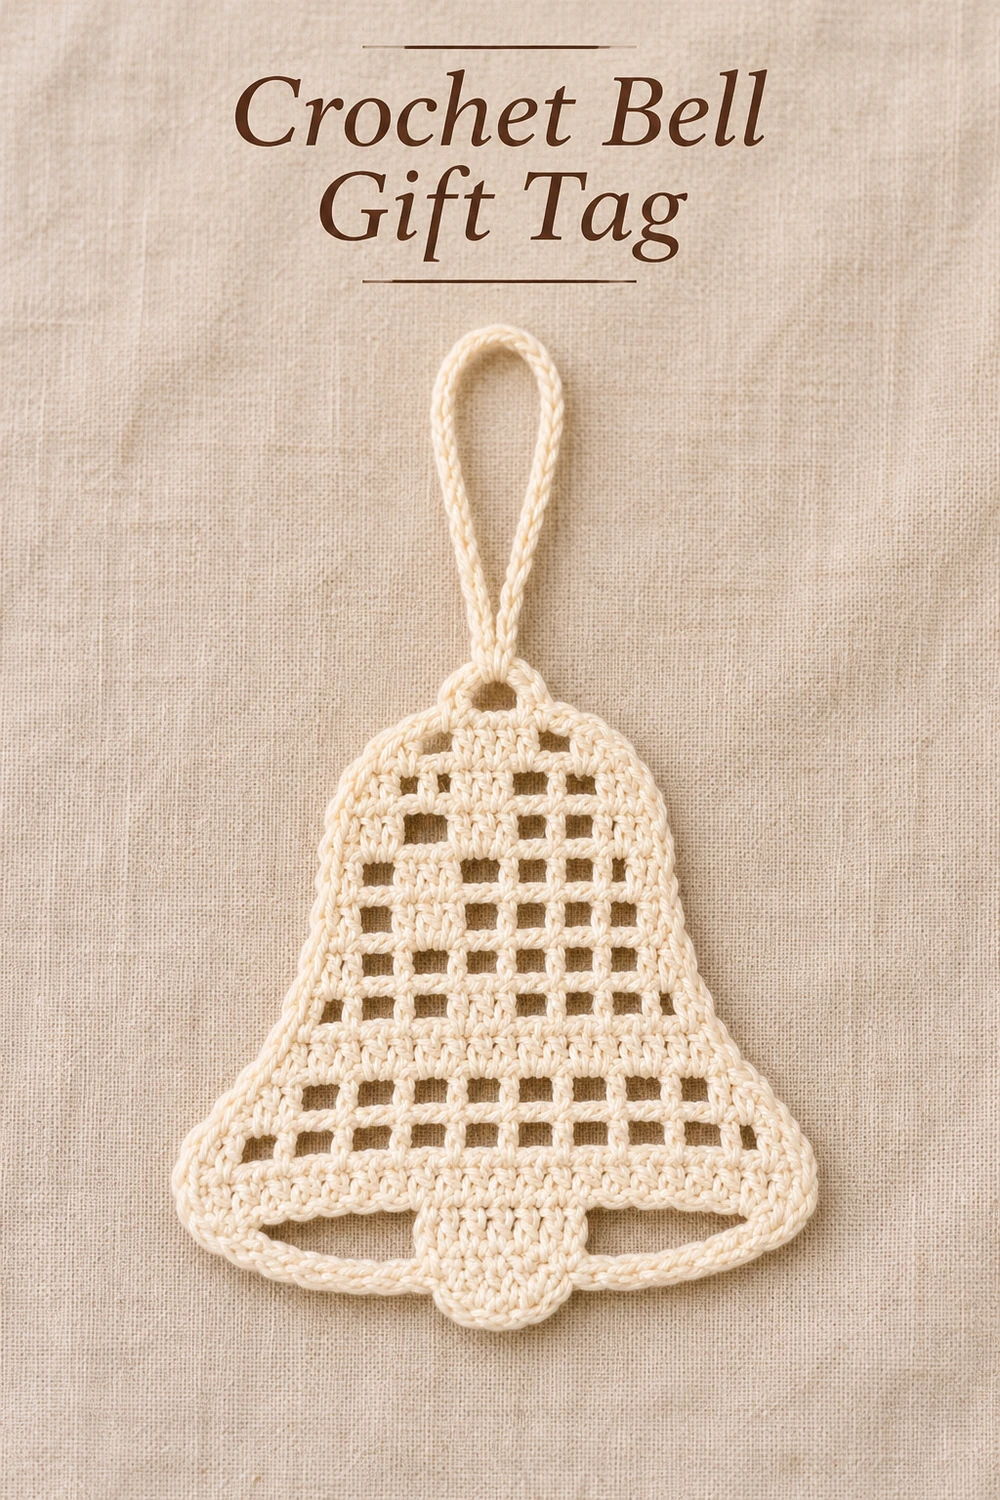
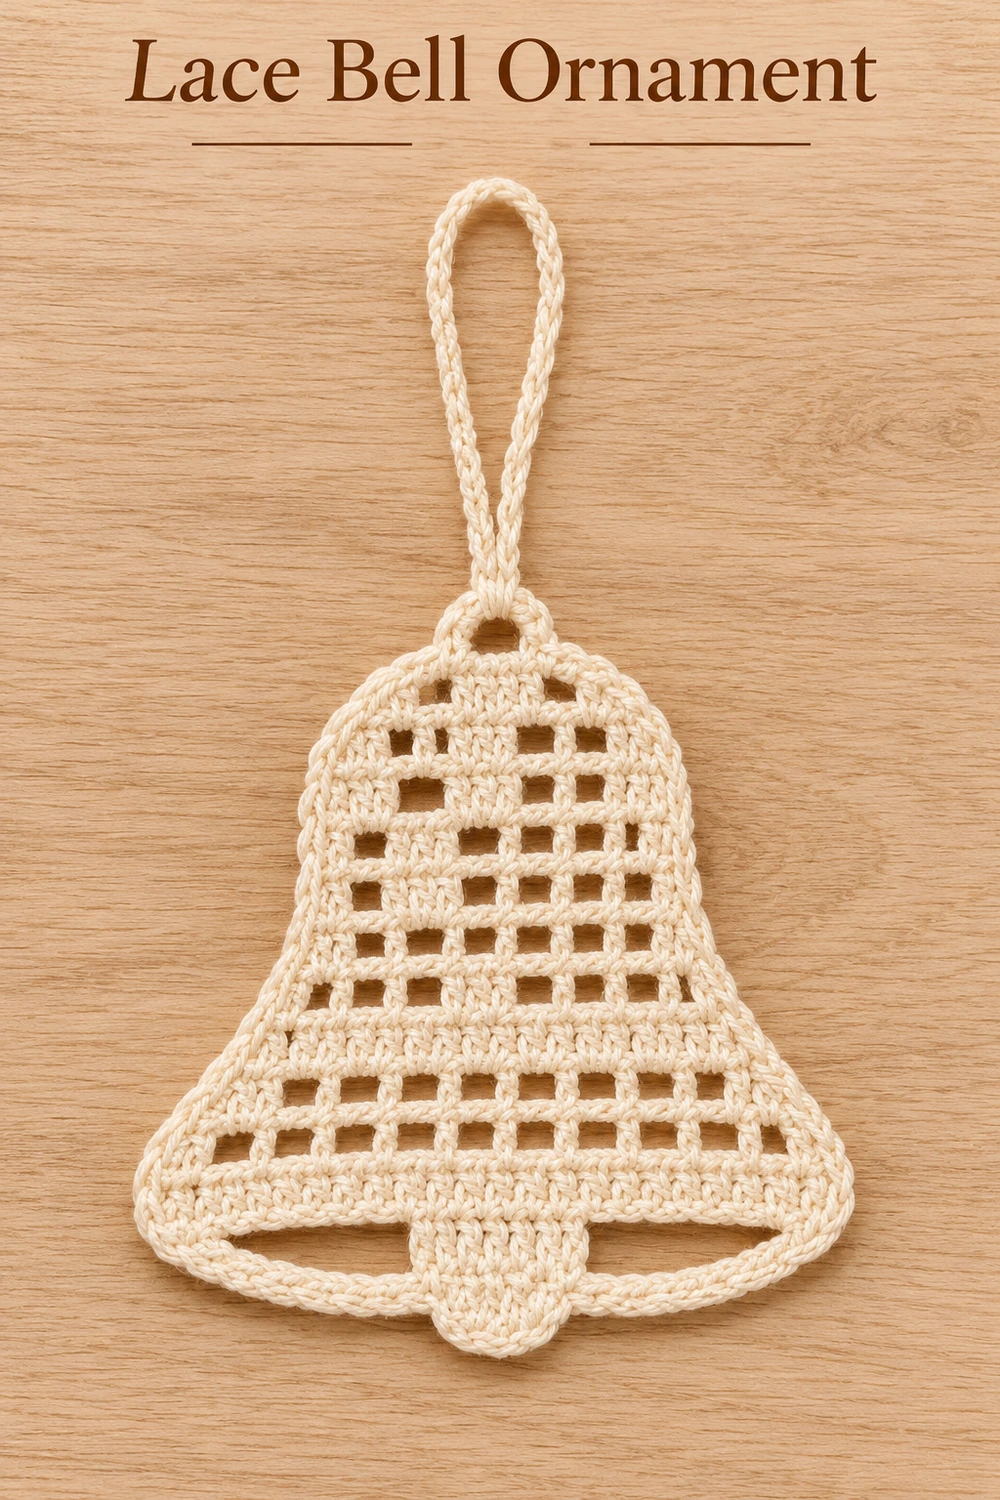
This ivory filet crochet bell has a square-mesh body, a flared hem, an open curved lower outline and a flat central clapper. The long chain loop lets it hang from a tree branch or slip over the ribbon on a wrapped gift.
This pattern is an adaptation developed from the photograph. The arrangement of solid filet cells and the hidden attachment stitches were reconstructed. The counts were checked on paper. The pattern has not been physically crocheted or tested.
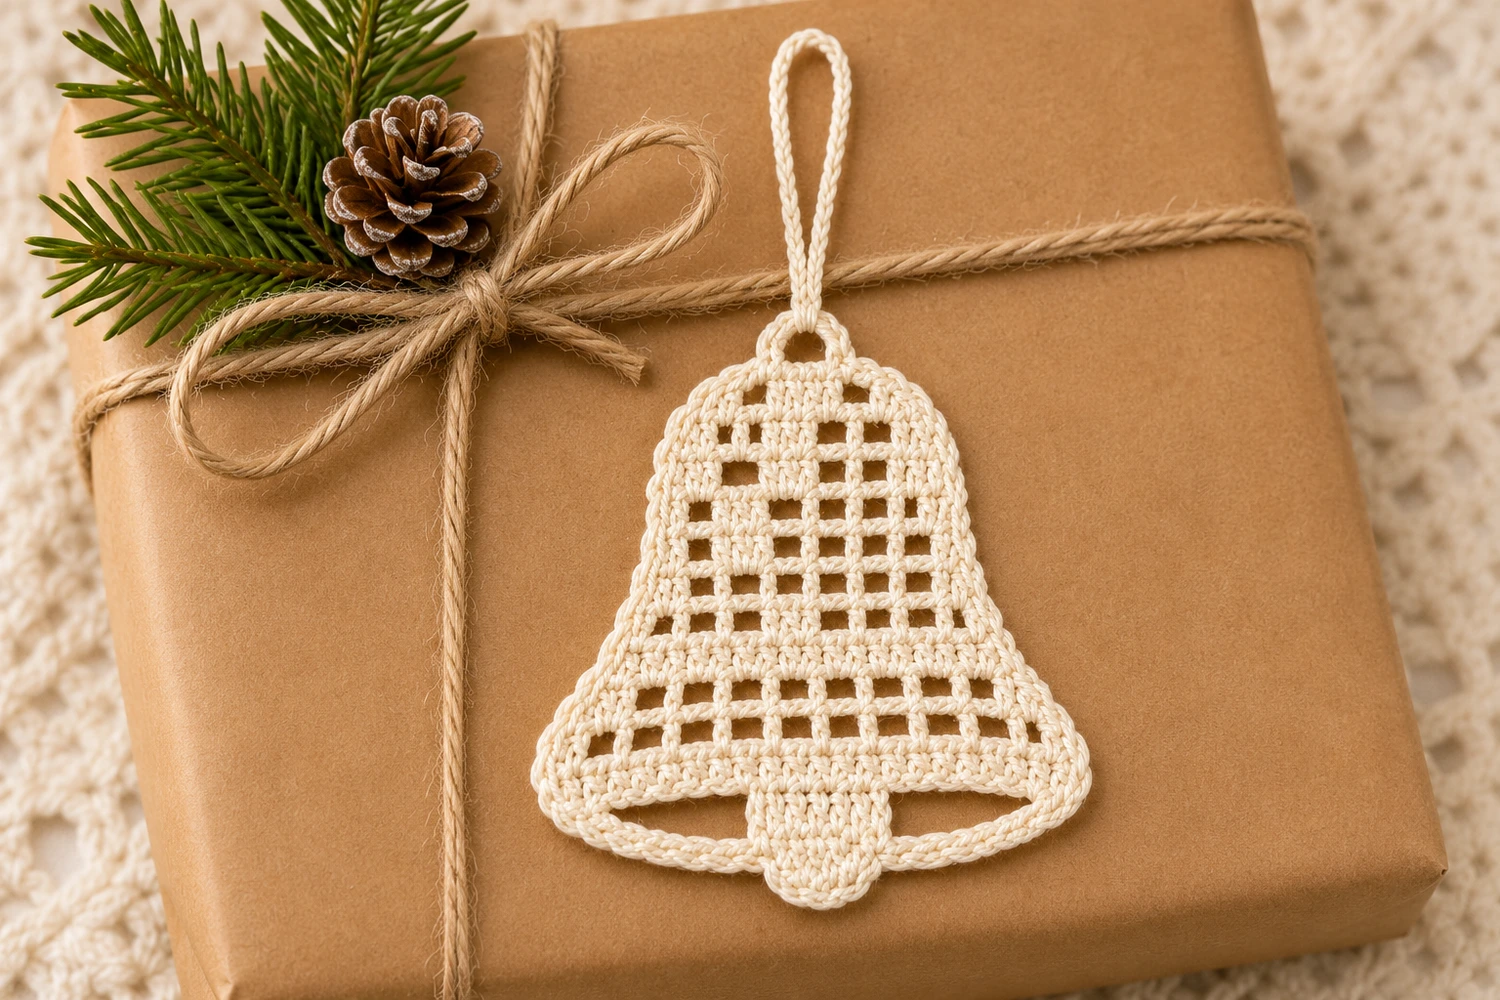
Ivory Filet Crochet Bell Materials
- Size 10 crochet cotton in warm ivory, approximately 5–8 g per bell including sewing tails. This is a planning estimate.
- 1.75–2 mm steel crochet hook, tapestry needle, scissors, removable markers, a blocking mat and rustproof pins.
- Intermediate. Estimated body width at the hem: 3–3¾ in (7.5–9.5 cm). Estimated height from crown to clapper, excluding hanger: 3½–4½ in (9–11.5 cm).
Before You Begin
Work four sample filet cells in a short swatch and check that the openings look nearly square. Gauge affects both the silhouette and the finished size. Loosen the ch-2 spaces if they pinch the mesh. Keep the side stitches firm enough to support the edging.
Make one flat bell body, one lower outline strip and one clapper. The hanger is attached at the crown. Everything is made from the same ivory cotton. The clapper stays flat without stuffing.
US Crochet Terms and Working Notes
ch chain, sl st slip stitch, sc single crochet, dc double crochet, st(s) stitch(es), sp space, RS right side, sc2tog single crochet two together. For sc2tog, draw up a loop in each of the next two stitches, then yarn over and draw through all three loops.
The body is worked bottom up in turned rows. Ch 3 counts as the first dc. Mark its top so the last dc of the following row can be placed there. Ch 1 on the trim and clapper does not count. Read each table row in the direction you are crocheting. The cell sequences are symmetrical, so the design reads the same from either side.
Each working row consists of a starting dc and three positions per cell. Mark the boundary dc after each cell on your first mesh row. See the Craft Yarn Council guide to US abbreviations for terminology.
Crochet the Filet Bell Body
Open and filled cells
O (open). Ch 2, pass over the two interior positions of the next cell, then dc in its far boundary dc.
F (filled). Dc once in each of the next three positions. If the two interior positions are a ch-2 space, work 2 dc around the space, then dc into the boundary dc. Adjacent cells share a boundary. The previous cell’s last dc is already the next cell’s starting post.
Foundation and changes in width
Row 1. Ch 27. Dc in the fourth chain from the hook and in every remaining chain. The skipped three chains count as the first dc. 25 dc.
Straight rows. Turn, ch 3 and work the listed cells, leaving the first old boundary dc under the turning chain unworked. At the far edge, the last dc goes in the top of the previous turning chain or beginning dc.
Narrow rows (5, 11 and 13). Fasten off after the previous row and turn. Leave the first whole cell unused. Join yarn at the boundary dc at the far side of that skipped cell, then ch 3 in that boundary. Work the listed cells and leave the last whole cell unused. The two outer cells are removed together and leave matched ledges. Mark the new first dc and retain the tails for weaving.
Row-by-row filet chart
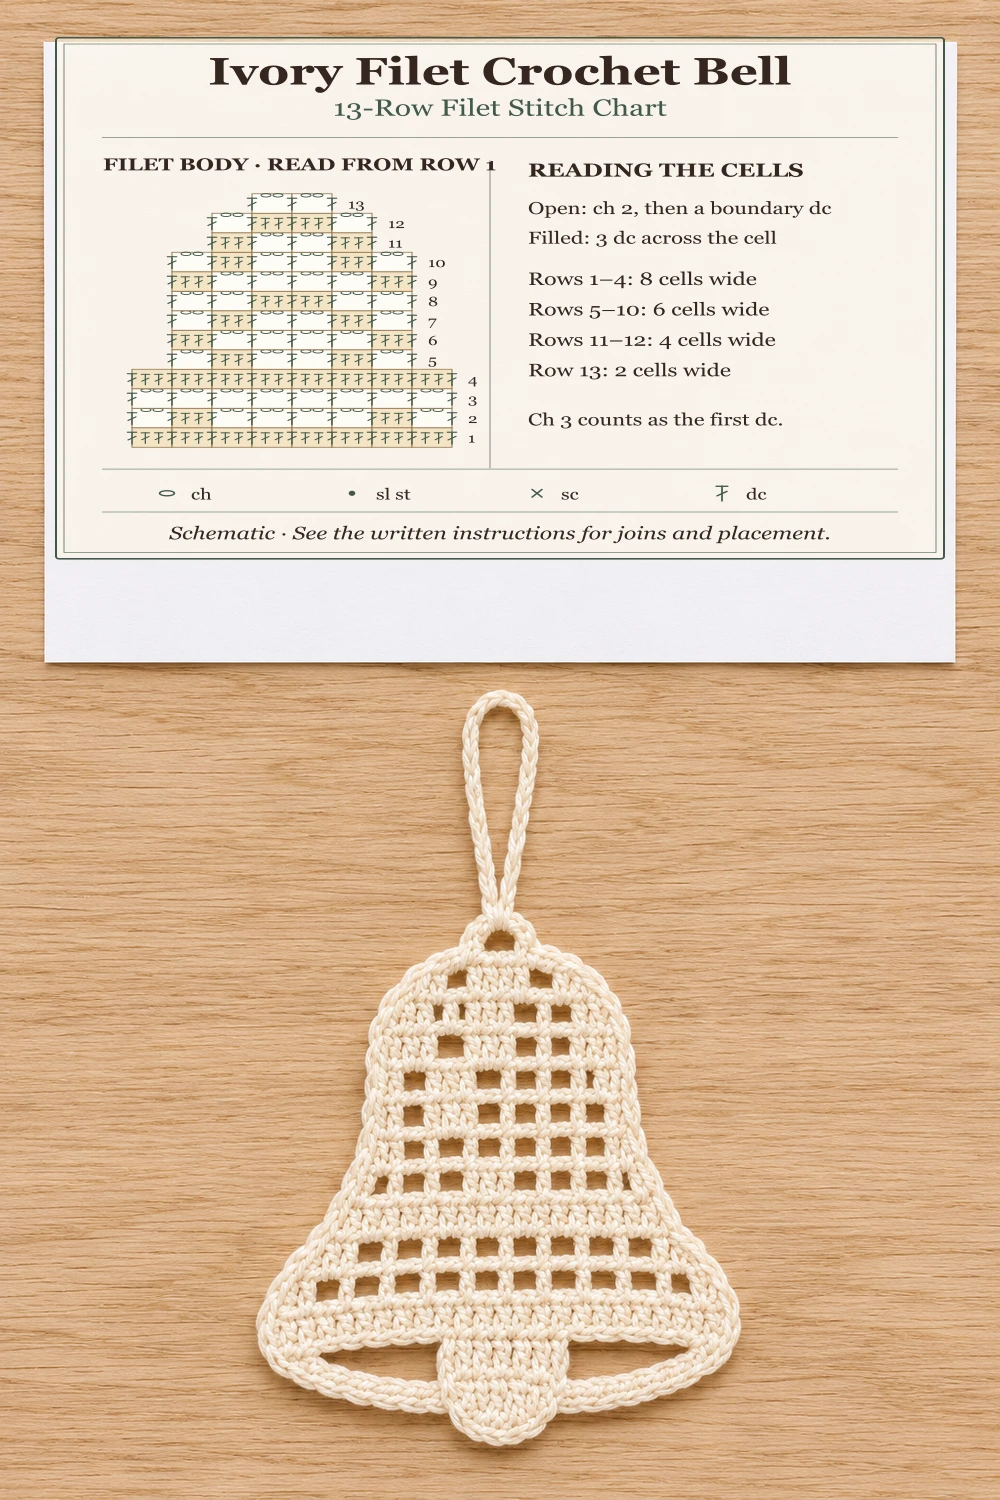
| Row | Shaping | Cells in working order | Final count |
|---|---|---|---|
| 1 | Foundation | F F F F F F F F | 25 dc, 0 ch-2 spaces |
| 2 | Straight | O F O O O O F O | 13 dc, 6 ch-2 spaces |
| 3 | Straight | O O O O O O O O | 9 dc, 8 ch-2 spaces |
| 4 | Straight | F F F F F F F F | 25 dc, 0 ch-2 spaces |
| 5 | Narrow | O F O O F O | 11 dc, 4 ch-2 spaces |
| 6 | Straight | F O O O O F | 11 dc, 4 ch-2 spaces |
| 7 | Straight | O F O O F O | 11 dc, 4 ch-2 spaces |
| 8 | Straight | O O F F O O | 11 dc, 4 ch-2 spaces |
| 9 | Straight | F O O O O F | 11 dc, 4 ch-2 spaces |
| 10 | Straight | O F O O F O | 11 dc, 4 ch-2 spaces |
| 11 | Narrow | F O O F | 9 dc, 2 ch-2 spaces |
| 12 | Straight | O F F O | 9 dc, 2 ch-2 spaces |
| 13 | Narrow | O O | 3 dc, 2 ch-2 spaces |
Widths are 25 positions for 8 cells, 19 positions for 6 cells, 13 positions for 4 cells and 7 positions for 2 cells. A represented open space uses two positions even though you skip those positions in the row below.
Outline the Crown and Sides
With RS facing, join yarn at either bottom corner. Work up that side, across Row 13 and back down the other side. Work 2 sc around each row-end post on each side. At every narrowed ledge, work 1 sc in each of the three exposed positions: into dc tops where present, or 2 sc around a ch-2 space and 1 sc in the exposed boundary dc. Across the crown, work 1 sc into each dc and 2 sc around each ch-2 space. Fasten off at the other bottom corner. 77 sc total (26 side sc and 9 ledge sc per side, plus 7 crown sc). The row-end posts and crown stitch tops are separate insertion points.
Make the Curved Lower Outline
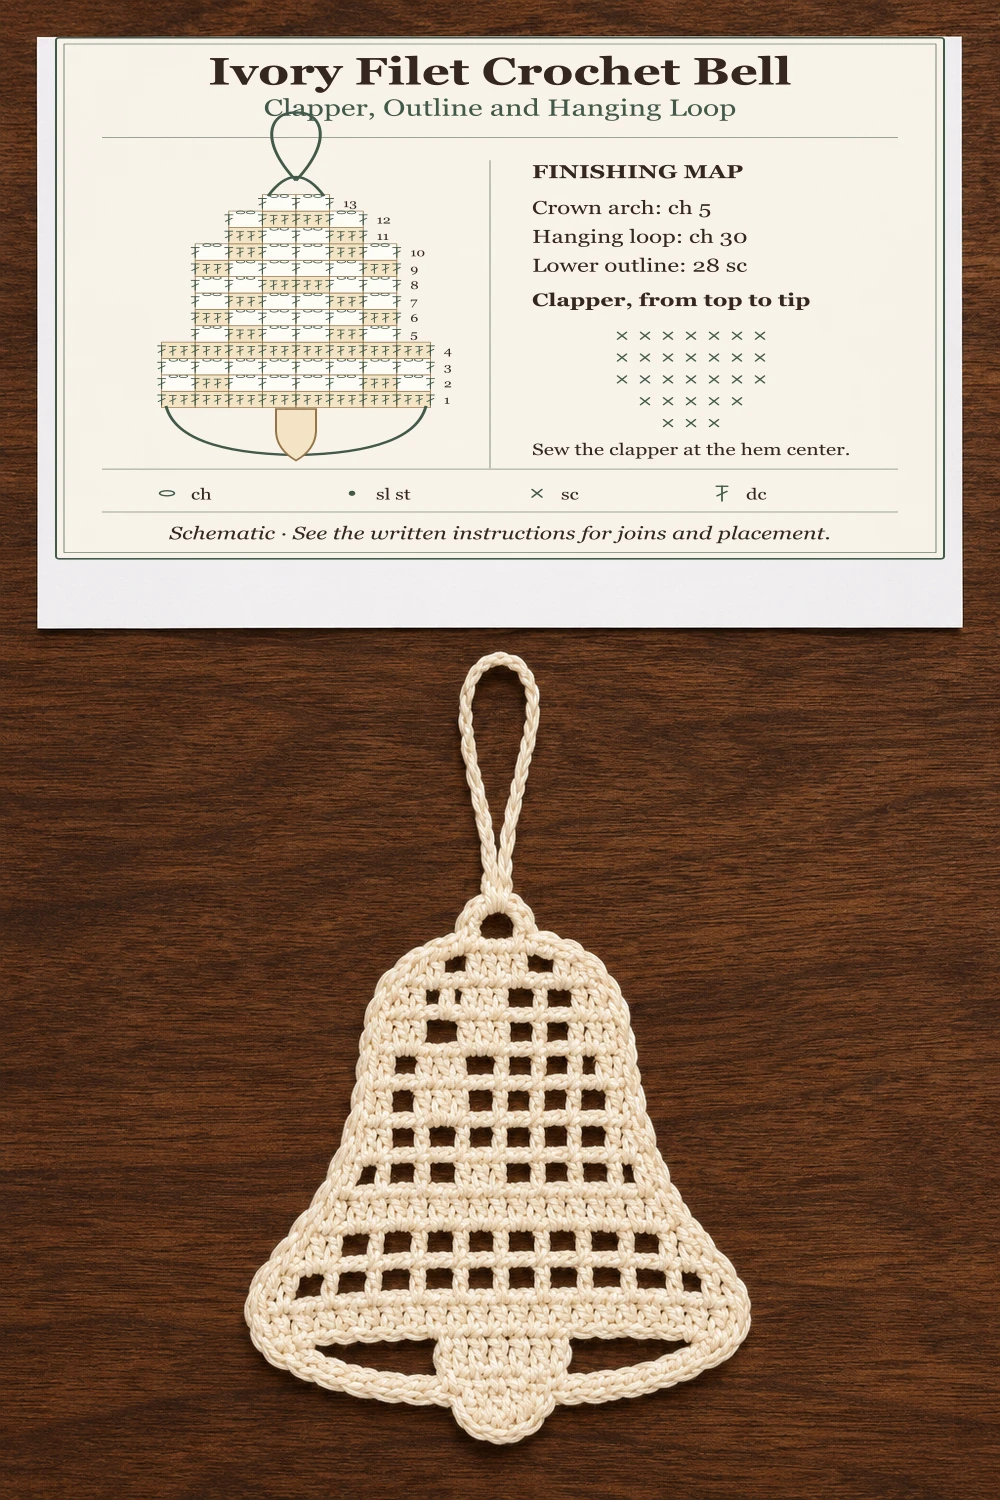
Ch 29 with an 8 in (20 cm) sewing tail. Sc in the second chain from the hook and across, leaving another sewing tail. 28 sc. Lay the strip across the 25-position bottom edge, allowing it to bow downward. Sew one end to each bottom corner of the side outline with two small passes. Keep the central portion free. If your strip pulls the corners together, remake it with looser tension. Count and record any length adjustment for matching bells.
Make the Flat Clapper
- Ch 8, sc in second ch from hook and in the remaining chains. Row 1: 7 sc.
- Ch 1, turn, sc across. Repeat the same row once. Rows 2 and 3: 7 sc each.
- Ch 1, turn, sc2tog, sc in each of the next 3 sts, sc2tog. Row 4: 5 sc.
- Ch 1, turn, sc2tog, sc in next st, sc2tog. Row 5: 3 sc. Fasten off with a sewing tail.
On the back, align the seven foundation positions of the clapper under the center seven positions of the bell hem (positions 10–16). Sew the clapper’s upper edge to that section with small passes. The rounded tip points down and can overlap the curved strip slightly. Tack the midpoint of the strip behind the clapper with one small stitch so the two gaps remain even.
Add the Crown Arch and Hanging Loop
Locate the seven sc across the crown. Join at the third crown sc, ch 5, skip the middle sc, and sl st in the fifth sc. Fasten off. One ch-5 arch. Join fresh yarn around that arch, ch 30, and sl st back around the same arch. Fasten off and weave securely. One 30-chain loop. Pull gently on the hanger to check that the bell hangs upright before trimming the ends.
Finish, Troubleshoot and Store
Weave in the ends on the back. Dampen according to the cotton label and pin the body flat, opening the mesh gently. Keep the hem, clapper and crown centered on the same vertical line. Pin both lower gaps evenly and let the bell dry completely.
If one side narrows more steeply than the other, count left and right ledges and confirm each narrowing leaves one whole cell at both ends. If the lower strip looks straight, release the corner seams and re-pin it in a shallow arc before resewing. If a gift ribbon tilts the bell, thread the ribbon through the crown loop so the clapper hangs freely.
Hand-wash according to the thread label, blot gently and reblock flat. Store flat in tissue with the loop laid loose. For another holiday gift accent, see the Two-Round Crochet Star.
Visual Tutorial and Crochet Charts
The generated tutorial illustrates the construction. The first chart maps every filet row. The second shows the clapper, lower strip and hanging loop. Use the written instructions for all joins and exact counts.