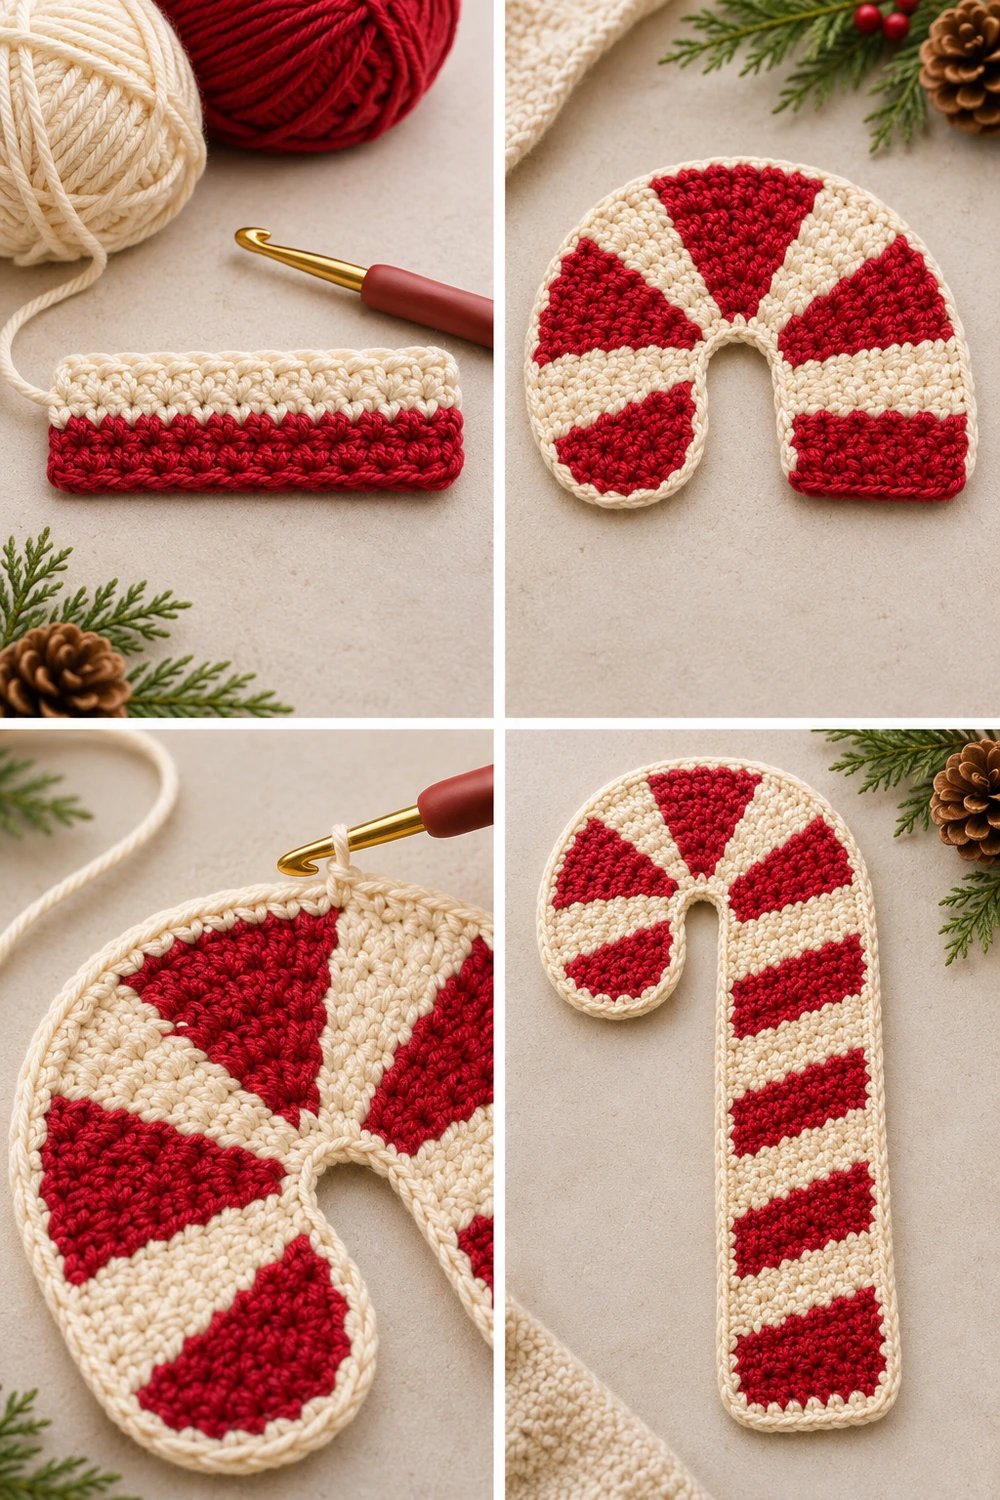
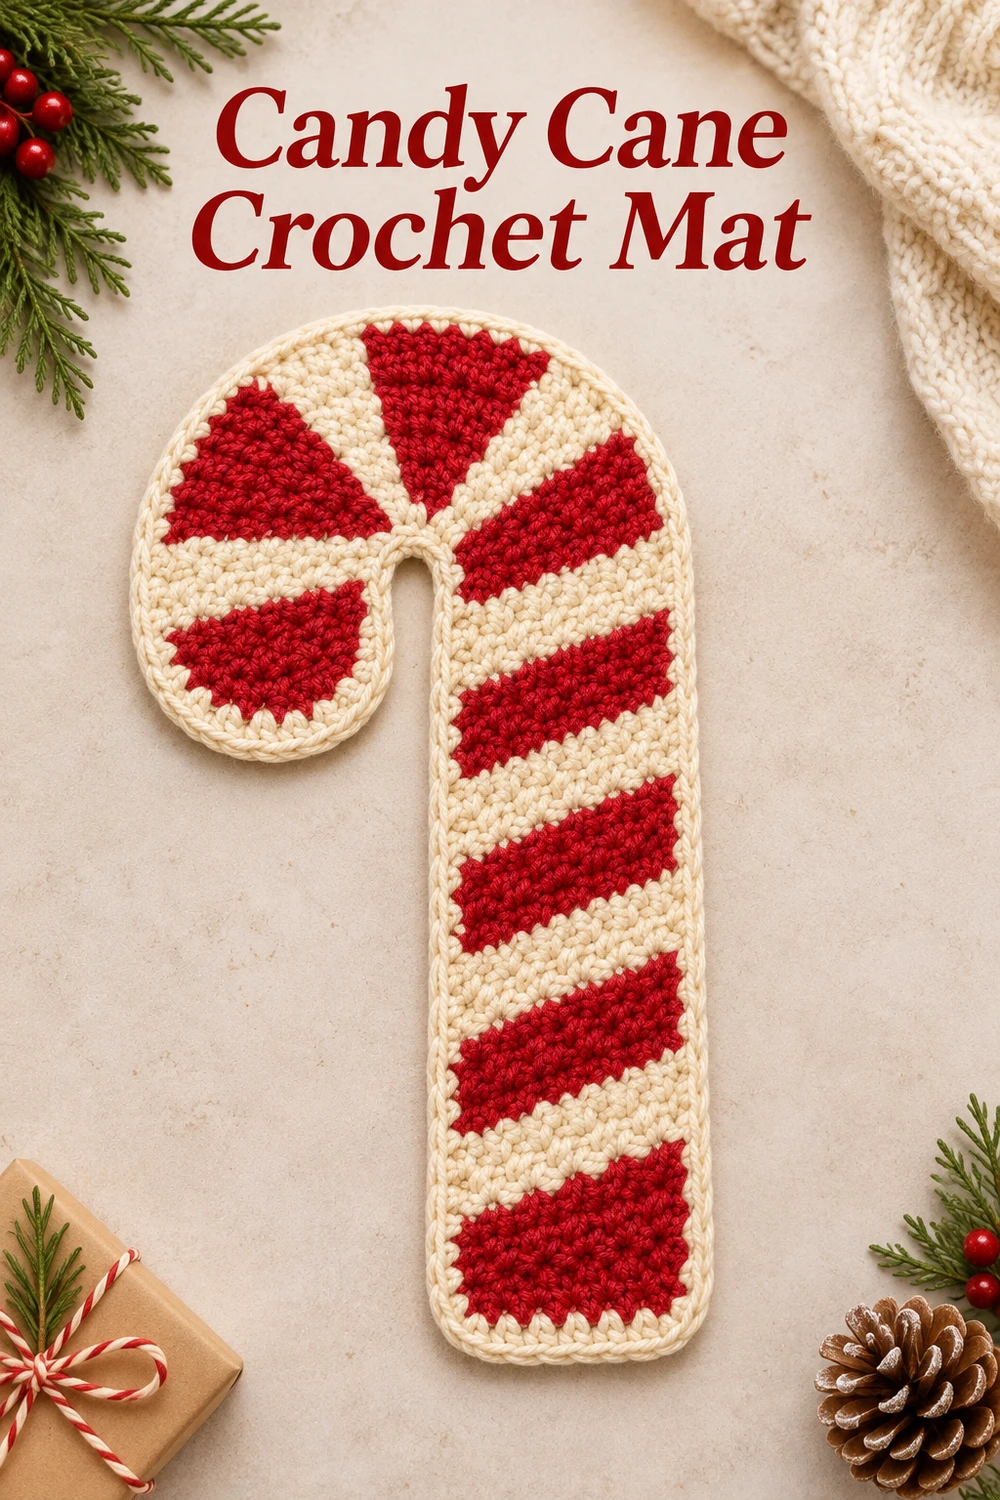
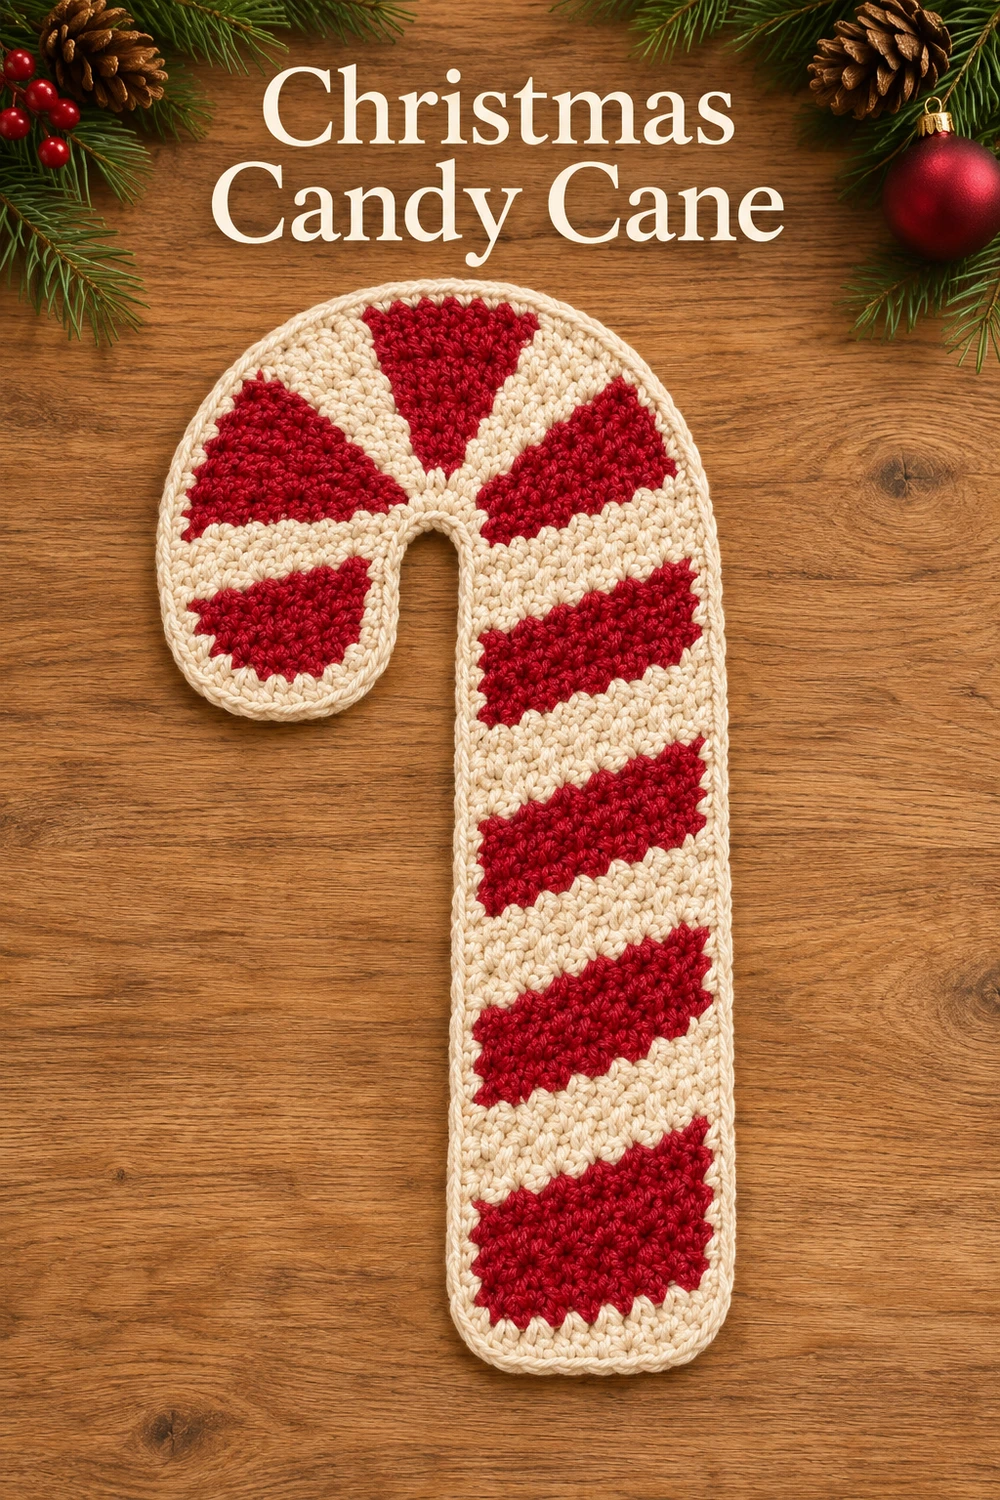
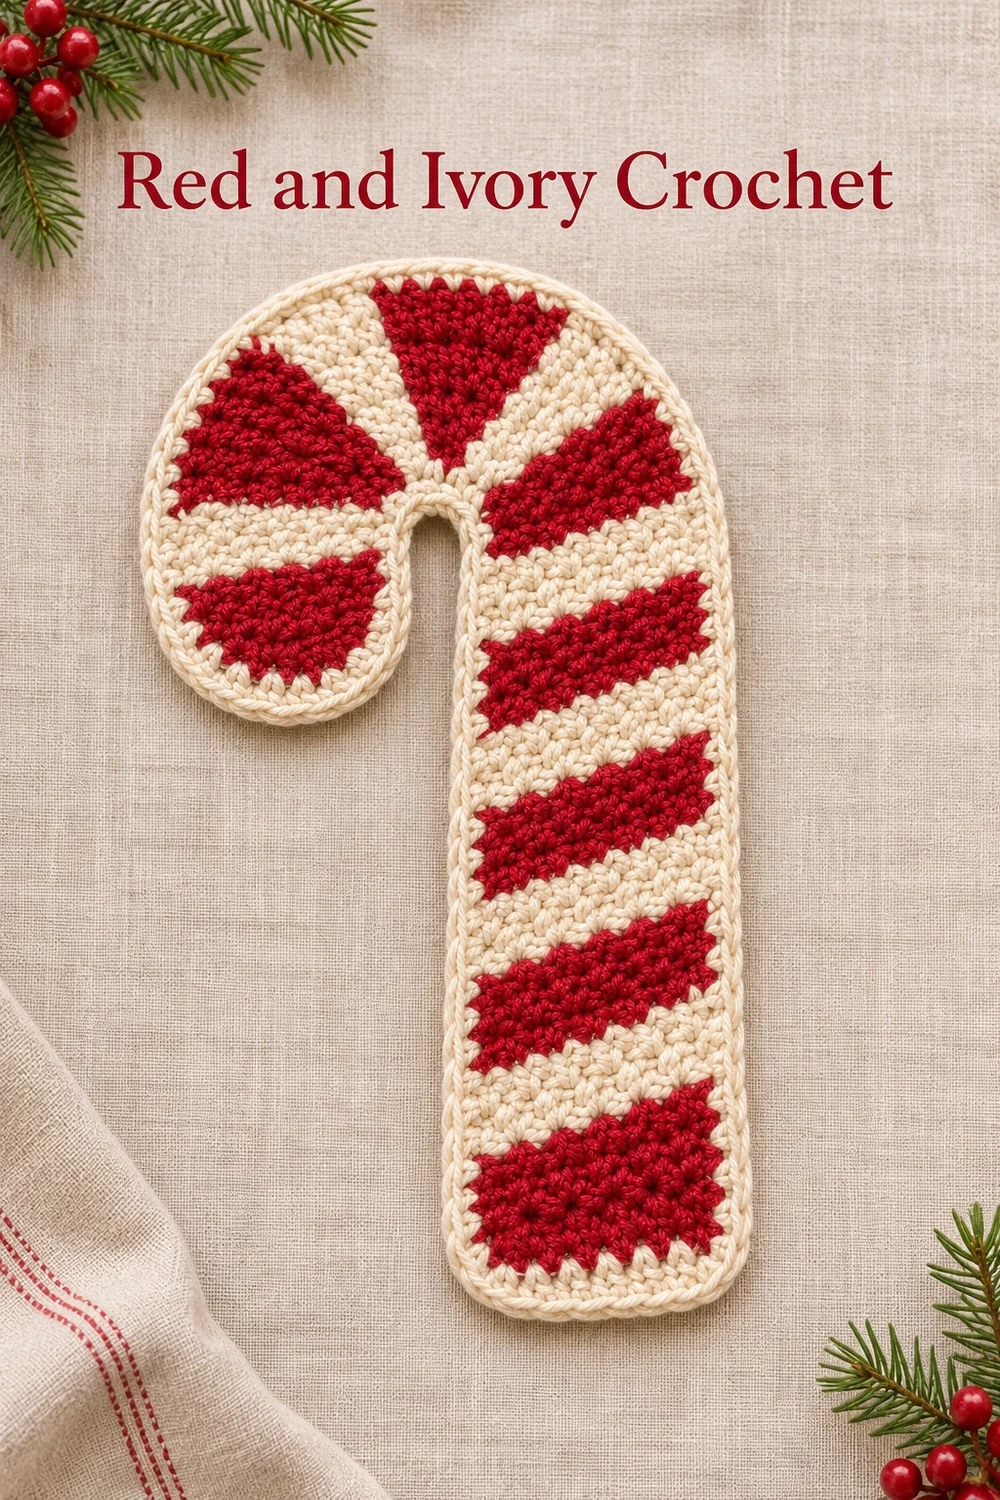
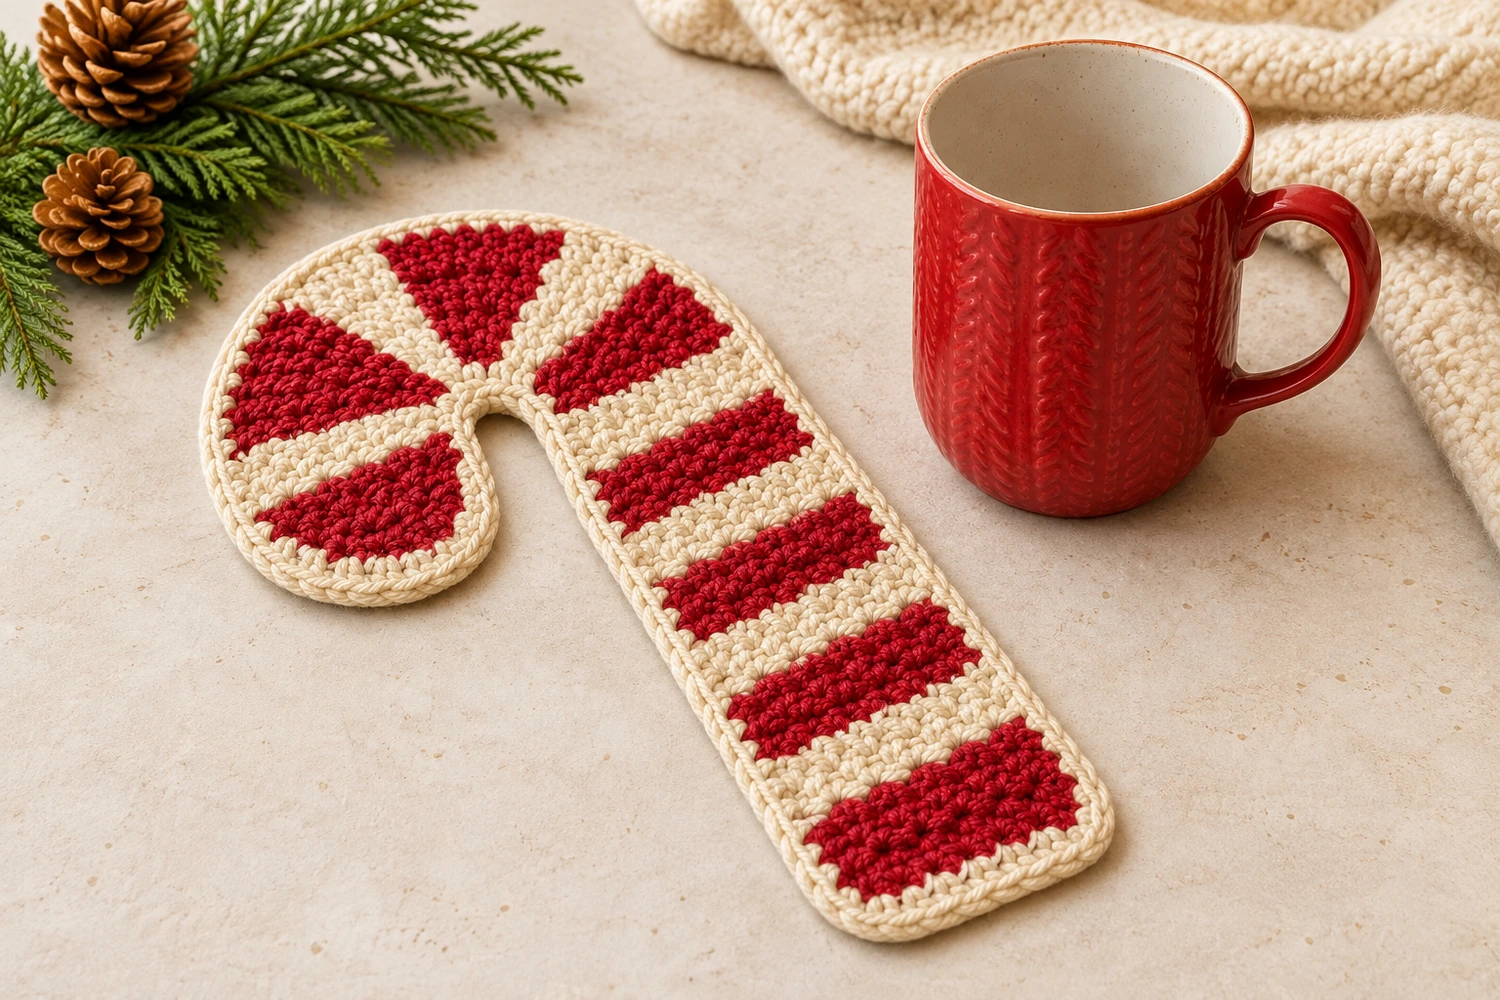
This candy cane crochet mat has a broad hook that turns left, a long striped stem and a slim ivory outline. The flat cotton fabric works as a small holiday table accent or a mug mat when the cup base fits on the solid section.
This photo-inspired adaptation reproduces the silhouette with shaped single-crochet rows. The color placement around the curve was reconstructed from the reference. The counts were checked on paper. The design has not been physically crocheted or tested.
Candy Cane Crochet Mat Materials
- Smooth worsted-weight (4) cotton in cherry red and warm ivory. Allow approximately 20–30 g red and 25–35 g ivory including the outline. These are estimates.
- 4 mm hook as a starting size, two small yarn bobbins per color, a blunt needle, scissors, two locking markers and rustproof blocking pins.
- Intermediate. Estimated blocked size: 7–8½ in (18–22 cm) high and 5–6 in (13–15 cm) across the hook, depending on your gauge.
Before You Begin
Check a single-crochet swatch for firm, flexible fabric. Roughly 16–18 sc and 17–20 rows per 4 in (10 cm) is a starting range. Measure the table surface or mug base you plan to use. The long stem is intentionally narrow, so many mugs will fit the display better beside the mat.
Make one continuous body, first the crown alone, then the short return and long stem as two sections attached directly to the final crown row. A single ivory round smooths the stepped outline. There is no backing, stuffing or sewn seam.
US Crochet Terms and Working Notes
ch chain, sc single crochet, sl st slip stitch, st(s) stitch(es), RS right side, WS wrong side. Inc is 2 sc into one old st. For sc2tog, pull up a loop through each of the next two stitches, then yarn over and draw through all three loops.
Work back and forth. Ch 1 and turn before every row except the foundation and the two fresh joins in Row 9. The turning chain never counts. Mark the first stitch if you have difficulty finding it at the turn. The row tables already reverse the color order on even rows. Follow them from left to right as written for each row.
In the tables, R means red and I means ivory. For example, R3 means the next three completed stitches are red. Change color on the last yarn-over of the previous stitch. At an increase, its two stitches may have different colors. Use the color sequence for the new stitch tops while following the shaping for the old insertion points.
Carry the resting strand inside the stitches where it is needed again within a few stitches. Use separate small bobbins across longer sections if the darker yarn shows through. At the end of a row, bring the next starting color up the edge loosely or rejoin it with a tail. The Craft Yarn Council abbreviation guide lists the American terms.
Shape the Broad Crown
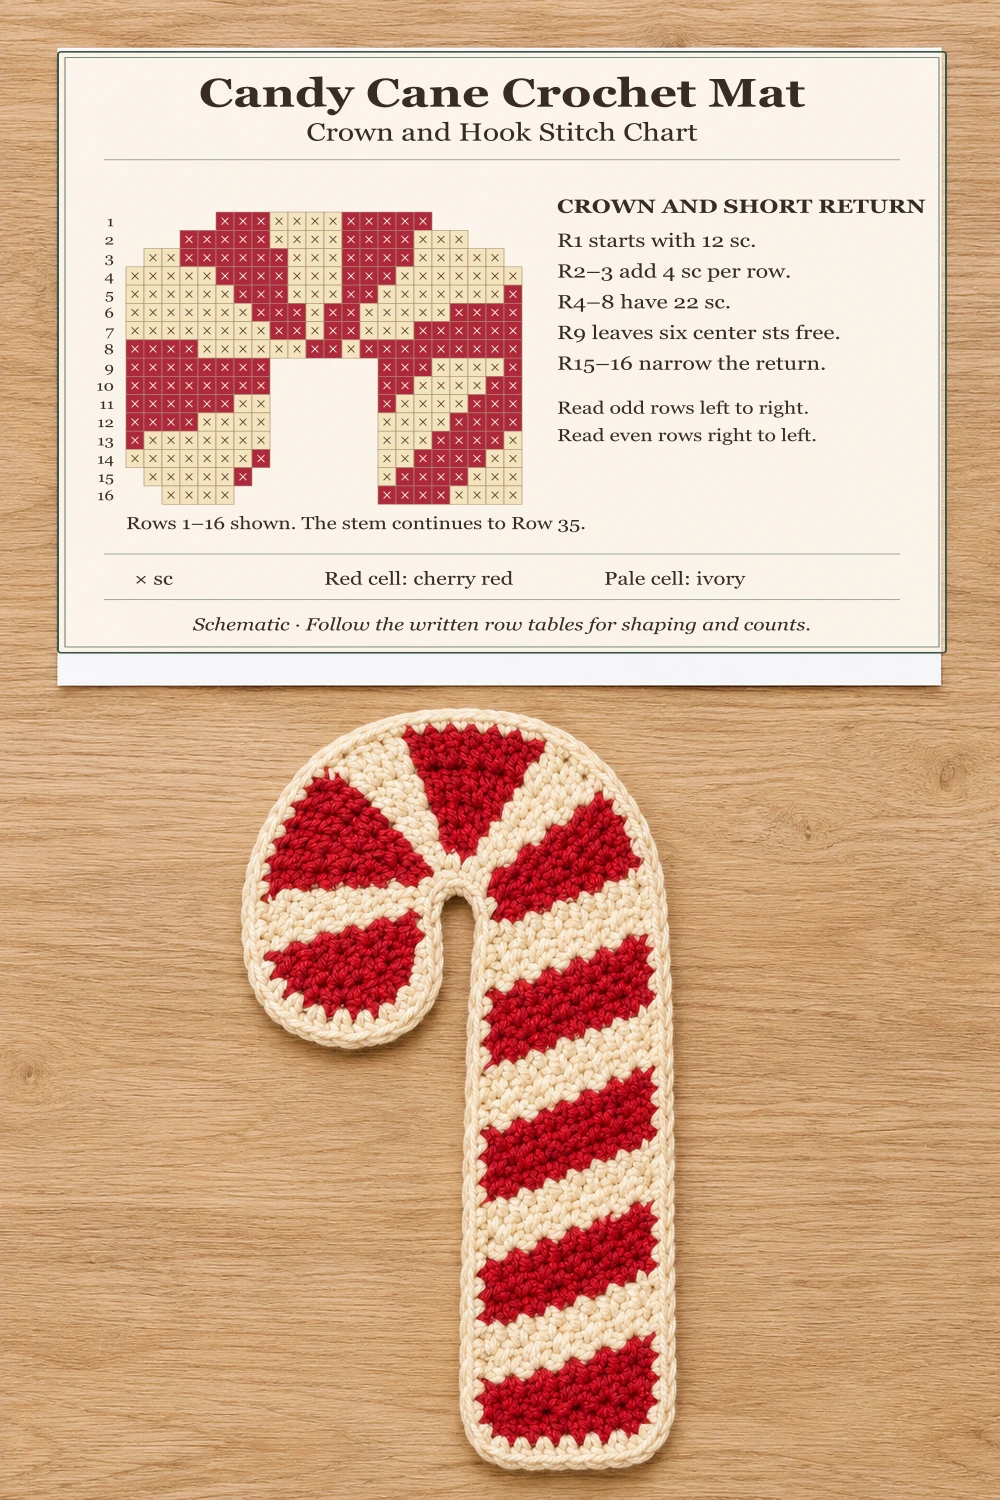
Row 1. Ch 13 in the first listed color. Sc in the second chain from the hook and across, following the first row’s color sequence. The skipped chain does not count. For the layout, call the direction of this first row left to right when you look at the finished RS.
Rows 2 and 3. Inc in each of the first two old stitches, sc in each stitch up to the final two old stitches, and inc in each of those final two stitches. Each row adds four stitches. Row 4. Inc in the first and last stitch, sc once in each stitch between them. Rows 5–8. Work one sc in each old stitch.
| Row | Shaping | Color sequence in working order | Count |
|---|---|---|---|
| 1 | Foundation | R3 · I4 · R5 | 12 sc |
| 2 | Widen by four | I3 · R4 · I4 · R5 | 16 sc |
| 3 | Widen by four | I2 · R6 · I3 · R4 · I5 | 20 sc |
| 4 | Widen by two | I7 · R3 · I3 · R4 · I5 | 22 sc |
| 5 | Even | I6 · R3 · I3 · R2 · I7 · R1 | 22 sc |
| 6 | Even | R4 · I5 · R2 · I1 · R3 · I7 | 22 sc |
| 7 | Even | I8 · R2 · I1 · R2 · I3 · R6 | 22 sc |
| 8 | Even | R9 · I1 · R2 · I6 · R4 | 22 sc |
Work the Short Hook Return
After Row 8, fasten off and place the crown RS up with the foundation above the live edge. Mark the leftmost eight and rightmost eight stitches. Leave the middle six stitches free for the opening. In Row 9, join at the far left, ch 1, and sc into those eight left-hand stitches from left to right. Join with a sl st to the first base if needed to position the yarn, then work the first sc into that same base. The slip stitch does not count.
Rows 10–14 each work one sc per old stitch. To narrow Rows 15 and 16, sc2tog over the first two old stitches, sc once in each old stitch up to the last two stitches, then sc2tog over those last two. Each row removes two stitches. Fasten off after Row 16.
| Row | Shaping | Color sequence in working order | Count |
|---|---|---|---|
| 9 | Even | R8 | 8 sc |
| 10 | Even | R8 | 8 sc |
| 11 | Even | R6 · I2 | 8 sc |
| 12 | Even | I4 · R4 | 8 sc |
| 13 | Even | R1 · I7 | 8 sc |
| 14 | Even | R1 · I7 | 8 sc |
| 15 | Narrow by two | I5 · R1 | 6 sc |
| 16 | Narrow by two | I4 | 4 sc |
Work the Long Straight Stem
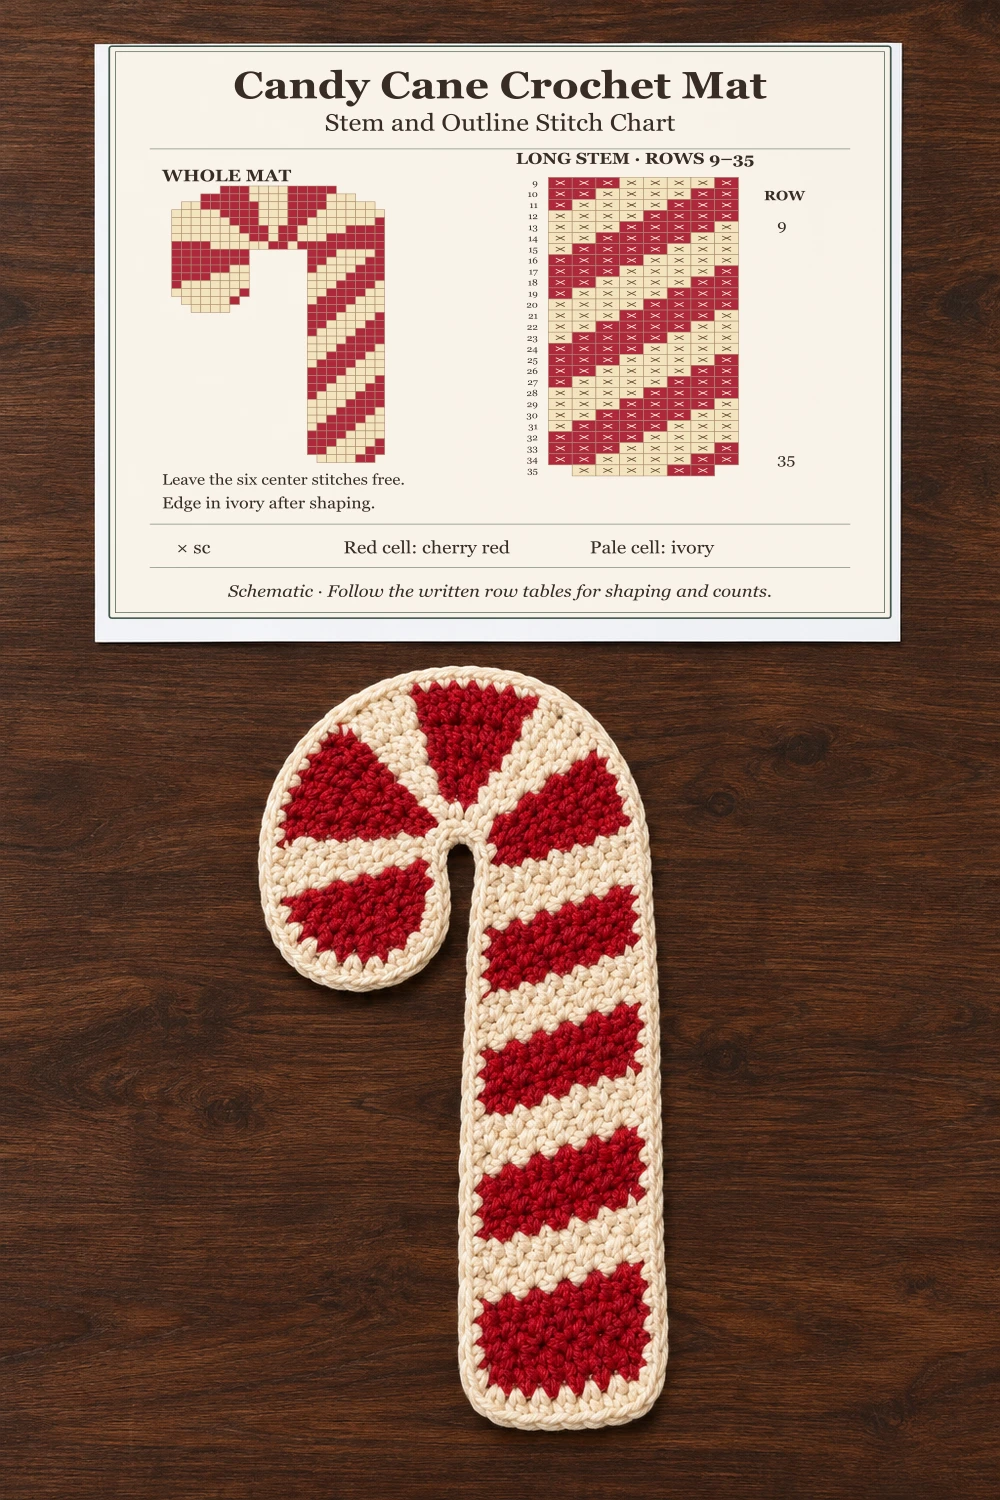
With the RS up, rejoin at the inner edge of the right-hand group. Ch 1 and work Row 9 from that point to the outer right edge. Use only the marked eight stitches of Row 8. Work one sc into each old stitch on Rows 10–34. The alternating color sequence shifts the stripes diagonally across the stem. On Row 35, sc2tog at both ends with one sc in each stitch between the decreases. Fasten off after the final six stitches.
| Row | Shaping | Color sequence in working order | Count |
|---|---|---|---|
| 9 | Even | R3 · I4 · R1 | 8 sc |
| 10 | Even | R2 · I4 · R2 | 8 sc |
| 11 | Even | R1 · I4 · R3 | 8 sc |
| 12 | Even | R4 · I4 | 8 sc |
| 13 | Even | I3 · R4 · I1 | 8 sc |
| 14 | Even | I2 · R4 · I2 | 8 sc |
| 15 | Even | I1 · R4 · I3 | 8 sc |
| 16 | Even | I4 · R4 | 8 sc |
| 17 | Even | R3 · I4 · R1 | 8 sc |
| 18 | Even | R2 · I4 · R2 | 8 sc |
| 19 | Even | R1 · I4 · R3 | 8 sc |
| 20 | Even | R4 · I4 | 8 sc |
| 21 | Even | I3 · R4 · I1 | 8 sc |
| 22 | Even | I2 · R4 · I2 | 8 sc |
| 23 | Even | I1 · R4 · I3 | 8 sc |
| 24 | Even | I4 · R4 | 8 sc |
| 25 | Even | R3 · I4 · R1 | 8 sc |
| 26 | Even | R2 · I4 · R2 | 8 sc |
| 27 | Even | R1 · I4 · R3 | 8 sc |
| 28 | Even | R4 · I4 | 8 sc |
| 29 | Even | I3 · R4 · I1 | 8 sc |
| 30 | Even | I2 · R4 · I2 | 8 sc |
| 31 | Even | I1 · R4 · I3 | 8 sc |
| 32 | Even | I4 · R4 | 8 sc |
| 33 | Even | R3 · I4 · R1 | 8 sc |
| 34 | Even | R2 · I4 · R2 | 8 sc |
| 35 | Narrow by two | I4 · R2 | 6 sc |
Add the Continuous Ivory Outline
With the RS facing, join ivory at one end of the crown foundation. Ch 1. Work one outline sc for each exposed stitch-width along the foundation, bottom edges and inside gap, and one sc around each exposed row end. At a shaping step, count both the exposed row end and the adjoining horizontal ledge. Place the two adjacent stitches in different visible strands when possible.
Follow the outer edge around the long stem, up its inner side, across the six unused stitches of Row 8, down the short return’s inner side and around its rounded end. Continue around to the first sc and join with a sl st. 130 sc by the row outline. Mark the sections while working if the ledges are hard to see. There are no extra corner increases in this count.
Finish and Block the Candy Cane Crochet Mat
Weave the ends through matching-color stitches and keep the backs of the stripes flat. Dampen the cotton according to its label. Lay the long stem straight, open the gap under the hook and pin both rounded ends. Let the outline settle into a smooth curve without pulling on individual color changes. Let the mat dry completely before using it.
Troubleshooting
The diagonals zigzag at each turn. Check that you used the printed color sequence in order on both sides. It has already been reversed on even rows. The gap closes up. Confirm all six center stitches were left free in Row 9. The outline looks tight. Rework the sc around the inner turn more loosely, then block the opening gently.
Care and Storage
Test the red cotton for dye transfer before washing, follow the yarn care label and reshape the mat while damp. Dry flat and store flat to preserve the bend. For a round cup mat with the same holiday palette, see the Christmas Snowflake Crochet Coaster.
Visual Tutorial and Crochet Charts
The generated photos show the intended appearance. Both charts are schematic. Each colored cell represents one completed stitch, and the written tables give the exact stitch sequence and shaping.