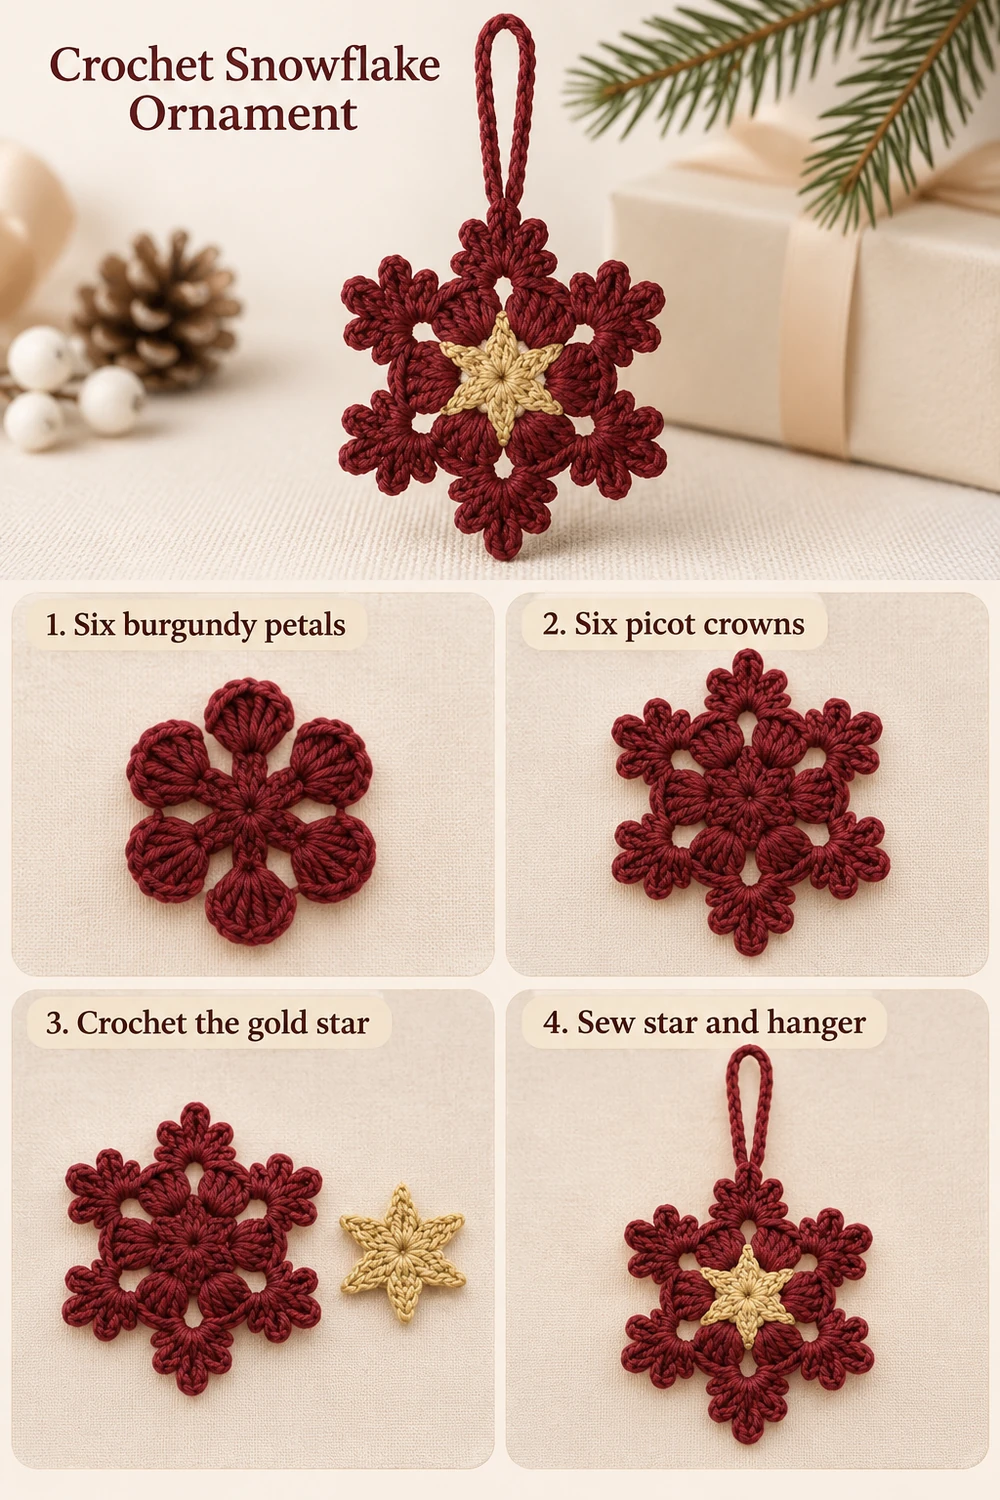
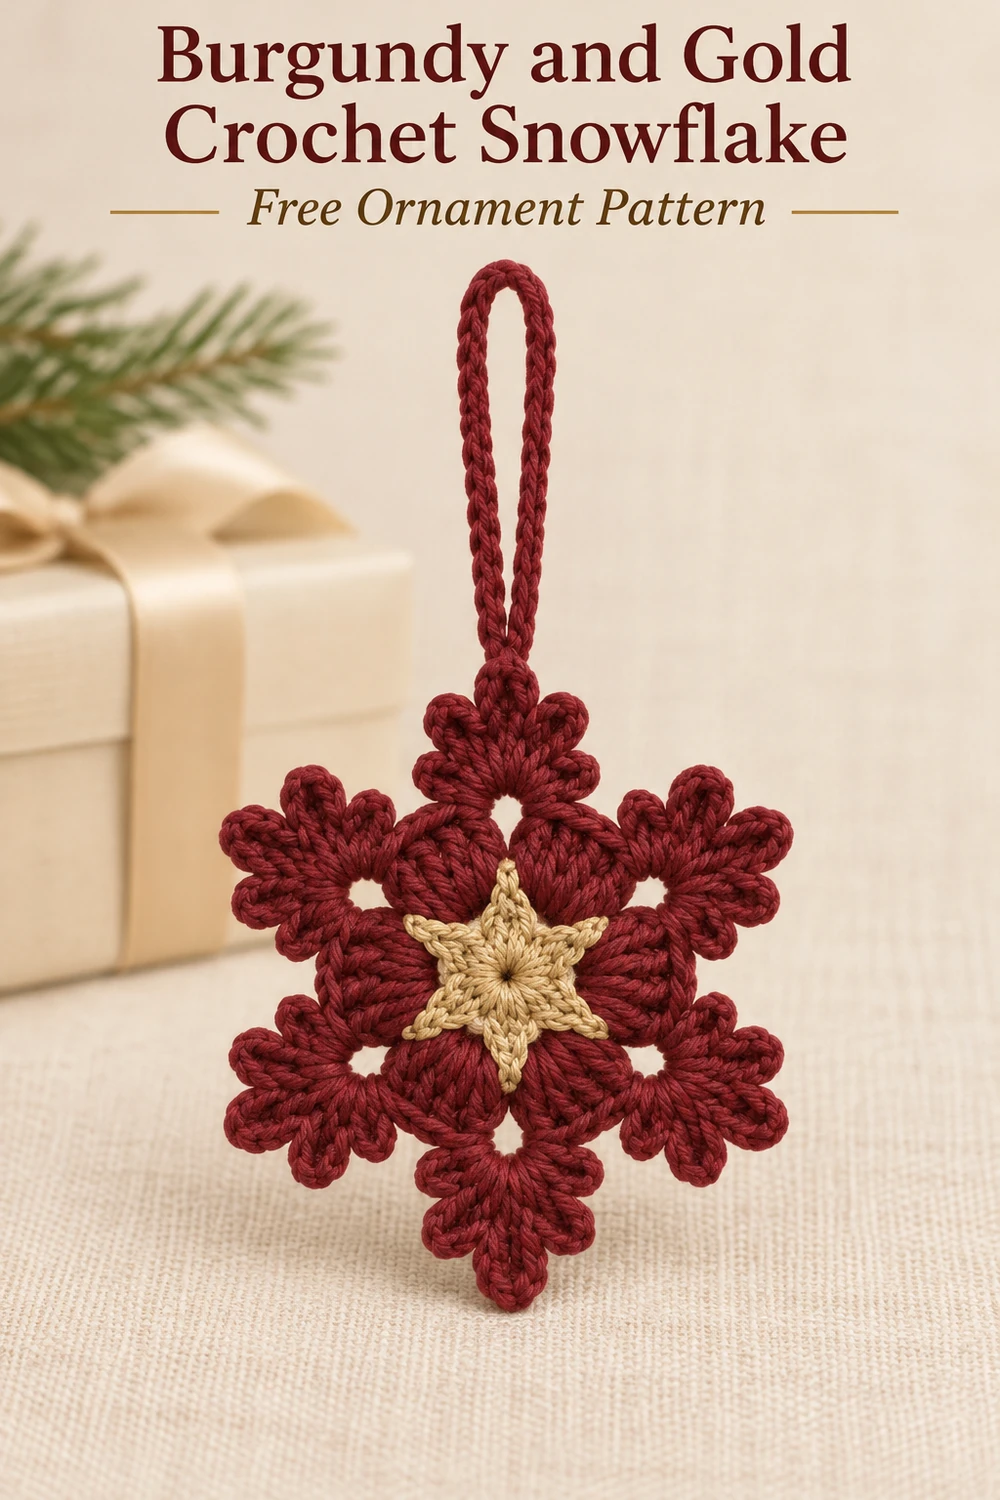
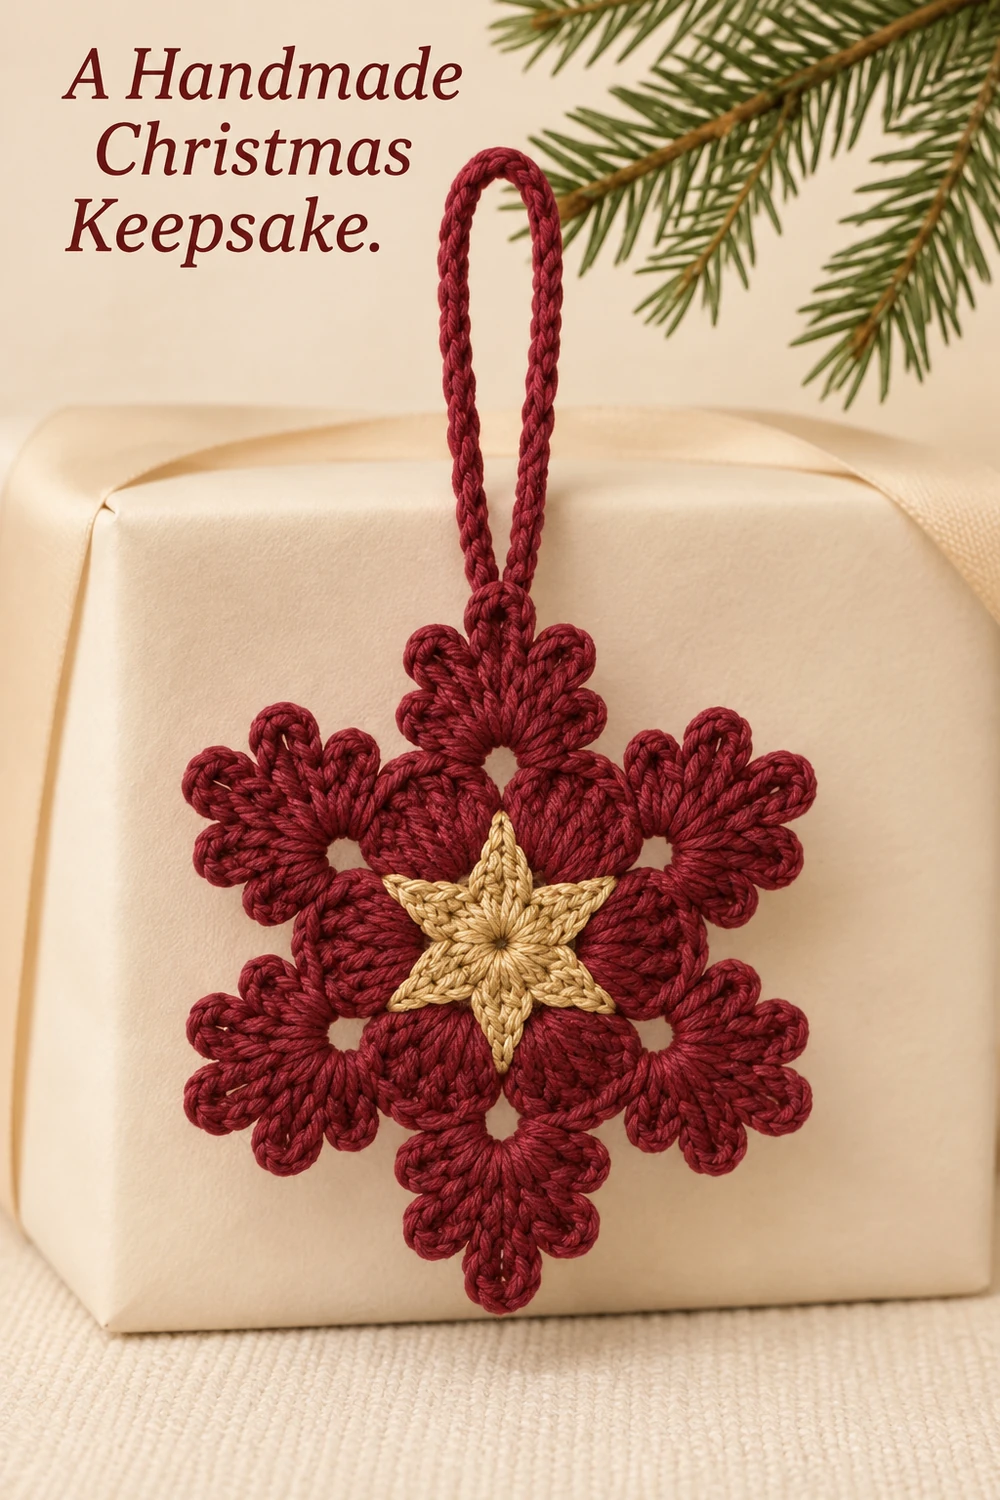
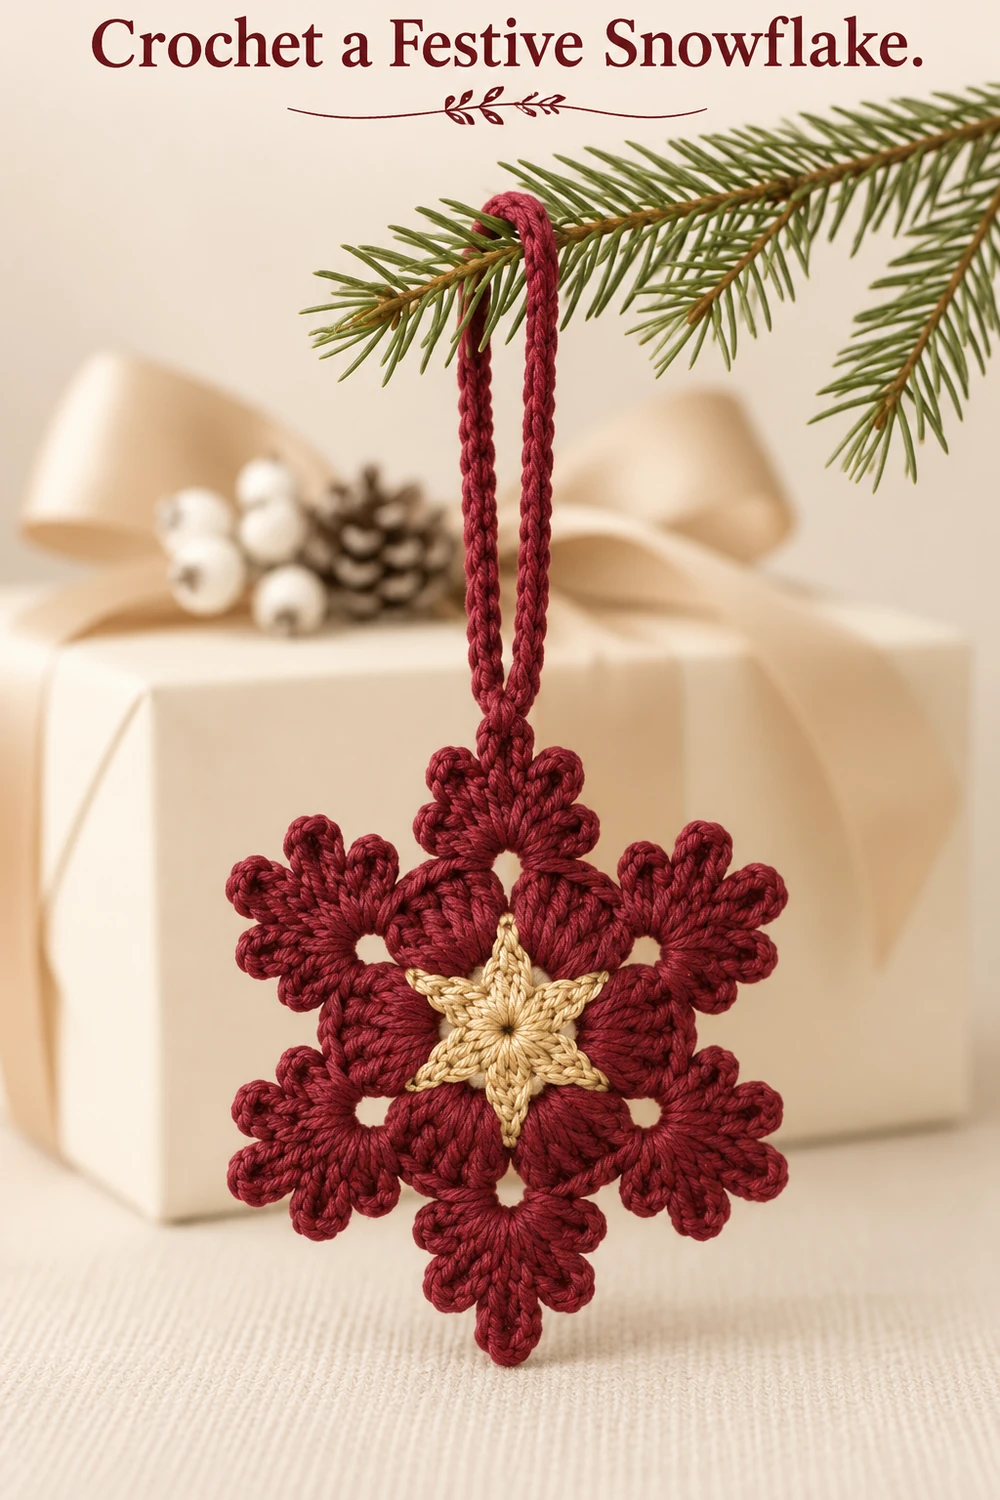
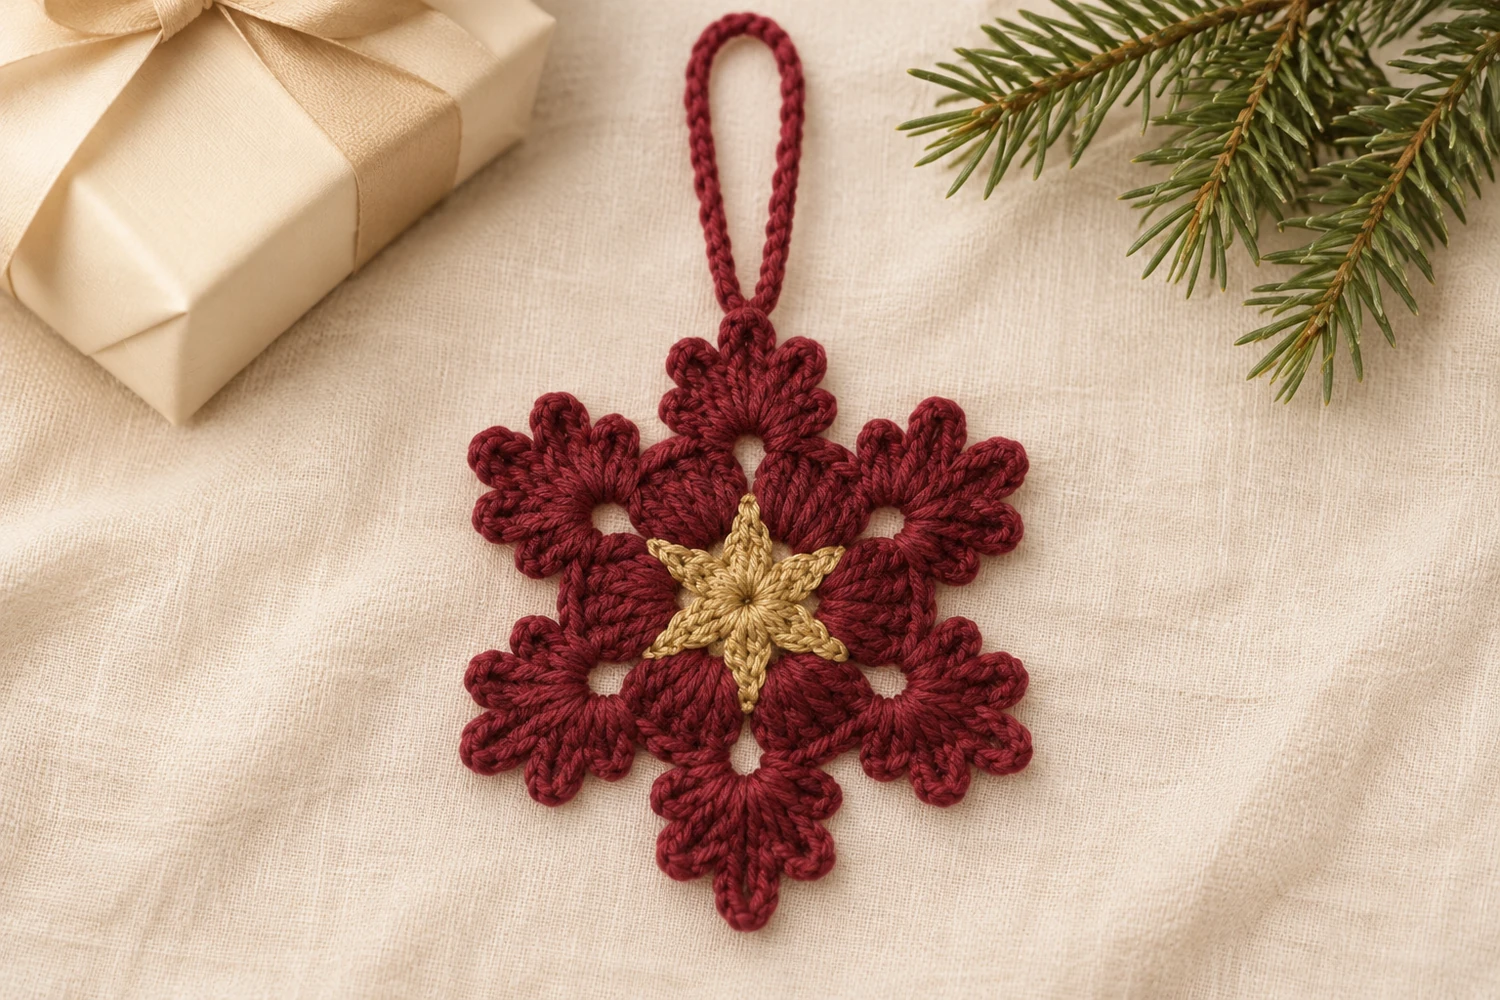
This burgundy and gold crochet snowflake combines six soft petal sections, six rounded arms, and a small gold star at its center. Three little picots crown each outer arm, while a long burgundy chain loop finishes the top. The wine-red yarn gives the ornament a warm look against cream wrapping paper or evergreen branches.
Make the burgundy body first, then crochet the smaller six-point star separately in fine gold yarn and sew it to the center. The hanger is also a separate chain. This original pattern is inspired by the supplied reference, not the photographer’s original instructions. The counts have been checked mathematically; the pattern has not been physically tested. The styled photographs illustrate the intended appearance.
Burgundy and Gold Crochet Snowflake Materials
- Smooth DK cotton in burgundy or wine red. Allow approximately 20–30 yd (18–27 m) as a planning estimate rather than measured consumption.
- A small amount of fine antique-gold crochet yarn or metallic thread for the center star. Choose a softer strand that bends easily.
- A 3 mm hook for the burgundy body and a smaller hook, approximately 1.75–2 mm, suited to the gold thread.
- A tapestry needle, a small sewing needle if needed for the gold yarn, scissors, and six removable markers.
- A blocking surface and rustproof pins.
- Optional fabric stiffener compatible with your materials.
Skill level: Intermediate. Estimated size: approximately 3.5–4.5 in (9–11.5 cm) across the body, excluding the chain loop. The gold star should be about 0.75–1 in (2–2.5 cm) across so it sits inside the burgundy petals. These are design estimates; yarn, hook, tension, and blocking determine the actual size.
Before You Start
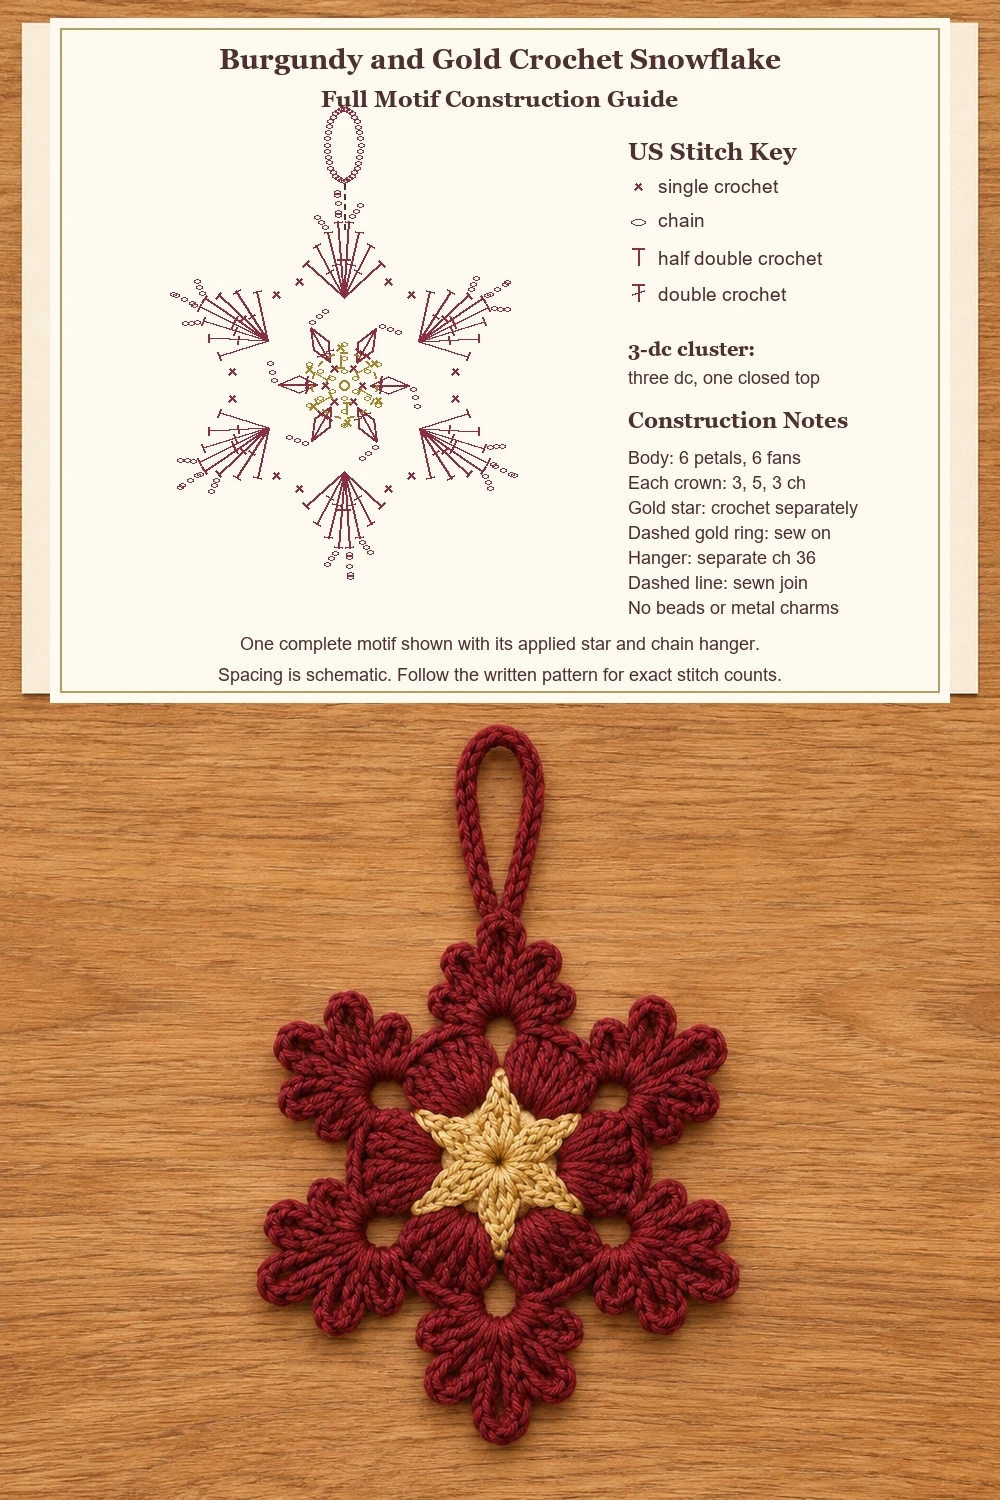
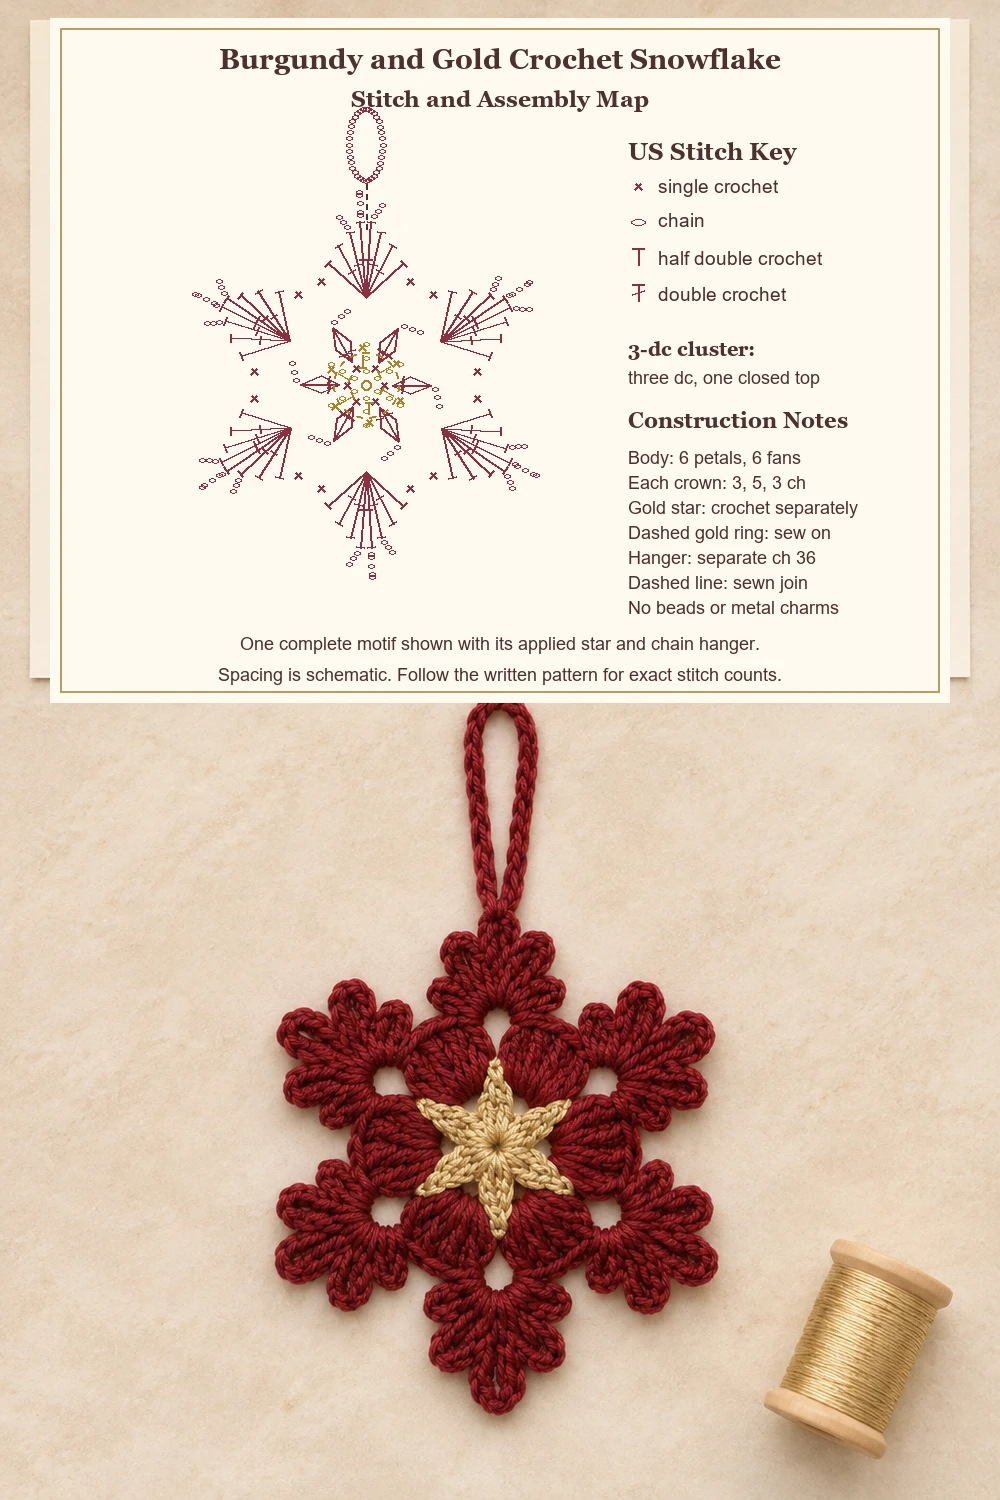
The burgundy body has three joined rounds. Six single crochets form the foundation. Six closed clusters create the raised inner petals, and the spaces between those petals support the outer fans. Each fan has ten stitches and three picots placed on consecutive double crochet stitches near its outer center.
Keep the burgundy yarn and hook the same throughout the body. The gold thread is intentionally finer: a star made with the same bulky strand as the body can cover the petal details and make the center heavy. Crochet one gold point first if you are unsure about the thread thickness.
Work all burgundy rounds with the same side facing you. Beginning chains and joining slip stitches do not count as working stitches. There is no stuffing, bead, or metal star in this version; the gold decoration is crocheted and sewn on.
US Crochet Terms and Abbreviations
- MR = magic ring.
- ch = chain.
- sl st = slip stitch.
- sc = single crochet.
- hdc = half double crochet.
- dc = double crochet.
- 3-dc cl = three-double-crochet cluster in one base stitch.
- st(s) = stitch(es); sp(s) = space(s).
Three-double-crochet cluster
Yarn over, insert the hook into the indicated base stitch, yarn over, and pull up a loop. Yarn over and pull through two loops, leaving the final loop of the unfinished dc on the hook. Two loops remain.
Repeat the unfinished dc twice more in the same base stitch. Four loops remain after the third partial dc. Yarn over and pull through all four loops at once. This is one closed cluster. The three dc components share one top and are counted as one petal.
Picots anchored to a double crochet
For each picot in the outer fan, make the stated number of chains, then sl st under both top loops of the same dc just completed. Return to that original dc top rather than closing into a chain from a neighboring picot. The three picots in a crown are attached to three different consecutive dc stitches.
The chain lengths are 3, 5, and 3. The center picot is longer than the two beside it. Picot chains and their closing slip stitches are decorative elements and stay outside the fan’s ten-stitch count.
Burgundy Snowflake Body
Round 1: six-stitch center
With burgundy, make a MR. Ch 1, then work 6 sc into the ring. Pull the center closed and join with a sl st to the first sc. 6 sc.
Make the center snug, but do not pull so tightly that the sc tops disappear. You need to locate all six stitches for the next round.
Round 2: six raised petals
Ch 2 for height; it does not count. Beginning in the same sc as the join, repeat [3-dc cl in the next sc, ch 3] six times, using every foundation sc once. Join to the closed top of the first cluster. 6 clusters and six ch-3 spaces.
There are eighteen partial dc components, grouped into six shared tops. Count the closed tops rather than the individual strands. Do not add a separate securing chain after closing a cluster: the stated ch 3 is the complete separator.
Place a marker in each ch-3 space if you find it difficult to distinguish the spaces from the cluster tops. Every outer fan in Round 3 belongs in one of these spaces.
Round 3: six fans with picot crowns
Sl st into the first ch-3 space. Ch 1. Work the following complete fan in that space:
- Sc, hdc, and 2 dc.
- Ch 3 and sl st under both top loops of the last dc made. This forms the first small picot.
- Work 1 dc into the original ch-3 space below. Ch 5 and sl st under both top loops of this new dc. This forms the longer center picot.
- Work another dc into that same original ch-3 space. Ch 3 and sl st under both top loops of this dc. This forms the second small picot.
- Work 2 dc, hdc, and sc into the original ch-3 space to finish the fan.
Repeat the complete fan in each of the remaining five ch-3 spaces. Move directly from one fan to the next without adding a chain between them. Join to the first sc of the first fan and fasten off.
Round 3 count: six fans of ten stitches each, giving 60 stitches. The breakdown is 12 sc, 12 hdc, and 36 dc. There are 18 picots: twelve ch-3 picots and six ch-5 picots. The picot chains and closing slip stitches are not included in the 60 working stitches.
Each arm should show a small open space at its base and a crown of three loops at its outer edge. The middle loop projects slightly farther. Remove the markers, then weave burgundy tails into the backs of the dense stitches.
Small Gold Six-point Star
Use the finer gold thread and smaller hook. This star is made from six short chain points worked into one magic ring. Each point is a narrow triangle with a single crochet near the tip and a half double crochet nearer the center.
- Make a MR, leaving a long starting tail for sewing.
- Ch 3. Work 1 sc in the second chain from the hook and 1 hdc in the next chain.
- Sl st into the MR to anchor the point.
- Repeat Steps 2–3 five more times, for six points total.
- Pull the ring closed carefully, arrange the six points evenly, and join to the base of the first point with a sl st. Fasten off, leaving a second sewing tail.
Gold star count: six points, each containing 1 sc and 1 hdc. The star has 6 sc and 6 hdc, plus its anchoring slip stitches. The skipped chain at the tip provides turning height; it is not an extra worked stitch.
Lay the star on the burgundy center before sewing. Its points should sit within the inner petal area rather than covering the outer fans. If it is too large, use a finer gold thread or a smaller suitable hook while keeping the same stitch sequence. Do not force a thick metallic strand through an undersized hook.
Blocking Before Assembly
Block the burgundy body and gold star separately if their yarn care instructions allow. This lets the body open evenly and prevents the gold star from holding the center in an uneven shape.
- Moisten the burgundy motif gently and press excess moisture into a towel without twisting.
- Place it with the raised petal side facing up.
- Arrange the six fans at equal distances from the center.
- Separate the three picots on each crown, with the longer loop in the middle.
- Shape the small gold star separately, using only light tension.
- Allow both pieces to dry completely.
Pin through openings beside the picots rather than stretching their chains tightly. The outer loops should stay rounded. If using a stiffener, test it on each yarn first, since metallic thread and cotton may react differently. Follow the product directions before sewing the parts together.
Sew the Gold Star to the Center
Place the dry gold star on the front of the burgundy center. Arrange one gold point upward and spread the remaining five evenly. Use one tail to secure the gold ring to the burgundy center with several small stitches.
Use the second tail to tack the base of each gold point to the body. Catch the backs of nearby burgundy stitches so the sewing thread stays hidden from the front. Leave the ends of the gold points free enough to show their shape. Secure the tails on the back and weave them in.
The gold star is an appliqué attached by sewing. These sewing stitches do not change any burgundy round counts. Avoid pulling the thread so tightly that the center puckers or the outer fans lift off the table.
Burgundy Chain Hanging Loop
With burgundy and the body hook, ch 36. Fasten off, leaving a tail at each end. Fold the chain into a loop and bring its ends together. Sew both ends to the back of the upper fan, just below its picot crown.
Take the sewing stitches through several sturdy dc tops or bases beneath the decorative loops. Do not hang the entire ornament from one fine picot chain. Wrap the tails neatly around the joined chain ends if you want a compact neck like the reference, then secure and weave the ends into the back.
Lift the ornament by its loop and check that one arm hangs straight down. Adjust the attachment before securing the last tails if the motif tilts. The chain loop is made separately and is not part of the 60-stitch body count.
Finishing and Troubleshooting
A petal has an open or loose top
Check the cluster closure in Round 2. After three unfinished dc in the same base stitch, four loops should remain before the final pull-through. Closing fewer loops leaves part of the cluster unfinished. Correct the petal before working the outer fan round.
A crown has only two loops
Count the fan’s dc stitches and locate the three consecutive anchors. The first picot sits on the second dc, the longer picot on the third dc, and the last small picot on the fourth dc. Two more dc complete the descending side, giving six dc in the whole fan.
The arms curl toward the back
Check that the fan stitches were all worked under the ch-3 space and that the picot closures are relaxed. Tight slip stitches can shorten the outer edge. Gently shape the dry motif after checking the counts; do not try to correct a missing stitch by stretching one arm much farther than the others.
The gold star will not lie flat
Loosen the sewing stitches first. A small appliqué can pucker if its six point bases are pulled together too firmly. If the star itself is stiff, shape it separately according to its yarn instructions before attaching it again. Choose a flexible gold yarn rather than a rigid decorative wire.
Care and storage
Dust the ornament gently and follow the care needs of both yarns and any stiffener. Store flat or hang it where the picot crowns will not be crushed. Keep the chain loop away from young children and place the ornament away from open flames or hot bulbs.
More Christmas Crochet Projects
For a contrasting floral center, try the Blue Flower Crochet Snowflake. The Trefoil Crochet Snowflake explores a lighter two-round structure, while the Red and Gold Crochet Angel carries a similar festive palette into another ornament shape.