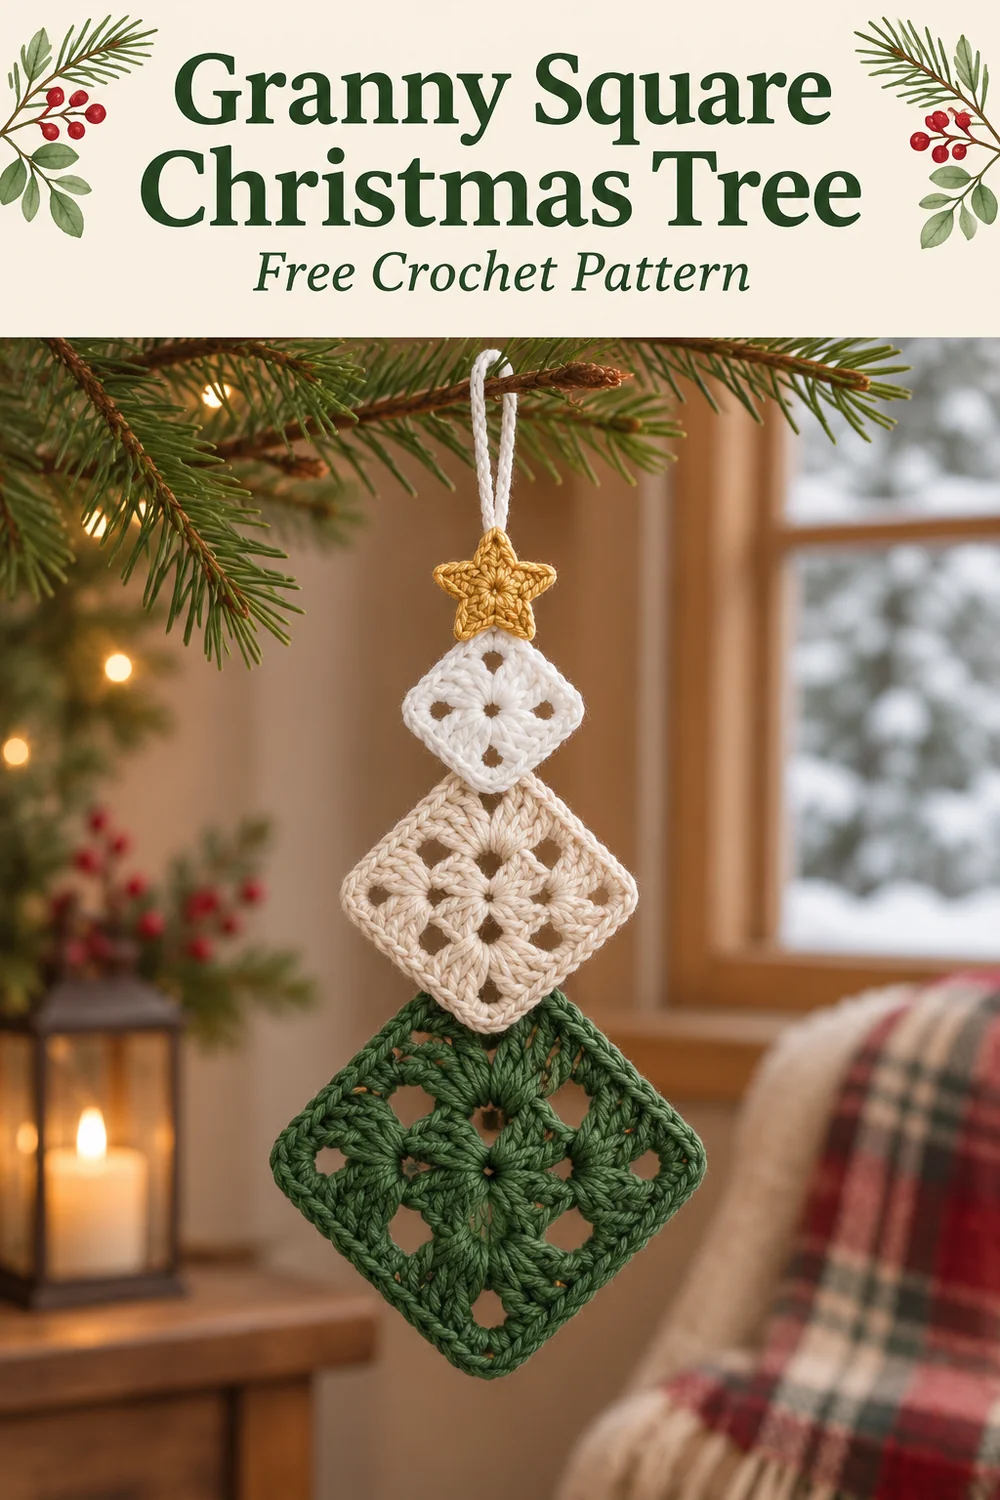
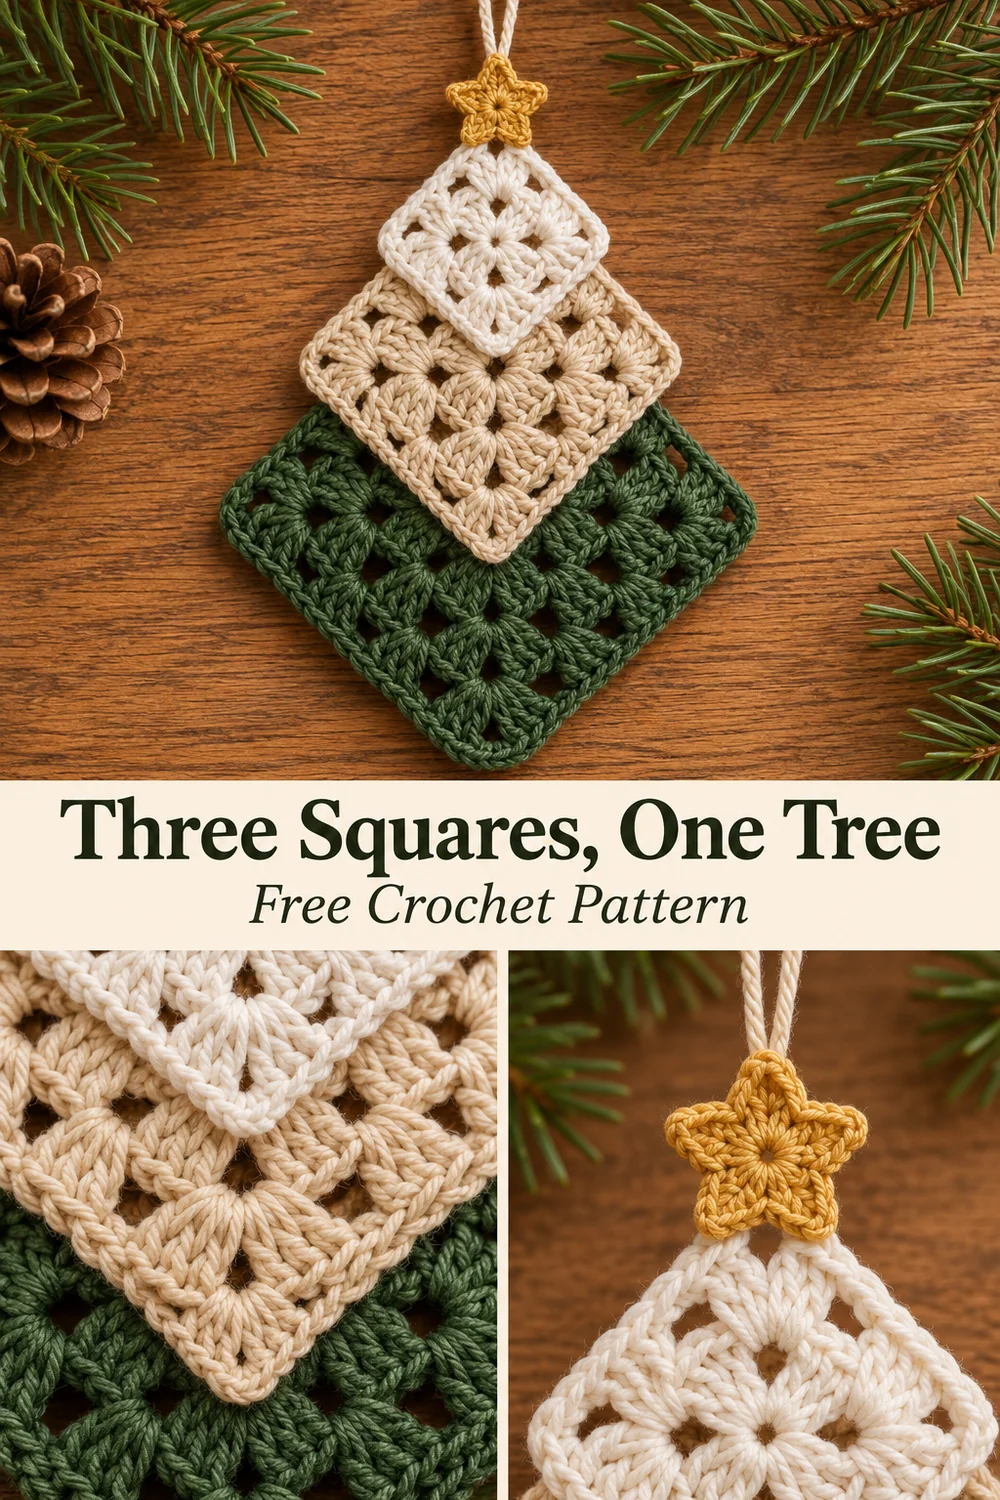
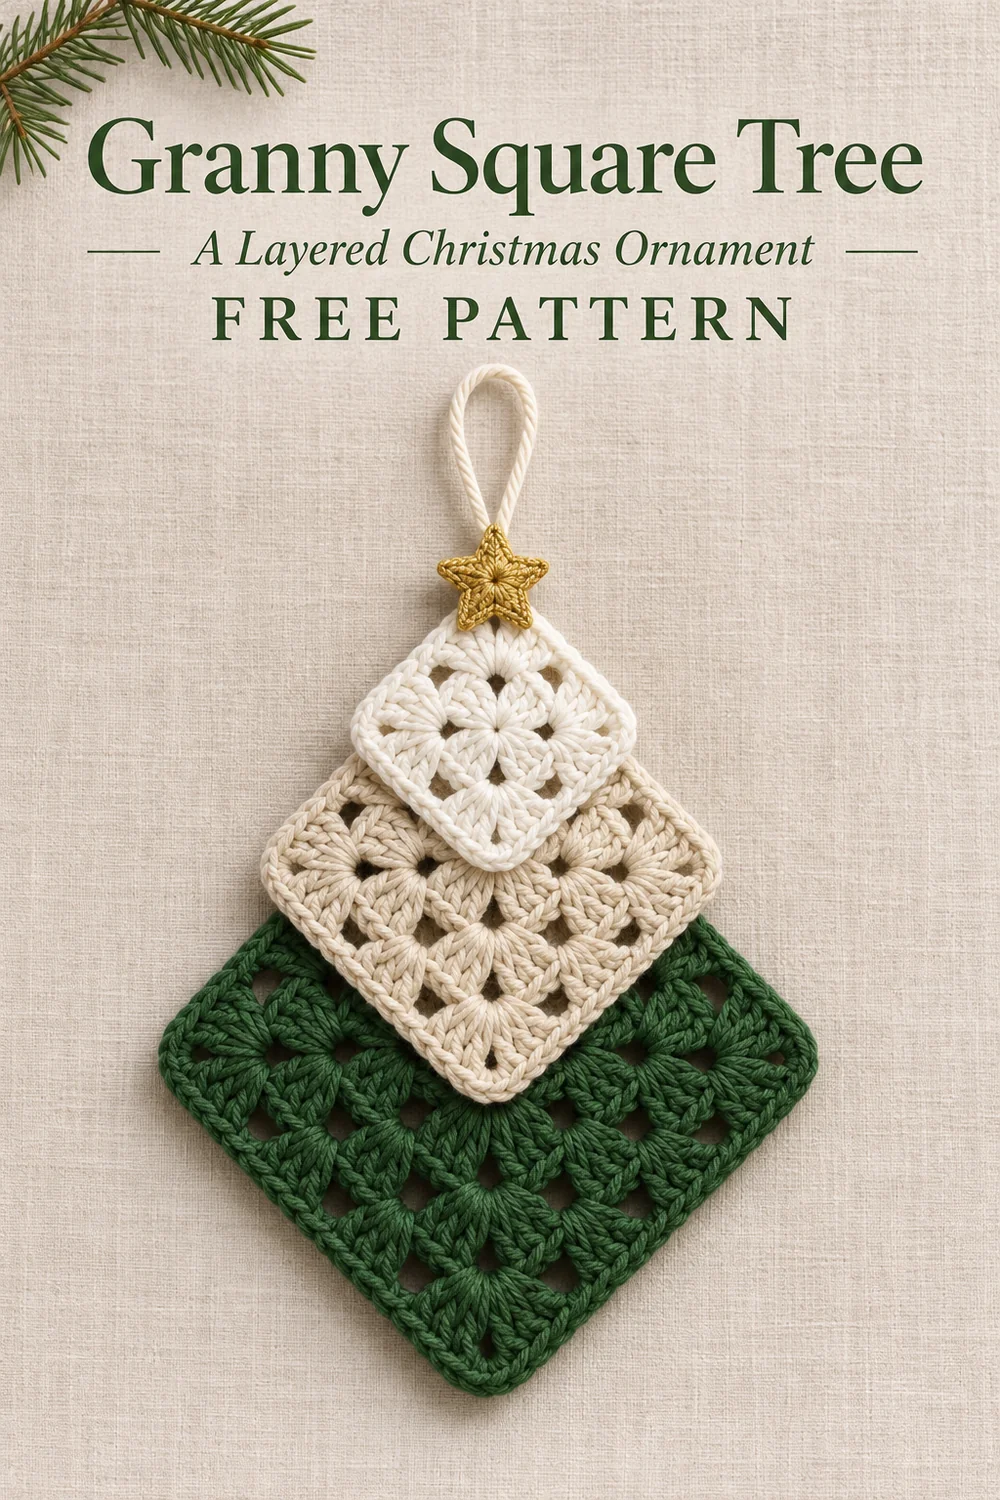
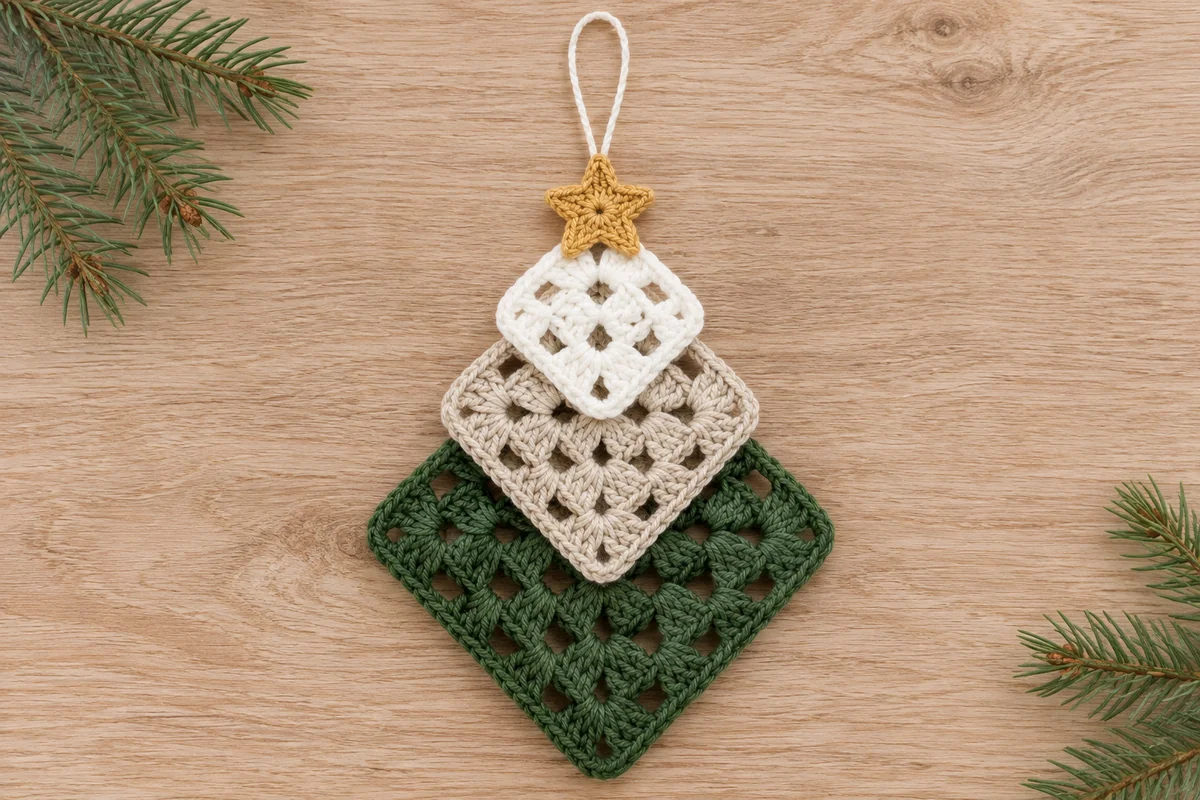
This granny square Christmas tree uses three open squares in white, oatmeal, and forest green. Turn each square onto a point and overlap the smaller pieces over the larger ones. A small gold star finishes the top without hiding the spaces between the crochet groups.
The squares share the same starting round, then stop at different stages: two rounds for the white top, three for the oatmeal middle, and four for the green base. Make the pieces separately so you can adjust their overlap before sewing. There is no stuffing or folded fabric inside the ornament.
This is an original interpretation inspired by the reference photograph, using classic granny groups and a separate star. The instructions and chart counts below describe this version rather than the exact photographed recipe. The design has not been physically tested.
Granny Square Christmas Tree Materials
- Smooth yarn in white, oatmeal, forest green, and gold, all in a similar weight.
- A crochet hook suited to your yarn and the fabric you prefer.
- A tapestry needle, scissors, and removable stitch markers.
- Rustproof pins and a blocking surface, if suitable for your yarn.
Cotton gives the open groups a defined shape. A smooth wool blend makes a softer ornament; avoid a very fuzzy yarn if you want the chain spaces to remain visible. Use the same hook for the three squares so the extra rounds create the change in size. Finished dimensions, gauge, and yarn use depend on your materials and tension; no measured values are specified here.
US Crochet Terms and Notes
- MR = magic ring
- ch = chain
- sl st = slip stitch
- sc = single crochet
- hdc = half double crochet
- dc = double crochet
- st(s) = stitch(es)
- sp(s) = space(s)
- Group = 3 dc worked into the same space
For standard terminology, see the Craft Yarn Council crochet abbreviation guide. All square rounds face the same way; do not turn. The beginning ch 3 counts as the first dc of its group. Corner spaces use ch 2, while spaces between groups along a side use ch 1.
Each new round starts in a corner. After joining, slip stitch across the next two dc and into the following corner space before beginning the next round. Those three travelling slip stitches position the hook; they do not form an extra group. Put a marker in the top of the beginning ch 3 if the join is hard to identify.
Square Counts at a Glance
| Round | DC including beginning ch 3 | Groups | Ch-2 corners | Ch-1 side spaces |
|---|---|---|---|---|
| 1 | 12 | 4 | 4 | 0 |
| 2 | 24 | 8 | 4 | 4 |
| 3 | 36 | 12 | 4 | 8 |
| 4 | 48 | 16 | 4 | 12 |
The white square stops after Round 2, the oatmeal square after Round 3, and the green square after Round 4. The totals count the beginning ch 3 as one dc, so the number of actual dc worked is 11, 23, 35, and 47 respectively. Joining and travelling slip stitches stay outside these totals.
Granny Square Christmas Tree Pattern
Round 1: make the center
Make an MR. Ch 3, then work 2 dc into the ring. Ch 2. Repeat [3 dc into the ring, ch 2] three times. Pull the ring closed enough to gather the groups without crushing their bases. Join with a sl st to the top of the beginning ch 3. 12 dc in 4 groups; four ch-2 corner spaces.
Before the next round, sl st in each of the next two dc, then sl st into the following ch-2 corner space. You are now ready to make the first full corner of Round 2.
Round 2: two groups at every corner
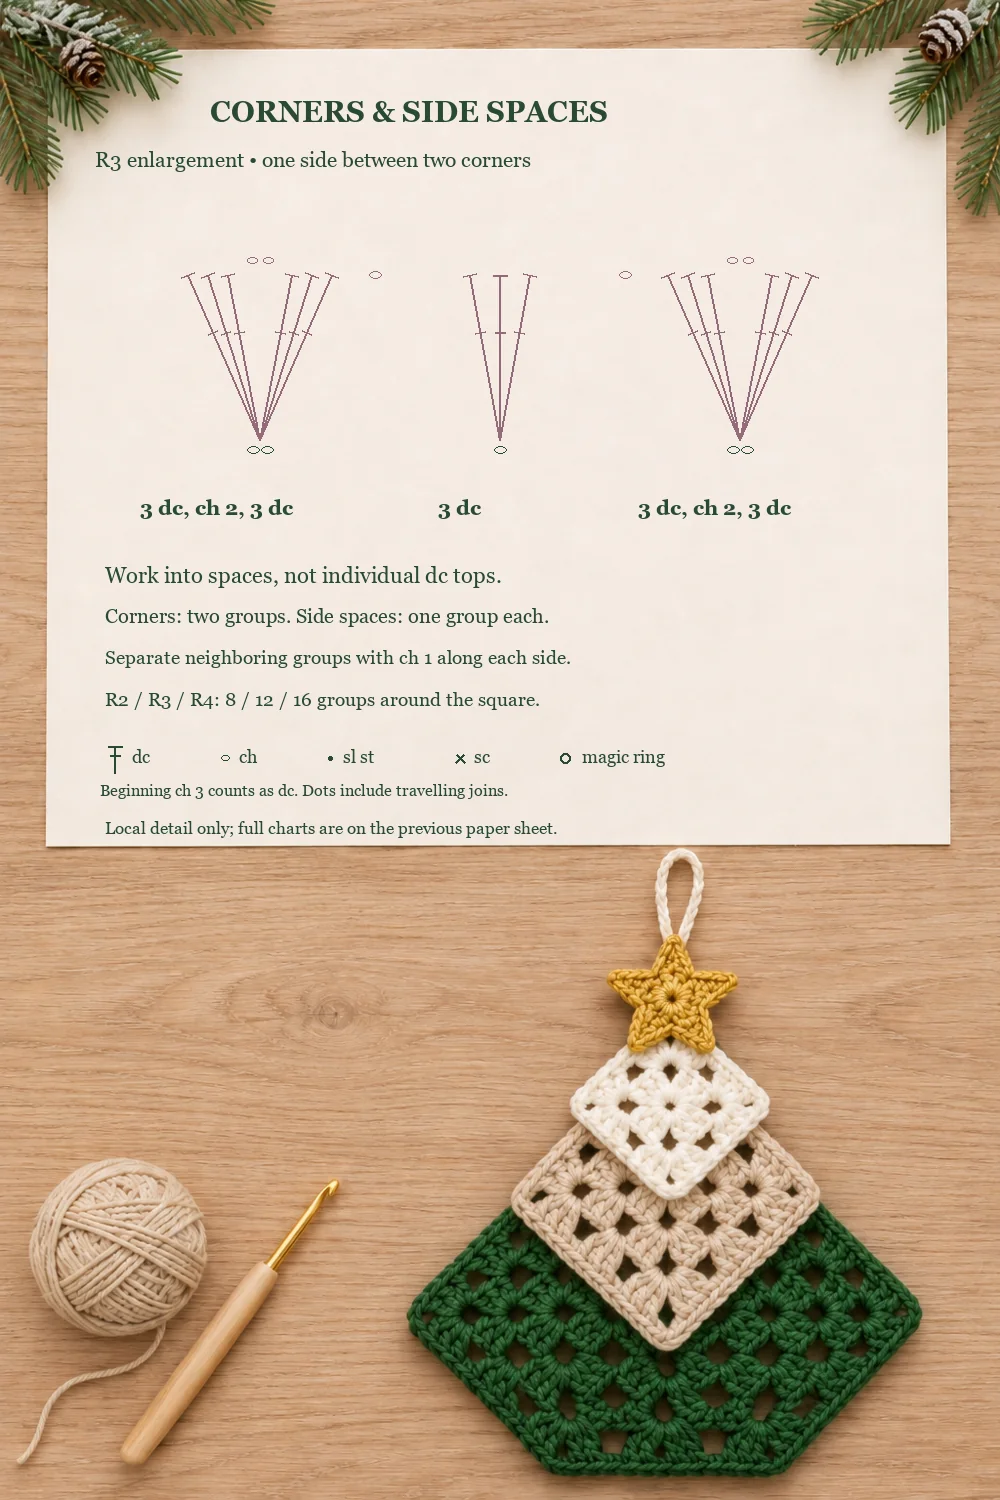
Ch 3, then work [2 dc, ch 2, 3 dc] in the same corner space. Ch 1. In each of the next three corner spaces, work [3 dc, ch 2, 3 dc], followed by ch 1. Join to the top of the beginning ch 3. 24 dc in 8 groups; four ch-2 corner spaces and four ch-1 side spaces.
For the white square, fasten off here, leaving a sewing tail. For the oatmeal and green squares, sl st across the next two dc and into the next corner space. Do not work an extra group into the side space while moving the hook.
Round 3: add a group along each side
Ch 3, then work [2 dc, ch 2, 3 dc] in the same corner. Ch 1, work 3 dc in the next ch-1 side space, then ch 1. Repeat [work (3 dc, ch 2, 3 dc) in the next corner, ch 1, work 3 dc in the next side space, ch 1] three times. Join to the top of the beginning ch 3. 36 dc in 12 groups; four ch-2 corner spaces and eight ch-1 side spaces.
Fasten off the oatmeal square here with a sewing tail. For the green square only, move into the next corner with the same three travelling slip stitches used previously.
Round 4: finish the green base
Ch 3, then work [2 dc, ch 2, 3 dc] in the same corner. Ch 1, work 3 dc in the next side space, ch 1, work 3 dc in the next side space, then ch 1. Repeat [work (3 dc, ch 2, 3 dc) in the next corner, ch 1, work 3 dc in the next side space, ch 1, work 3 dc in the next side space, ch 1] three times. Join to the top of the beginning ch 3 and fasten off. 48 dc in 16 groups; four ch-2 corner spaces and twelve ch-1 side spaces.
There are two side groups between the corner groups on each edge of this final round. Count the four corner spaces first, then count the groups around the perimeter. This catches a missed side space before assembly hides the upper part of the green square.
Make the gold five-point star
With gold, make an MR, ch 1, and work 5 sc into the ring. Join with a sl st to the first sc. The beginning ch 1 does not count. 5 sc.
With the hook at the first base sc, work [ch 4, sl st in the second chain from the hook, sc in the next chain, hdc in the last chain, sl st in the next base sc]. Repeat this sequence four more times. The fifth point ends in the original first base sc. Fasten off with a sewing tail. Five points, each with a ch-4 extension and a three-stitch return.
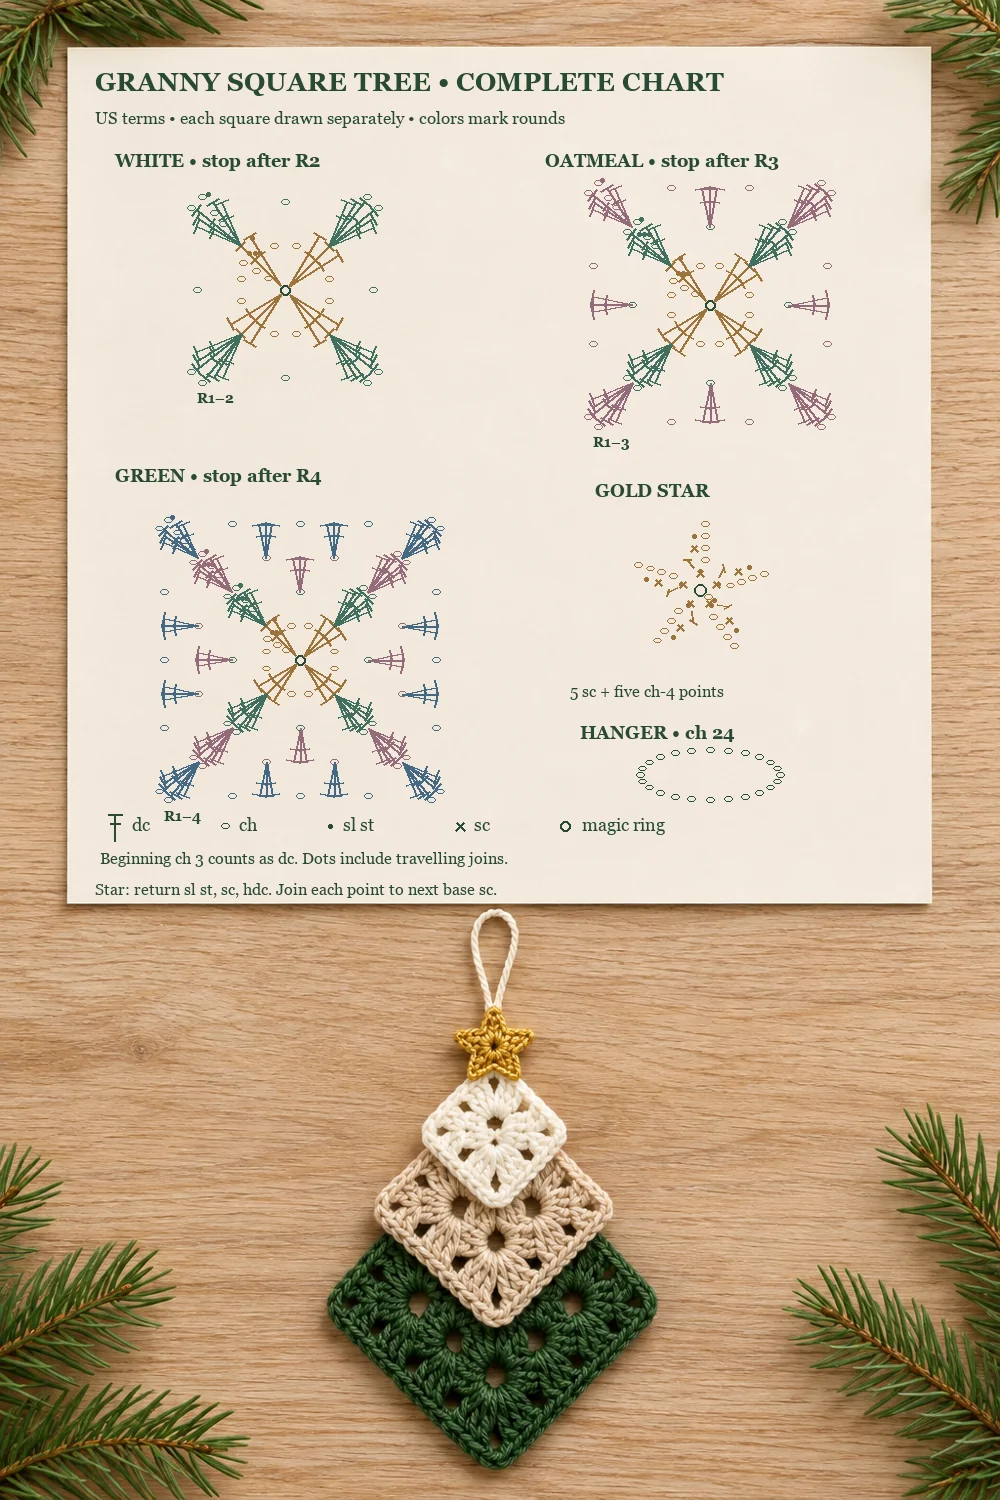
The return stitches run along the new chain, not into the magic ring. The slip stitch into the next base sc anchors the point and advances the hook. The chart shows these five separate extensions so their skipped tip chains are visible.
Make the hanging loop
With white, ch 24 and fasten off with a tail at each end. This is an open chain strip until its ends are sewn to the ornament. Set it aside while arranging the squares.
Layering the Granny Square Christmas Tree
- Lay the green square right side up and turn it so one corner points straight upward. Its opposite corner points down; the two side corners form the widest branches.
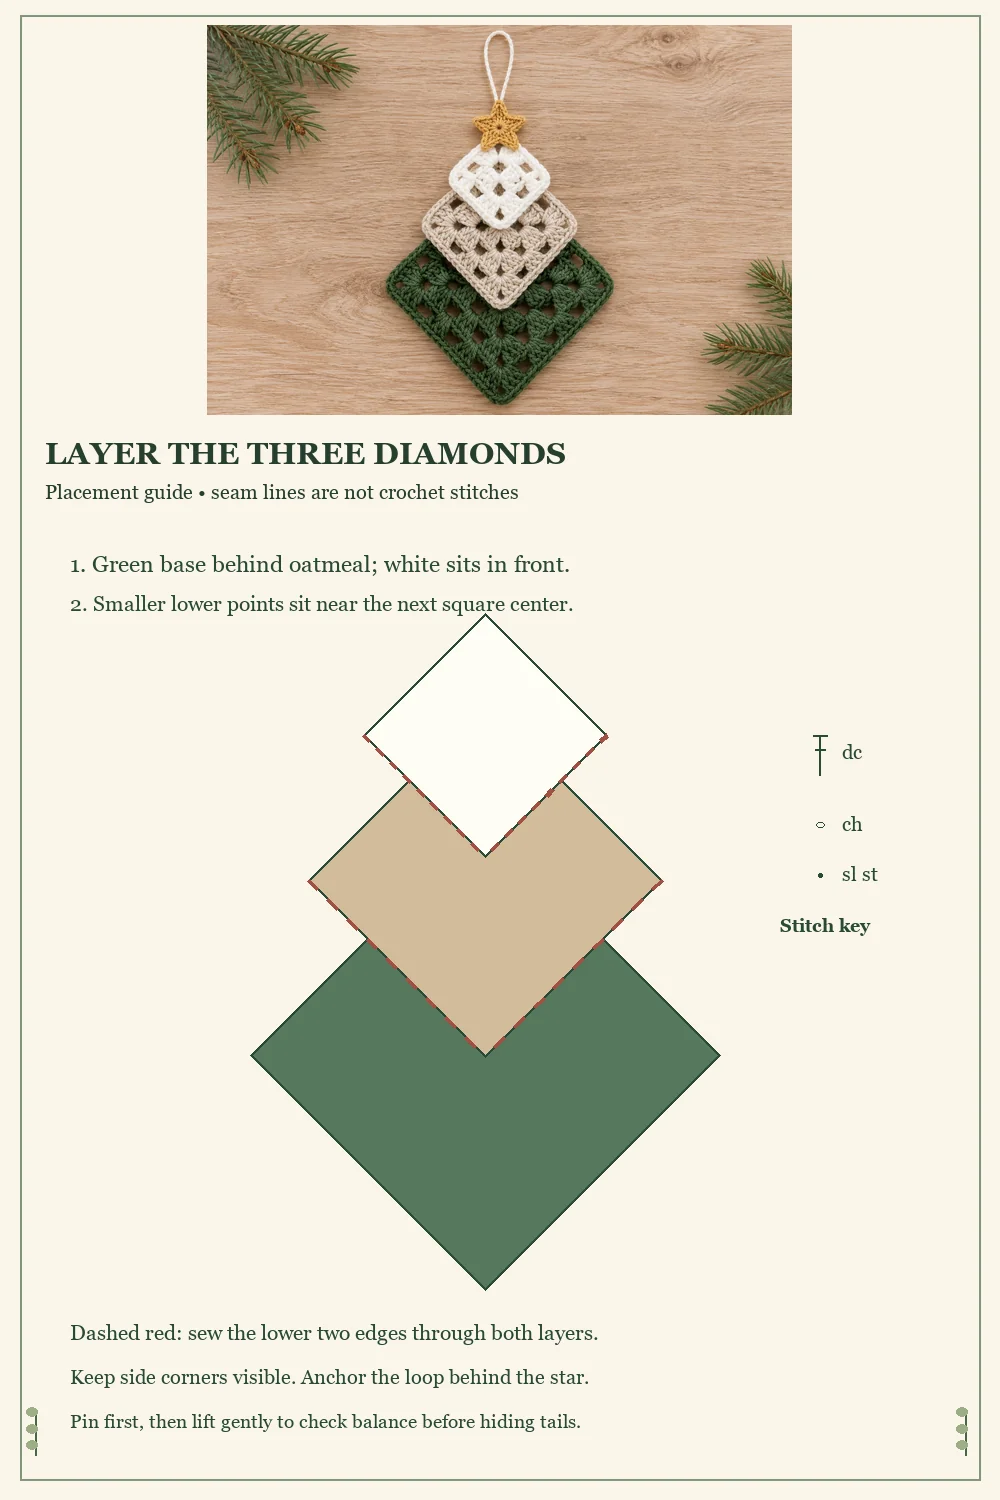
- Place the oatmeal diamond over it, with both vertical center lines aligned. Start with the oatmeal bottom point near the green square’s center. Keep the green left and right corners and its lower point visible.
- Place the white diamond over the oatmeal one in the same way. Its lower point sits near the oatmeal center. Adjust the overlaps together until each tier remains visible and the tree reads as one connected shape.
- Pin both overlaps. Sew the lower two sloping edges of the white diamond to the oatmeal fabric beneath them. Catch the backs of the white edge stitches and solid dc posts in the oatmeal square; do not stretch a seam across an open hole.
- Sew the lower two sloping edges of the oatmeal diamond to the green square in the same way. Keep the fabric flat on the table as you sew. Add a small tack near each end of both seams to prevent swivelling.
- Place the gold star over the upper white corner. Sew through the star’s center and lower points, catching solid white stitches. Leave its upper point free.
- Fold the ch-24 strip into a loop. Sew both ends separately to the back of the upper white corner, behind the star. Spread the anchoring stitches across nearby dc posts so the ornament hangs from the square rather than from a single star point.
The overlap is an adjustable placement guide, not a measured seam allowance. Before hiding the tails, lift the tree by its loop. If a tier twists, lay it down and add another small anchoring stitch at the overlap. Check the front again before tightening that stitch.
Finishing and Troubleshooting
Shape the squares before sewing
Weave the starting tails through the backs of several nearby stitches. If the yarn label permits it, lightly dampen the squares and pin the four corners into shape. Let them dry completely before assembly. Do not pull the corners so hard that the side chains become long, thin loops.
A square has too many groups
Only corner spaces receive two groups. Each existing ch-1 side space receives one group. Do not crochet a group into the tops of individual dc stitches. Round 3 must have twelve groups, and Round 4 must have sixteen.
The edge ripples or cups
Check the chains before changing hooks: every corner needs ch 2, and every gap along a side needs ch 1. A missing chain can draw the edge inward; an extra group can create a ruffle. If the count is right, compare the firmness of your chains with your dc stitches and remake an unusually tight or loose section.
The layers disappear behind one another
Move the smaller square upward slightly before sewing. Leave the lower square’s side corners exposed and keep all three vertical center lines aligned. Avoid moving only one side of a diamond; that makes the ornament lean.
The star points curl
Work the return slip stitch loosely enough to admit the hook without forcing it. Check that each point has one slip stitch, one sc, and one hdc before its anchoring slip stitch. Shape the points with your fingers or block gently if the yarn allows it.
More Christmas Crochet Ideas
For a different construction, try the tree made from a folded square or the layered triangle tree keychain. Pair this open granny square Christmas tree with a two-round crochet star for a coordinated set of hanging ornaments.
Pins and Granny Square Christmas Tree Charts
The complete paper chart draws all three squares separately, together with the gold star and hanging chain. The second paper chart enlarges a corner and side-space repeat. The final panel explains overlap placement; its seam lines are assembly guides rather than crochet stitches. Use the written instructions for joins and sewing order.