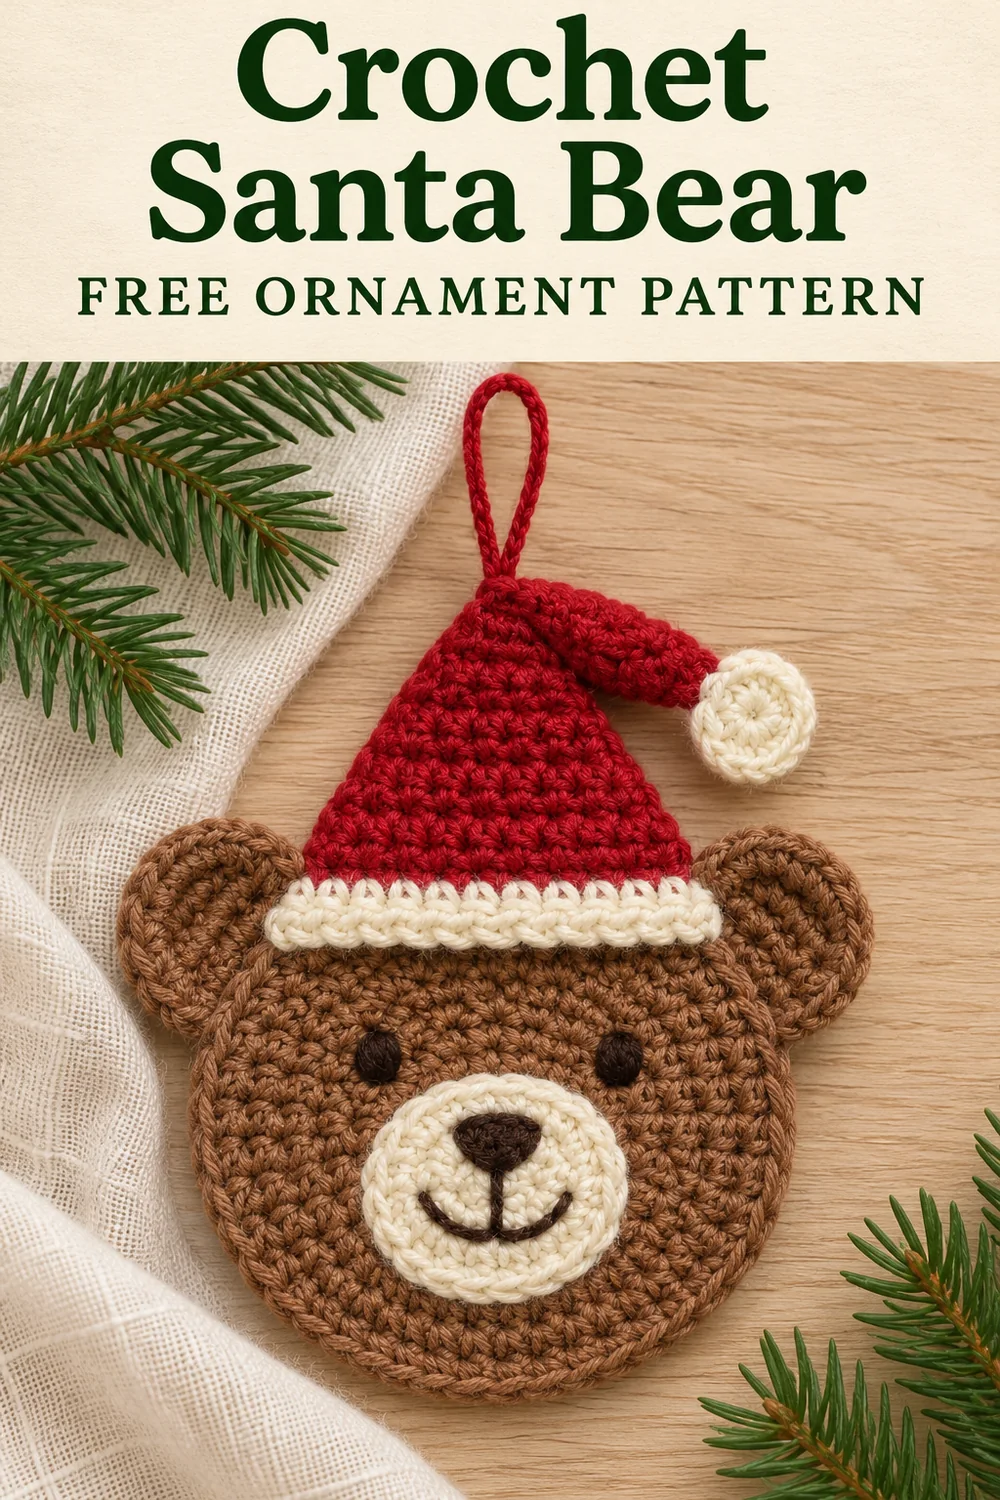
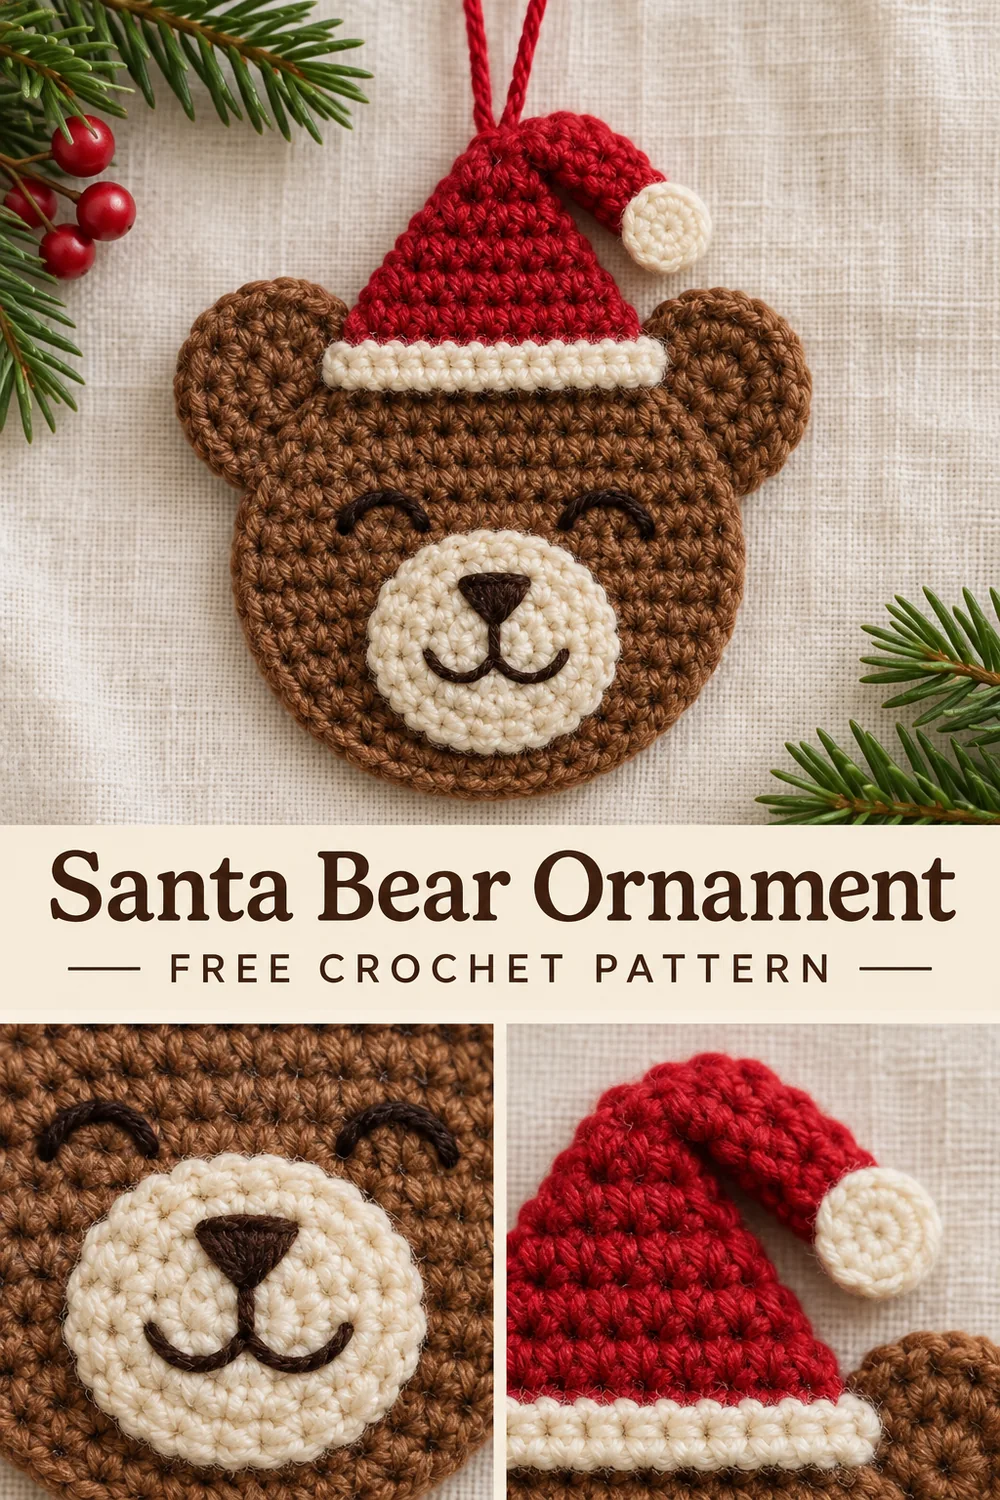
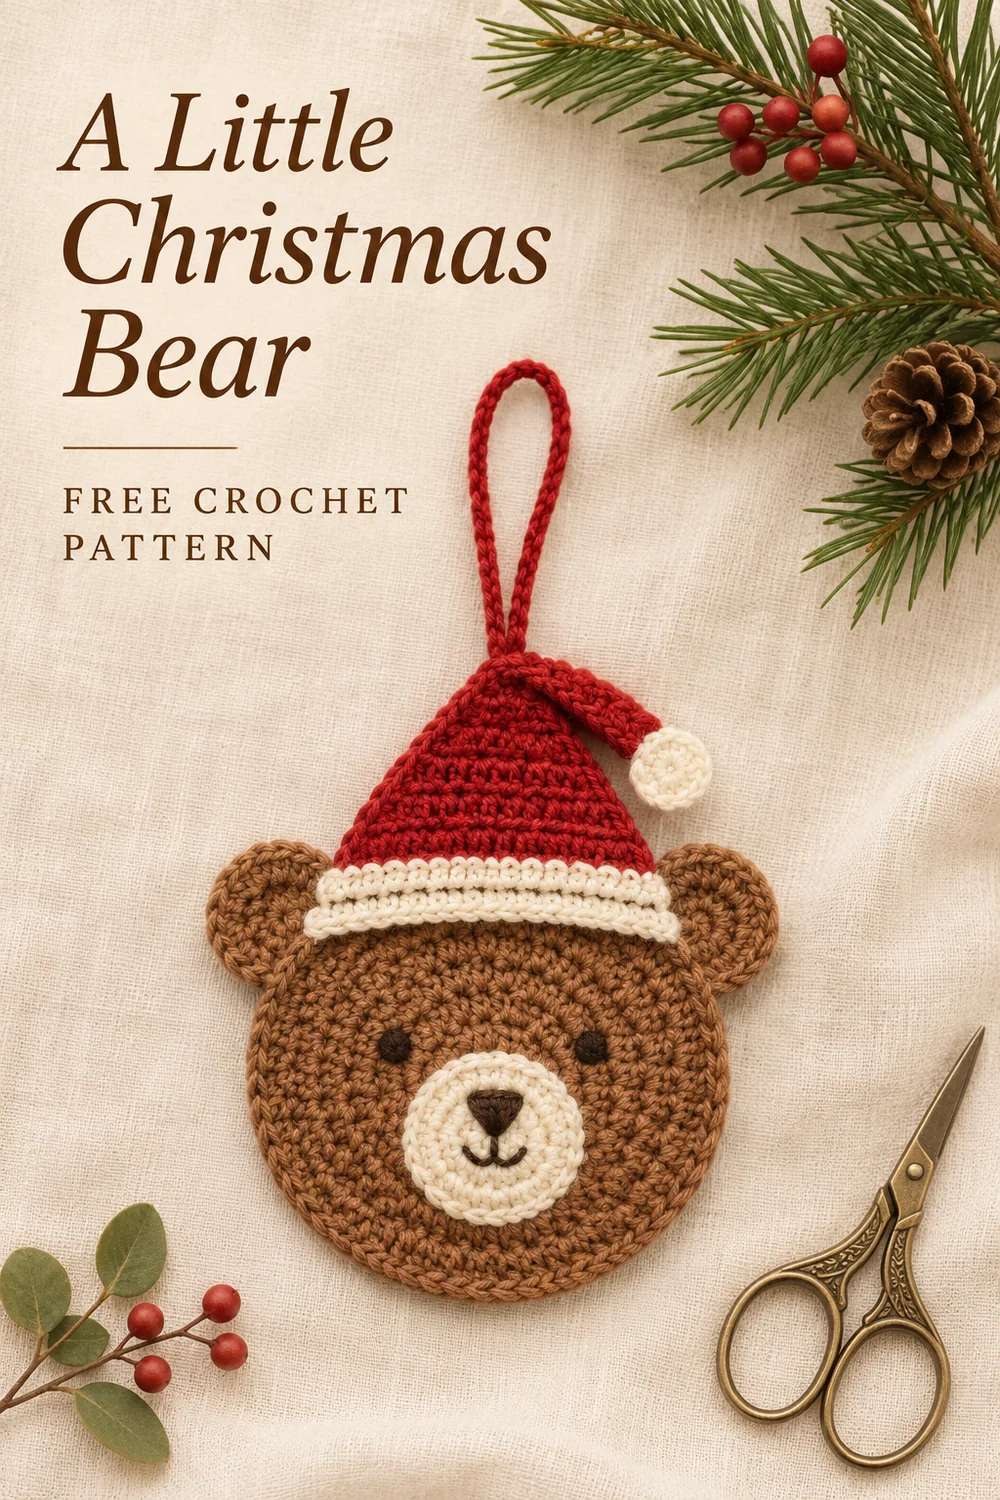
This crochet Santa bear ornament starts with a brown single-crochet circle and a small cream muzzle. Two round ears frame a red hat, while embroidered eyes and a curved smile keep the face simple. A red chain loop finishes the top.
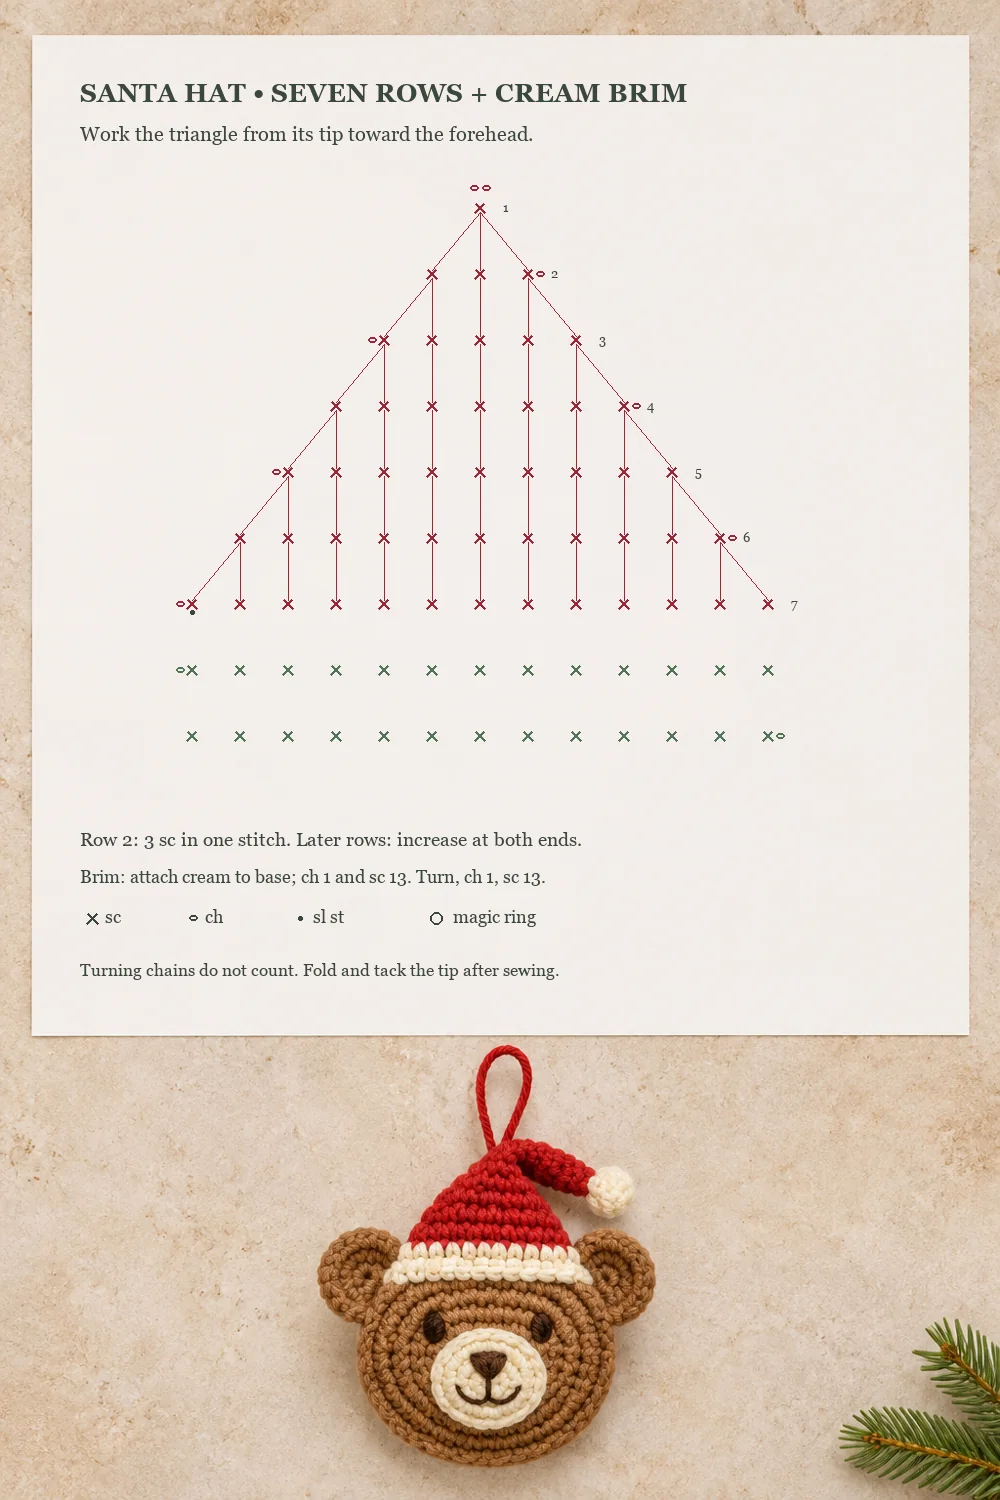
Make the flat pieces separately, then arrange them on a table before sewing. The hat is a seven-row triangle with a narrow cream brim. You can fold its tip to one side and tack a small cream circle over the fold for a soft pompom effect without stuffing.
This pattern is an original interpretation inspired by the reference photograph. It uses the specific counts below rather than claiming to reproduce the photographed recipe. The charts follow these instructions; the design has not been physically tested.
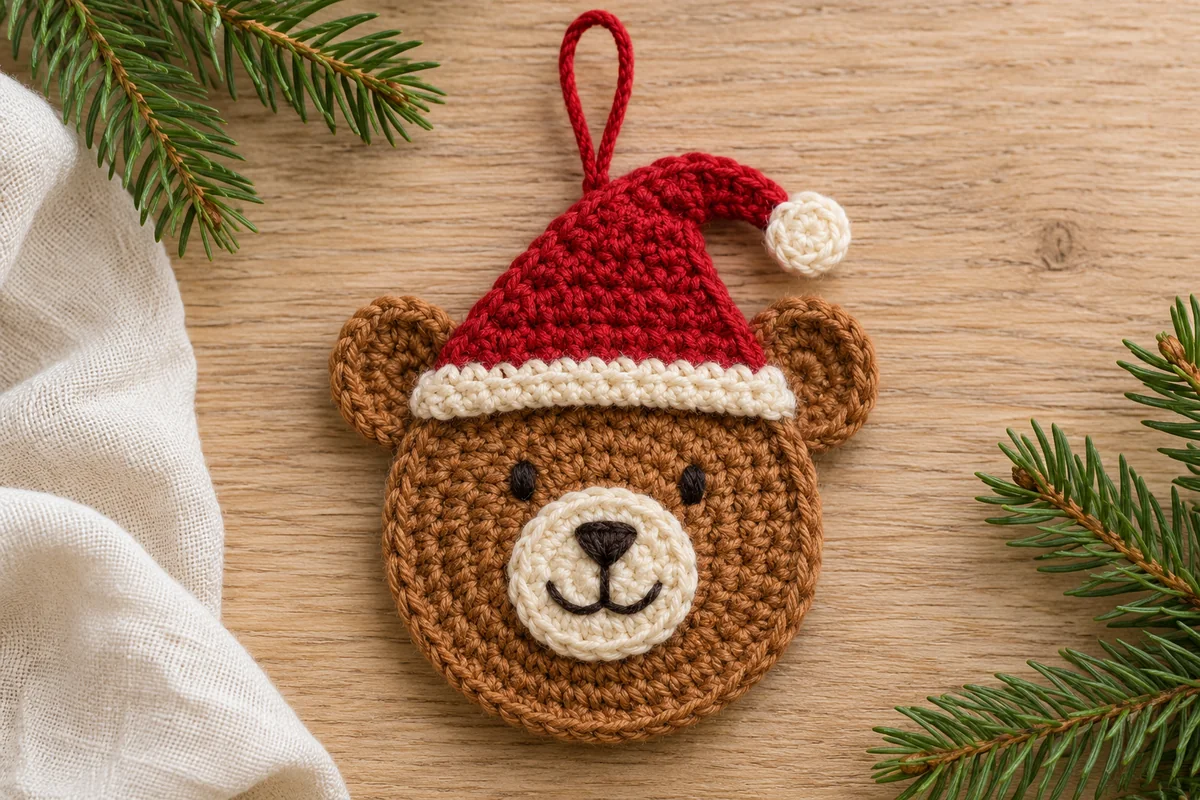
Crochet Santa Bear Ornament Materials
- Smooth brown, red, and cream yarn of the same weight.
- A hook suited to your yarn, plus a tapestry needle, scissors, and removable stitch markers.
- A small amount of dark brown or black embroidery thread for the nose, mouth, and eyes.
- Optional rustproof pins and a blocking surface.
Choose a yarn that shows the individual stitches clearly. Cotton gives the flat pieces a defined edge; a smooth wool blend gives a softer finish. No stuffing is required. Finished dimensions and yarn use depend on your yarn, hook, and tension, so no measured gauge or fixed size is specified.
US Terms and Pattern Notes
- MR = magic ring
- ch = chain
- sl st = slip stitch
- sc = single crochet
- inc = 2 sc in the same stitch
- st(s) = stitch(es)
All circles use joined rounds with the same side facing you. Ch 1 at the beginning of each round does not count as a stitch. Join to the first sc, never to the starting chain. Hat and brim rows are turned; their turning chains also stay outside the stitch count. The Craft Yarn Council abbreviation guide explains the US terminology.
Work through both loops throughout. Instructions in square brackets form one repeat. Keep a marker in the first working stitch so the joining slip stitch does not accidentally become an extra stitch on the following round.
Crochet Santa Bear Ornament Pattern
Brown face disk
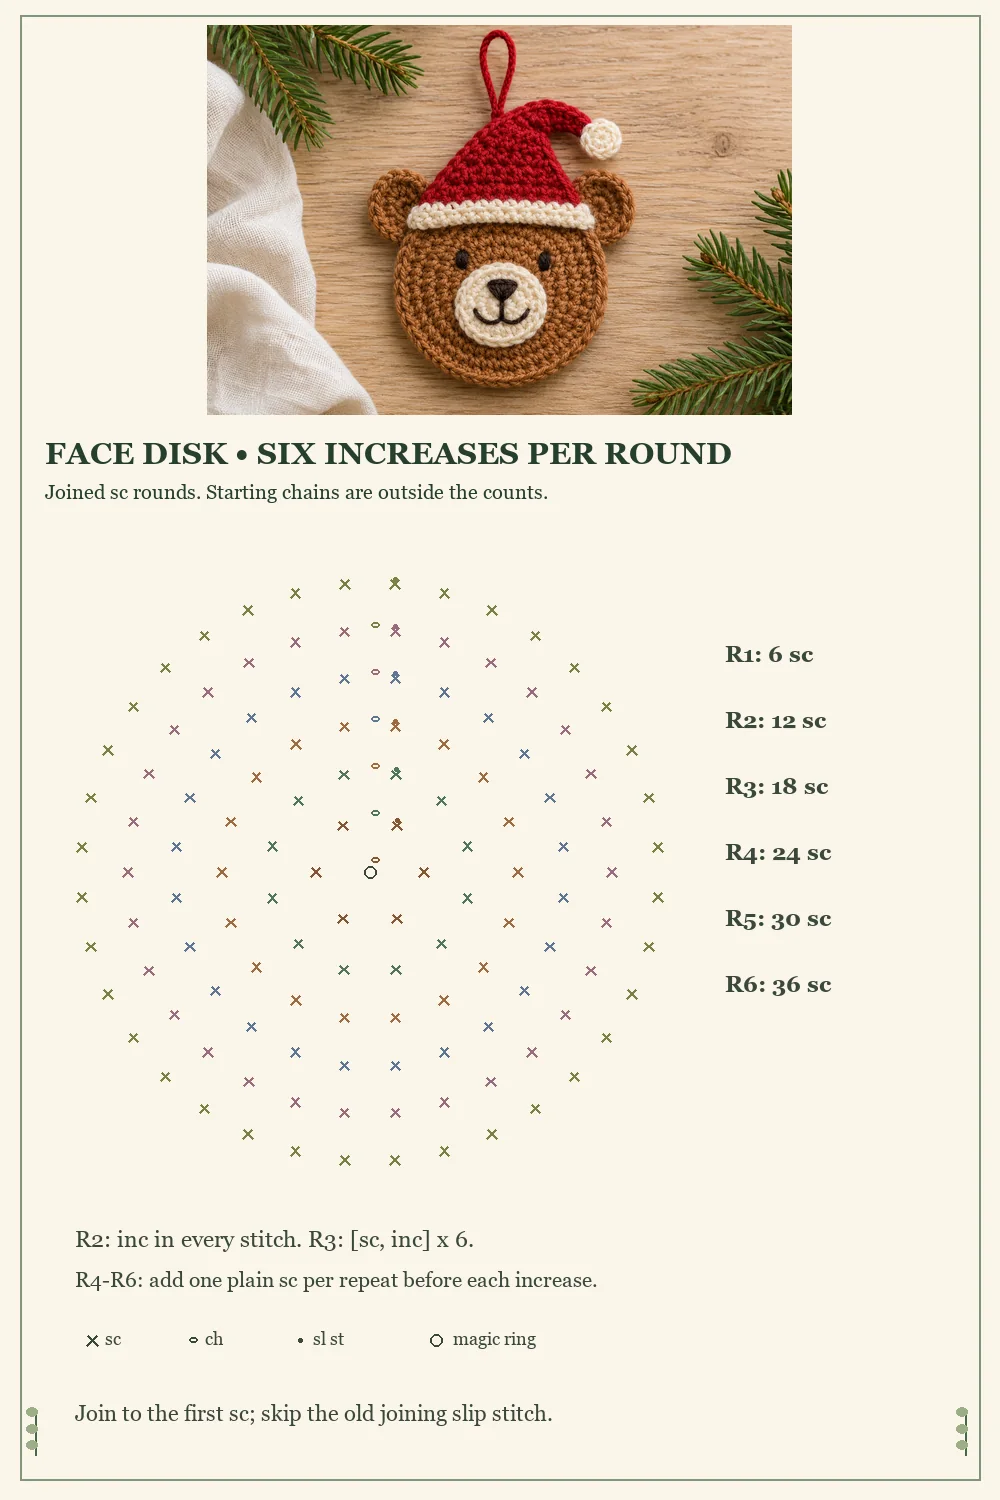
- Round 1: Make an MR, ch 1, and work 6 sc into the ring. Close the ring and sl st to the first sc. 6 sc.
- Round 2: Ch 1, work 2 sc in each st, and join. 12 sc.
- Round 3: Ch 1, repeat [sc in the next st, inc in the next st] 6 times, and join. 18 sc.
- Round 4: Ch 1, repeat [sc in the next 2 sts, inc in the next st] 6 times, and join. 24 sc.
- Round 5: Ch 1, repeat [sc in the next 3 sts, inc in the next st] 6 times, and join. 30 sc.
- Round 6: Ch 1, repeat [sc in the next 4 sts, inc in the next st] 6 times, and join. 36 sc. Fasten off and weave in the ends.
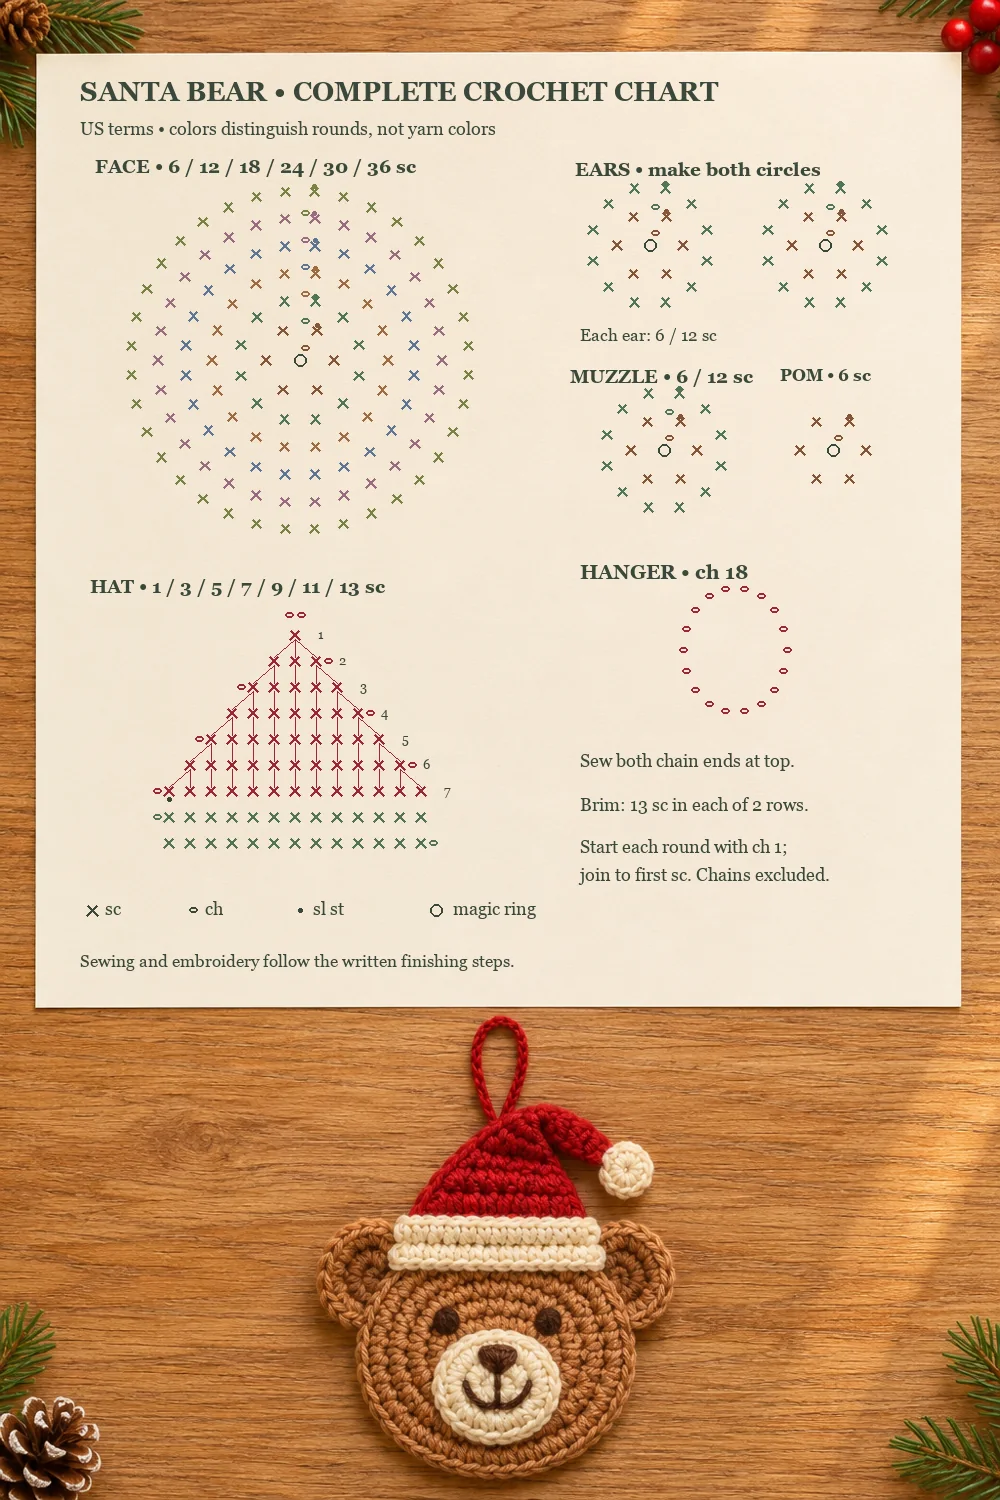
Each increase adds one stitch, so six increases add six stitches per round. The face sequence is 6, 12, 18, 24, 30, 36. Lay the circle down after each round to check that it rests reasonably flat before covering its upper edge with the hat.
Brown ears, make two
Round 1: Make an MR, ch 1, work 6 sc into the ring, and join. 6 sc. Round 2: Ch 1, inc in every st, and join. 12 sc. Fasten off with a sewing tail. Make the second ear in the same way.
Cream muzzle
Round 1: Make an MR, ch 1, work 6 sc into the ring, and join. 6 sc. Round 2: Ch 1, inc in each st, and join. 12 sc. Fasten off with a sewing tail. Leave the muzzle flat rather than gathering its edge.
Red Santa hat
The hat starts at its tip and widens toward the forehead. Row 2 puts three stitches in one stitch; later rows add one stitch at each edge.
- Row 1: With red, ch 2. Sc in the second chain from the hook. 1 sc.
- Row 2: Turn, ch 1, and work 3 sc in the single st. 3 sc.
- Row 3: Turn, ch 1, inc in the first st, sc in the next st, and inc in the last st. 5 sc.
- Row 4: Turn, ch 1, inc in the first st, sc in the next 3 sts, and inc in the last st. 7 sc.
- Row 5: Turn, ch 1, inc in the first st, sc in the next 5 sts, and inc in the last st. 9 sc.
- Row 6: Turn, ch 1, inc in the first st, sc in the next 7 sts, and inc in the last st. 11 sc.
- Row 7: Turn, ch 1, inc in the first st, sc in the next 9 sts, and inc in the last st. 13 sc. Fasten off with a sewing tail.
Cream brim
With the hat’s right side facing you, attach cream with a sl st in the first stitch of its thirteen-stitch base. Row 1: Ch 1, sc in that same stitch, then sc in each remaining base stitch. 13 sc. Row 2: Turn, ch 1, and sc in all 13 sts. Fasten off with a sewing tail.
There are 26 cream working stitches in the brim. Its attachment slip stitch and two beginning chains are separate. Do not add stitches down the hat’s side edges when working the brim.
Flat cream pompom and red hanger
Pompom: Make an MR, ch 1, work 6 sc into the ring, and join to the first sc. Close the ring and fasten off with a sewing tail. 6 sc. This is a small flat circle, not a stuffed ball.
Hanger: With red, ch 18 and fasten off, leaving a tail at each end. Sew the two ends next to each other on the back near the top of the hat. Catch the hat stitches securely with several small passes. The chain stays open until its ends are sewn into a loop.
Assembling the Crochet Santa Bear Ornament
- Place the face right side up. Tuck the lower portion of each ear behind the upper-left and upper-right edges. Leave similar amounts visible on both sides. Pin, then sew each overlap with small stitches that catch both layers.
- Set the hat over the upper face. Its cream brim should lie across the forehead, with the eyes positioned below it. Sew the lower brim edge to the disk without pulling the forehead inward. Tack the two brim ends as well.
- Fold the hat’s narrow tip gently to the right. Secure the fold with a short stitch on the back, then sew the cream pompom over the tip. Keep the fold shallow so the hat does not curl the face.
- Center the muzzle in the lower half of the face. Embroider a small filled triangle in its upper half with dark thread. Add a short vertical stitch below the nose, followed by two curved backstitch arcs for the mouth.
- Pin the muzzle, check its position below the brim, then sew around its edge. Add two small embroidered eyes above and slightly outside the muzzle. Keep long thread carries loose on the back, or finish each eye with its own thread.
- Attach the red chain hanger. Weave all tails securely into matching stitches on the back, and trim only after the ends are secured. Shape the ornament flat by hand.
If the yarn label allows it, lightly dampen the plain crochet pieces and let them dry flat before assembly. Avoid pressing the embroidery with a hot iron. Test any moisture or heat treatment on a spare yarn scrap first.
Troubleshooting
The face has an extra stitch at the join
The slip stitch and ch 1 are not working stitches. Move the marker into the first sc of each new round, and stop when you reach that marker again. Round 6 must finish with 36 sc, not 37.
The hat widens unevenly
After the three-stitch second row, put two sc into both the first and last stitches of every row. Work the middle stitches once each. Counts should read 1, 3, 5, 7, 9, 11, 13. Turning chains do not receive a stitch.
The ears or muzzle lift away
Pin the piece at several points before sewing. Keep both layers resting on the table, and take short stitches through the edge loops. A seam pulled too tightly can make a flat circle dome.
The finished ornament tilts
Hold it by the hanger before hiding the hanger tails. Shift the attachment slightly toward the heavier folded side if needed, then secure it again. Check that the ears sit at the same height before tightening their final seam stitches.
More Christmas Crochet
Pair this little face with the lace-body polar bear ornament, a two-round crochet star, or the snowman face mat for a coordinated winter display.
Pins and Crochet Santa Bear Ornament Charts
The first tabletop chart shows every crochet piece, with both ears drawn separately. The second paper sheet enlarges the hat and brim. The final diagram explains the six-increase circle sequence. Embroidered features and assembly seams are finishing steps rather than crochet stitches.