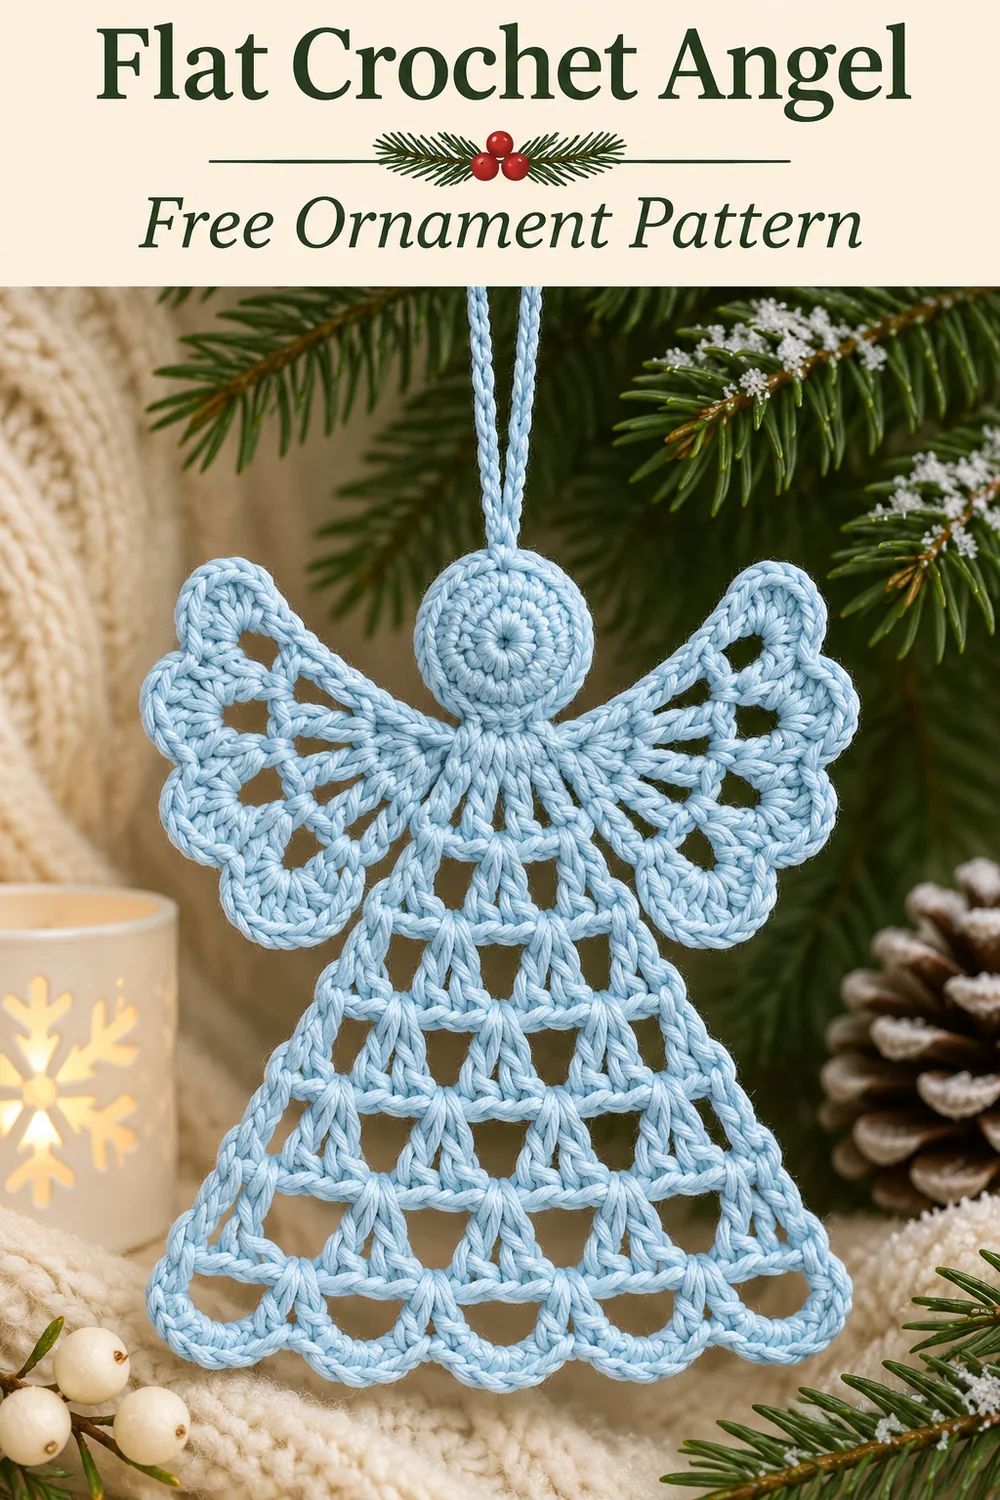
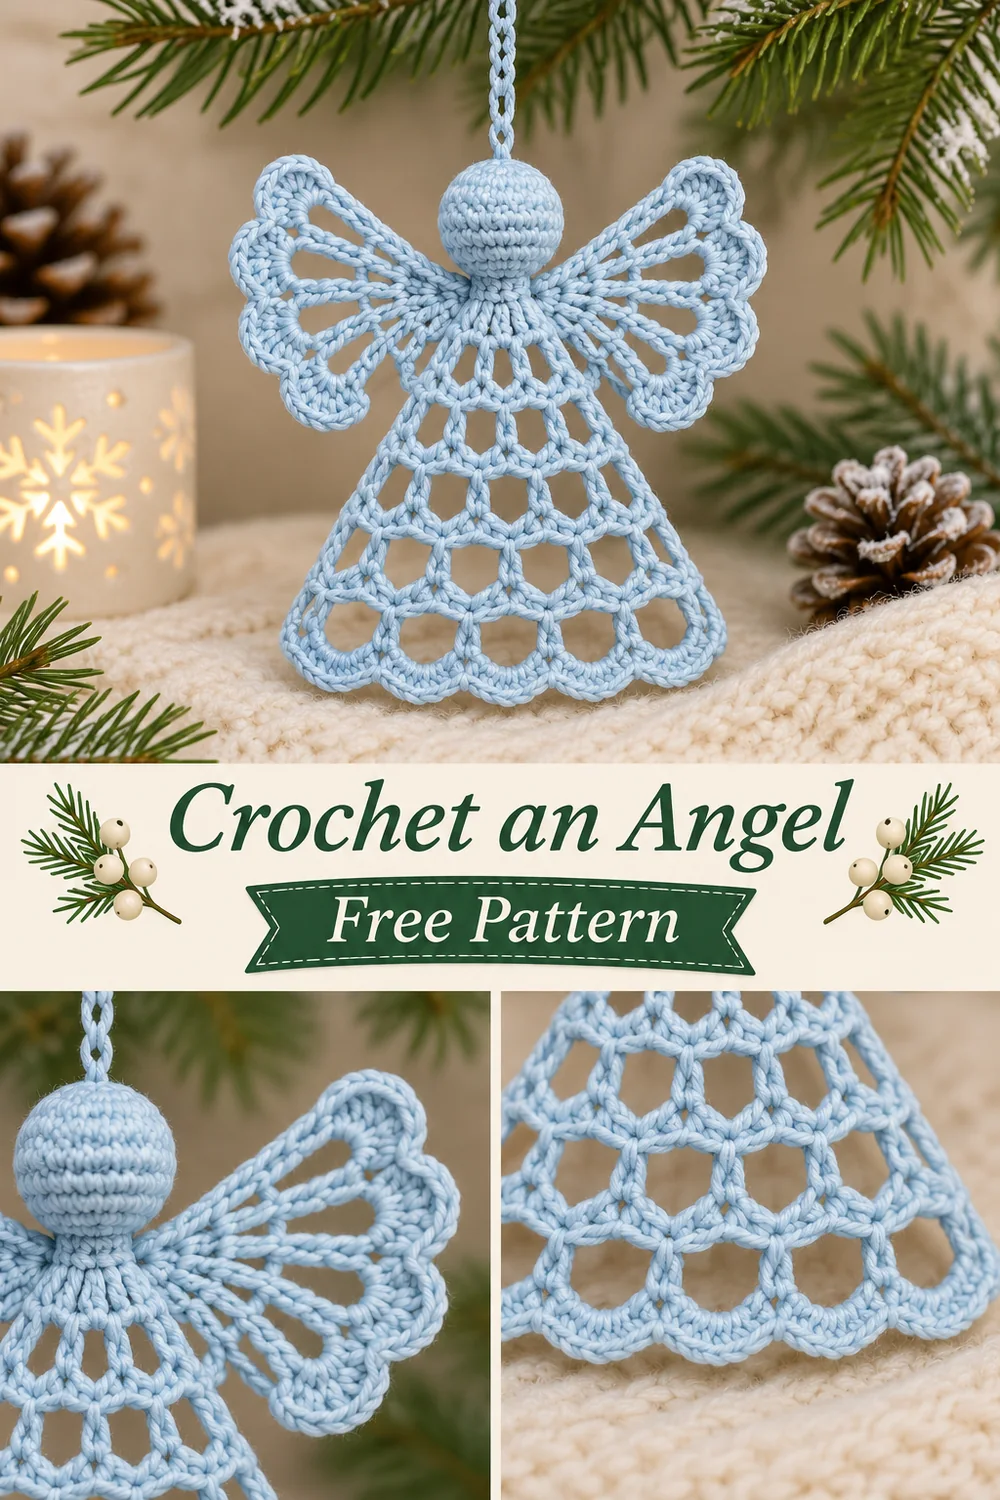
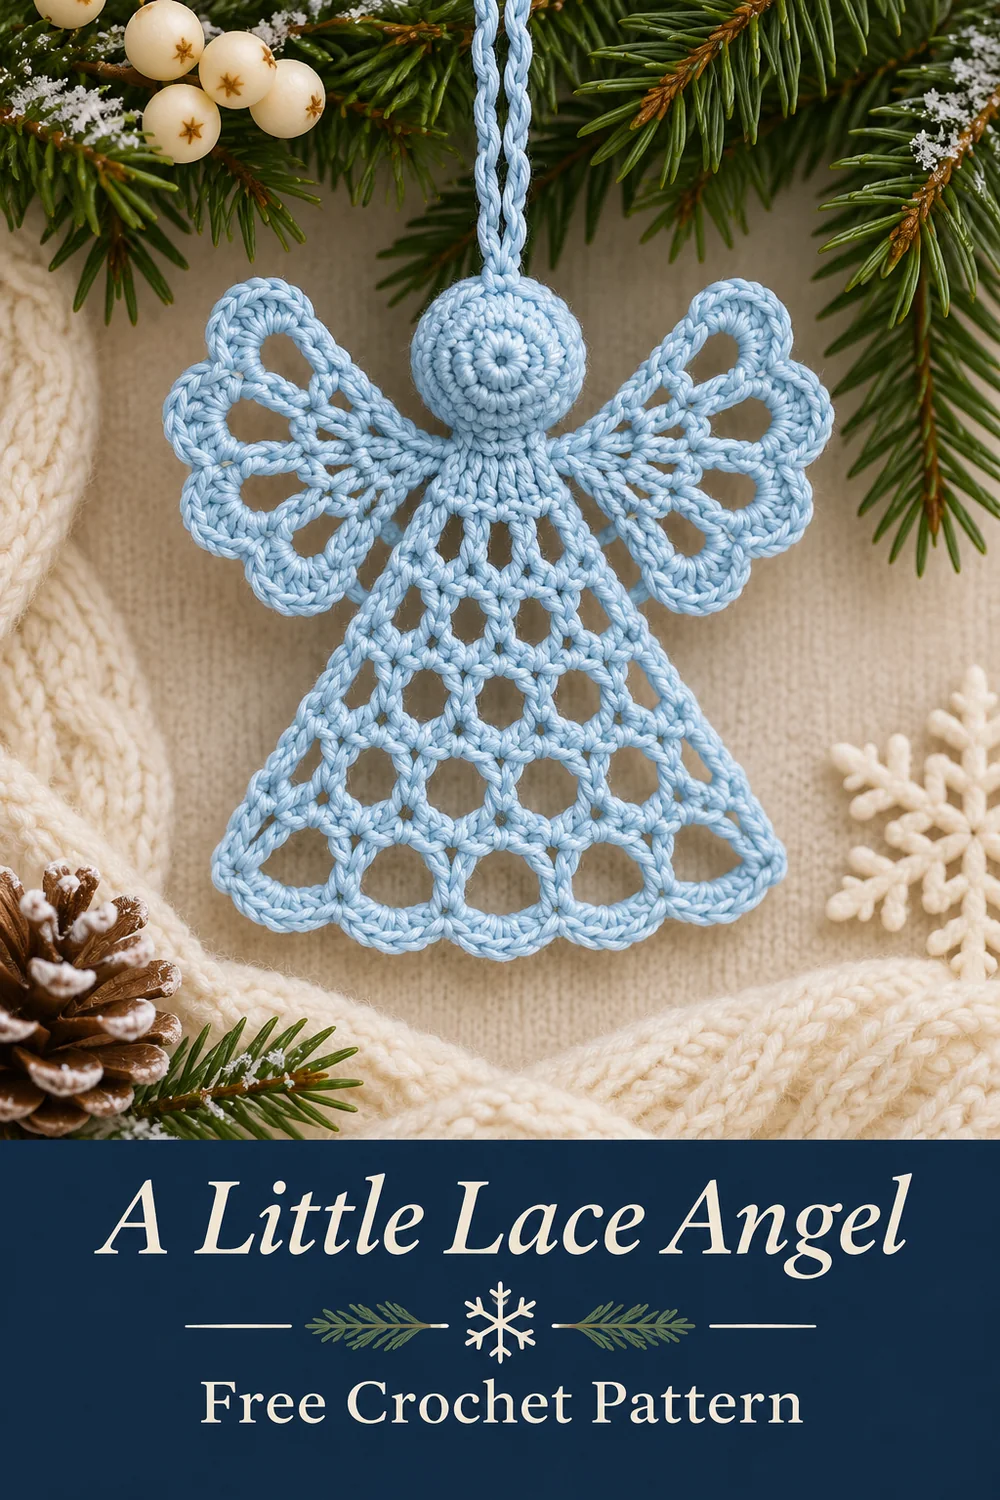
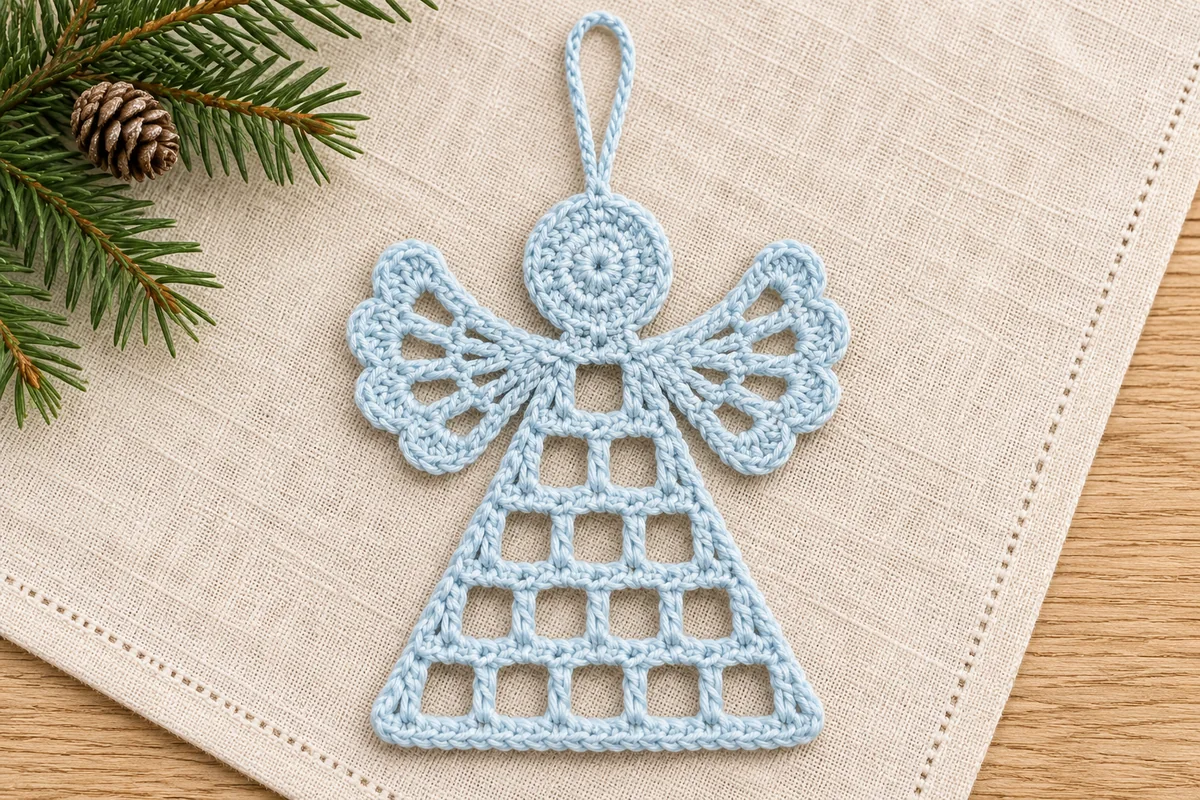
This flat crochet angel ornament has a round head, two scalloped wings, and a skirt that opens out into a little triangle of mesh. Ice blue cotton gives the chain spaces a crisp outline, while a matching loop makes the angel easy to hang.
Work the skirt in turned rows, then make the head and wings separately. The pieces join at a short neck, where a few sewing stitches hold the wings at the same angle. The finished motif can lie flat against a card or hang freely from a branch.
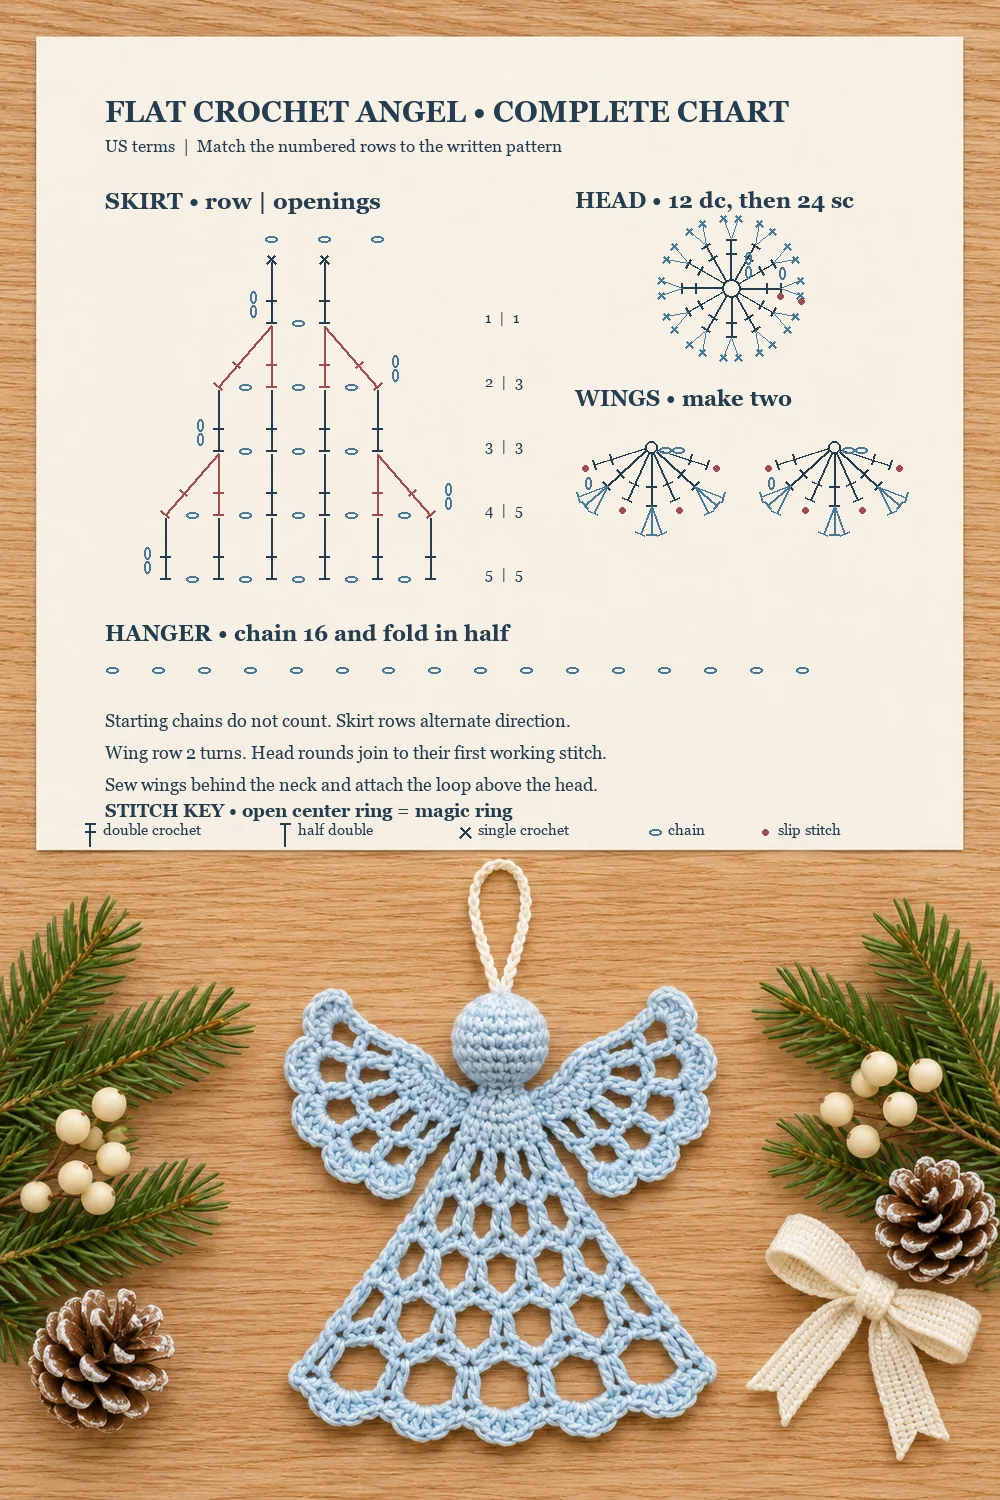
This original pattern takes its silhouette from the reference. Its skirt has five rows, with paired increases on two rows. The photos show the intended shape and styling. Use the written instructions and accompanying symbol charts to place each stitch.
Flat Crochet Angel Ornament Materials
- Smooth cotton yarn in ice blue or another solid color. A smooth strand makes it easier to see the double crochet posts and the chains between them.
- A crochet hook suited to the yarn. Choose a hook that makes a firm fabric while leaving the chains easy to work into.
- Tapestry needle, scissors, and two removable stitch markers.
- Optional rustproof pins and a blocking mat.
Use the same yarn and hook for the skirt, head, and wings so the pieces have similar weight. Gauge is flexible for this ornament. Use the shape and stitch counts to check your progress.
US Crochet Terms and Abbreviations
- MR = magic ring
- ch = chain
- sl st = slip stitch
- sc = single crochet
- hdc = half double crochet
- dc = double crochet
- st(s) = stitch(es)
- ch-1 sp = chain-one space
The ch 2 at the beginning of a row or round gives the working loop height. It is excluded from the count. In the skirt, each opening is one ch-1 space between two dc posts. Work the dc into the top of a post and pass over the old chain spaces. The Craft Yarn Council abbreviation list covers the US terms used here.
Flat Crochet Angel Ornament Pattern
Skirt foundation
Ch 3. Work 1 sc in the second ch from the hook and 1 sc in the last ch. You have 2 sc. The free edge of this short foundation will sit against the head.
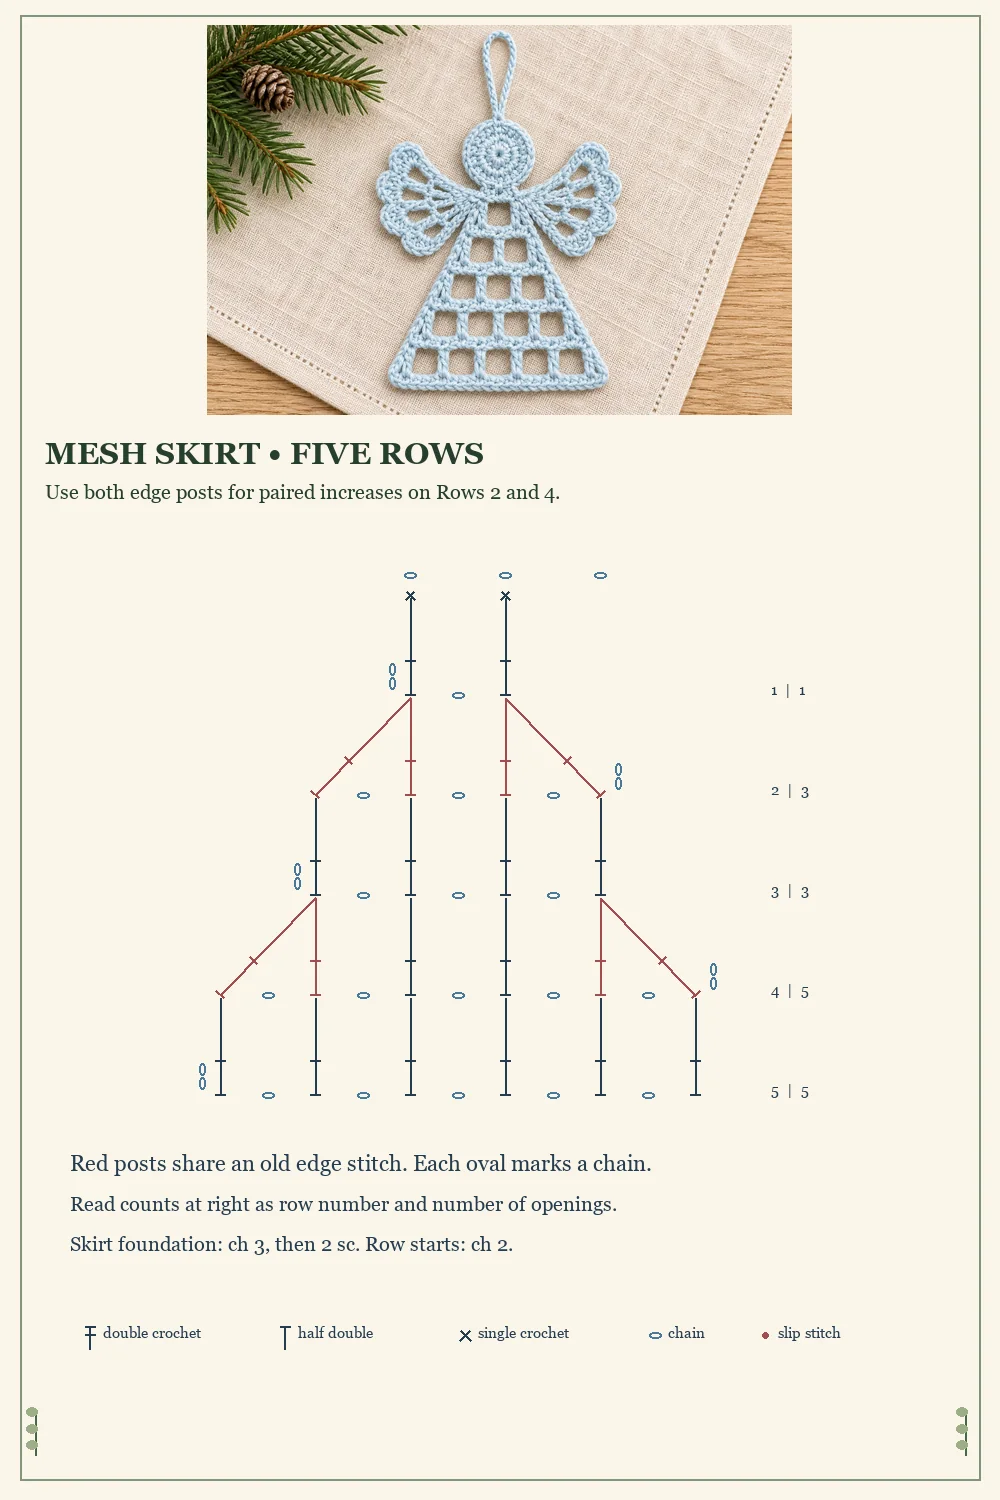
Five rows of open mesh
- Row 1: Turn and ch 2. Dc in the first sc, ch 1, dc in the last sc. 2 dc, 1 opening.
- Row 2: Turn and ch 2. Work (dc, ch 1, dc) in the first dc, ch 1, skip the old ch-1 sp, and work (dc, ch 1, dc) in the last dc. 4 dc, 3 openings.
- Row 3: Turn and ch 2. Dc in the first dc. Repeat [ch 1, skip the old ch-1 sp, dc in the next dc] 3 times. 4 dc, 3 openings.
- Row 4: Turn and ch 2. Work (dc, ch 1, dc) in the first dc. Repeat [ch 1, skip the old ch-1 sp, dc in the next dc] twice. Ch 1, skip the remaining old ch-1 sp, then work (dc, ch 1, dc) in the last dc. 6 dc, 5 openings.
- Row 5: Turn and ch 2. Dc in the first dc. Repeat [ch 1, skip the old ch-1 sp, dc in the next dc] 5 times. 6 dc, 5 openings. Fasten off and weave the tail into the last few dc tops.
Mark the first and last working dc if the turning chains blend into the sides. The skirt uses 22 dc across its five rows. Every row has one fewer opening than dc posts. On Rows 2 and 4, the two posts at each edge share one base stitch.
Round head
Round 1: Make an MR. Ch 2 and work 12 dc into the ring. Pull the ring closed and sl st into the first dc. 12 dc. Keep the same side facing you for the next round.
Round 2: Ch 1. Work 2 sc into each dc. Sl st into the first sc. 24 sc. Fasten off with a tail for sewing. Weave the ring tail back through the bases of several dc to keep the center closed.
Scalloped wings, make two
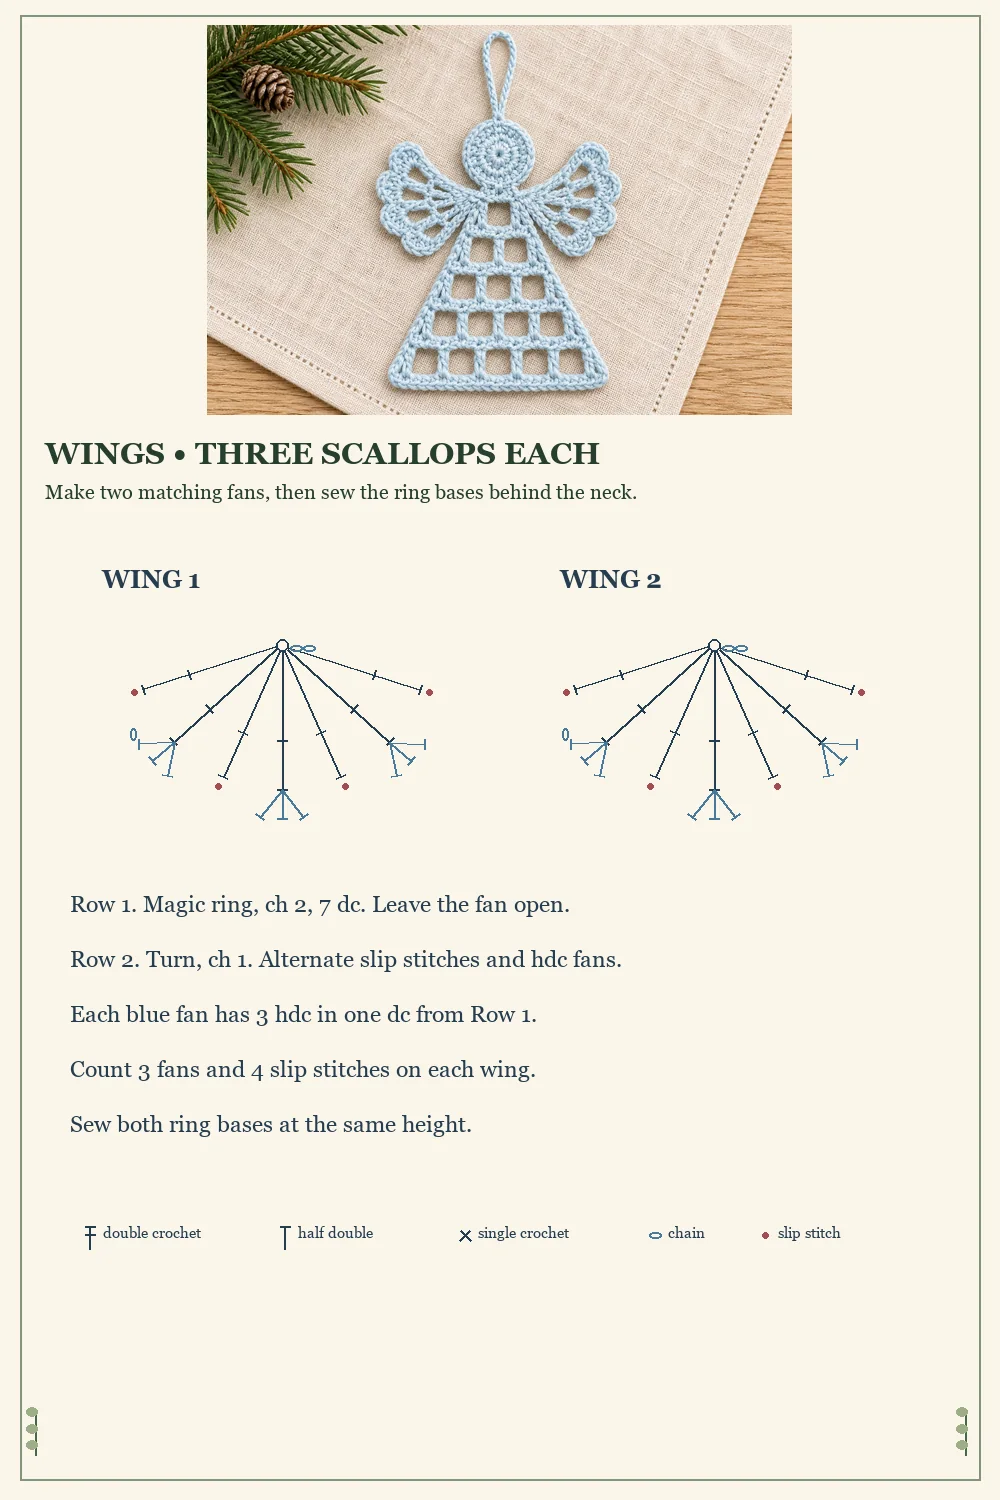
Row 1: Make an MR, ch 2, and work 7 dc into the ring. Pull the ring closed. Leave the row open so the stitches form a fan. 7 dc.
Row 2: Turn and ch 1. Repeat [sl st into the next dc, 3 hdc into the next dc] 3 times. Sl st into the last dc. Fasten off. 9 hdc and 4 sl sts, forming 3 scallops. Leave a tail at the ring for sewing the wing to the neck.
Each scallop uses one base stitch. When you reach the end, you should see a slip stitch at either edge and two between the scallops. Keep these four slip stitches loose enough for the outer edge to lie flat.
Hanging loop
Ch 16 and fasten off, leaving tails at both ends. Fold the chain in half. The tails will sit together at the top of the head.
Assemble the Flat Crochet Angel Ornament
- Lay the skirt flat with the narrow foundation at the top. Center the head above the two sc and whipstitch the foundation to adjacent stitches along the bottom edge of the head.
- Place the ring of one wing behind each end of the neck. Spread the scalloped edges outward and angle the top of each fan slightly up. Compare the two sides before sewing.
- Use the wing tails to sew through the ring bases and neck. Add a small tack through the back of each wing near the neck if it pivots on the seam.
- Sew both ends of the folded chain through the back of the head near its top edge, directly above the skirt center. Hang the angel briefly to check its balance, then weave in the tails.
- Block according to your yarn label. Pin the skirt at both hem corners and shape the wings into matching fans. Let the motif dry flat.
Troubleshooting the Angel
The skirt grows wider on one side
Check Rows 2 and 4 for an increase at each end. The two dc of an edge increase share the same old post, with a ch 1 between them. On Rows 3 and 5, use one new dc in every old dc. Mark both edge posts before turning to make the first and last insertion points easier to see.
The openings look pinched
Look at the chains between posts. Make each ch 1 with the yarn relaxed, especially across the wider rows. Gentle blocking can even out minor differences. If the sides pull inward sharply, undo the affected row and remake the chains with more ease.
The wings sit at different heights
Lay the angel flat and match the two ring bases to the ends of the neck foundation. Pin the wings in place before sewing. If the ornament tilts when hung, check that the loop is centered above the head and the skirt.
More Christmas Crochet Ornaments
Pair this flat angel with a blue lace crochet star or a crochet heart bell. For a three-dimensional angel with a stuffed head, see the delicate crochet angel pattern.
Pins and Flat Crochet Angel Diagrams
The complete chart includes the skirt, both wings, the head, and the hanger. The two detail diagrams show where the mesh increases and how the wing scallops are placed. The symbols follow the written counts for this original construction.