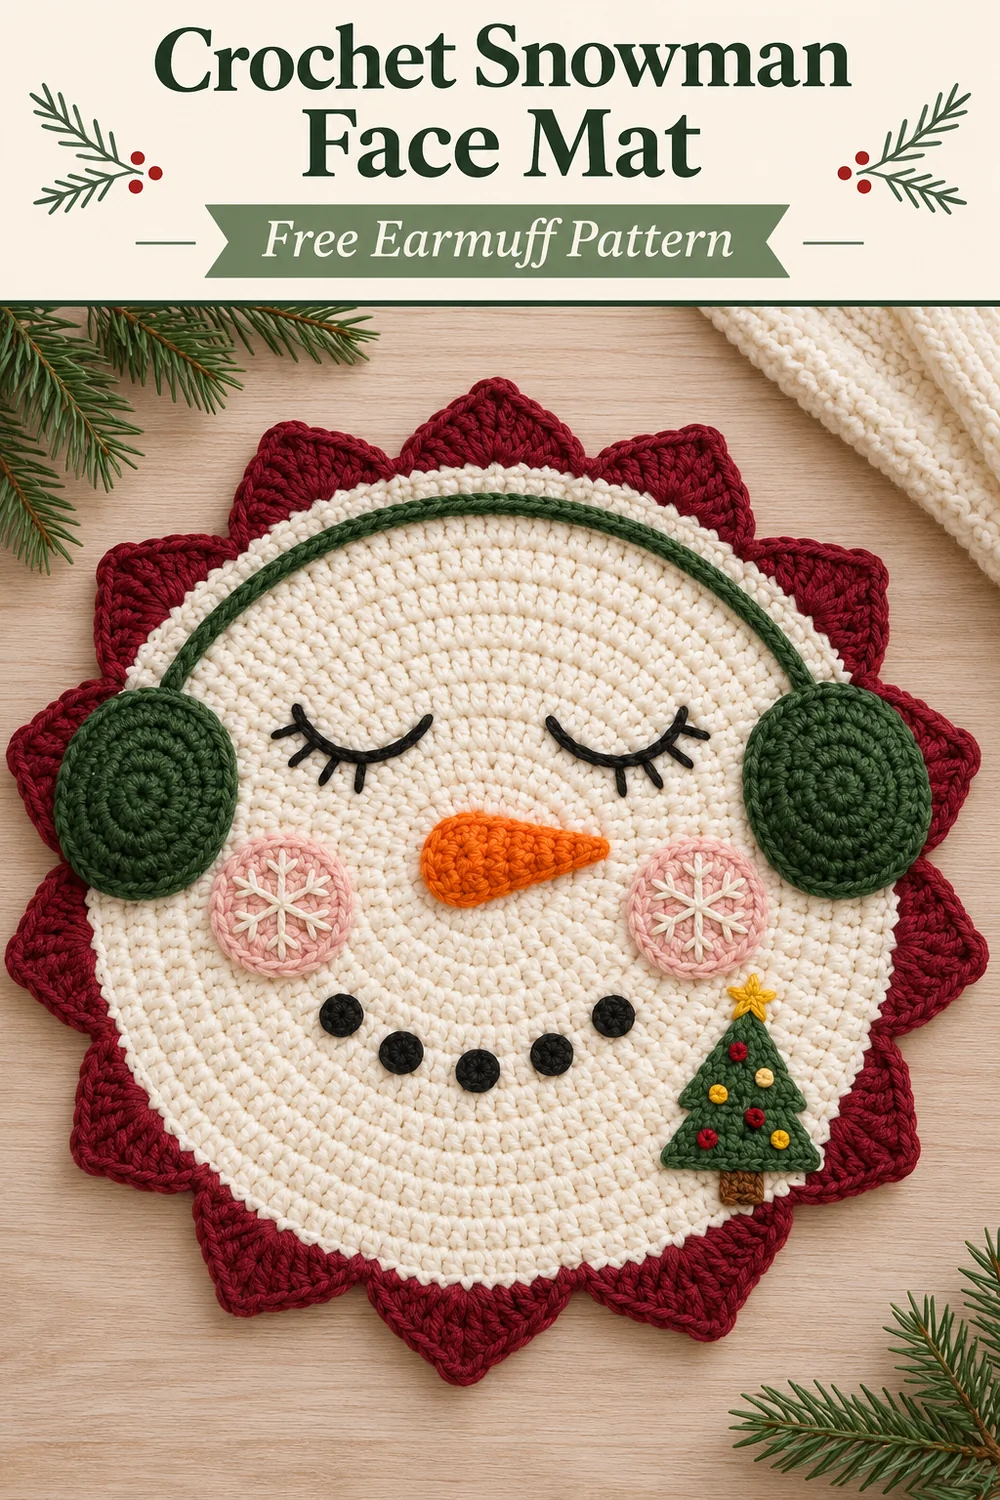
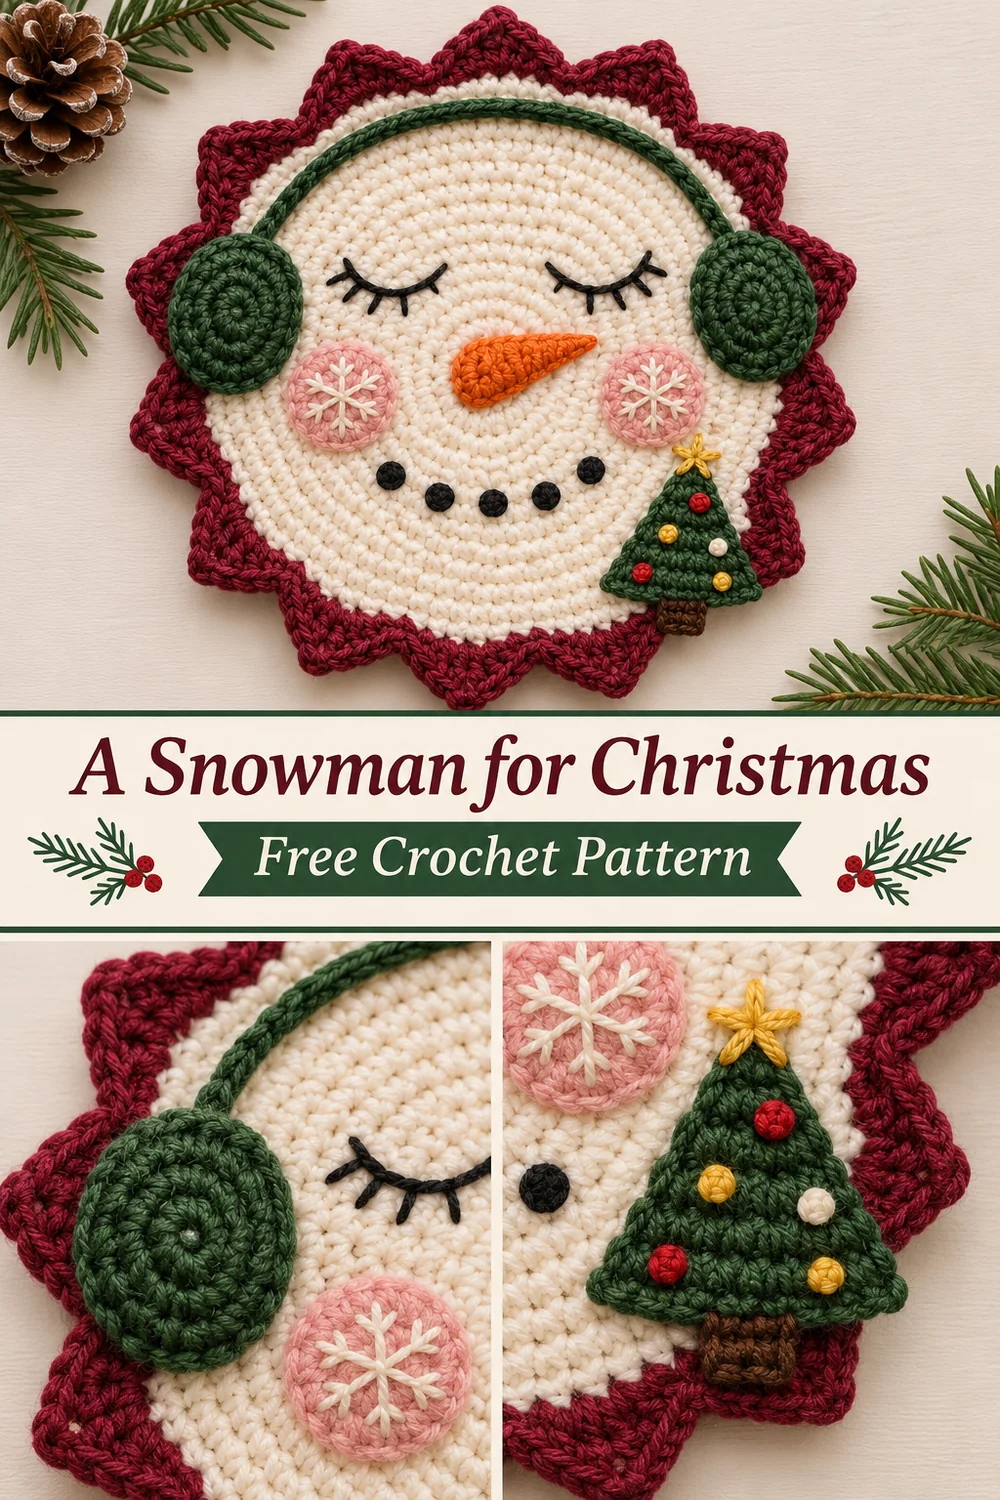
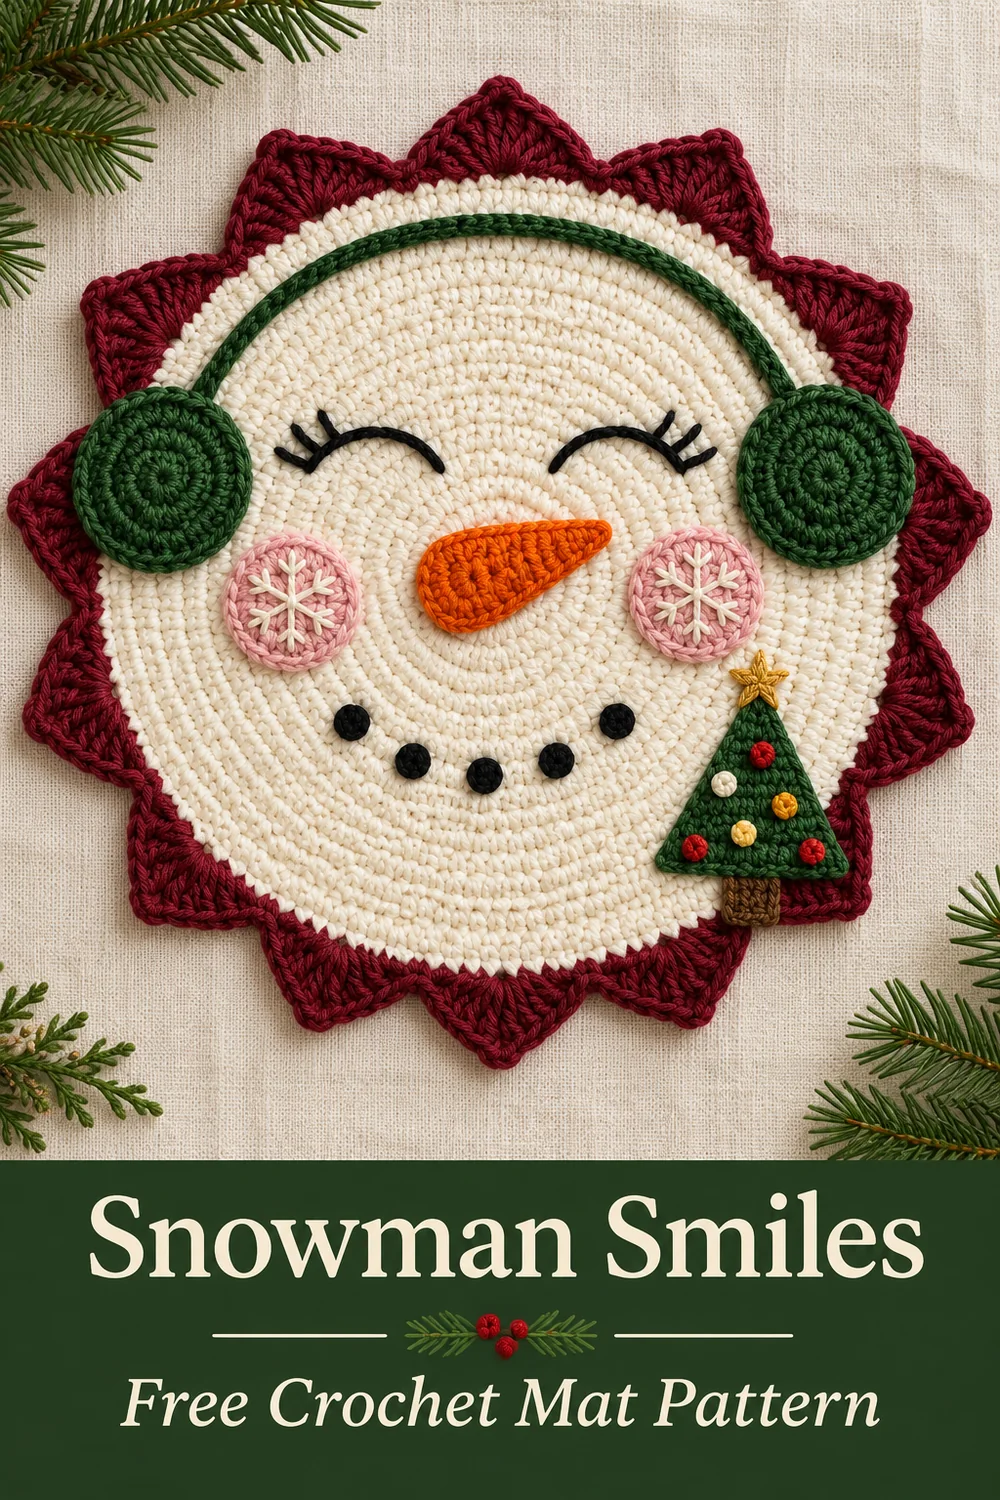
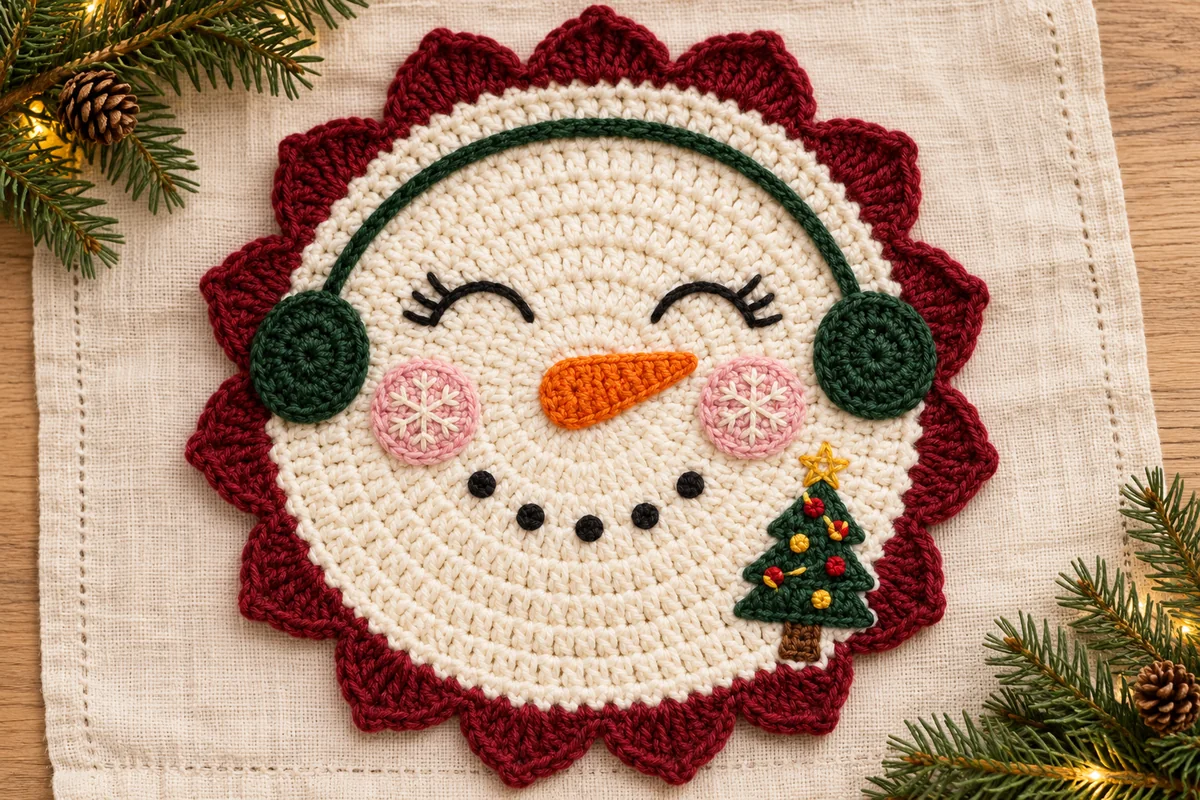
This crochet snowman face mat combines an ivory circle with a burgundy pointed edge and forest green earmuffs. Closed eyes, pink cheeks, and a sideways carrot give the face a soft expression. A small tree sits over the lower-right border.
Work the circle and border first, then make the earmuff pads, band, cheeks, nose, and tree separately. Lay out the pieces before sewing so you can balance the expression and keep the green band centered over the forehead.
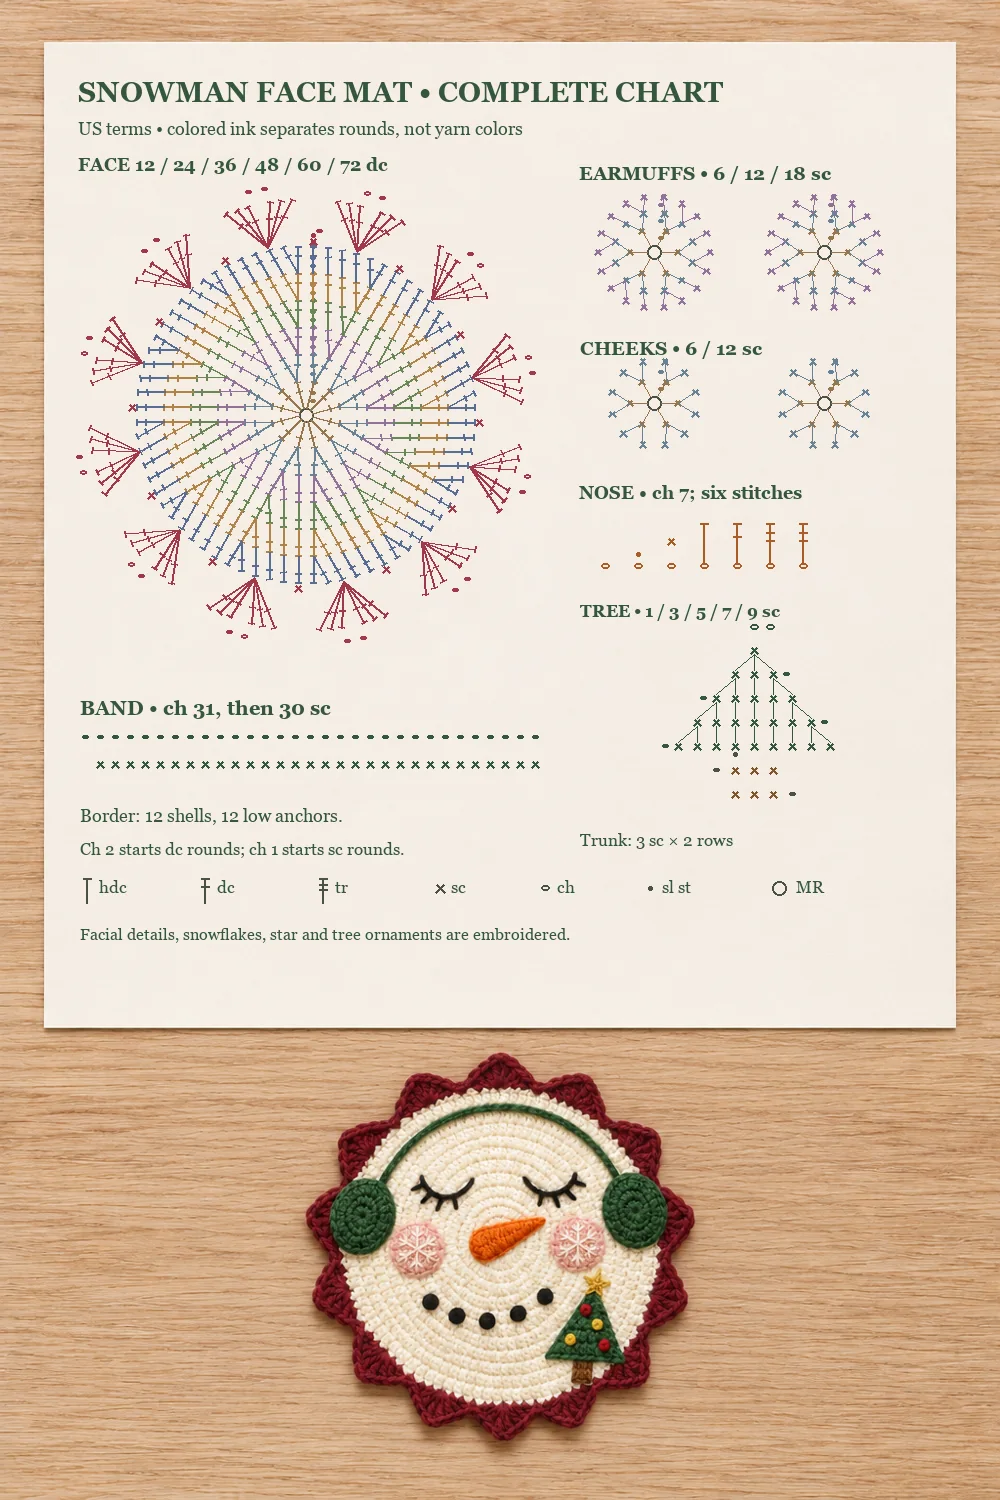
This is an original interpretation inspired by the reference image. Its twelve-point border and applique pieces follow the stitch counts below. The photographs illustrate the intended arrangement, and the charts show the crochet construction.
Crochet Snowman Face Mat Materials
- Smooth cotton yarn in ivory, burgundy, forest green, pale pink, orange, and brown.
- Black yarn or embroidery thread for the eyes and smile, plus gold, red, and ivory thread for the small embroidered details.
- A hook appropriate for the main yarn, tapestry needle, embroidery needle, scissors, and removable stitch markers.
- Optional rustproof pins and a blocking surface.
Keep the yarn weights consistent for the face and border. The applique pieces can use the same yarn or a finer yarn with a suitable hook if you prefer smaller details. Gauge is flexible for this decorative mat. Finished size and yarn use depend on your materials and tension.
US Crochet Terms
- MR = magic ring
- ch = chain
- sl st = slip stitch
- sc = single crochet
- hdc = half double crochet
- dc = double crochet
- tr = treble crochet
- inc = 2 stitches of the specified type in one stitch
- st(s) = stitch(es)
For tr, yarn over twice, insert the hook, yarn over and draw up a loop, then [yarn over and draw through two loops] three times. The Craft Yarn Council abbreviation guide covers the US stitch names.
Round and row conventions
Beginning chains are excluded from the counts. Join rounds to their first working stitch, keeping the same side facing you. Turn the band, tree, and trunk only where directed. A group in parentheses goes into one base stitch.
Crochet Snowman Face Mat Pattern
Ivory circle
- Round 1. Make an MR, ch 2, and work 12 dc into the ring. Close the ring and sl st to the first dc. 12 dc.
- Round 2. Ch 2, work 2 dc in every stitch, and join. 24 dc.
- Round 3. Ch 2, repeat [dc, 2 dc in the next st] 12 times, and join. 36 dc.
- Round 4. Ch 2, repeat [dc in the next 2 sts, 2 dc in the next st] 12 times, and join. 48 dc.
- Round 5. Ch 2, repeat [dc in the next 3 sts, 2 dc in the next st] 12 times, and join. 60 dc.
- Round 6. Ch 2, repeat [dc in the next 4 sts, 2 dc in the next st] 12 times, and join. 72 dc. Fasten off ivory.
Burgundy twelve-point border
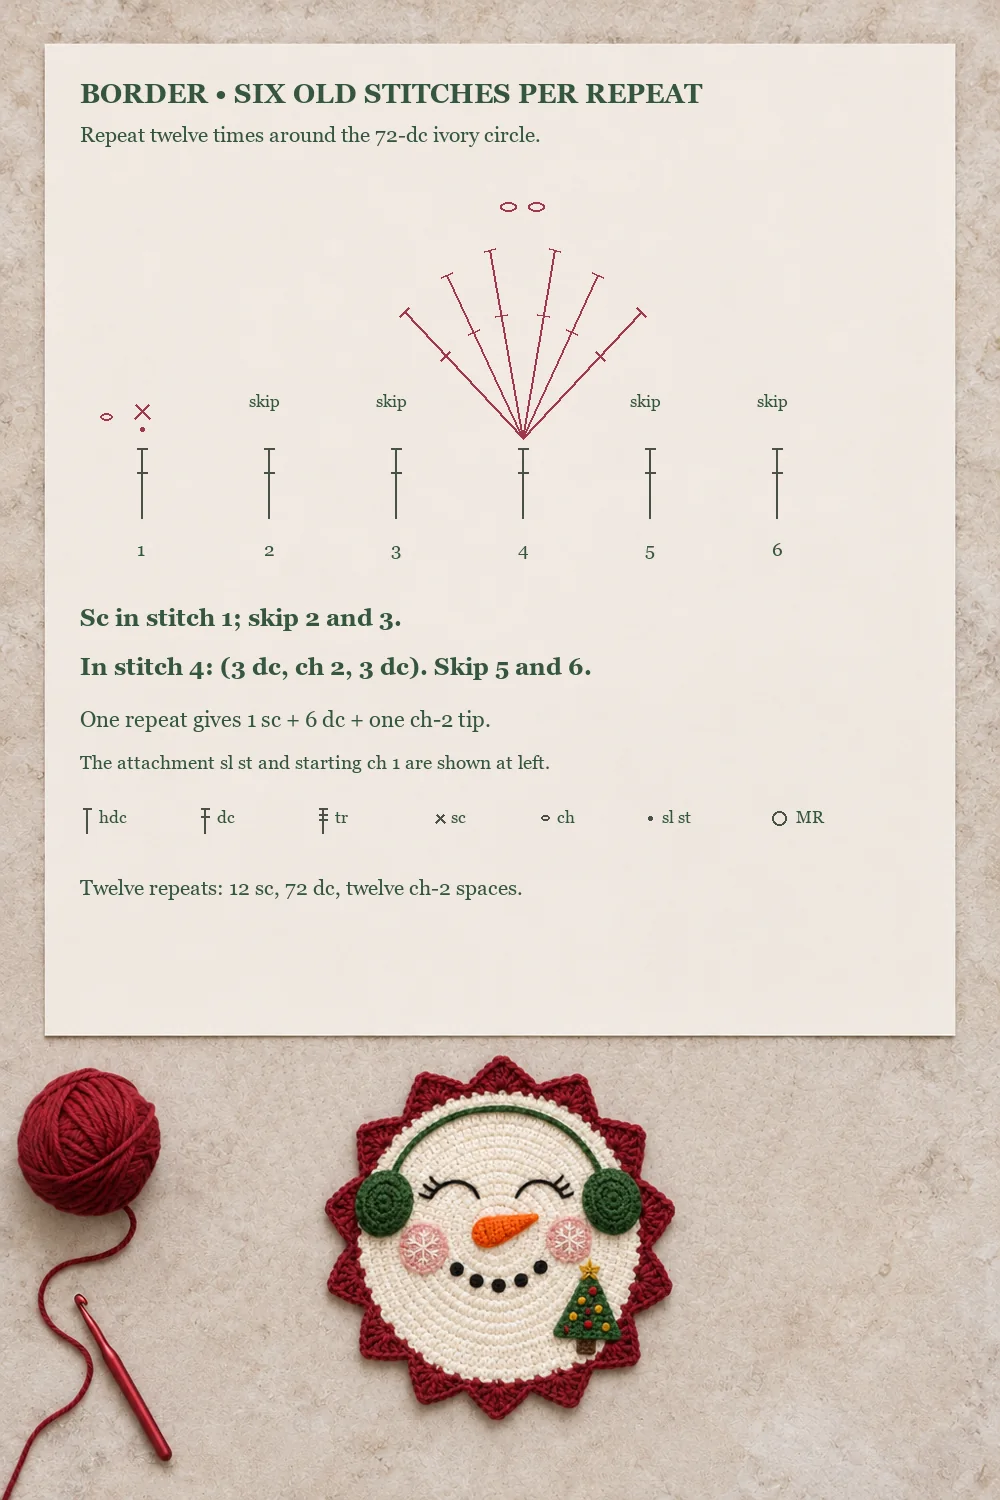
Attach burgundy with a sl st in any dc and ch 1. Starting in that same dc, repeat [sc in the next st, skip 2 sts, (3 dc, ch 2, 3 dc) in the next st, skip 2 sts] 12 times. Sl st to the first sc and fasten off.
Count 12 sc, 72 dc, and twelve ch-2 tip spaces. Each repeat consumes six old stitches and produces one six-dc shell and one low sc anchor. Twelve repeats use all 72 stitches of the face. Keep the skipped stitches unworked.
Green earmuff pads, make two
- Make an MR, ch 1, work 6 sc into the ring, and join to the first sc. 6 sc.
- Ch 1, work 2 sc in each stitch, and join. 12 sc.
- Ch 1, repeat [sc, 2 sc in the next st] 6 times, and join. 18 sc. Fasten off with a sewing tail.
Green headband
Ch 31. Starting in the second ch from the hook, sc in every remaining chain. 30 sc. Fasten off with tails for sewing. Curve the strip across the upper face and position the pads over its ends before sewing. Leave ease in the curve so it rests against the ivory circle.
Pink cheeks, make two
Round 1. Make an MR, ch 1, work 6 sc into the ring, and join. 6 sc. Round 2. Ch 1, work 2 sc in each stitch, and join. 12 sc. Fasten off with a sewing tail.
Flat carrot nose
With orange, ch 7. Starting in the second ch from the hook, work sl st, sc, hdc, dc, tr, tr, one stitch into each of the six chains. Fasten off with a sewing tail. 6 working stitches. The slip-stitch end forms the narrow tip, and the two trebles form the broad base.
Small solid tree
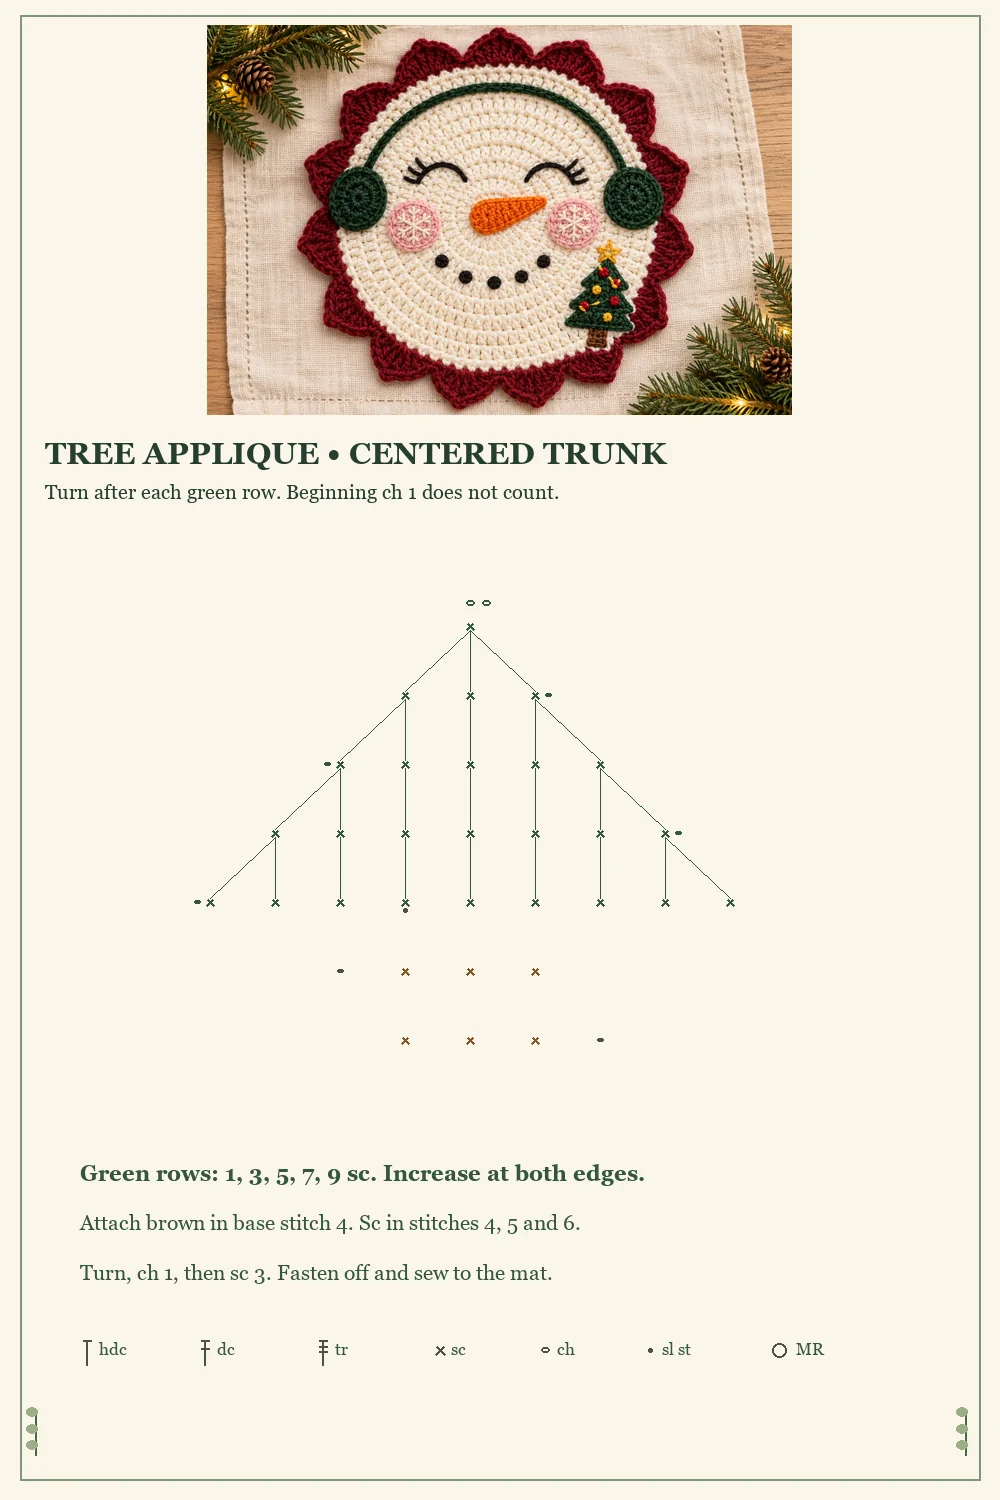
- Row 1. With green, ch 2 and sc in the second chain from the hook. 1 sc.
- Row 2. Turn and ch 1. Work 3 sc in the single stitch. 3 sc.
- Row 3. Turn and ch 1. Work 2 sc in the first st, sc in the middle st, and 2 sc in the last st. 5 sc.
- Row 4. Turn and ch 1. Work 2 sc in the first st, sc in each of the next 3 sts, and 2 sc in the last st. 7 sc.
- Row 5. Turn and ch 1. Work 2 sc in the first st, sc in each of the next 5 sts, and 2 sc in the last st. 9 sc. Fasten off.
Trunk Row 1. With the tree right side facing you, attach brown with a sl st in stitch 4 of its nine-stitch base. Ch 1, sc in that same stitch, then sc in stitches 5 and 6. 3 sc. Row 2. Turn, ch 1, and sc in all 3 sts. Fasten off with a sewing tail.
Assembly and Embroidery
- Lay the face flat and position the green band over the upper curve. Set the pads over its ends at the two sides of the face. Sew the band down with small stitches, then sew the pads around their edges.
- Place the orange nose near the center, with its broad end toward the left and its tip angled slightly up to the right. Set the pink cheeks below the eye positions. Pin all three pieces before sewing.
- Embroider two short curved closed eyes in black, adding two or three small lashes at the outside of each. Use relaxed backstitches so the circle stays flat.
- Make five small black embroidered knots along a curved smile below the nose. Add three crossing ivory stitches over each cheek to suggest a snowflake.
- Sew the little tree at the lower right, with its trunk toward the burgundy edge. Keep the face details visible. Embroider a gold five-point star above its tip using five straight stitches, then add small colored knots as ornaments.
- Secure and weave every tail on the back. If your yarn permits, dampen and shape the finished mat flat. Pin the twelve border tips evenly and let it dry completely.
Try the arrangement before committing to the seams. The band can sit higher or lower within the ivory circle, and the pads can overlap the red border slightly. If the band is shorter than the curve you want, position the pads a little higher and closer together so the strip can lie flat.
Troubleshooting the Crochet Snowman Face Mat
The border has eleven points
Count 72 dc at the end of the ivory circle. Each border repeat needs six of those stitches. Mark every sixth stitch before beginning if the skip sequence is difficult to follow. The initial sc is part of the first repeat.
The circle cups or ripples
Check the sequence 12, 24, 36, 48, 60, 72. Each round adds twelve stitches, and each increase uses one old stitch. Keep the starting chains relaxed and join to the first working dc. Undo a miscounted round before adding the border.
The embroidery gathers the face
Work with the mat resting on the table and leave a little ease behind every stitch. Avoid carrying a tight thread across the back between distant features. Secure separate thread ends for each eye and each cheek detail.
The little tree pulls up the edge
Sew the applique while both layers lie flat. Place the initial tacks at the tip, base corners, and trunk, then fill the spaces between them with small stitches. A tight seam can bend the circle even when both crocheted parts are flat.
More Winter Crochet Ideas
The snowman face ornament uses a winter hat and hanging details. For a matching display, add a tiered crochet Christmas tree or a set of two-round crochet stars.
Pins and Crochet Snowman Face Mat Charts
The complete tabletop sheet shows the base, border, and applique pieces. The second sheet enlarges one six-stitch border repeat. The third diagram shows the tree and centered trunk. Embroidered facial details are added after the crochet pieces are complete.