If you’re new to crochet and looking for an easy project to start with, a Solid Granny Square Bottom Bag is a great option! Not only is it simple to make, but it’s also incredibly practical and stylish.
In this tutorial, we’ll walk you through the steps to make your own Solid Granny Square Bottom Bag. We’ll cover everything from selecting the right yarn and hook to creating the perfect granny square and finishing off your project.
Materials Needed
Before we get started, let’s go over the materials you’ll need to make your Solid Granny Square Bottom Bag:
- Worsted weight yarn in your preferred color
- Crochet hook (size G/4mm)
- Scissors
- Yarn needle

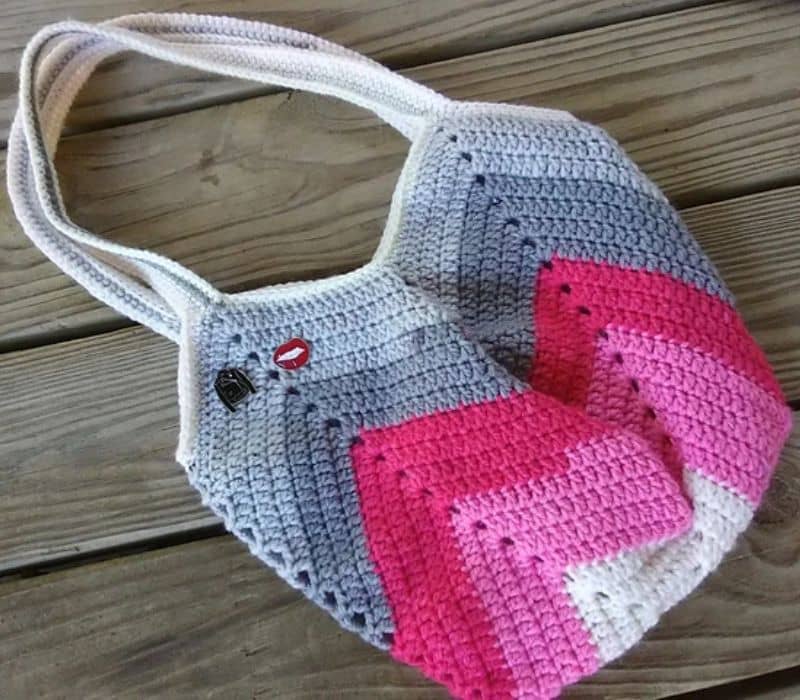
Tutorial / Image / Pattern: Solid Granny Square Bottom Bag
Choosing Your Yarn
When selecting your yarn, keep in mind that a Solid Granny Square Bottom Bag requires a medium weight yarn, such as worsted weight. This will help ensure that your bag is sturdy and can hold its shape.
You’ll also want to choose a yarn that matches your personal style and the purpose of your bag. Are you making a bag for everyday use? Consider a neutral color like black, white, or gray. Want something more fun and colorful? Look for a variegated yarn with bright hues.
Creating the Granny Square
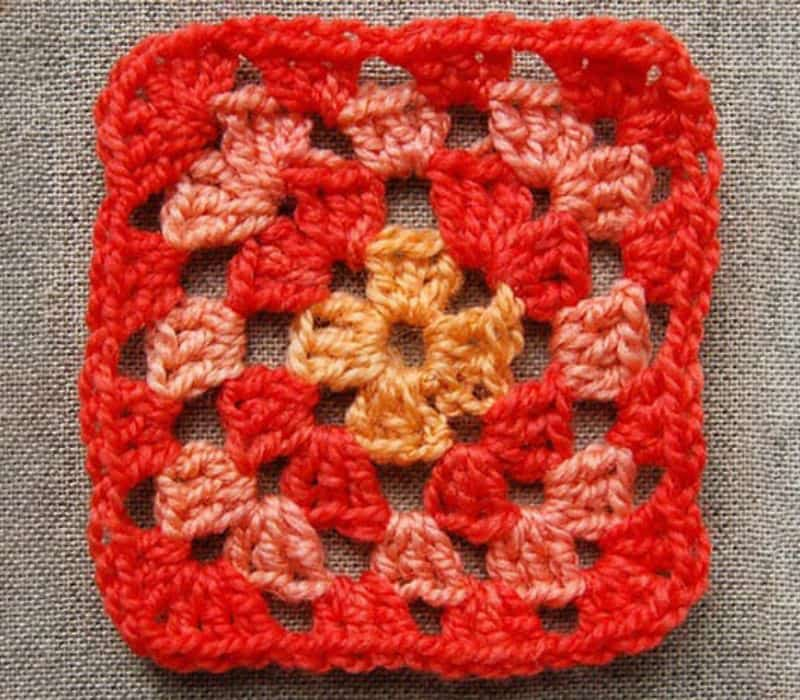
Once you’ve gathered your materials, it’s time to start crocheting! To begin, you’ll need to create your granny square. Follow these steps:
- Chain 4, then slip stitch into the first chain to form a ring.
- Chain 3 (this counts as your first double crochet), then work 2 double crochets into the ring. Chain 2, then work 3 more double crochets into the ring. Chain 2, then work 3 more double crochets into the ring. Chain 2, then slip stitch into the top of the chain 3 to close the round.
- Chain 3, then work 2 double crochets into the chain 2 space from the previous round. Chain 1, then work 3 more double crochets into the same chain 2 space. Chain 2, then work 3 double crochets, chain 1, 3 double crochets into the next chain 2 space. Repeat from * to * two more times, then chain 2 and slip stitch into the top of the chain 3 to close the round.
- Continue this pattern, adding 1 chain stitch in the corners each round, until your granny square is the desired size for your bag. We recommend a square that is at least 8 inches wide.
Creating the Bottom of the Bag
Now that you have your granny square, it’s time to create the bottom of the bag. Follow these steps:
- Fold your granny square in half diagonally, right sides together.
- Using a tapestry needle and a strand of yarn, sew the two sides of the granny square together, starting from one corner and working your way to the opposite corner. This will create a triangle.
- Repeat this process on the other side of the granny square to create a diamond shape.
- To create the base of the bag, fold each corner of the diamond up towards the center of the bag, creating a square shape. Sew the corners together using your tapestry needle and yarn.
Finishing the Bag
To finish off your Solid Granny Square Bottom Bag, follow these steps:
- Create a chain long enough to act as the strap of your bag. We recommend a length of at least 20 inches.
- Attach the chain to the top of one side of your bag using your tapestry needle and yarn.
- Repeat this process on the other side of your bag to create the other half of the strap.
- Weave in any remaining ends of yarn and trim off any excess.
Congratulations! You’ve just completed your Solid Granny Square Bottom Bag.
Why Choose the Solid Granny Square Bottom Bag?
Not only is the Solid Granny Square Bottom Bag a great project for beginners, but it’s also incredibly versatile. Here are just a few reasons why you might want to choose this bag for your next crochet project:
- It’s practical. The Solid Granny Square Bottom Bag is the perfect size for carrying everyday essentials, such as a wallet, phone, and keys. Plus, the sturdy bottom ensures that your bag will stand up on its own.
- It’s customizable. With so many different yarn options available, you can create a Solid Granny Square Bottom Bag that perfectly matches your personal style. Plus, you can experiment with different color combinations and patterns to make your bag truly one-of-a-kind.
- It’s eco-friendly. By making your own Bag, you’re reducing your reliance on single-use plastic bags and contributing to a more sustainable future.
How to Make Your Solid Granny Square Bottom Bag Even Better
While the Bag is a great project on its own, there are a few ways you can take it to the next level. Here are some tips for customizing your bag:
- Add a lining. If you want to make your bag even sturdier, consider adding a fabric lining. This will help protect your bag from wear and tear and ensure that your items stay secure.
- Embellish your bag. You can add buttons, tassels, or even embroidery to your Solid Granny Square Bottom Bag to give it a unique look. Get creative and have fun with it!
- Experiment with different sizes. While we recommend a square that is at least 8 inches wide, you can make your Solid Granny Square Bottom Bag as big or as small as you like. Consider making a smaller version for your child or a larger version for a weekend getaway.
Final Thoughts
The Bag is a fantastic crochet project for beginners and experienced crocheters alike. With its practical design and customizable options, it’s no wonder why this bag has become a popular choice among crafters.
By following our tutorial and putting your own spin on the design, you can create a Solid Granny Square Bottom Bag that perfectly suits your needs and personal style.
So grab your yarn and crochet hook, and get ready to make your own Bag today!
Free Pattern Download: Solid Granny Square Bottom Bag
Discover the Pattern with an Easy-to-Follow Video Tutorial
Check out more crochet patterns
1 – Nature’s Walk Blanket Granny Square
